Understanding ASP.NET Core with IIS on Nano Server
In this recipe, we will create an ASP.NET Core website application and run it on Visual Studio 2017.
Getting ready
To step through this recipe, you need Visual Studio 2017 set up. For all the installation and configuration work, you should have administrative privileges.
How to do it...
- Log in to your Windows 10 PC or Windows Server 2016. We've already installed Visual Studio for testing, so open it.
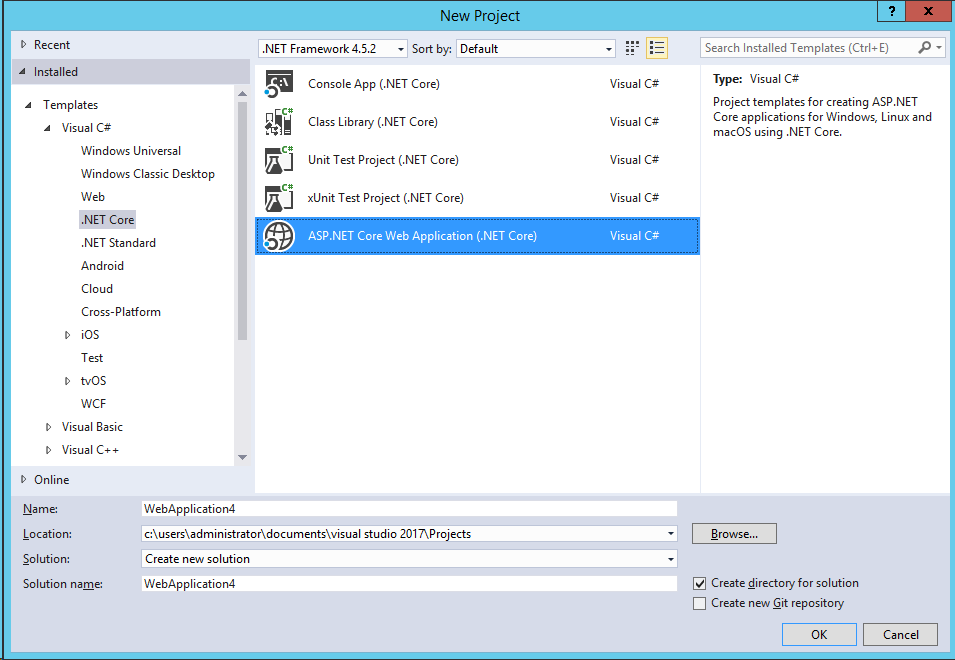
- Open the
Filemenu, create a new project, and select.Net Coreand application typeASP.NET Core Web Application (.NET Core), as shown here:
- Click on the
OKbutton. You will get a New ASP.NET Core window to select the type of ASP.NET Core application, as shown here:
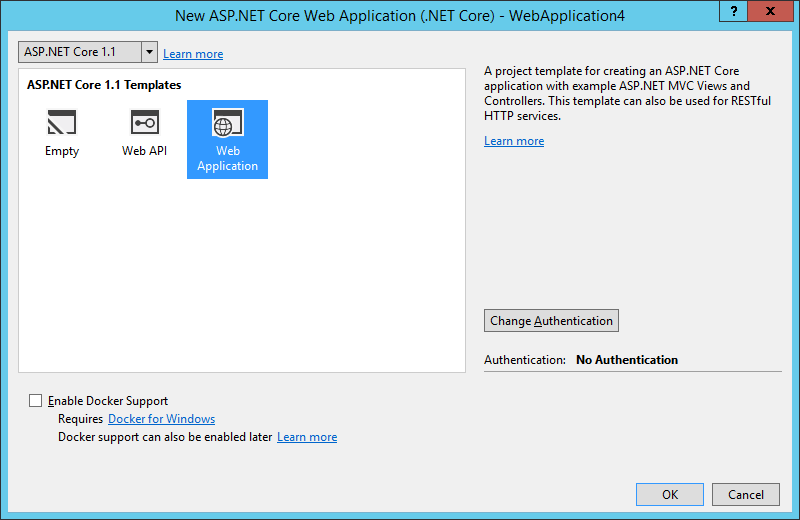
- Now select the
Web Applicationoption and click onOK. You'll have the default ASP.NET web application created. This is just for demonstration to show you how an ASP.NET web application looks. - Now let's run the created project on Visual Studio 2017, and you will get the web application page...