Setting up the basic HTML for this project
The basic HTML for this project is shown in the following screenshot:
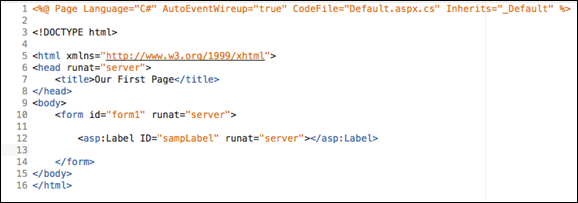
Figure 6.15.1: The starting HTML for our project in this lesson
Creating the Car class
The first step is to make a class file. Go to Solution Explorer as usual, right-click on the name of the website, select Add, and click on Class. Name the class Car and click on OK. When the Visual Studio message comes up, click on Yes.
There it is! The section of the Car class where we'll begin our work looks like the following screenshot:
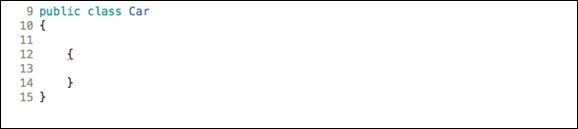
Figure 6.15.2: Relevant starting section of the Car class
As in the previous lesson, we will make a relatively simple class called Car using automatic properties to save time. So, enter the following lines under the open curly brace below the public class, namely Car:
public string MakeModel { get; set; }
public string PreviousOwner { get; set; }
To set the values of these automatic properties inside the constructor, add a parameter. So enter the following as the...