Designing the starting markup
Let's begin with a simple markup page. Open Toolbox (Ctrl+Alt+X) and drag a Button control into the form so that you have something to click on. Change the displayed text so that the Button control says Show Product, for example. Then, place a Label control below the Button control line so that you have a place where the output should go. Your markup page should now look like the one shown in the following code block:
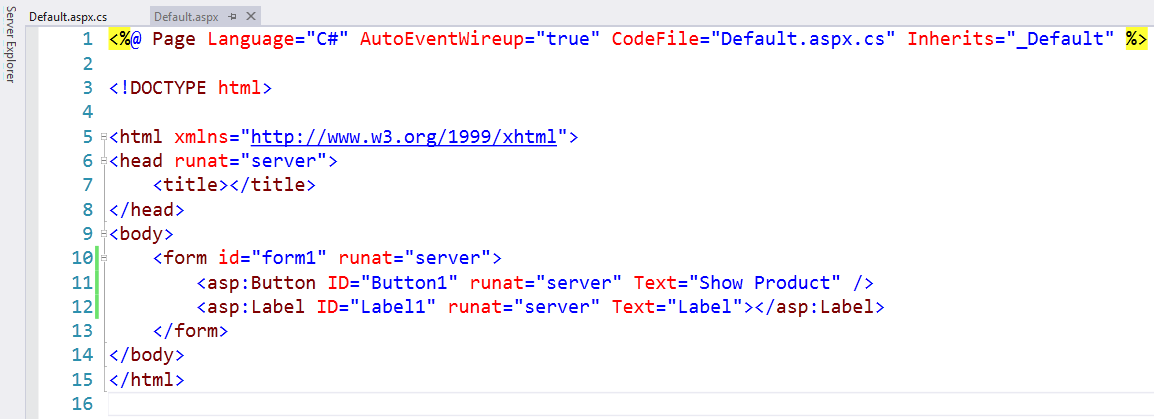
Figure 5.6.1: Our simple markup for this chapter
When you're learning, it's not good to have all the lines crammed together. So, separate the two lines by inserting a <br> tag at the end of the Button markup line. I've tried doing this by placing Label right after Button, but that gets really confusing when you're learning, so even a little <br> tag is helpful.
Creating the product method
Now, go to the Design view and double-click the Show Product button so that it brings up the Button1_Click Event Handler—the code that runs when somebody...