
Setting up software on Raspberry Pi
The SD card works as the hard drive of your Raspberry Pi. As you know, every computer should have an operating system to manage.
The official operating system for Raspberry Pi is known as Raspbian. The Raspbian OS can be installed on the SD card.
Installing Raspbian
Raspbian is the officially supported operating system for Raspberry Pi by the Raspberry Pi Foundation. Raspbian can be installed on Raspberry Pi through NOOBS, or as a standalone image:
- Browse the page https://www.raspberrypi.org/downloads/ on the Raspberry Pi website. You can find two options at the top of the page:
- New Out Of Box Software (NOOBS): An easy operating system installer for beginners
- Raspbian: The officially supported Raspberry Pi operating system based on Debian
- Click
Raspbian:
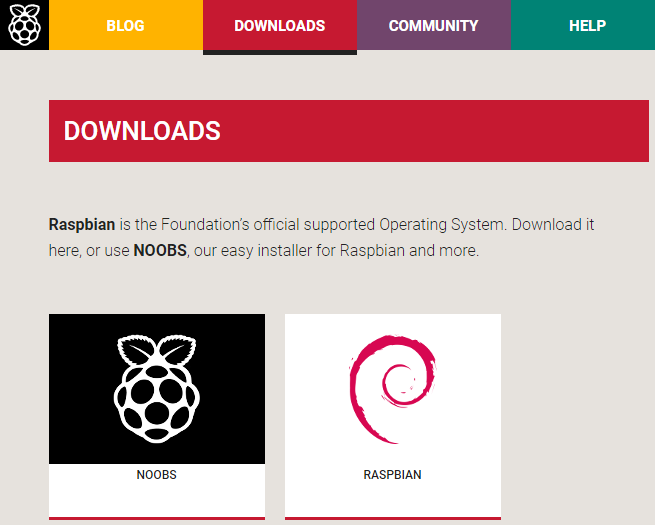
Raspbian
- You will navigate to the https://www.raspberrypi.org/downloads/raspbian/page. Click on
RASPBIAN STRETCH LITE, which is aminimal image based on Debian Stretch:
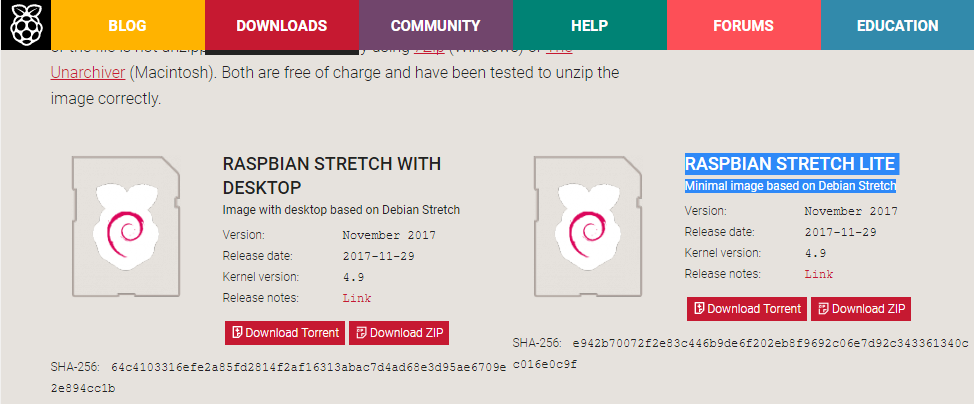
RASPBIAN STRETCH LITE
- You can directly download the image file as a Zip file, or you can download it through the torrent. I found that downloading through the torrent is the fastest and most convenient way, but you will need a torrent client installed on your computer. uTorrent and BitTorrent are a couple of the popular clients. You can find plenty of resources on the internet on how to install and use torrent software.
- Extract the downloaded compressed image file using 7-Zip (Windows), or the Unarchiver (macOS). You will get an image file like
2017-11-29-raspbian-stretch-lite.img. The first part of the filename indicates the date on which you downloaded the file.
Writing Raspbian Stretch Lite image on SD card
You will need to use an image writing tool to install the image you have downloaded on your SD card.
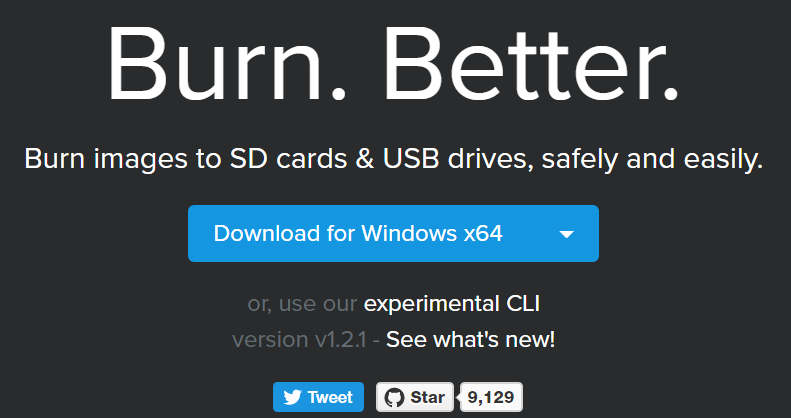
Etcher is a graphical SD card writing tool that works on macOS, Linux, and Windows, and is the easiest option for most users. Etcher also supports writing images directly from the ZIP file, without any unzipping required. You can download Etcher at https://etcher.io/:
- From the drop down-list, choose the operating system you are going to use to run Etcher (I chose Etcher for Windows x64):
Choosing the operating system
- The executable file will start downloading, and will be saved to your computer's
Downloadsfolder. You can use Etcher on your computer without installing it. Just run the executable file (Etcher-Portable-1.2.1-x64.exe) to launch the application:
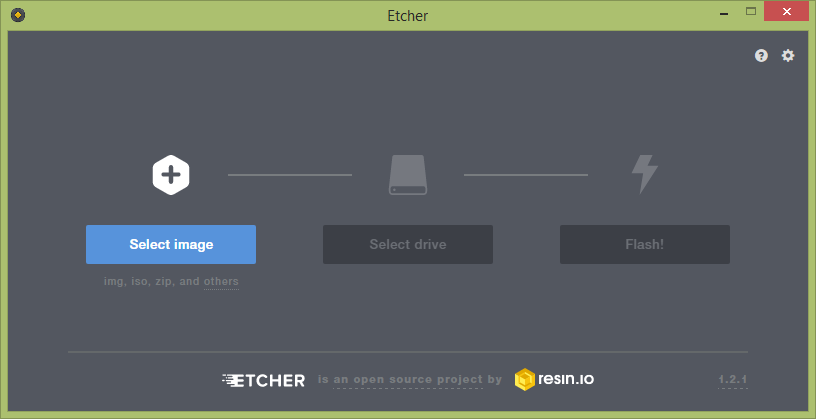
Etcher application window
- Connect the micro SD card to your computer. You can use an SD card reader to connect it to your computer. Once connected, Windows will recognize it as a removable drive.
- Click the
Select Imagebutton, browse the Raspbian image file (2017-11-29-raspbian-stretch-lite.img), and click theOpenbutton. The following screenshot shows the resultant window after selecting the image file:
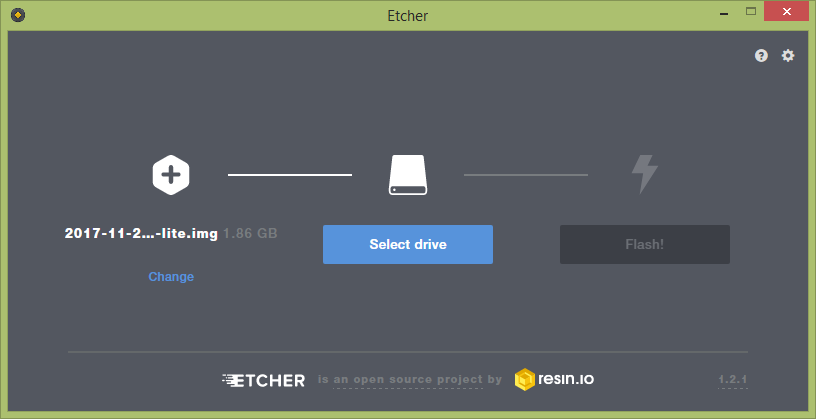
Selecting image
- Click the
Select Drivebutton and choose the SD card. The following screenshot shows the resultant window after selecting the drive for the SD card:
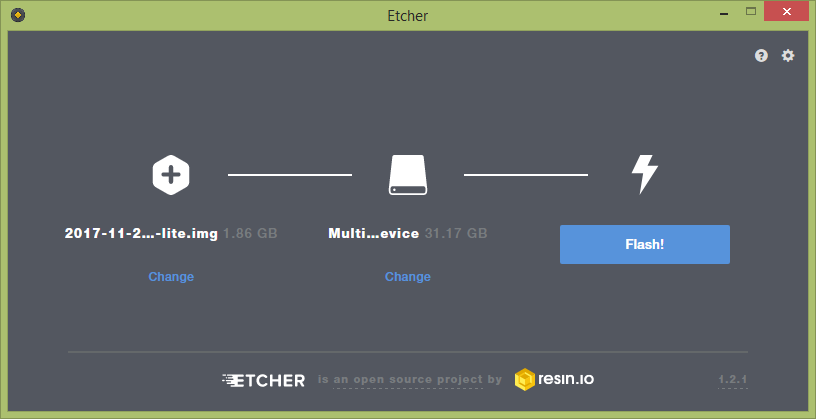
Selecting SD card as the drive
- Click the
Flash!button to write the image on your micro SD card. The following screenshot shows the window during flashing. When you get a message from Windows User Account Control, click theYesbutton to proceed:
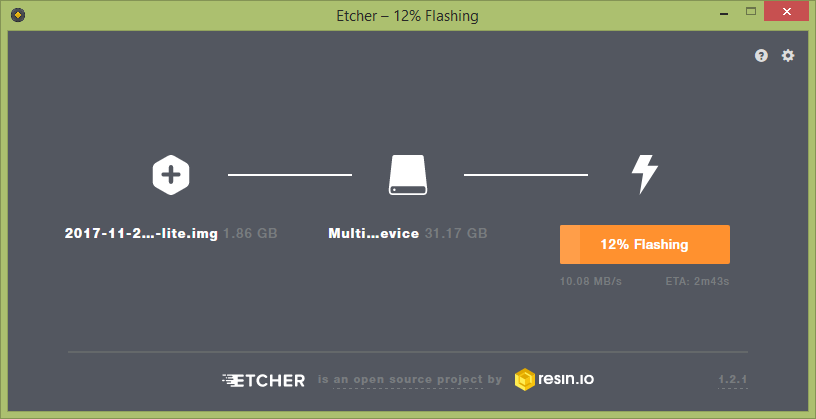
Image flashing to SD card in progress
Creating a configuration file for SSH
The Raspbian Stretch Lite doesn't have any configuration settings enabled to work with the SSH protocol for secure remote login from another computer. Therefore, first you should create a configuration file to enable the use of the SSH protocol:
- With the SD card connected to your computer, open Command Prompt and change to your Pi's boot partition (let's assume the boot partition of the SD card is
i):
C:>i- Then type the following command to create an empty file named
.sshon the root of the boot partition of the SD card:
i:>echo .ssh- Remove the SD card from your computer, and place it into the SD card slot on the Raspberry Pi. It will only fit one way.
- Connect the USB Wi-Fi dongle to one of the USB ports (unless you have a Raspberry Pi 3).
- Connect the Ethernet cable between your Raspberry Pi and the router.
- Finally, connect the power supply to the micro USB port of the Raspberry Pi, and apply power. You will see a steady red LED and intermittently flashing green LED. Wait until the green LED turns off.
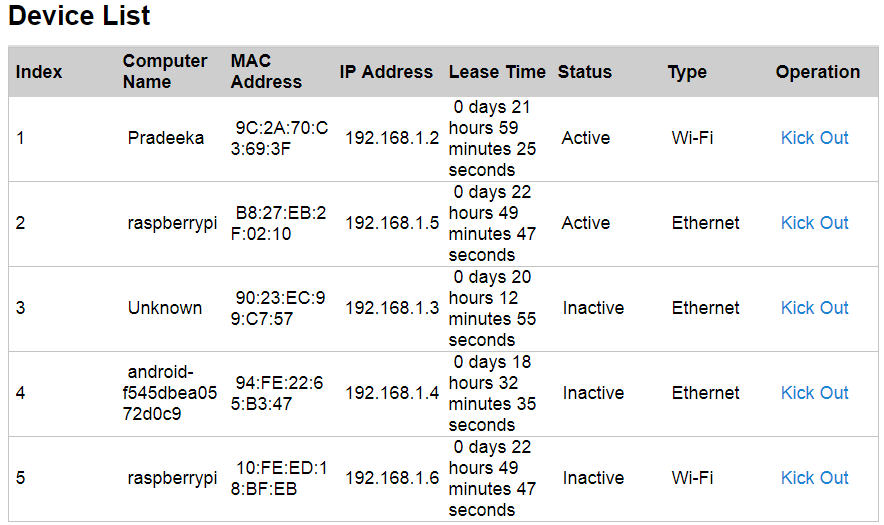
- Log into your router's portal and find the dynamic IP address assigned with your Raspberry Pi:
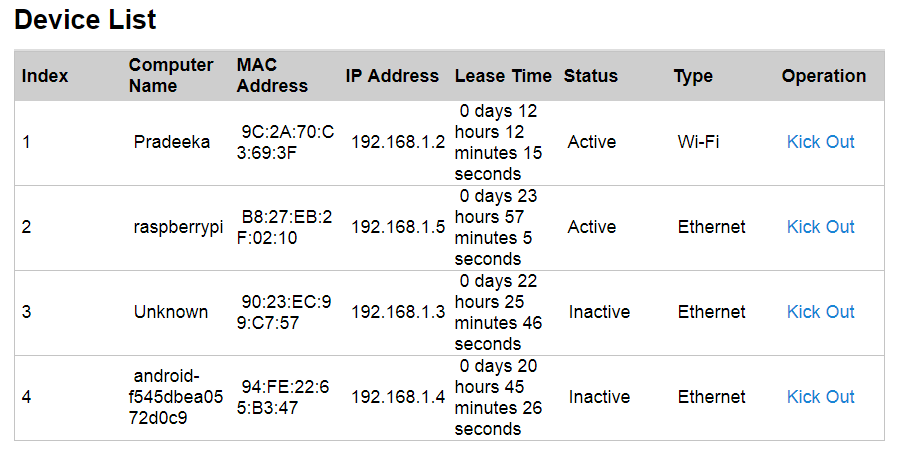
Raspberry Pi can be found under Device List
- You will notice that the allocated IP address for my Raspberry Pi is
192.168.1.5. You may get a different IP address based on your network topology.
Connecting with Raspberry Pi with SSH
SSH allows you to secularly log into the Raspberry Pi from your computer. PuTTY can be used to establish the connection between your computer and Raspberry Pi, and provides a terminal to run commands on Raspberry Pi. You can download PuTTY at http://www.chiark.greenend.org.uk/~sgtatham/putty/download.html.
The following steps will show you how to use PuTTY on Windows:
- Open PuTTY by running the downloaded executable file (
putty.exe). - In the
PuTTY Configurationwindow, type in your connection settings:Host Name(or IP address)192.18.1.5Port:22Connection type:SSH
- Then click the
Openbutton to start the SSH session:
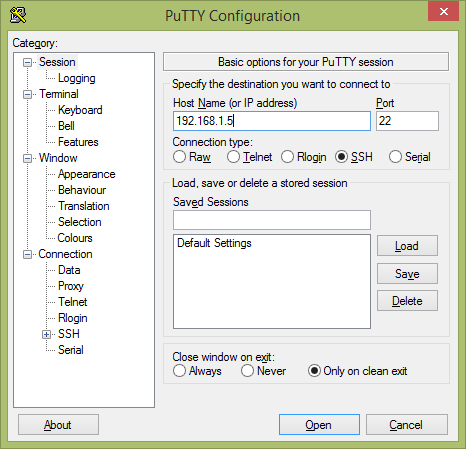
PuTTY configuration
- If this is your first time connecting to Raspberry Pi from your computer, you will see the PuTTY security alert. Accept the connection by clicking the
Yesbutton:
PuTTY Security Alert
- Once the SSH connection is open, you should see a terminal. Type in the following default credentials to log into your Raspberry Pi. Press Enter following each input:
login as: pi
[email protected]'s password: raspberry
- You are now logged in to your Raspberry Pi with SSH.
- When typing your password, you will not see the cursor moving, or any characters typed on your terminal screen:
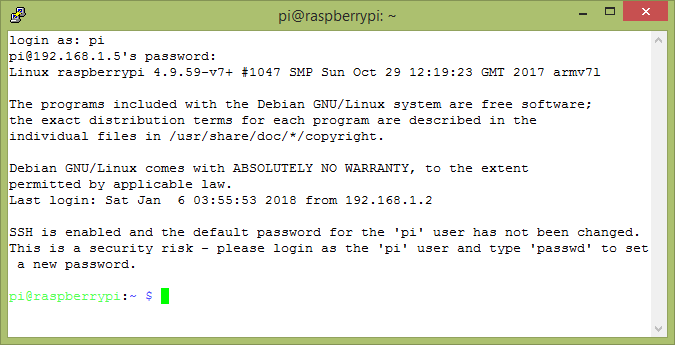
- Log into Raspberry Pi using your default username and password.
Configuring a wireless connection on Raspberry Pi
Now you can configure the wireless connection to allow your Raspberry Pi to connect with your home or school Wi-Fi network. The following steps will guide you through how to configure the connection settings:
- Open the
wpa_supplicantconfiguration file in nano using the following command:
pi@raspberrypi:~ $sudonano /etc/wpa_supplicant/wpa_supplicant.conf- Go to the bottom of the file and add the following:
network={
ssid="testing"
psk="testingPassword"
}- If the network you are connecting to does not use a password, the
wpa_supplicantentry for the network will need to include the correctkey_mgmtentry:
network={
ssid="testing"
key_mgmt=NONE
}- Alternatively, you can use the
wpa_passphraseutility to generate an encrypted PSK:
network={
ssid="testing"
#psk="testingPassword"
psk=131e1e221f6e06e3911a2d11ff2fac9182665c004de85300f9cac208a6a80531
}- If you are using a hidden network, an extra option in the
wpa_supplicantfile,scan_ssid, may help connection:
network={
ssid="yourHiddenSSID"
scan_ssid=1
psk="Your_wifi_password"
}- Now save the file by pressing Ctrl + X, then Y, then finally press Enter.
- Reboot your Raspberry Pi for the new configurations to take effect by issuing the following command:
pi@raspberrypi:~ $sudo reboot- You can verify if it has successfully connected by using
ifconfig wlan0. If theinetaddrfield has an address beside it, the Raspberry Pi has connected to the network. If not, check that yourssidandpskare correct:
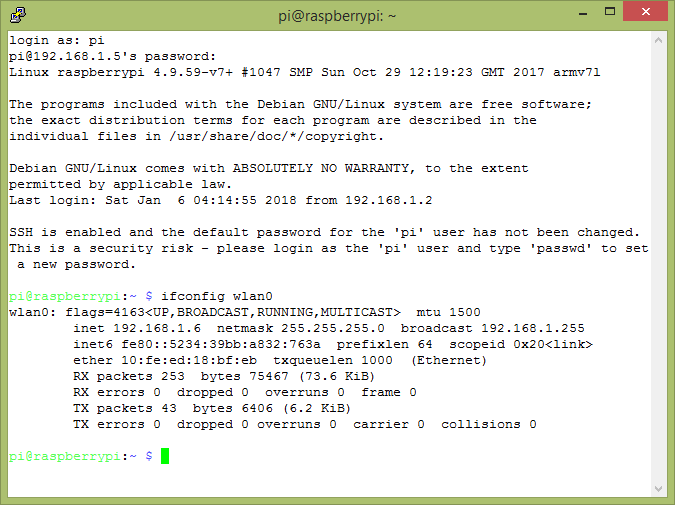
Verifying the wireless connection
- Otherwise, you can verify the wireless connection between your Raspberry Pi and router by logging into your router's configuration page.
Note
You may get a different user interface depending on your router's brand.
Refer to the following screenshot:
Device list at router configuration page
- Now you have successfully connected your Raspberry Pi to the home router's wireless network.