Creating a Kali Linux virtual machine
Kali is a GNU/Linux distribution built by Offensive Security that is focused on security and penetration testing. It comes with a multitude of tools preinstalled, including the most popular open source tools used by security professionals for reverse engineering, penetration testing, and forensic analysis.
We will use Kali Linux throughout this book as our attacking platform and we will create a virtual machine from scratch and install Kali Linux in it in this recipe.
Getting ready
Kali Linux can be obtained from its official download page https://www.kali.org/downloads/. For this recipe, we will use the 64-bit image (the first option on the page).
How to do it...
The process of creating a virtual machine in VirtualBox is pretty straightforward; let's look at this and perform the following steps:
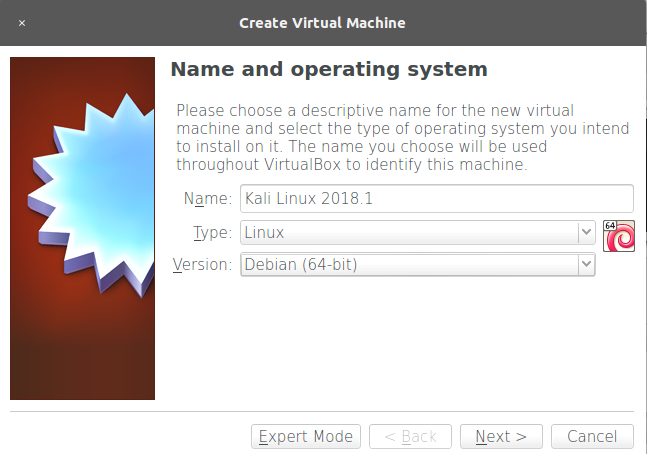
- To create a new virtual machine in VirtualBox, we can use the main menu,
Machine|New, or click theNewbutton.
- New dialog will pop up; here, we choose a name for our virtual machine, the type, and the version of the operating system:
- Next, we are asked about the memory size for this virtual machine. Kali Linux requires a minimum of 1 GB; we will set 2 GB for our virtual machine. This value depends on the resources of your system.
- We click
Nextand get to the hard disk setup. SelectCreate a virtual hard disk nowand clickCreatefor VirtualBox to create a new virtual disk file in our host filesystem:
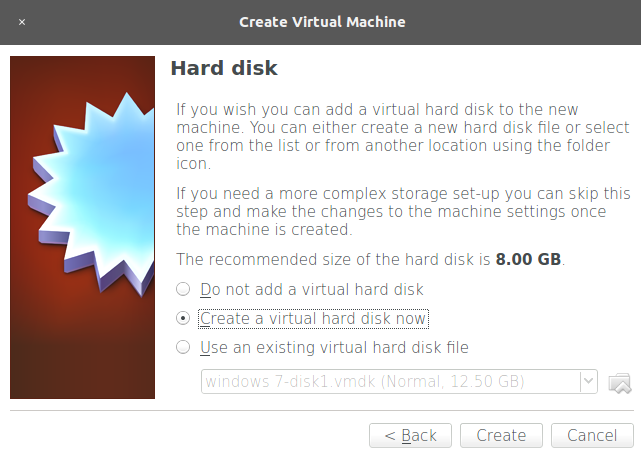
- On the next screen, select these options:
Dynamically allocated: This means the disk image for this virtual machine will be growing in size (in fact, it will be adding new virtual disk files) when we add or edit files in the virtual system.- For
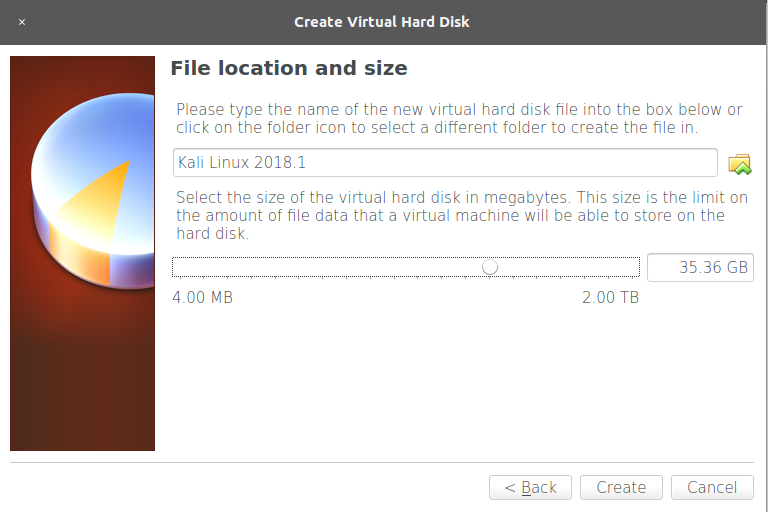
Hard disk file type, pickVDI (VirtualBox Disk Image)and clickNext. - Next, we need to select where the files will be stored in our host filesystem and the maximum size they will have; this is the storage capacity for the virtual operating system. We leave the default location alone and select a
35.36 GBsize. This depends on your base machine's resources, but should be at least 20 GB in order to install the requisite tools. Now, click onCreate:
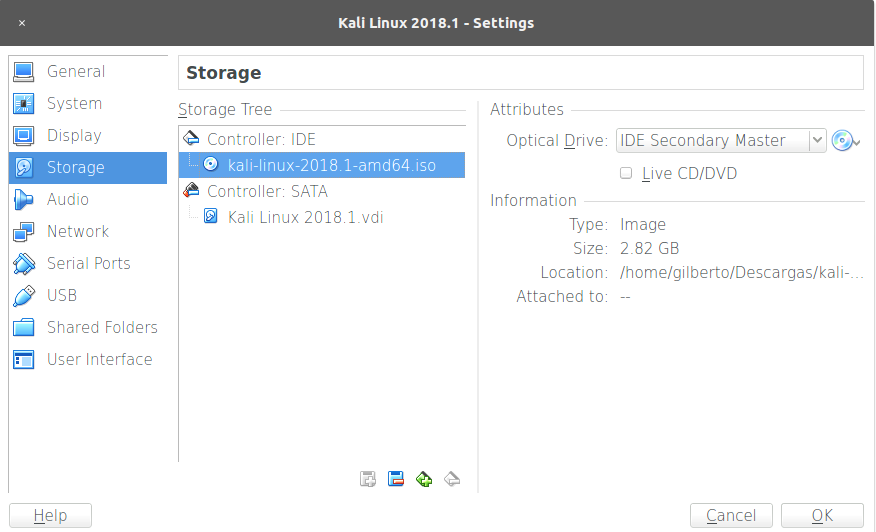
- Once the virtual machine is created, select it and click
Settings, and then go toStorageand select the CD icon underController: IDE. In theAttributespanel, click on the CD icon and selectChoose Virtual Optical Disk Fileand browse to the Kali image downloaded from the official page. Then clickOK:
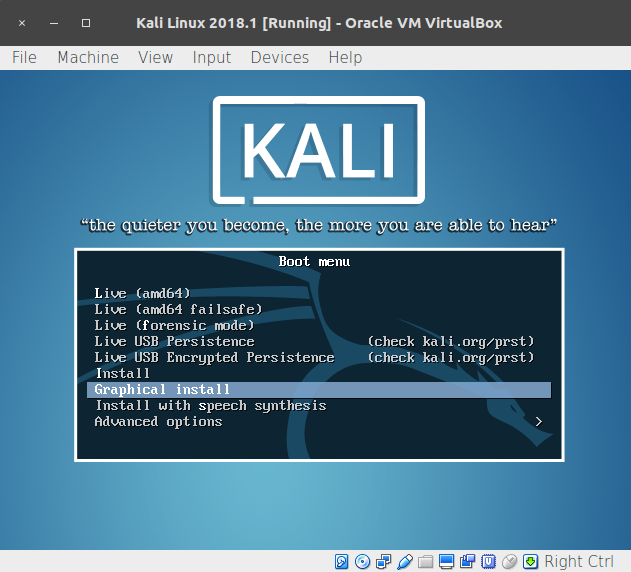
- We have created a virtual machine, but we still need to install the operating system. Start the virtual machine and it will boot using the Kali image we configured as the virtual CD/DVD. Use the arrows to select
Graphical installand hit Enter:
- We are starting the installation process. On the next screens, select the language, keyboard distribution, hostname, and domain for the system.
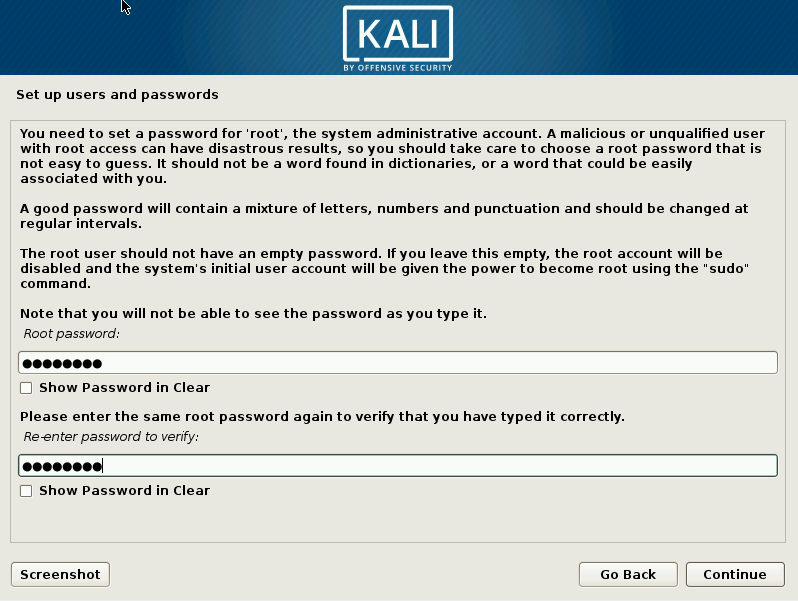
- After that, you will be asked for a
Root password; root is the administrative, all-powerful user in Unix-based systems and, in Kali, it is the default login account. Set a password, confirm it, and clickContinue:
- Next, we need to select the time zone, followed by configuration of the hard disk; we will use guided setup using the entire disk:
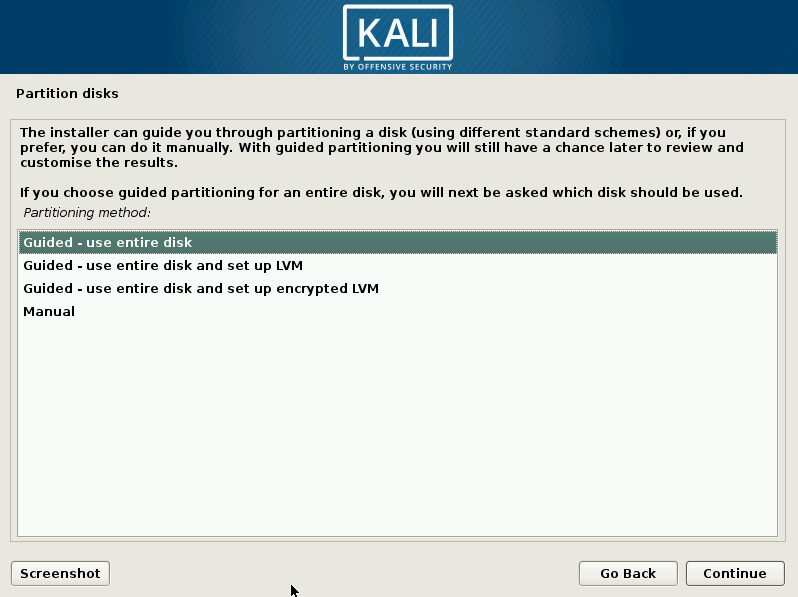
- Select the disk on which you want to install the system (there should only be one).
- The next step is to select the partitioning options; we will use
All files in one partition.
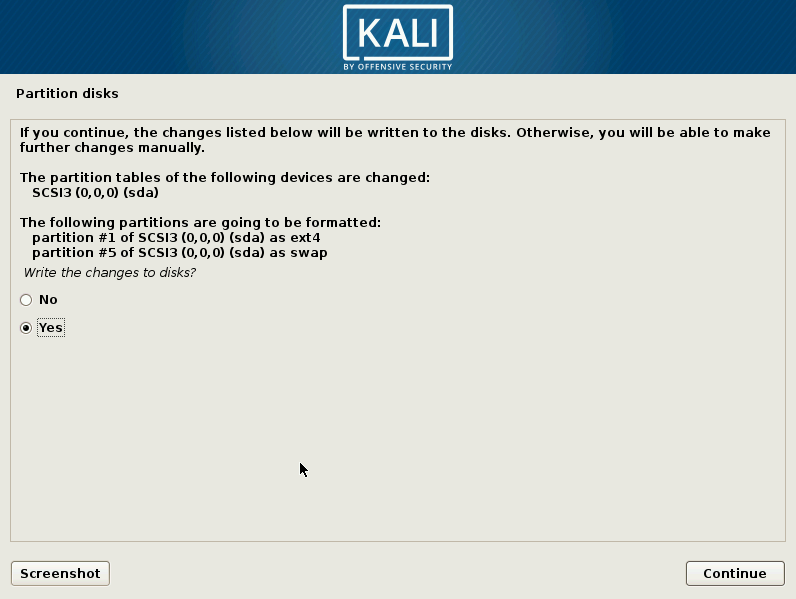
- Next, we need to confirm the setup by selecting
Finish partitioning and write changes to diskand clickingContinue. Then selectYesto write the changes andContinueagain on the next screen. This will start the installation process:
- When the installation is finished, the installer will ask you to configure the package manager. Answer
YestoUse a network mirrorand set up your proxy configuration; leave it blank if you don't use a proxy to connect to the internet. - The final step is to configure the GRUB loader: just answer
Yesand, on the next screen, select the hard disk from the list. Then, clickContinueand the installation will be complete. - Click
Continuein theInstallation completewindow to restart the VM. - When the VM restarts, it will ask for a username; type
rootand hit Enter. Then enter the password you set for the root user to log in. Now we have Kali Linux installed.
How it works...
In this recipe, we created our first virtual machine in VirtualBox, set the reserved amount of memory our base operating system will share with it, and created a new virtual hard disk file for the VM to use and set the maximum size. We also configured the VM to start with a CD/DVD image and, from there, installed Kali Linux the same way we would install it on a physical computer.
To install Kali Linux, we used the graphical installer and selected guided disk partitioning, this is, when we install an operating system, especially a Unix-based one, we need to define which parts of the system are installed (or mounted) in which partitions of the hard disk; luckily for us, Kali Linux's installation can take care of that and we only need to select the hard disk and confirm the proposed partitioning. We also configured Kali to use the network repositories for the package manager. This will allow us to install and update software from the internet and keep our system up to date.
There's more...
There are different (and easier) ways to get Kali Linux running in a virtual machine. For example, there are pre-built virtual machine images available to download from the Offensive Security site: https://www.offensive-security.com/kali-linux-vm-vmware-virtualbox-hyperv-image-download/. We chose this method as it involves the complete process of creating a virtual machine and installing Kali Linux from scratch.