Configuring JAVA_HOME in Jenkins
Jenkins is an open source server that can be to configure Continuous Integration for projects written in many programming languages. Let's consider the case of an application that is Java-based.
We need to tell Jenkins where Java is installed.
Getting ready
Download the required Java version based on the requirements of an application, or install automatically.
How to do it...
- Open the Jenkins dashboard.
- Go to
Manage Jenkins. - Go to
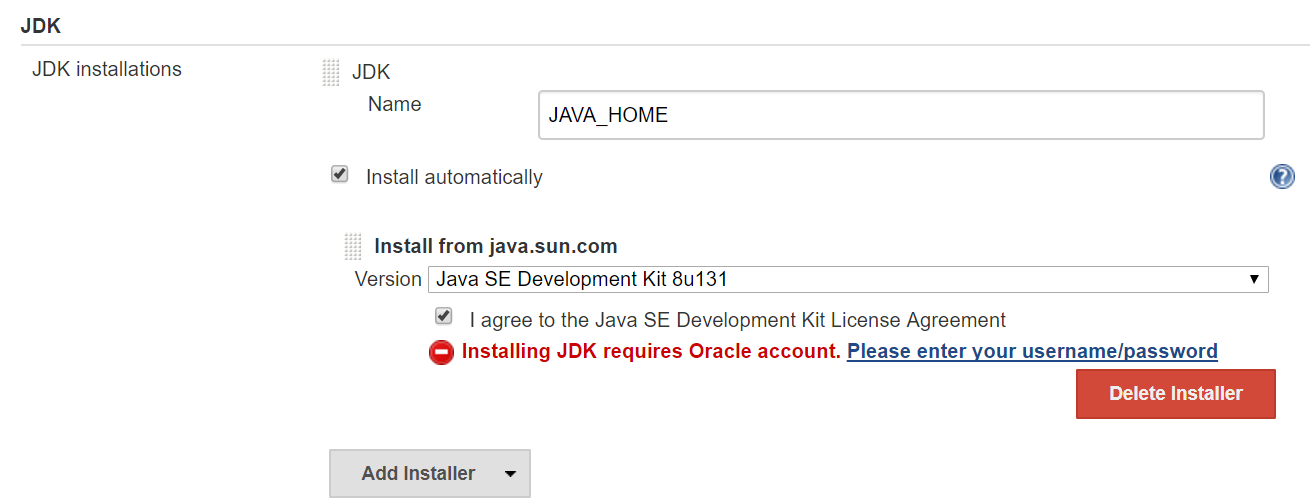
Global Tool Configurationto configure tools, their locations, and automatic installers. - Go to the
JDKsection. - Give the
Nameand tick theInstall automaticallyoption; provide details for the Oracle account to download JDK successfully. - You can give a logical name such as
JDK 1.7orJDK 1.8to identify the correct version while configuring a build job. - You can add multiple JDKs based on the version, so if different applications require different JDKs then the scenario can be managed easily by adding JDK in Jenkins:
How it works...
When you create a build job in Jenkins and configure it, you need to specify the Java version that will be used by the build execution. You can use existing Java available on the system as well if you don't want to install automatically.
In the general section of the build job, we can select a JDK from the list. This list contains all the JDKs that we have configured in the Global Tool Configuration.