Enabling the API
Now that we have a project and we have both the API and service account keys, we will enable the required API and test our application:
- Navigate to the project home page (https://console.cloud.google.com/home/dashboard?project=smart-exchange-b10882). From the menu on the left-hand side, select
APIs & Services|Library. - Once we land on this page, search for
Vision APIand click on that card.
- Then, click the
Enablebutton. This will prompt you to set up billing as follows:
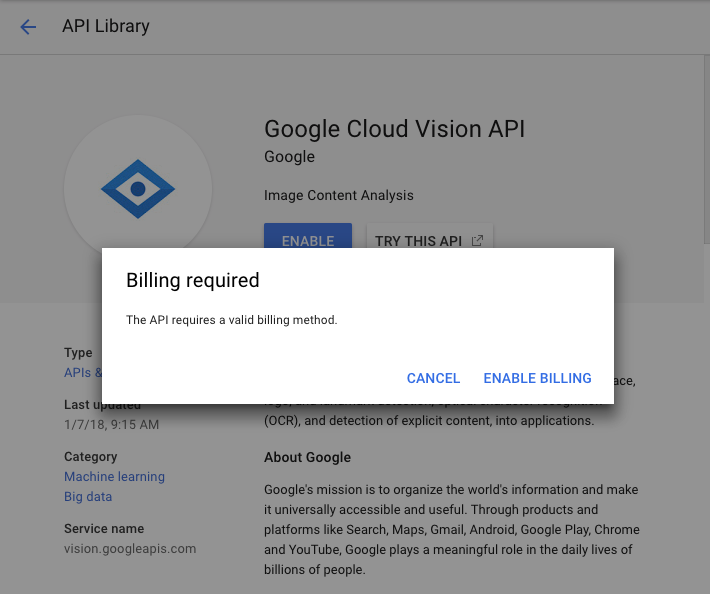
- Click on
ENABLE BILLING. You will be asked to select or create a new billing account:
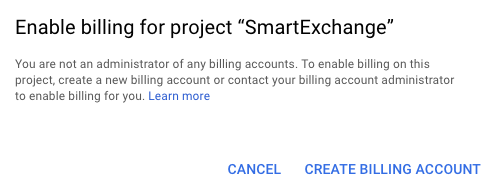
- Click on
CREATE BILLING ACCOUNT.
- Fill in the form as shown on the following screens and validate your payment. Once that is done, you will be automatically redirected to the
Enable APIpage and the API will be automatically enabled for you, if everything is set up correctly. Finally, you should see a screen as follows:

This concludes our section on enabling the API. In the next section, we are going to explore the API.