Search icon CANCEL
Subscription
0
Cart icon
Your Cart (0 item)
Close icon
You have no products in your basket yet
Save more on your purchases! discount-offer-chevron-icon
Savings automatically calculated. No voucher code required.
Arrow left icon
All Products
Best Sellers
New Releases
Books
Videos
Audiobooks
Learning Hub
Newsletter Hub
Free Learning
Arrow right icon
timer SALE ENDS IN
0 Days
:
00 Hours
:
00 Minutes
:
00 Seconds
Arrow up icon
GO TO TOP
3D printing with RepRap Cookbook

You're reading from   3D printing with RepRap Cookbook Over 80 fast-paced recipes to help you create and print 3D models

Arrow left icon
Product type Paperback
Published in Jun 2014
Publisher
ISBN-13 9781782169888
Length 346 pages
Edition 1st Edition
Tools
Arrow right icon
Author (1):
Arrow left icon
 Salinas Salinas
Author Profile Icon Salinas
Salinas
Arrow right icon
View More author details
Toc

Table of Contents (19) Chapters Close

3D Printing with RepRap Cookbook
Credits
About the Author
About the Reviewers
www.PacktPub.com
Preface
1. Getting Started with 3D Printing 2. Optimizing the Printing Process FREE CHAPTER 3. Scanning and Printing with a Higher Resolution 4. Modeling and Printing with Precision 5. Manipulating Meshes and Bridges 6. Making the Impossible 7. Texture – the Good and the Bad 8. Troubleshooting Issues in 3D Modeling 9. Troubleshooting Issues in 3D Printing Understanding and Editing Firmware Taking a Closer Look at G-code Filament Options for RepRap Printers Index

Using the command line


The host can also make changes to the G-code on the fly. This is handy if you want to make changes quickly, such as turn a fan on or off or adjust its speed. To do this, you simply enter the G-code command in a command-line window and click on Send.

The following screenshot shows the host program Repetier-Host:

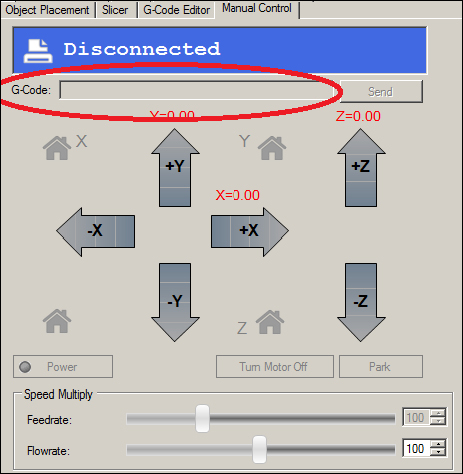
Its command line is located under the Manual Control tab. The following screenshot shows the host Pronterface:

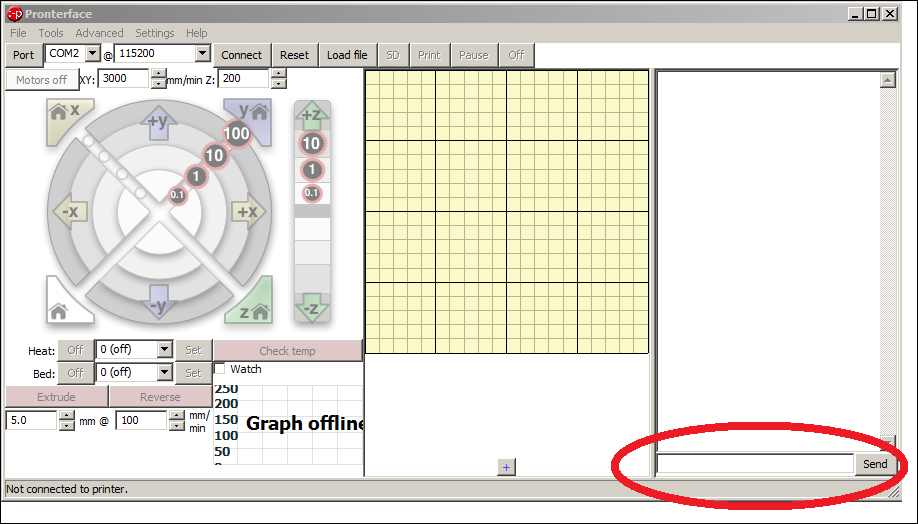
Its command line is located on the bottom-right corner of the program. A nice feature of Pronterface is its capability to create custom buttons that will send frequently used G-code commands. For instance, it's very convenient to have a set of buttons that will move the extruder to all four corners of the build platform when bed leveling.

We'll make the first button for a 200 mm x 200 mm bed by starting with the front-left position. To do this, left-click on the small + button at the bottom center of the program. A pop up will appear with the following three text fields:

  • Button title: In this field, enter XY front left

  • Command: In this field, enter G1 X0 Y0 F10000

  • Color: In this field, enter a hex color code (check the following list):

    • For yellow, it is #FFFF00; for red, #FF0000; for blue, #0000FF; for green, #00FF00; for magenta, #FF00FF; and for cyan, #00FFFF

Also, continue to make buttons for the other three corners with the following data:

  • XY front right: G1 X260 Y0 F10000

  • XY rear right: G1 X260 Y230 F10000

  • XY rear left: G1 X0 Y230 F10000

Making other buttons for G-code commands can be very convenient, for instance, a button for fan control. The Pronterface host doesn't have a manual control feature for the fan. By allowing the use of custom buttons, many useful G-code commands can be accessed.

lock icon The rest of the chapter is locked
Register for a free Packt account to unlock a world of extra content!
A free Packt account unlocks extra newsletters, articles, discounted offers, and much more. Start advancing your knowledge today.
Unlock this book and the full library FREE for 7 days
Get unlimited access to 7000+ expert-authored eBooks and videos courses covering every tech area you can think of
Renews at $15.99/month. Cancel anytime
Visually different images