Working with Git repositories
Git for Visual Studio 2017 comes as an optional component and you need to manually install it to work with Git servers such as Team Foundation Services, GitHub, and BitBucket. In this section of the chapter, we will learn how to work with Git repositories. This will cover creating/cloning a repository, creation of a branch, working with changes, syncing, pull requests, and commit history.
Installing Git for Visual Studio 2017
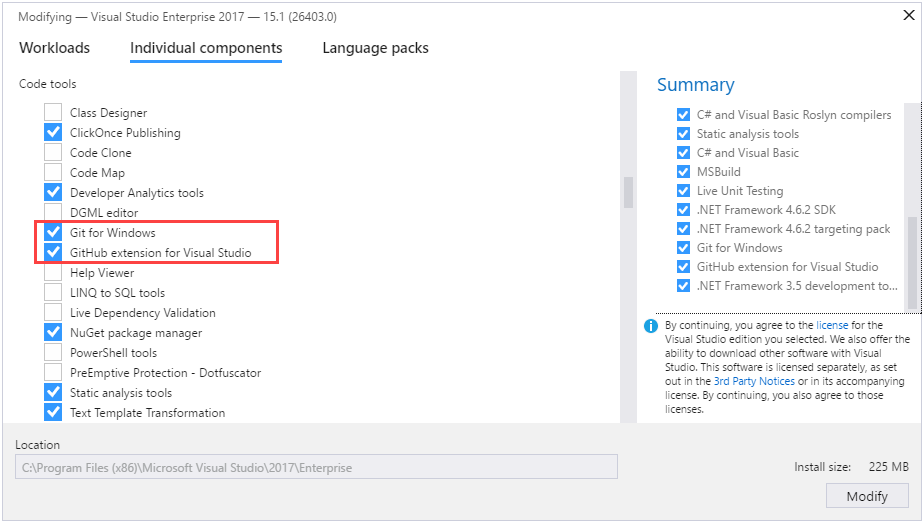
To install the Git plugin for Visual Studio, run the Visual Studio 2017 installer and click on Modify. Once the screen loads, navigate to the Individual Components tab, as shown in the following screenshot. Scroll down to the Code tools section and select Git for Windows & GitHub extension for Visual Studio. Click on the Modify button to continue with the installation:
Note
Git for Windows will allow you to use local Git repositories as well as to perform Git commands to work with any remote repositories. If you are going to deal with GitHub...