Creating an Azure website from Visual Studio
As we have already learned how to create an Azure website from the Azure Management Portal, let's learn how to create the same from Visual Studio 2017. Make sure that you have the required components/workloads already installed (see Configuring Visual Studio 2017 for Azure development from this chapter).
Creating an ASP.NET Web Application
Once you are ready with creating an ASP.NET website and deploying it to Azure, open your Visual Studio 2017 instance. Create a new project by navigating to Templates | Visual C# | Cloud and selecting ASP.NET Web Application (.NET Framework), as shown in the following New Project dialog:
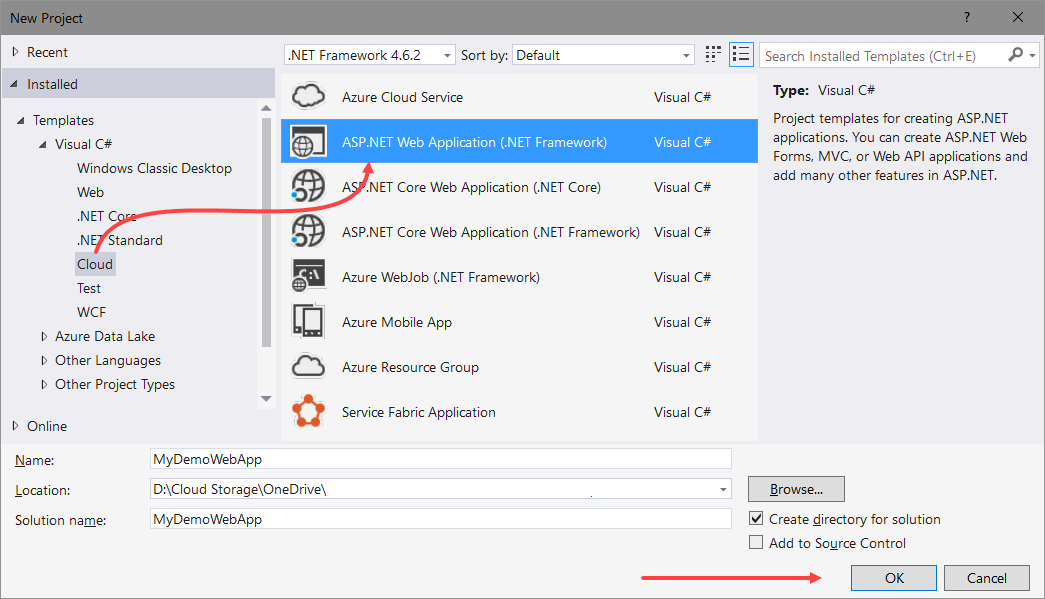
Give your project a name and click the OK button to start creating your web application from a template. The next screen will guide you to select the template that you want to use. There exists a number of templates (Empty, Web Forms, MVC, Web API, Azure Mobile App, and so on) available for you to select.
We will select Web Forms...