
Unity3d quick overview
In the Unity3d quick overview, we will have a quick, very general overview of Unity. In the next chapter, we will begin the first stages of our project. With the following overview, what you will learn in the chapter will stick a little bit better:
- Click on the
Unity HoloLensicon to run Unity, as follows:
- If you have a Unity account, enter your account name and password, otherwise you will need to create a new account before you can move forward.
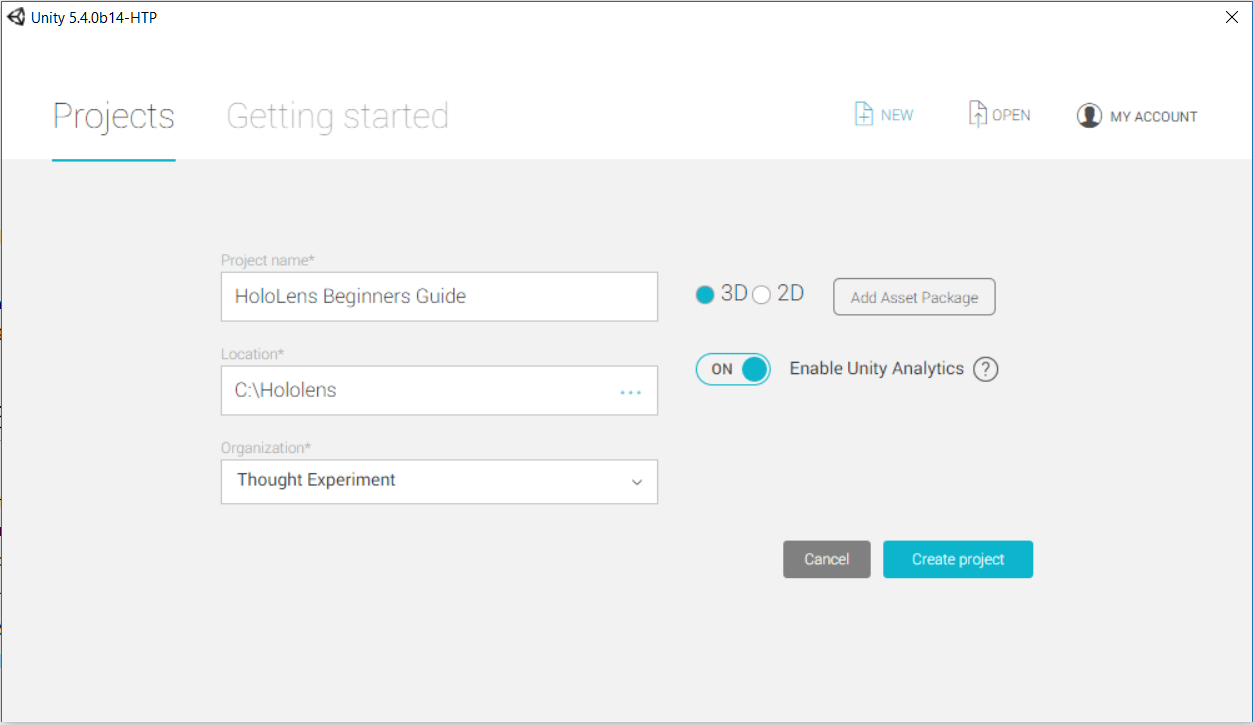
- Type the name of the project--
HoloLens Beginners Guide--into theProject nameinput field. - Ensure that you have 3D selected as the project type and click on
Create project.
The main view
When the project is created and the program finishes loading, you should see the following default view:
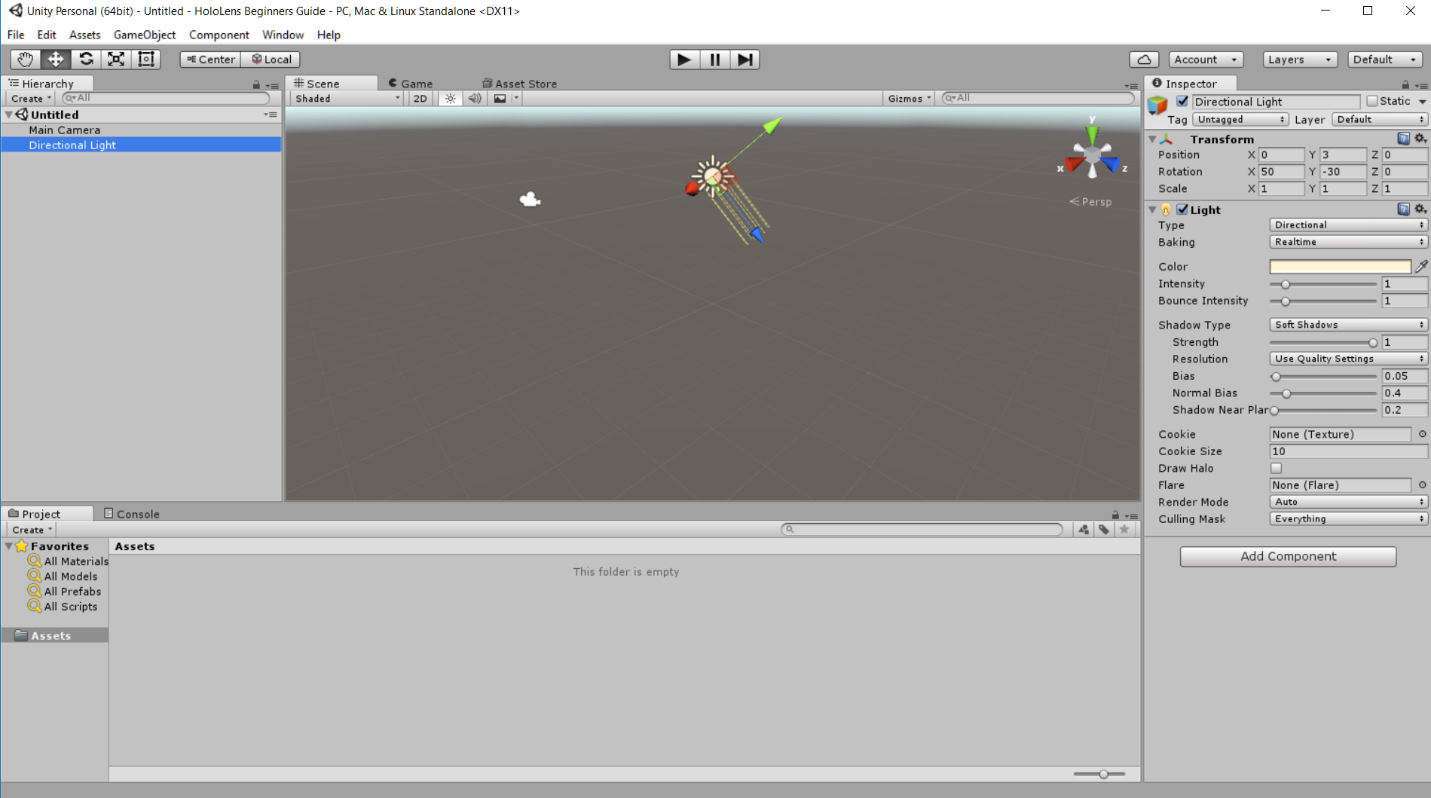
Here, we can see our main work areas:
- Scene: This is where we view our scene and can make certain types of changes.
- Hierarchy: This is a list of all objects currently in the scene.
- Project Window: Here, we have all the assets of the project. This will list our 3D models, scripts, textures, materials, sounds, prefabs, and all other elements of the programs.
- Inspector: When an object is selected, we will be given many changeable details about that object.
You may notice a few in at the upper part of certain windows. These windows offer other functions, as shown in the following screenshot:
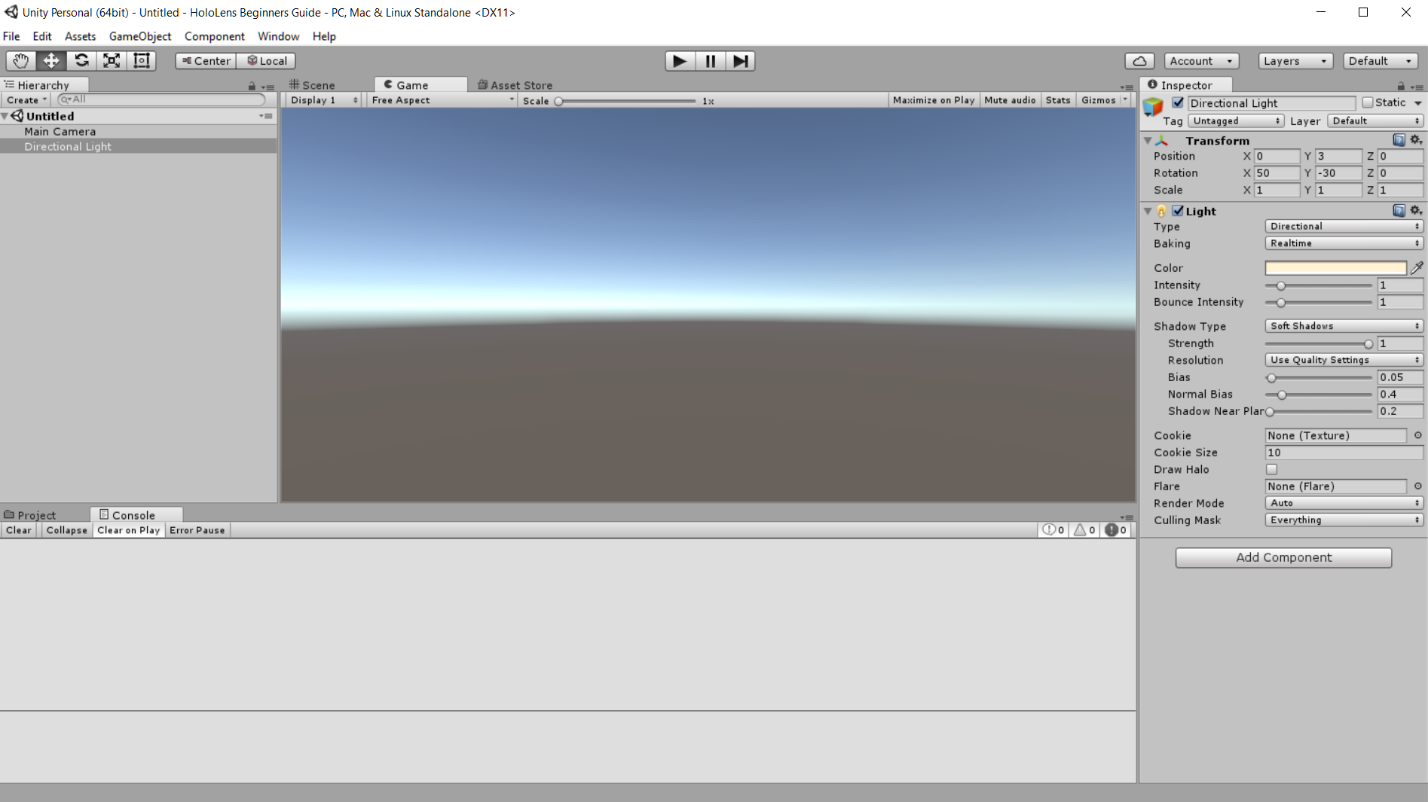
- Console: Here, we can have the debug information presented to us. This allows us to test certain parts of a program to ensure that it is working.
- Game View: When we test our project on our development computer, this is the window that our program will appear in; this is the main camera view.