Configuring Visual Studio 2017 for Azure development
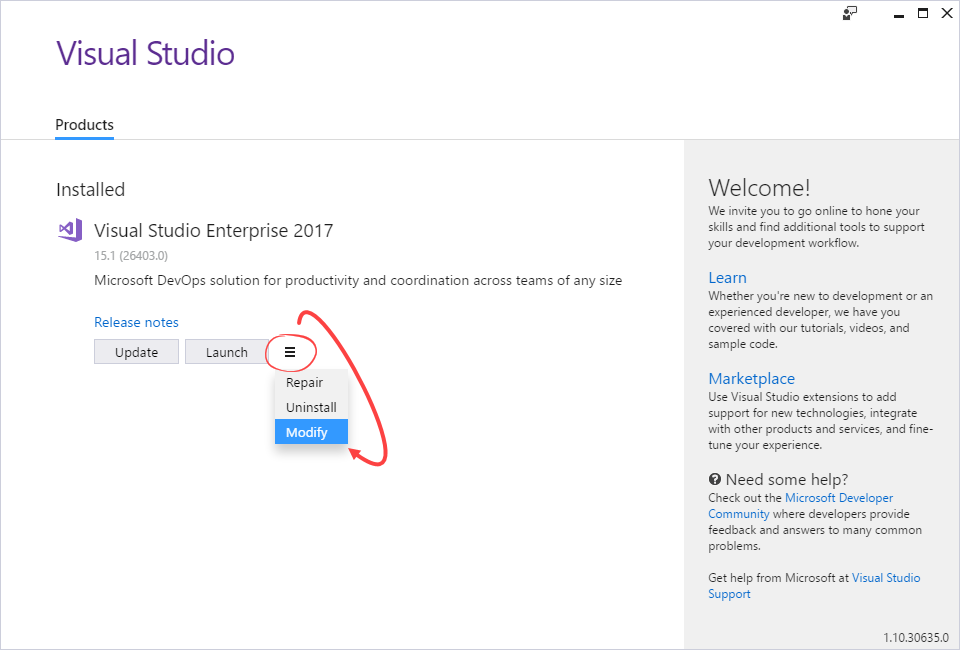
Before you start building Azure applications from Visual Studio 2017, you need to configure it by installing the required workloads. If you have not already installed the Azure development workload, open your Visual Studio 2017 Installer.
As shown in the following screenshot, click on Modify to start customizing the instance of the IDE:
This will open the customization screen with the Workloads tab open. Scroll down to find the Azure development workload and select it. If you want to build ASP.NET applications, select the ASP.NET and web development workload, as shown in the following screenshot:
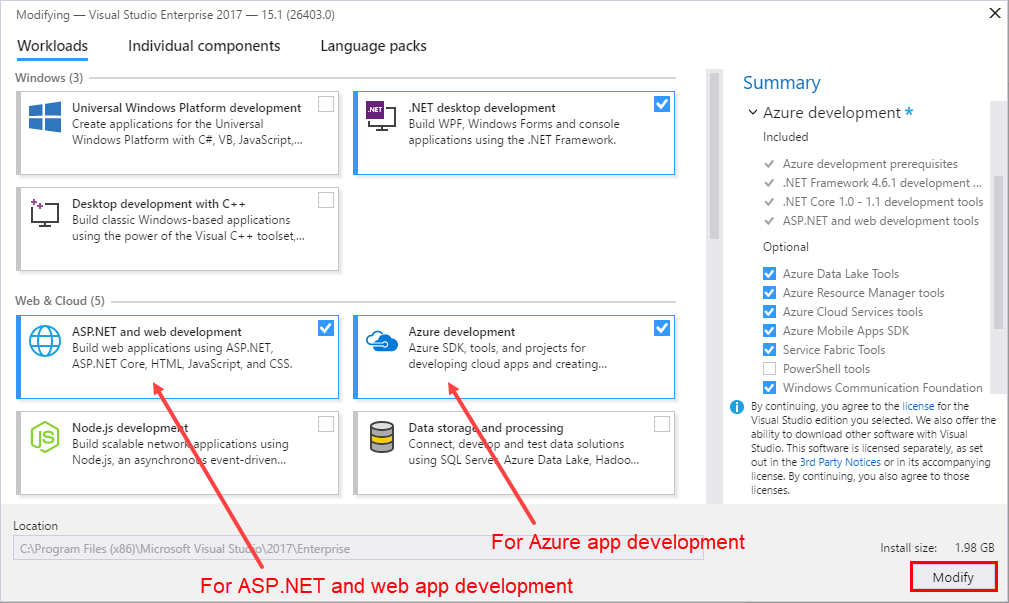
When you are ready, click the Modify button to start the installation process. This will take some time, based on your internet bandwidth, to download and install the required components.