Search icon CANCEL
Subscription
0
Cart icon
Your Cart (0 item)
Close icon
You have no products in your basket yet
Save more on your purchases! discount-offer-chevron-icon
Savings automatically calculated. No voucher code required.
Arrow left icon
All Products
Best Sellers
New Releases
Books
Videos
Audiobooks
Learning Hub
Newsletter Hub
Free Learning
Arrow right icon
timer SALE ENDS IN
0 Days
:
00 Hours
:
00 Minutes
:
00 Seconds
Arrow up icon
GO TO TOP
Building a Game with Unity and Blender

You're reading from   Building a Game with Unity and Blender Learn how to build a complete 3D game using the industry-leading Unity game development engine and Blender, the graphics software that gives life to your ideas

Arrow left icon
Product type Paperback
Published in Nov 2015
Publisher
ISBN-13 9781785282140
Length 250 pages
Edition 1st Edition
Tools
Arrow right icon
Toc

Table of Contents (16) Chapters Close

Building a Game with Unity and Blender
Credits
About the Author
About the Reviewers
www.PacktPub.com
Preface
1. Creating Your Game Concept FREE CHAPTER 2. Creating Characters 3. Animating Your Characters 4. Creating the Environment 5. Integrating Your Assets into the Game 6. Developing the Game Structure 7. Creating Levels and Game Progression 8. Post-Production and Visual FX 9. Deploying the Game Index

Unwrapping the player character's UV map


Before we unwrap the UV map of the character model, we need to identify where to cut the seam lines so that the resulting UV will have minimum stretches, while effectively hiding the texture seams. Next I have highlighted the seams I marked on the character model using white lines. Since I used the mirror modifier on this model (except the feathers), most of the UV islands only appear in half, which means the other side of the mesh is sharing the exact UV space with the original mesh. This saves a lot of UV space, thus allowing us to enlarge all the UV islands that enable us to display the finer details of the texture.

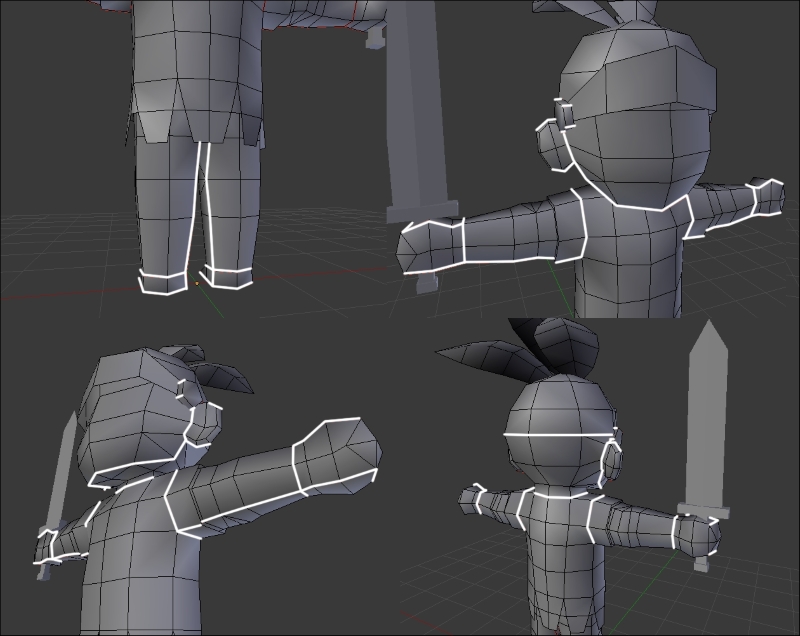
For this character, I'm more focusing on the face and torso's UVs because those areas have more important details than other parts of the mesh. I manually straighten the UVs of these two parts so that I can more easily create the texture without worrying about stretches and distortions. I wasn't too concerned about the other parts that...

lock icon The rest of the chapter is locked
Register for a free Packt account to unlock a world of extra content!
A free Packt account unlocks extra newsletters, articles, discounted offers, and much more. Start advancing your knowledge today.
Unlock this book and the full library FREE for 7 days
Get unlimited access to 7000+ expert-authored eBooks and videos courses covering every tech area you can think of
Renews at $15.99/month. Cancel anytime
Visually different images