Search icon CANCEL
Subscription
0
Cart icon
Your Cart (0 item)
Close icon
You have no products in your basket yet
Save more on your purchases! discount-offer-chevron-icon
Savings automatically calculated. No voucher code required.
Arrow left icon
All Products
Best Sellers
New Releases
Books
Videos
Audiobooks
Learning Hub
Newsletter Hub
Free Learning
Arrow right icon
timer SALE ENDS IN
0 Days
:
00 Hours
:
00 Minutes
:
00 Seconds
Arrow up icon
GO TO TOP
Kivy Cookbook

You're reading from   Kivy Cookbook Enhance your skills in developing multi-touch applications with Kivy

Arrow left icon
Product type Paperback
Published in Aug 2015
Publisher
ISBN-13 9781783987382
Length 246 pages
Edition 1st Edition
Languages
Tools
Arrow right icon
Authors (2):
Arrow left icon
Hugo Solis Hugo Solis
Author Profile Icon Hugo Solis
Hugo Solis
 Solis Solis
Author Profile Icon Solis
Solis
Arrow right icon
View More author details
Toc

Table of Contents (16) Chapters Close

Kivy Cookbook
Credits
About the Author
About the Reviewers
www.PacktPub.com
Preface
1. Kivy and the Kv Language FREE CHAPTER 2. Input, Motion, and Touch 3. Events 4. Widgets 5. Graphics – Canvas and Instructions 6. Advanced Graphics – Shaders and Rendering 7. The API in Detail 8. Packaging our Apps for PC 9. Kivy for Mobile Devices Index

Working with ActionBar


The ActionBar widget is like the popular Android's ActionBar. Here the children are stacked in horizontal and vertical groups such as menus. This recipe will use the ActionBar widget to organize eight buttons, and the bar will be the superior part of the app that has two buttons.

Getting ready

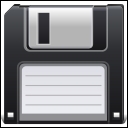
In this recipe, we need an icon such as the commonly used save icon. For this purpose, we will use the image floppy.png, which looks like:
How to do it…

Here, we will use a KV file to set and organize ActionBar and its children and the Python file to add ActionBar to our app. To complete the task, perform the following steps:

  1. In the KV file, define the rule <MyW>.

  2. In this rule, add the ActionBar widget.

  3. In the ActionBar child, add a button with the floppy.png icon.

  4. Add three more buttons.

  5. Add three child buttons to ActionGroup.

  6. Define another rule <MyW> with two buttons using the following code:

    <MyW>:
        ActionBar:
            pos_hint: {'top':1}
            ActionView:
       ...
lock icon The rest of the chapter is locked
Register for a free Packt account to unlock a world of extra content!
A free Packt account unlocks extra newsletters, articles, discounted offers, and much more. Start advancing your knowledge today.
Unlock this book and the full library FREE for 7 days
Get unlimited access to 7000+ expert-authored eBooks and videos courses covering every tech area you can think of
Renews at £13.99/month. Cancel anytime
Visually different images