Getting to Know Unreal
You will now be introduced to the Unreal Engine editor, which is a fundamental topic to get familiar with Unreal Engine 4.
When your project has finished generating, you should see the Unreal Engine editor open automatically. This screen is likely the one that you will see the most when working with Unreal Engine, so it is important that you get accustomed to it.
Let's break down what we see in the editor window:
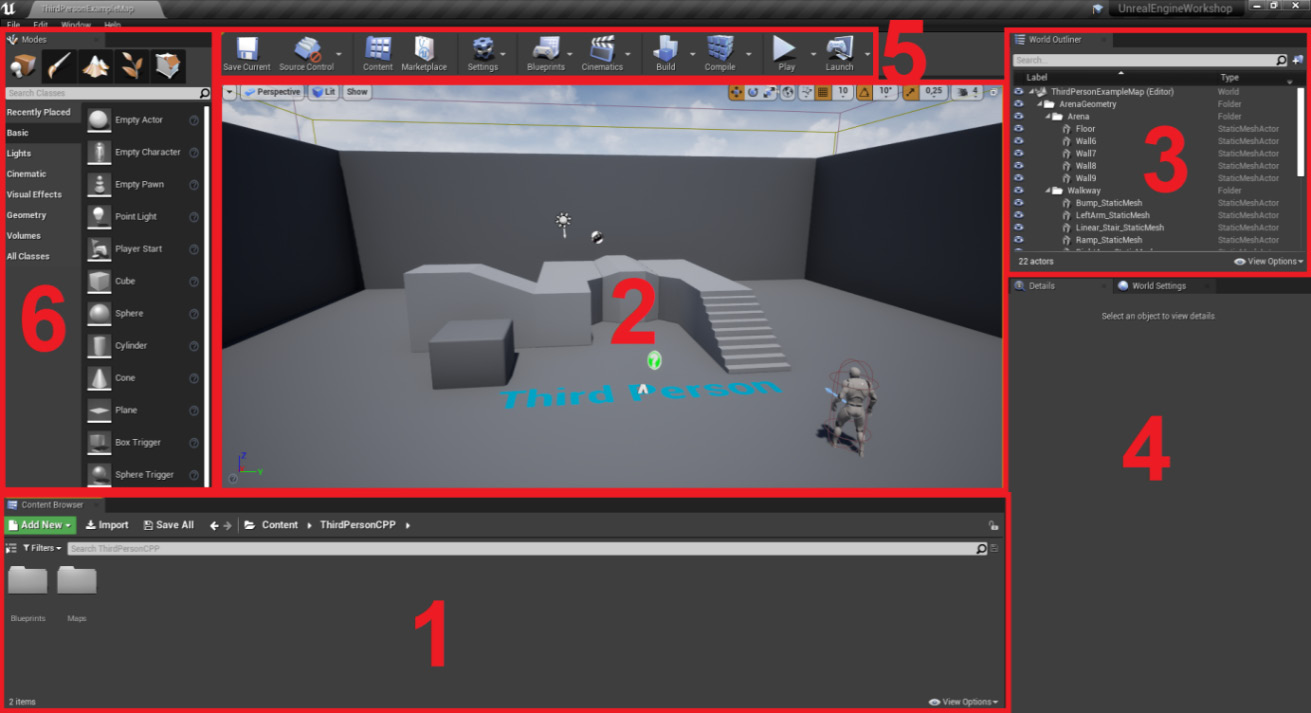
Figure 1.1: The Unreal Engine editor divided in its six main windows
Content Browser: The window that occupies the majority of the bottom of the screen is theContent Browser. This window will let you browse and manipulate all the files and assets located inside your project's folder. As was mentioned at the start of the chapter, Unreal Engine will allow you to import several types of multimedia files, andContent Browseris the window that will allow you to browse and edit them in their respective sub-editors. Whenever you create an Unreal Engine project, it will always generate aContentfolder. This folder will be the root directory of theContent Browser, meaning you can only browse files inside that folder. You can see the directory you're currently browsing insideContent Browserby looking at the top of it, which, in our case, isContent -> ThirdPersonCPP.If you click the icon to the left of the
Filtersbutton, at the very left ofContent Browser, you will be able to see the directory hierarchy of theContentfolder. This directory view allows you to select, expand, and collapse individual directories in theContentfolder of your project: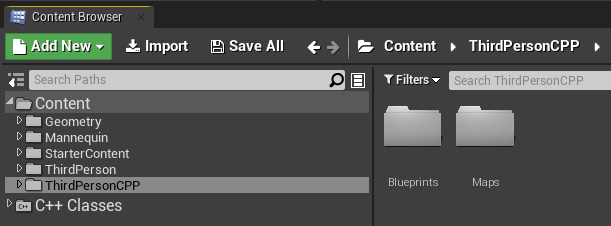
Figure 1.2: Content Browser's directory view
Viewport: At the very center of the screen, you'll be able to see theViewportwindow. This will show you the content of the current level and will allow you to navigate through your level as well as adding, moving, removing, and editing objects inside it. It also contains several different parameters regarding visual filters, object filters (which objects you can see), and the lighting in your level.World Outliner: At the top-right corner of the screen, you'll seeWorld Outliner. This will allow you to quickly list and manipulate the objects that are at your level.ViewportandWorld Outlinerwork hand in hand in allowing you to manage your level, where the former will show you what it looks like and the latter will help you manage and organize it. Similar toContent Browser,World Outlinerallows you to organize the objects in your level in directories, with the difference being thatContent Browsershows the assets in your project andWorld Outlinershows you the objects in your level.- The
Detailspanel andWorld Settings: At the far right of the screen, belowWorld Outliner, you'll be able to see two windows – theDetailspanel and theWorld Settingswindow. TheDetailswindow allows you to edit the properties of an object that you selected in your level. As there are no objects selected in the screenshot, it is empty. However, if you select any object in your level by left-clicking on it, its properties should appear in this window, as shown in the following screenshot: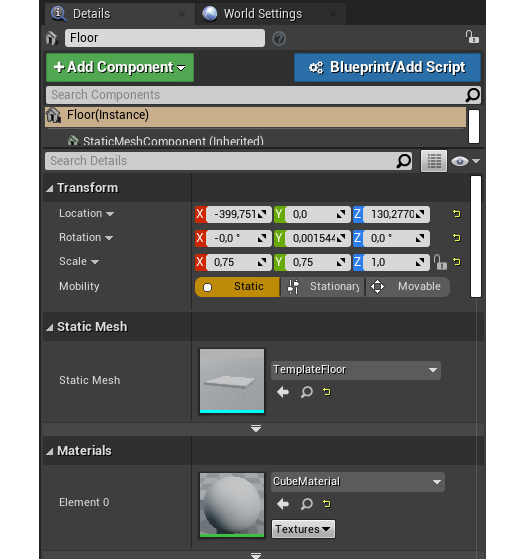
Figure 1.3: The Details tab
The
World Settingswindow allows you to set the overall settings of your level, instead of those of individual objects. Here, you'll be able to change things such as the Kill Z (the height at which you want your objects to be destroyed) and the desired lighting settings, among others: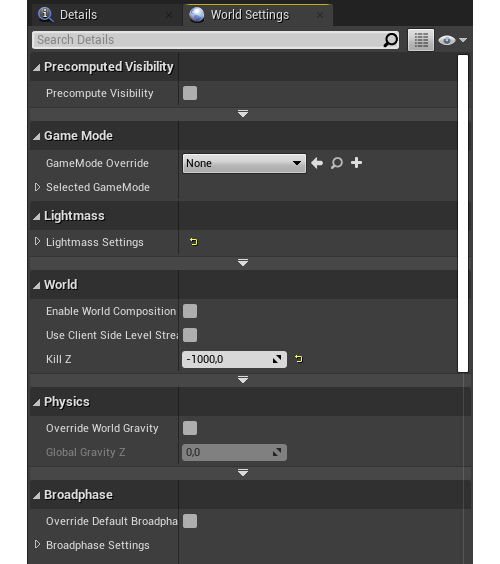
Figure 1.4: The World Settings window
Toolbar: At the top of the screen you'll see the editorToolbar, where you'll be able to save your current level, access the project and editor settings, and play your level, among other things.Note
We will only be using some of the buttons from these toolbars, namely, the
Save Current,Settings,Blueprints,Build, andPlaybuttons.Modes: At the very left of the screen, you'll see theModeswindow. It will allow you to drag objects to your levels, such as cubes and spheres, light sources, and other types of objects designed for a wide variety of purposes.
Now that we have learned about the main windows of the Unreal Engine editor, let's take a look at how to manage those windows.