


Using ccp helper methods
In the example of Rocket Through, the game we developed in Chapter 5, On the Line – Rocket Through, we used vectors to describe movement, and now I want to show you the logic behind some of the methods we used to handle vector operations and what they mean.
Rotating the rocket around a point
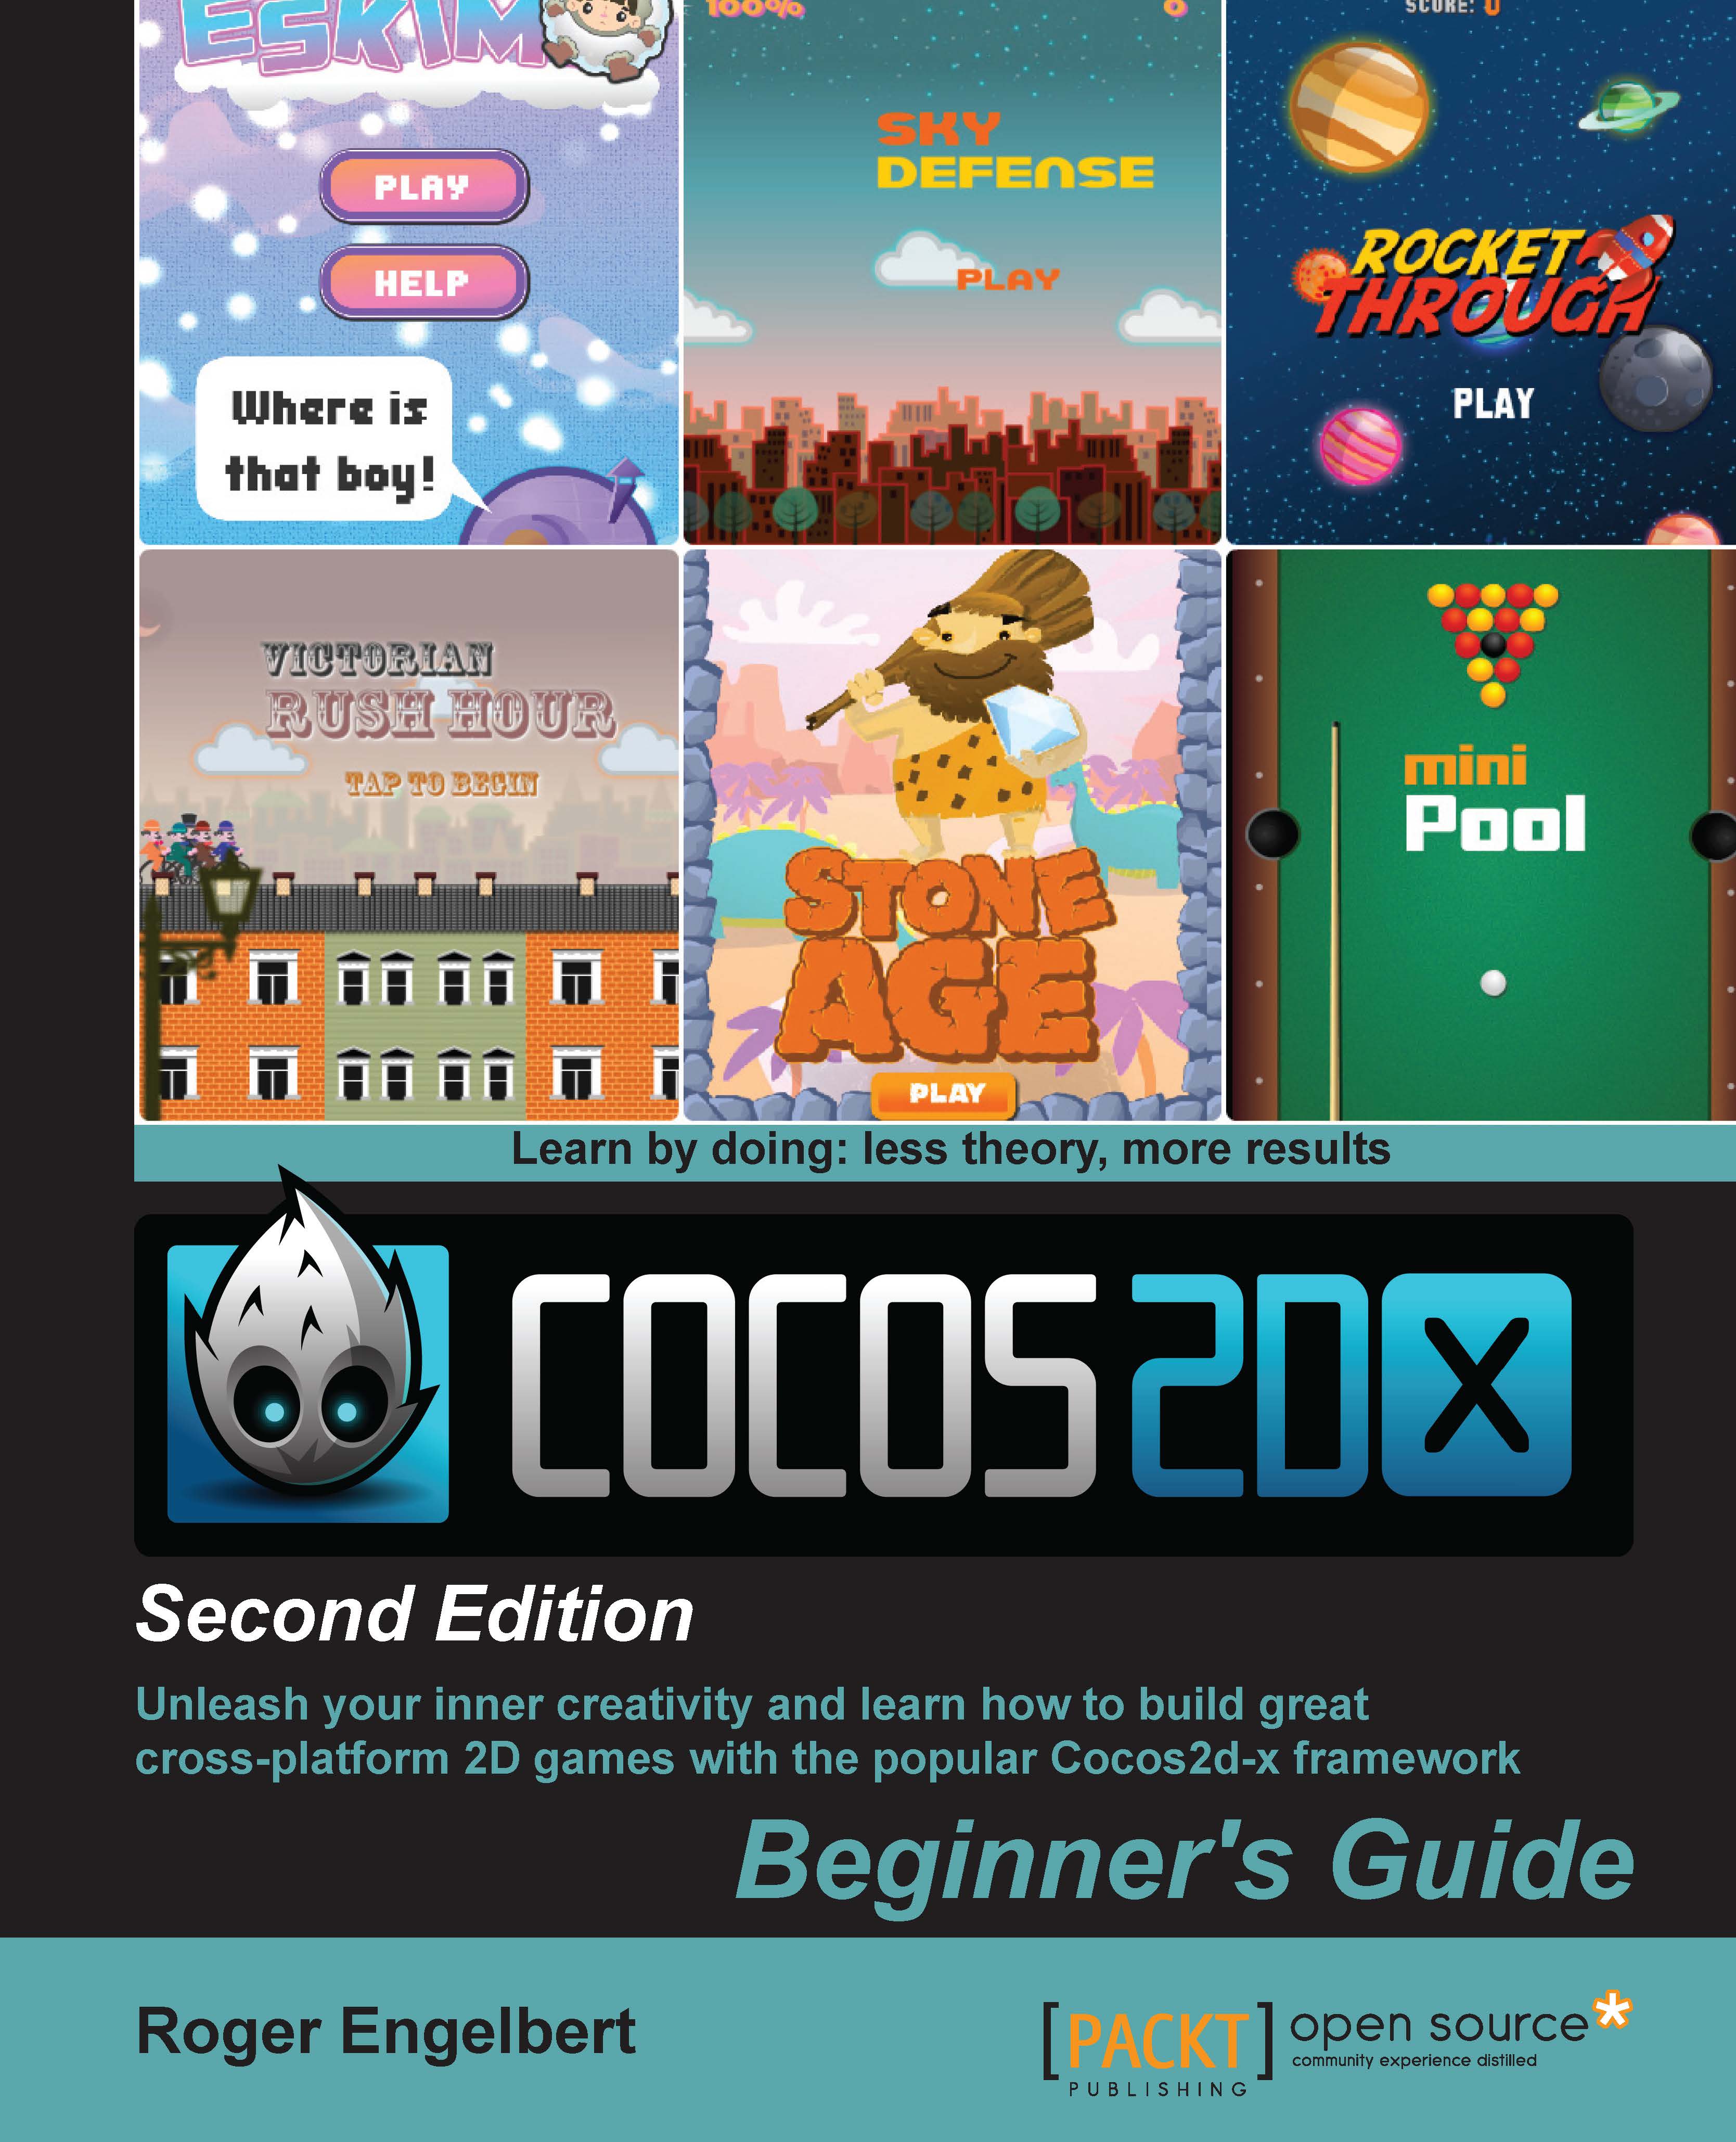
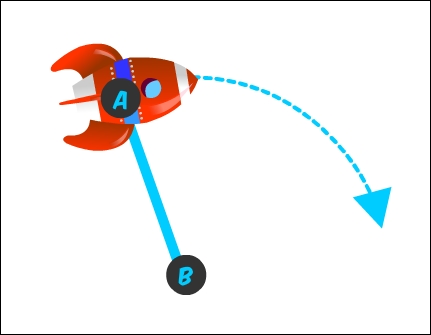
Let's start, as an example, with the rocket sprite moving with a vector of (5, 0):
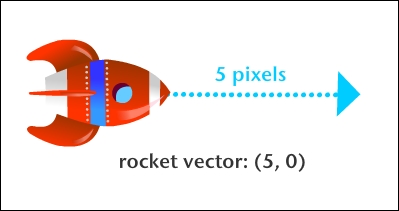
We then draw a line from the rocket, say from point A to point B:
Now we want the rocket to rotate around point B. So how can we change the rocket's vector to accomplish that? With Cocos2d-x, we can use the helper point method rotateByAngle to rotate a point around any other point. In this case, we rotate the rocket's position point around point B by a certain angle.
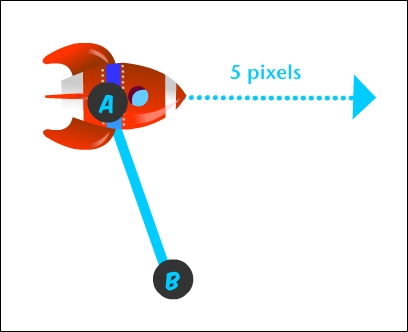
But here's a question – in which direction should the rocket rotate?
By looking at this figure, you know that the rocket should rotate clockwise, since it's moving towards the right. But programmatically, how could we determine that, and in the easiest way possible? We can determine this by using vectors and another property derived from them: the dot product.
Using the dot product of vectors
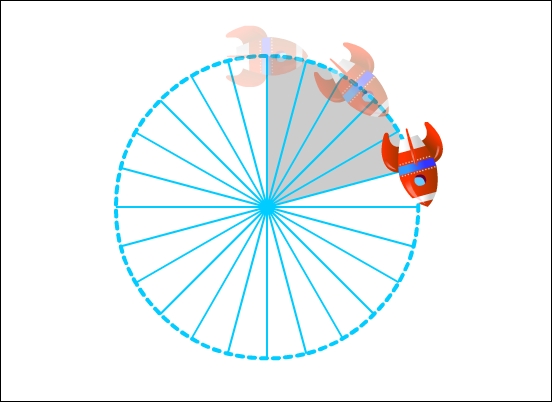
The dot product of two vectors describes their angular relationship. If their dot product is greater than zero, the two vectors form an angle smaller than 90 degrees. If it is less than zero, the angle is greater than 90 degrees. And if it is equal to zero, the vectors are perpendicular. Have a look at this descriptive figure:
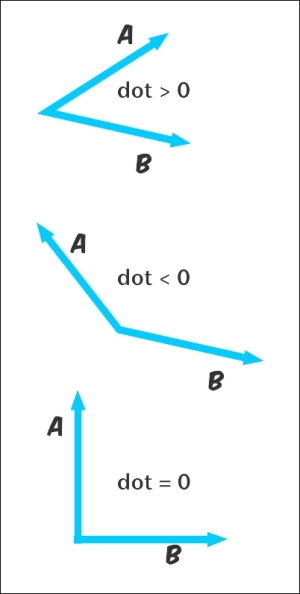
But one other way to think about this is that if the dot product is a positive value, then the vectors will "point" in the same direction. If it is a negative value, they point in opposite directions. How can we use that to help us?
A vector will always have two perpendiculars, as shown in the following figure:
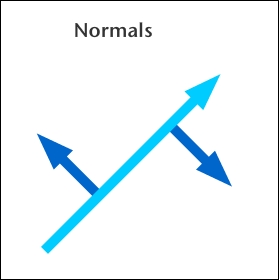
These perpendiculars are often called right and left, or clockwise and counterclockwise perpendiculars, and they are themselves vectors, known as normals.
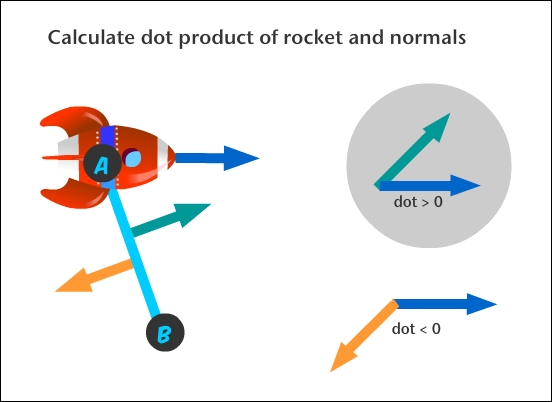
Now, if we calculate the dot product between the rocket's vector and each of the perpendiculars on line AB, you can see that we can determine the direction the rocket should rotate in. If the dot product of the rocket and the vector's right perpendicular is a positive value, it means the rocket is moving towards the right (clockwise). If not, it means the rocket is moving towards the left (counterclockwise).
The dot product is very easy to calculate. We don't even need to bother with the formula (though it's a simple one), because we can use the d
ot(vector1, vector2) method.
So we have the vector for the rocket already. How do we get the vector for the normals? First, we get the vector for the AB line. We use another method for this – point1 - point2. This will subtract points A and B and return a vector representing that line.
Next, we can get the left and right perpendiculars of that line vector with the getPerp() and getRPerp() methods respectively. However, we only need to check one of these. Then we get the dot product with dot(rocketVector, lineNormal).
If this is the correct normal, meaning the value for the dot product is a positive one, we can rotate the rocket to point to this normal's direction; so the rocket will be at a 90-degree angle with the line at all times as it rotates. This is easy, because we can convert the normal vector to an angle with the getAngle() method. All we need to do is apply that angle to the rocket.
But how fast should the rocket rotate? We'll see how to calculate that next.
Moving from pixel-based speed to angular-based speed
When rotating the rocket, we still want to show it moving at the same speed as it was when moving in a straight line, or as close to it as possible. How do we do that?
Remember that the vector is being used to update the rocket's position in every iteration. In the example I gave you, the (5, 0) vector is currently adding 5 pixels to the x position of the rocket in every iteration.
Now let's consider an angular speed. If the angular speed were 15 degrees, and we kept rotating the rocket's position by that angle, it would mean the rocket would complete a full circle in 24 iterations. Because 360 degrees of a full circle divided by 15 degrees equals 24.
But we don't have the correct angle yet; we only have the amount in pixels the rocket moves in every iteration. But math can tell us a lot here.
Math says that the length of a circle is twice the value of Pi, multiplied by the radius of the circle, usually written as 2πr.
We know the radius of the circle we want the rocket to describe. It is the length of the line we drew.

With that formula, we can get the length in pixels of that circle, also known as its circumference. Let's say the line has a length of 100 pixels; this would mean the circle about to be described by the rocket has a length (or circumference) of 628.3 pixels (2 * π * 100).
With the speed described in the vector (5, 0), we can determine how long it would take the rocket to complete that pixel length. We don't need this to be absolutely precise; the last iteration will most likely move beyond that total length, but it's good enough for our purposes.

When we have the total number of iterations to complete the length, we can convert that to an angle. So, if the iteration value is 125, the angle would be 360 degrees divided by 125; that is, 2.88. That would be the angle required to describe a circle in 125 iterations.
Now the rocket can change from pixel-based movement to angular-based movement without much visual change.

