Search icon CANCEL
Subscription
0
Cart icon
Your Cart (0 item)
Close icon
You have no products in your basket yet
Save more on your purchases! discount-offer-chevron-icon
Savings automatically calculated. No voucher code required.
Arrow left icon
All Products
Best Sellers
New Releases
Books
Videos
Audiobooks
Learning Hub
Newsletter Hub
Free Learning
Arrow right icon
timer SALE ENDS IN
0 Days
:
00 Hours
:
00 Minutes
:
00 Seconds
Arrow up icon
GO TO TOP
The Complete Guide to DAZ Studio 4

You're reading from   The Complete Guide to DAZ Studio 4 Bring your 3D characters to life with DAZ Studio

Arrow left icon
Product type Paperback
Published in Oct 2013
Publisher Packt
ISBN-13 9781849694087
Length 348 pages
Edition 1st Edition
Languages
Arrow right icon
Author (1):
Arrow left icon
 Ciccone Ciccone
Author Profile Icon Ciccone
Ciccone
Arrow right icon
View More author details
Toc

Table of Contents (20) Chapters Close

The Complete Guide to DAZ Studio 4
Credits
About the Author
About the Reviewers
www.PacktPub.com
Preface
1. Quick Start – Our First 3D Scene FREE CHAPTER 2. Customizing Studio 3. Posing Figures 4. Creating New Characters with Morphs 5. Rendering 6. Finding and Installing New Content 7. Navigating the Studio Environment 8. Building a Full Scene 9. Lighting 10. Hyper-realism – the Reality Plugin 11. Creating Content 12. Animation Installing DAZ Studio Index

Finishing touches


It's now time to focus on the small details that define a natural-looking pose. We are going to look at both posing and expression.

Arms and fingers

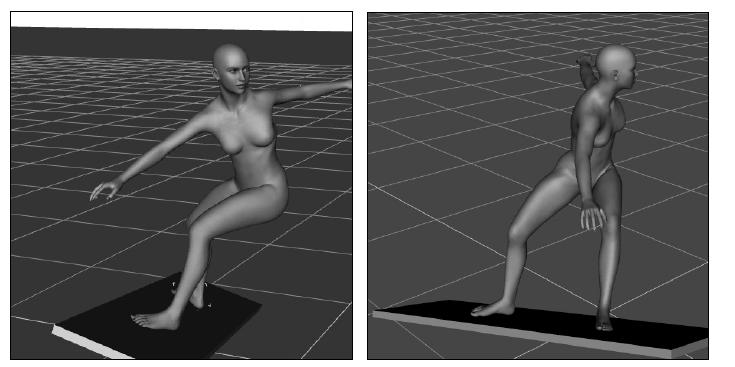
Looking at the arms of the base image we can see that the left one is pushed back quite a bit, as a way of creating counter balance. These are important clues that help in delivering a believable pose. To achieve that position, we need to select the body part called Left Collar and adjust the Front-Back parameter until the arm is in position. As it happened before, the limits applied to this joint are too low to express a realistic range, so we need to disable them before we can turn the left collar to the desired point.

The hands are bent slightly up and the left fingers are very straight. Those adjustments are all easy to do by using the Universal tool with its rotate widgets.

The final result should be something like this:

Removing the "gaze of death"

All the 3D figures that we add to a scene come with that dead stare that screams...

lock icon The rest of the chapter is locked
Register for a free Packt account to unlock a world of extra content!
A free Packt account unlocks extra newsletters, articles, discounted offers, and much more. Start advancing your knowledge today.
Unlock this book and the full library FREE for 7 days
Get unlimited access to 7000+ expert-authored eBooks and videos courses covering every tech area you can think of
Renews at $15.99/month. Cancel anytime
Visually different images