Setting up software RAID
Part of the benefit of the alternate installer is that it allows us to install Ubuntu in ways that aren't normally available with the live installer. One of the additional features is to be able to install Ubuntu on software RAID, which is what we will do in this section. Here, the steps that we'll go through actually continue on from step 14 in the previous section. Follow these steps to set up an installation with software RAID, specifically with RAID1 between two disks in this case.
- In the previous section, we chose
Guided - use entire diskat the screen shown in the following screenshot. To set up RAID, we'll selectManualon this screen instead:
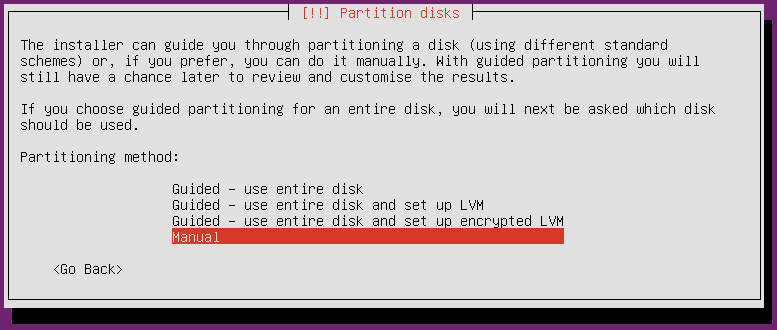
Choosing the option to manually partition our system
- Next, we'll select the first disk and press Enter:
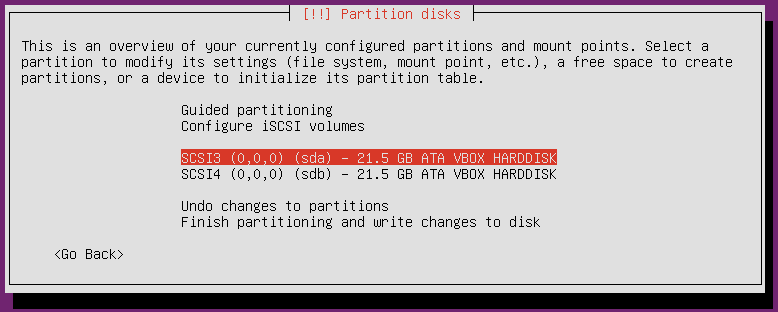
Selecting our first disk
- Next, you'll be asked whether you will want to create a new partition table on this disk, which will wipe all data on it. Choose
Yesand press Enter:

Confirming the initialization of the first disk
- On the next screen, select the second disk (the one we haven't initialized yet) and press Enter:
Selecting the second disk
- You'll again be asked whether you wish to create a new partition table. Select
Yesand press Enter:

Confirming the creation of a new partition table on the second disk
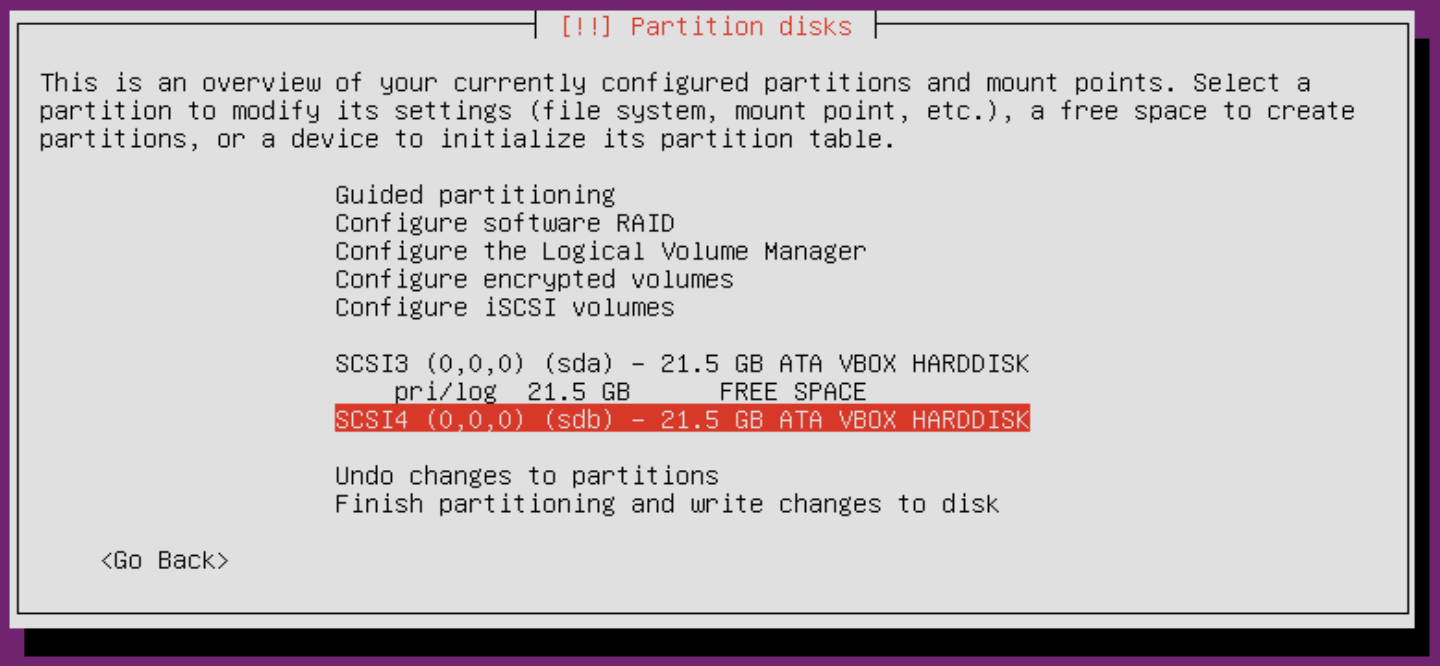
- On the next screen, we'll choose the
Configure software RAIDoption:
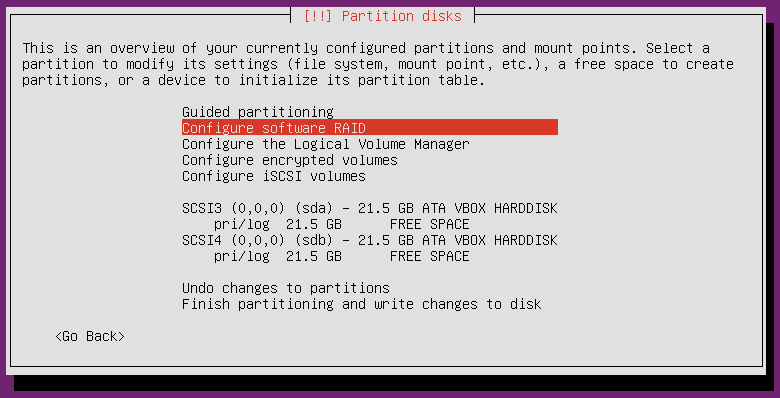
Choosing the software RAID option
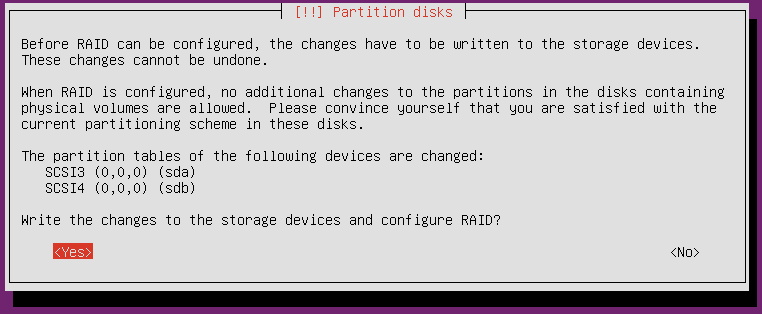
- Before we can continue, the installer must finalize the changes we've made so far (which at this point has only been to initialize the disks). Select
Yesand press Enter:
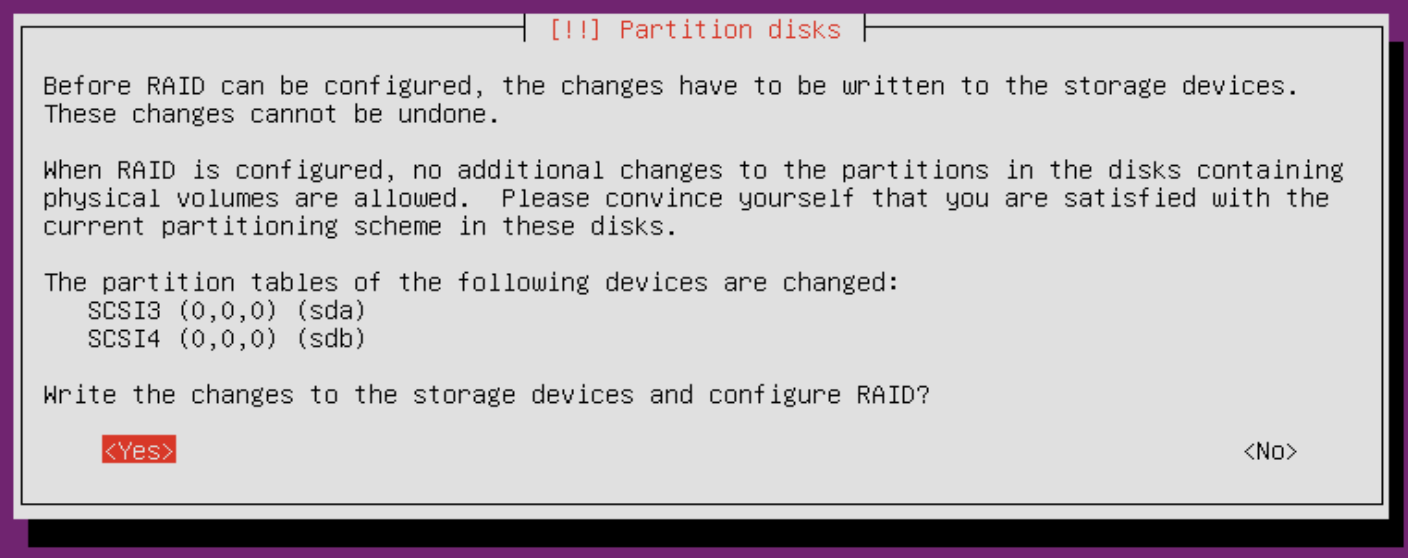
Finalizing disk initialization
- Next, choose
Create MD deviceand press Enter:
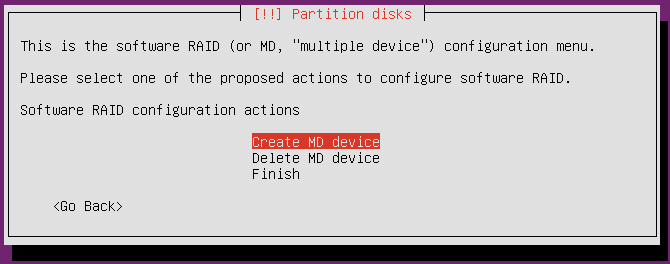
Getting ready to create a new MD device
- Next, we'll select the type of RAID we wish to work with. Select
RAID1and press Enter to continue:
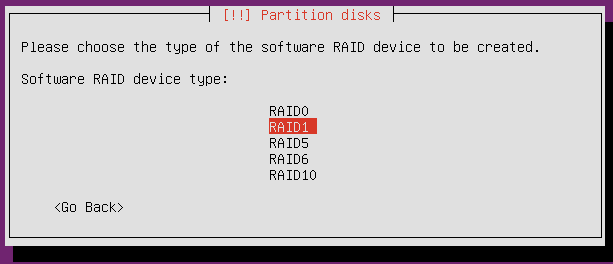
Selecting the type of RAID we will use
- Next, choose the number of disks we will add to RAID1. RAID1 requires exactly two disks. Enter
2here and press Enter:
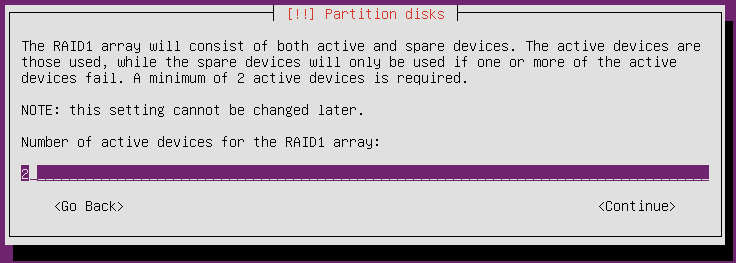
Choosing the number of disks we will use
- If we have additional drives beyond two, we can add one or more hot spares here. These will be used in the event of a failure with one of the RAID disks. If you have an extra disk, feel free to use it and enter the appropriate number here. Either way, select
Continueand press Enter:
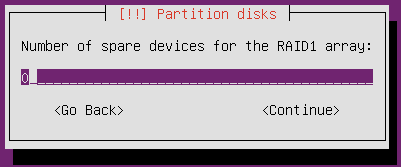
Choosing how many hot spares to initialize
- Next, we will choose which disks to include with our RAID1 configuration. We should have exactly two listed. Use the arrow keys to move between them, and press Space to select a disk. We need to select both disks, which means we will be marking both with an asterisk (
*). Once you've selected both disks, selectContinueand press Enter:
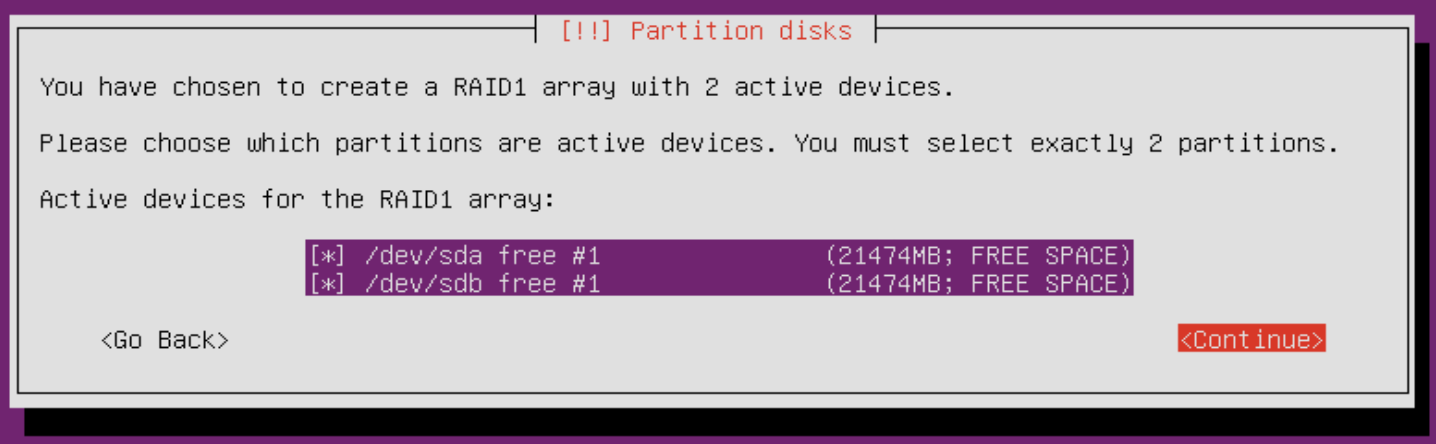
Choosing the disks to use with the RAID configuration
- Next, we'll finalize our selections so far. Select
Yesand pressEnter:
Finalize RAID changes
- Select
Finishto continue on:
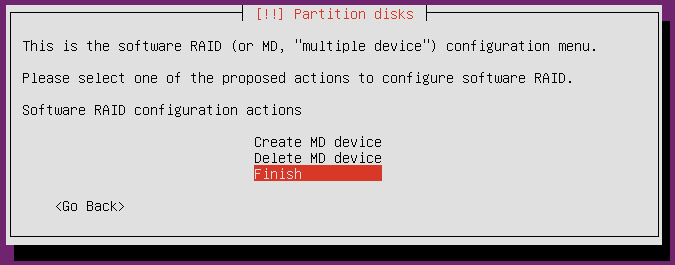
Selecting Finish to finish setting up RAID
- Now, we have successfully set up RAID. However, that alone isn't enough; we need to also format it and give it a mount point. Use the arrow keys to select the RAID device we just set up and press Enter:
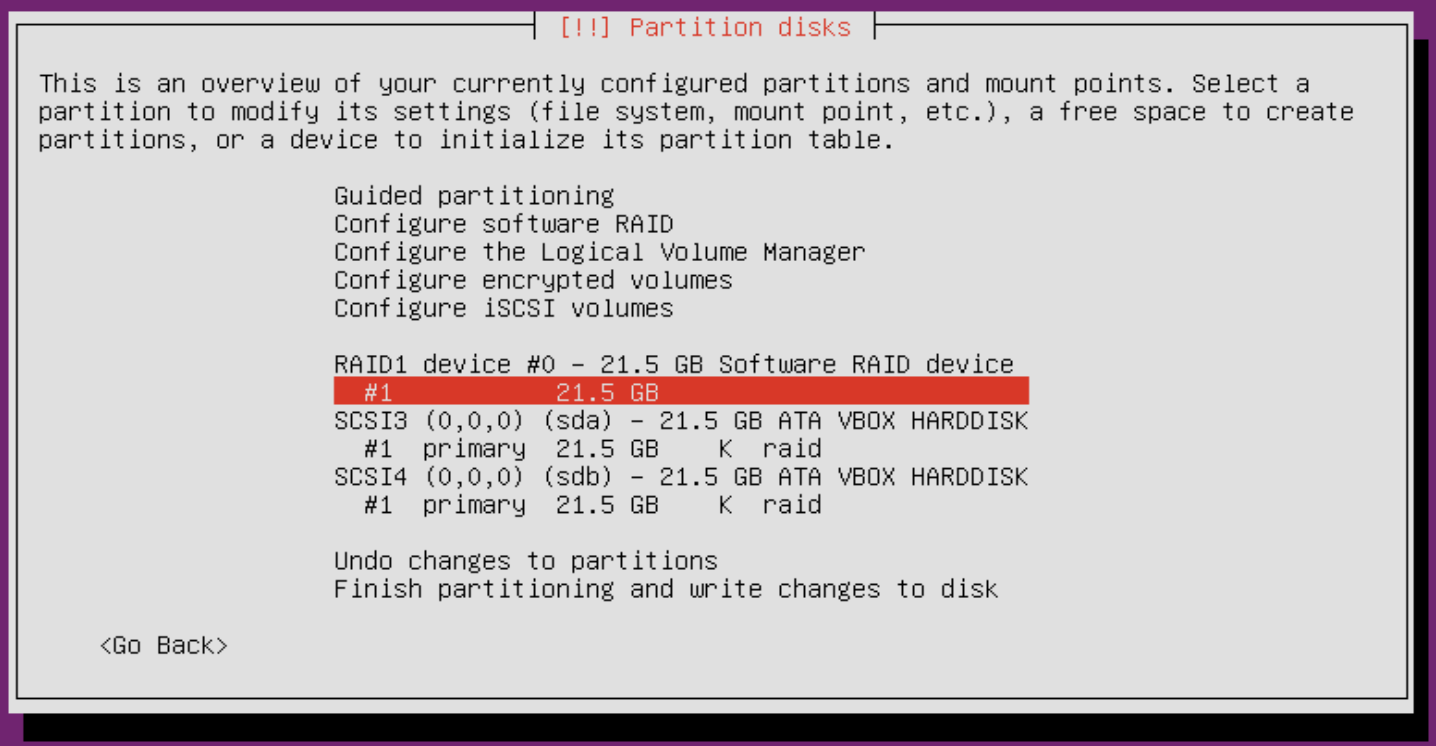
Selecting our new RAID device so we can configure it
- Using the following screenshot as a guide, make sure you set
Use astoEXT4 journaling file system(you can choose another filesystem type if you wish to experiment). In addition, set theMount pointto/and then selectDone setting up the partition:
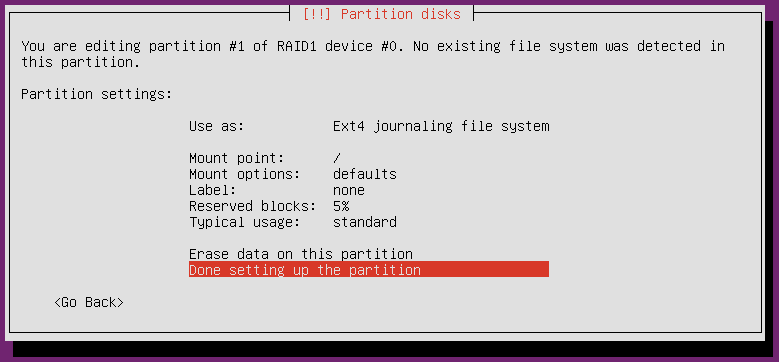
Reviewing configuration settings for our RAID device
- To finalize our selection, choose
Finish partitioning and write changes to disk:
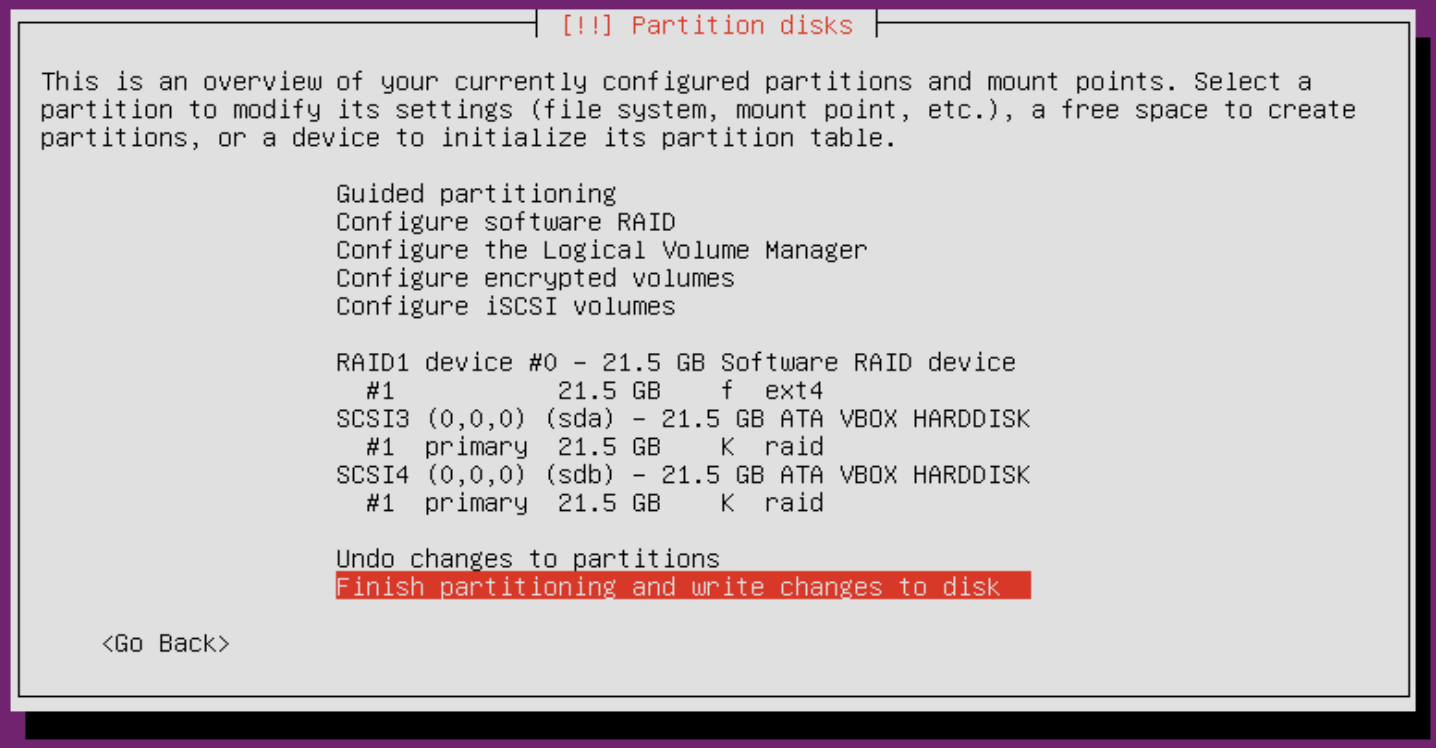
Finishing partitioning
- Next, we'll see one last confirmation before our new partition will be created. Select
Yesand press Enter:

Final confirmation for this portion of the installation routine
That pretty much covers the process of setting up RAID. From here, you can return to the previous section and continue on with the installation process with step 16. Once you finish the entire installation process, it will be useful to know how to check the health of the RAID. Once you log in to your new installation, execute the following command:
cat /proc/mdstat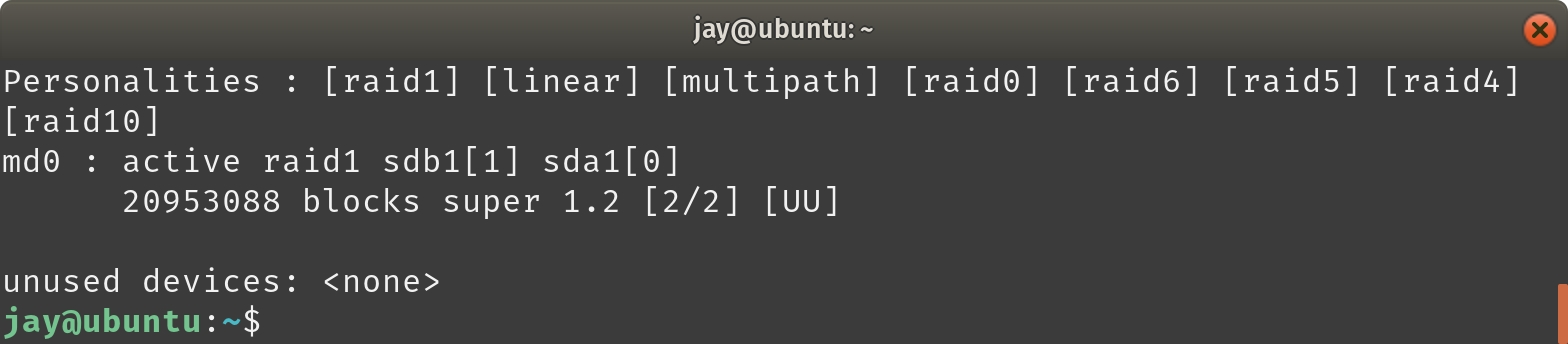
Checking the health of the RAID device
In the previous screenshot, you can see that we're using RAID1 (look for the section of the output that reads active raid1). We an also see whether each disk in the RAID array is online, looking for the appropriate number of Us. It's this line: 20953088 blocks super 1.2 [2/2] [UU]
If the output included U_ or _U instead of UU, we would have cause for alarm, because that would mean one of the disks encountered an issue or is offline. Basically, each U represents a disk, and each underscore represents where a disk should be. If one is missing and changed to an underscore, we have a problem with our RAID array.