
Initial hardware setup
We'll concentrate on the Edison package that comes with an Arduino expansion board. Initially, you will get two different pieces:
- The Intel® Edison board
- The Arduino expansion board
The following figure shows the architecture of the device:
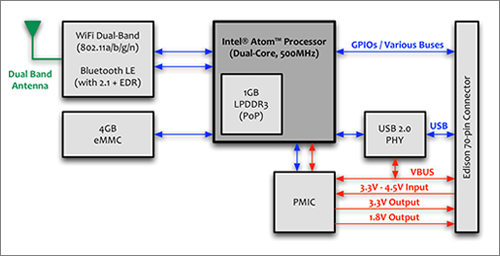
Architecture of Intel Edison. Picture Credits: http://www.software.intel.com
We need to hook these two pieces up in a single unit. Place the Edison board on top of the expansion board so that the GPIO interfaces meet at a single point. Gently push the Edison against the expansion board. You will hear a click. Use the screws that come with the package to tighten the setup. Once this is done, we'll now set up the device both at hardware level and software level to be used further. The following are the steps we'll cover in detail:
- Downloading the necessary software packages
- Connecting your Intel® Edison to your PC
- Flashing your device with the Linux image
- Connecting to a Wi-Fi network
- SSH-ing your Intel® Edison device
Downloading the necessary software packages
To move forward with the development on this platform, we need to download and install a couple of software packages, which includes the drivers and the IDEs. The following is the list of the software along with the links that are required:
- Intel® Platform Flash Tool Lite (https://01.org/android-ia/downloads/intel-platform-flash-tool-lite)
- PuTTY (http://www.chiark.greenend.org.uk/~sgtatham/putty/download.html)
- Intel XDK for IoT (https://software.intel.com/en-us/intel-xdk)
- Arduino IDE (https://www.arduino.cc/en/Main/Software)
- FileZilla FTP client (https://filezilla-project.org/download.php)
- Notepad ++ or any other editor (https://notepad-plus-plus.org/download/v7.3.html)
Drivers and miscellaneous downloads
Drivers and miscellaneous can be downloaded from:
- Latest Yocto Poky image
- Windows standalone driver for the Intel Edison
- FTDI drivers (http://www.ftdichip.com/Drivers/VCP.htm)
The first and the second packages can be downloaded from https://software.intel.com/en-us/iot/hardware/edison/downloads.
Plugging in your device
After the software and drivers have all been installed, we'll connect the device to a PC. You need two Micro-B USB cables(s) to connect your device to the PC. You can also use a 9V power adapter and a single Micro-B USB cable, but for now we won't use the power adapter. The main use of the power adapter will come in a later section of this book, especially when we'll be interfacing with other devices that require USB.The following figure shows different sections of an Arduino expansion board of the Intel Edison:
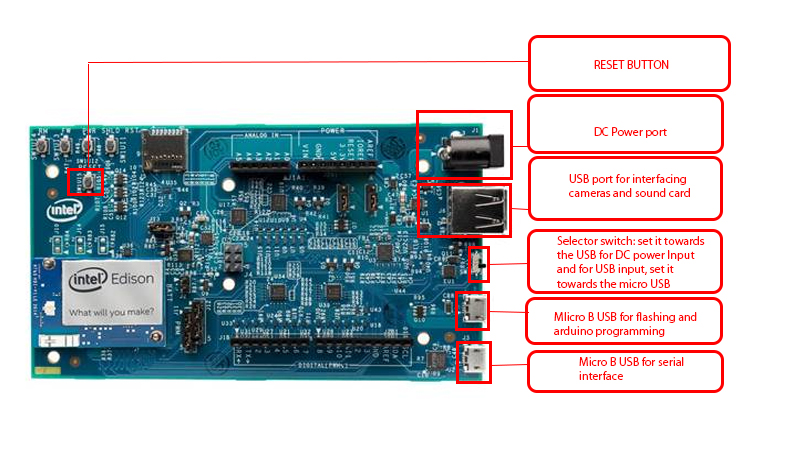
Different sections of an Arduino expansion board of Intel Edison
A small switch exists between the USB port and the OTG port. This switch must be towards the OTG port because we're going to power the device from the OTG port and not through the DC power port. Once it is connected to your PC, open your device manager and expand the ports section. If all the installations of the drivers were successful, then you'll see two ports:
- Intel Edison virtual com port
- USB serial port
Flashing your device
Once your device is successfully detected and installed, you need to flash your device with the Linux image. For this we'll use the flash tool provided by Intel:
- Open the flash lite tool and connect your device to the PC:
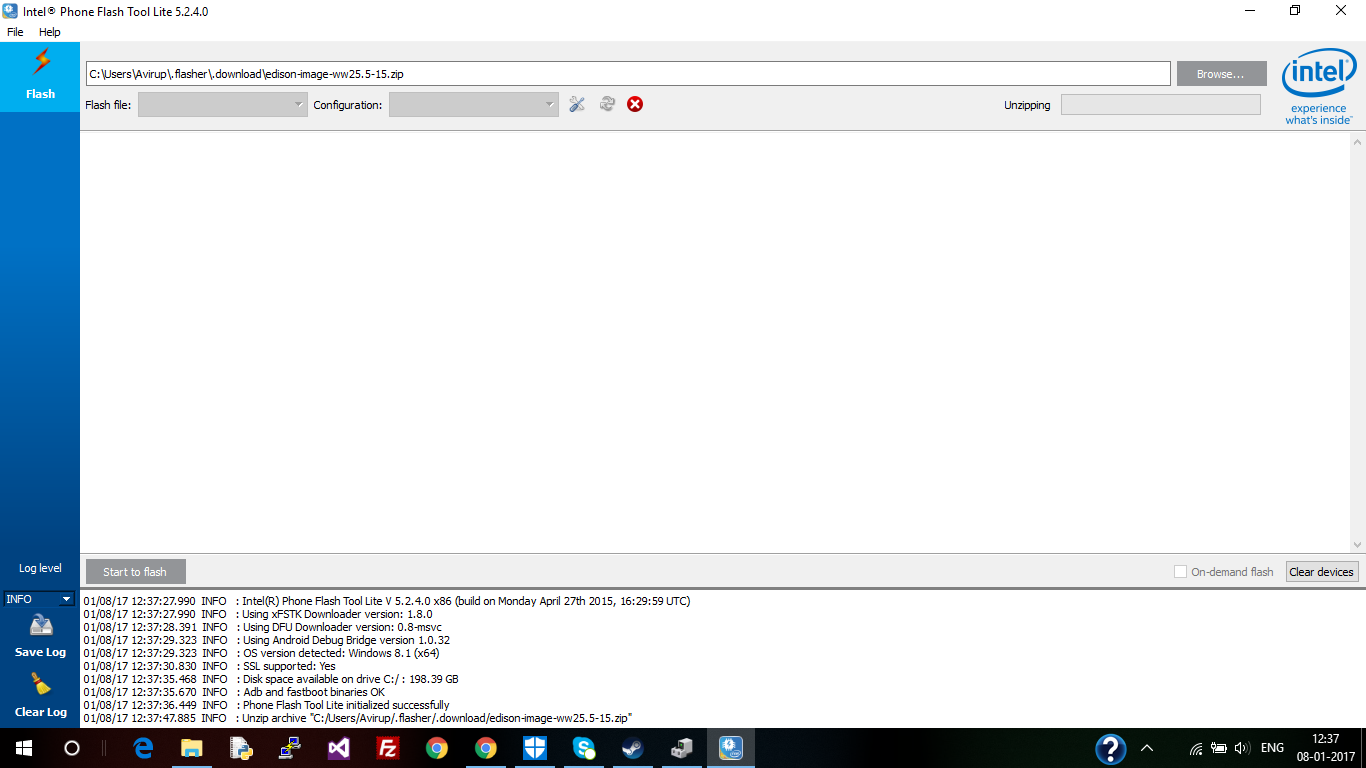
Intel phone flash lite tool
- Once the flash tool is opened, click on
Browse...and browse to the.zipfile of the Linux image you have downloaded. - After you click on
OK, the tool will automatically unzip the file.
- Next, click on
Startto flash:
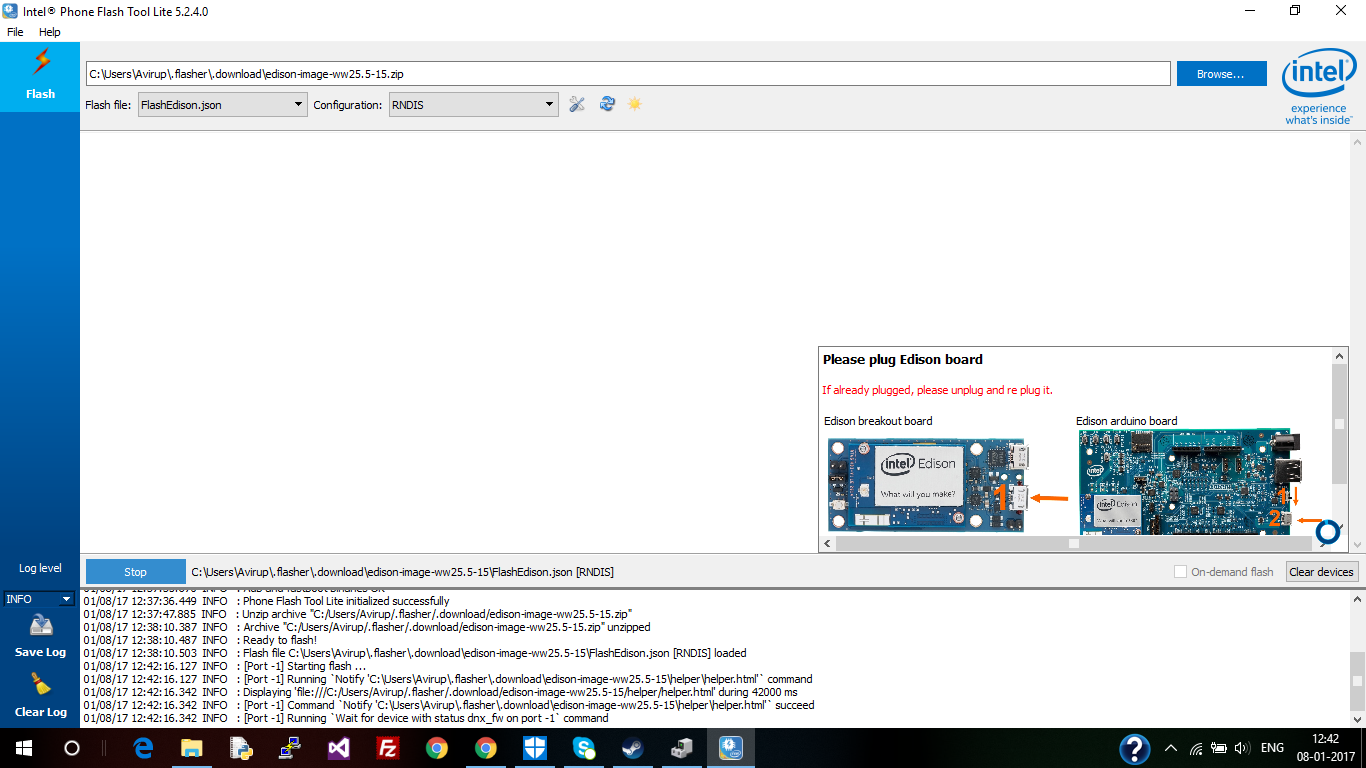
Intel® Phone flash lite tool — stage 1
- You will be asked to disconnect and reconnect your device. Do this, and the board should start flashing. It may take some time before the flashing is completed. Don't tamper with the device during this process.
- Once the flashing is completed, we can configure the device:
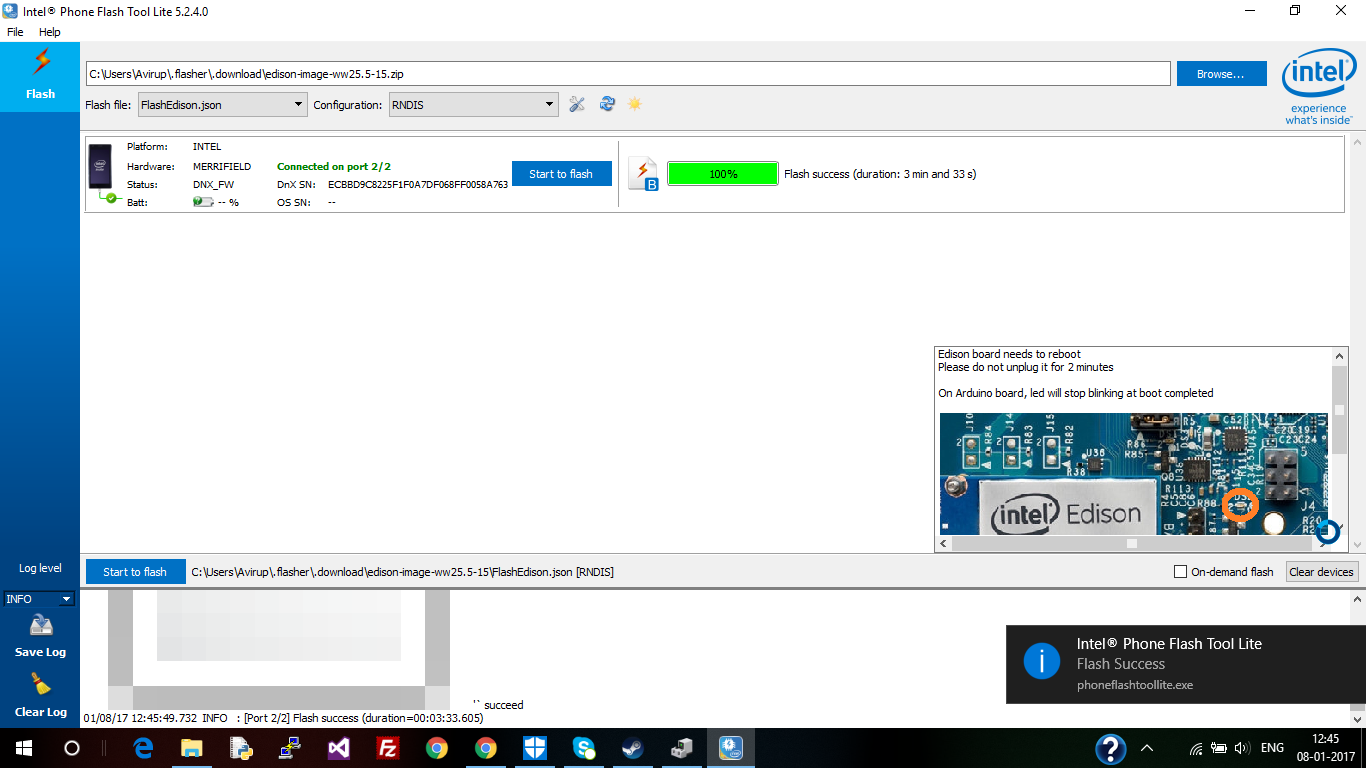
Intel® Phone flash lite tool — complete
Configuring the device
After flashing successfully, we'll now configure the device. We're going to use the PuTTY console for the configuration. PuTTY is an SSH and telnet client, developed originally by Simon Tatham for the Windows platform. We're going to use the Serial section here.
Before opening the PuTTY console, open up the Device manager and note the port number for the USB serial port. This will be used in your PuTTY console:

Ports for Intel® Edison in PuTTY
Next, select Serial on the PuTTY console and enter the port number. Use a baud rate of 115,200. Press Open to open the window for communicating with the device:
PuTTY console — login screen
Once you are in the PuTTY console, you can execute commands to configure your Edison. The following is the set of tasks we'll do in the console to configure the device:
- Provide a name for your device.
- Provide a root password (SSH your device).
- Connect your device to Wi-Fi.
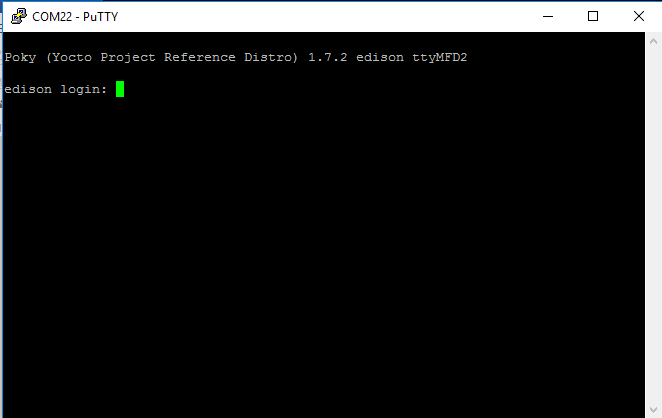
Initially, when in the console, you will be asked to log in. Type in root and press Enter. You will see root@edison, which means that you are in the root directory:
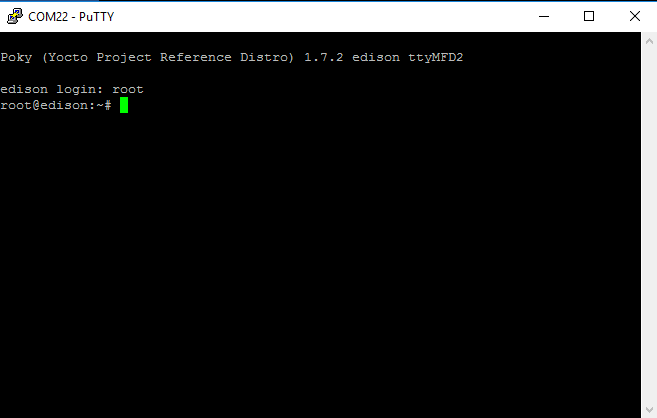
PuTTY console — login success
Now, we are in the Linux Terminal of the device. Firstly, we'll enter the following command for the setup:
configure_edison -setupPress Enter after entering the command, and the entire configuration will be straightforward:
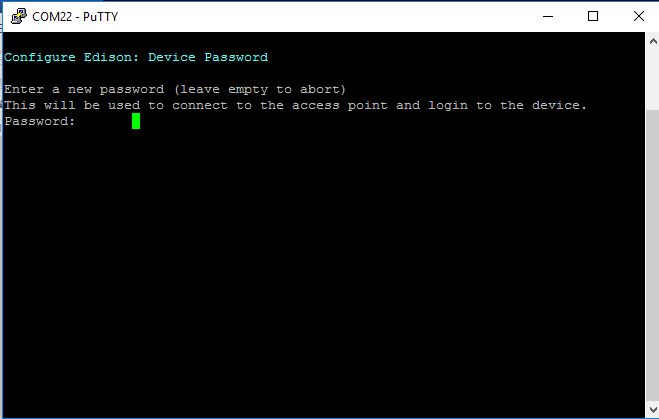
PuTTY console — set password
Firstly, you will be asked to set a password. Type in a password and press Enter. You need to type in your password again for confirmation. Next, we'll set up a name for the device:
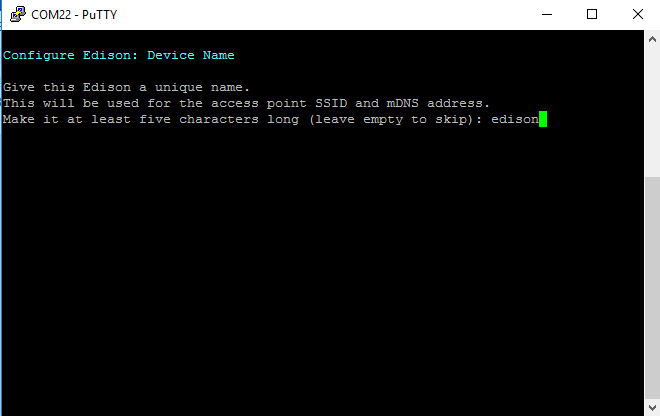
PuTTY console — set name
Give a name for your device. Please note that this is not the login name for your device. It's just an alias for your device. Also the name should be atleast five characters long. Once you've entered the name, it will ask for confirmation: press y to confirm. Then it will ask you to set up Wi-Fi. Again select y to continue. It's not mandatory to set up Wi-Fi, but it's recommended. We need the Wi-Fi for file transfer, downloading packages, and so on:
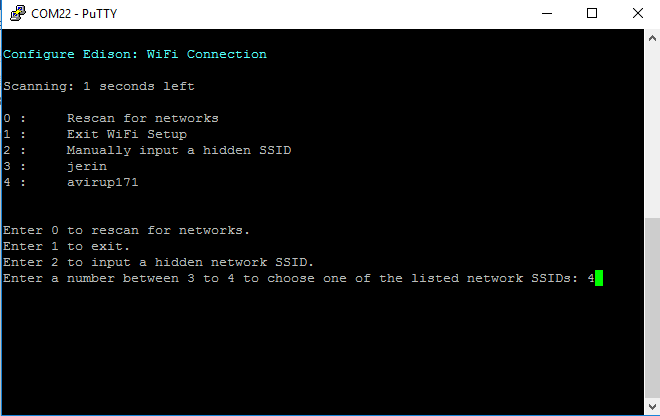
PuTTY console — set Wi-Fi
Once the scanning is completed, we'll get a list of available networks. Select the number corresponding to your network and press Enter. In this case, it's 5, which corresponds to avirup171 which is my Wi-Fi. Enter the network credentials. After you do that, your device will be connected to Wi-Fi. You should get an IP address after your device is connected:
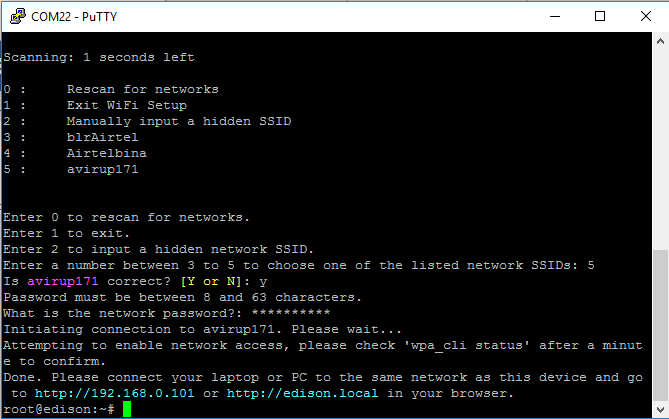
PuTTY console — set Wi-Fi -2
After successful connection, you should get this screen. Make sure your PC is connected to the same network. Open up the browser in your PC, and enter the IP address shown in the console. You should get a screen similar to this:
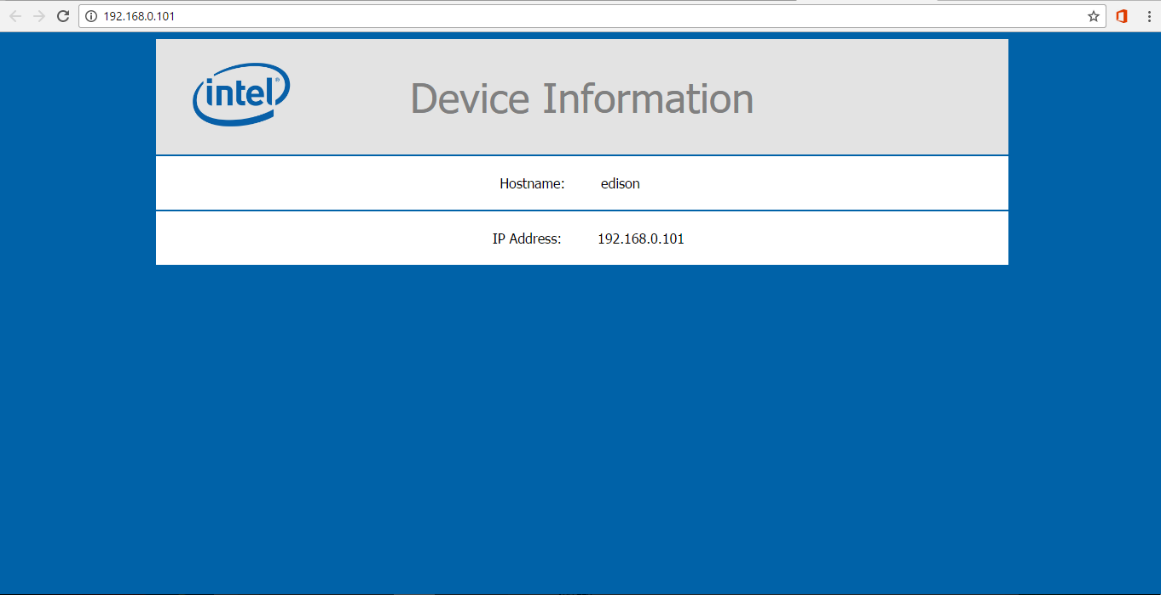
Wi-Fi setup — completed
Now, we've finished with the initial setup. However, the Wi-Fi setup normally doesn't happen in one go. Sometimes your device doesn't get connected to Wi-Fi and sometimes we cannot get the page shown previously. In those cases, you need to start wpa_cli to manually configure Wi-Fi.
Refer to the following link for the details:
http://www.intel.com/content/www/us/en/support/boards-and-kits/000006202.html
With Wi-Fi setup completed, we can move forward to set up our developer environment. We'll cover the following programming languages and the respective IDEs:
- Arduino processor language (C/C++)
- Python
- Node.js