Manipulating Actors
In Unreal Engine, all the objects that can be placed in a level are referred to as Actors. In a movie, an actor would be a human playing a character, but in UE4, every single object you see in your level, including walls, floors, weapons, and characters, is an Actor.
Every Actor must have what's called a Transform property, which is a collection of three things:
- Location: A
Vectorproperty signifying the position of that Actor in the level in the X, Y, and Z axis. A vector is simply a tuple with three floating point numbers, one for the location of the point in each axis. - Rotation: A
Rotatorproperty signifying the rotation of that Actor along the X, Y, and Z axis. A rotator is also a tuple with three floating point numbers, one for the angle of rotation in each axis. - Scale: A
Vectorproperty signifying the scale (meaning size) of that Actor in the level in the X, Y, and Z axis. This is also a collection of three floating point numbers, one for the scale value in each axis.
Actors can be moved, rotated, and scaled in a level, which will modify their Transform property accordingly. In order to do this, select any object in your level by left-clicking on it. You should see the Move tool appear:
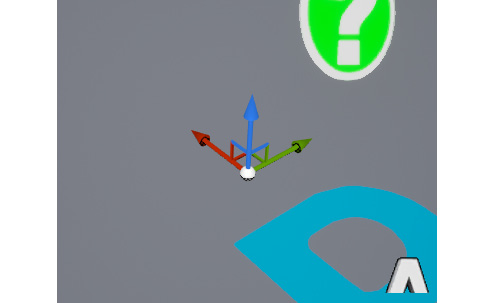
Figure 1.8: The Move tool, which allows you to move an Actor in the level
The Move tool is a three-axis gizmo that allows you to move an object in any of the axes simultaneously. The red arrow of the Move tool (pointing to the left in the preceding image) represents the X axis, the green arrow (pointing to the right in the preceding image) represents the Y axis, and the blue arrow (pointing up in the preceding image) represents the Z axis. If you click and hold either of these arrows and then drag them around the level, you will move your Actor along that axis in the level. If you click the handles that connect two arrows together, you will move the Actor along both those axes simultaneously, and if you click the white sphere at the intersection of all the arrows, you will move the Actor freely along all three axes:
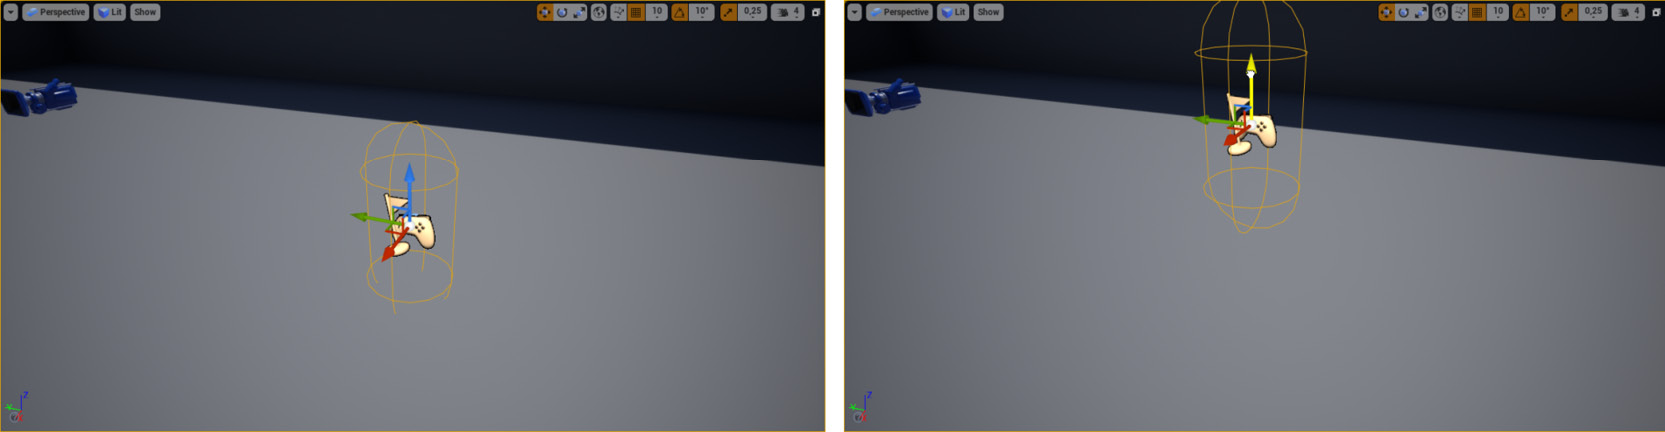
Figure 1.9: An actor being moved on the Z axis using the Move tool
The Move tool will allow you to move an Actor around the level, but if you want to rotate or scale an Actor, you'll need to use the Rotate and Scale tools, respectively. You can switch between the Move, Rotate, and Scale tools by pressing the W, E, and R keys, respectively. Press E in order to switch to the Rotate tool:

Figure 1.10: The Rotate tool, which allows you to rotate an Actor
The Rotate tool will, as expected, allow you to rotate an Actor in your level. You can click and hold any of the arcs in order to rotate the Actor around its associated axis. The red arc (upper left in the previous image) will rotate the Actor around the X axis, the green arc (upper right in the previous image) will rotate the Actor around the Y axis, and the blue arc (lower center in the previous image) will rotate the Actor around the Z axis:
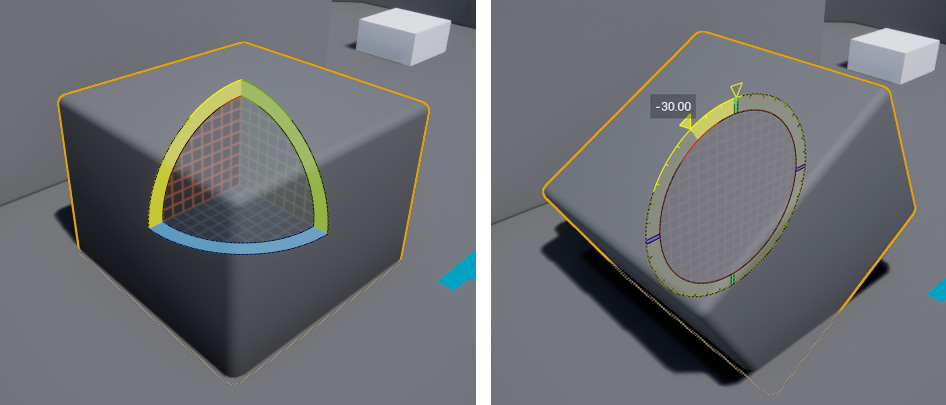
Figure 1.11: A cube before and after being rotated 30 degrees around the X axis
Keep in mind that an object's rotation around the X axis is usually designated as Roll, its rotation around the Y axis is usually designated as Pitch, and its rotation around the Z axis is usually designated as Yaw.
Lastly, we have the Scale tool. Press R in order to switch to it:
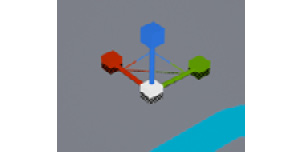
Figure 1.12: The Scale tool
The Scale tool will allow you to increase and decrease the scale (size) of an Actor in the X, Y, and Z axes, where the red handle (left in the previous image) will scale the Actor on the X axis, the green handle (right in the previous image) will scale the Actor on the Y axis, and the blue handle (upper in the previous image) will scale the Actor on the Z axis:
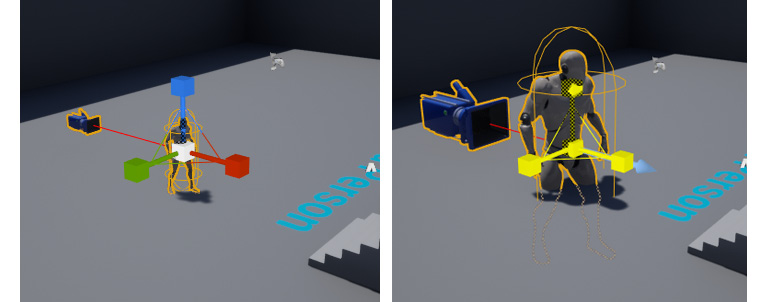
Figure 1.13: A character Actor before and after being scaled on all three axes
You can also toggle between the Move, Rotate, and Scale tools by clicking the following icons at the top of the Viewport window:

Figure 1.14: The Move, Rotate, and Scale tool icons
Additionally, you can change the increments with which you move, rotate, and scale your objects through the grid snapping options to the right of the Move, Rotate, and Scale tool icons. By pressing the buttons currently in orange, you'll be able to disable snapping altogether, and by pressing the buttons showing the current snapping increments, you'll be able to change those increments:

Figure 1.15: The grid snapping icons for moving, rotating, and scaling
Now that you know how to manipulate Actors already present in your level, let's learn how to add and remove Actors to and from our level in the next exercise.
Exercise 1.02: Adding and Removing Actors
In this exercise, we will be adding and removing Actors from our level.
When it comes to adding Actors to your level, there are two main ways in which you can do so: by dragging assets from Content Browser, or by dragging the default assets from the Modes window's Place Mode.
The following steps will help you complete this exercise:
- If you go to the
ThirdPersonCPP -> Blueprintsdirectory insideContent Browser, you will see theThirdPersonCharacterActor. If you drag that asset to your level using the left mouse button, you will be able to add an instance of that Actor to it, and it will be placed wherever you let go of the left mouse button: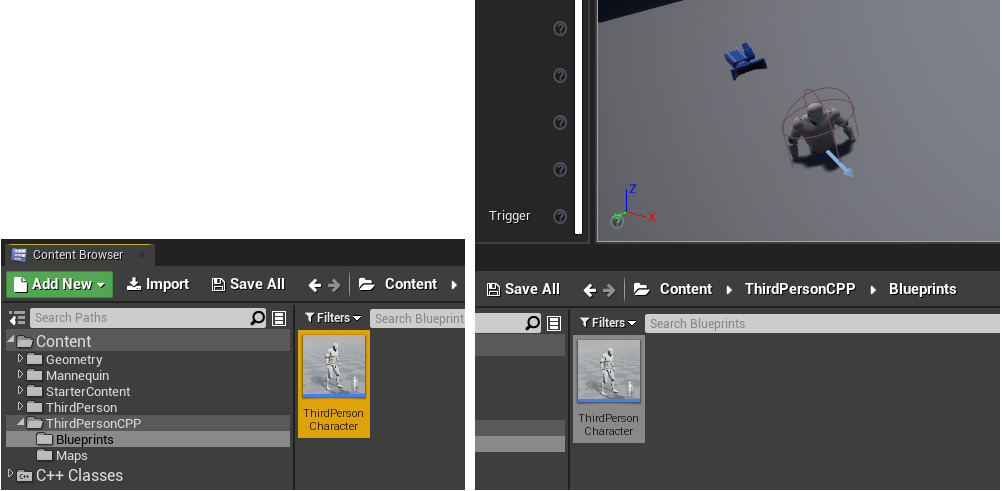
Figure 1.16: Dragging an instance of the ThirdPersonCharacter Actor to our level
- You can similarly drag an Actor from the
Modeswindow to your level as well: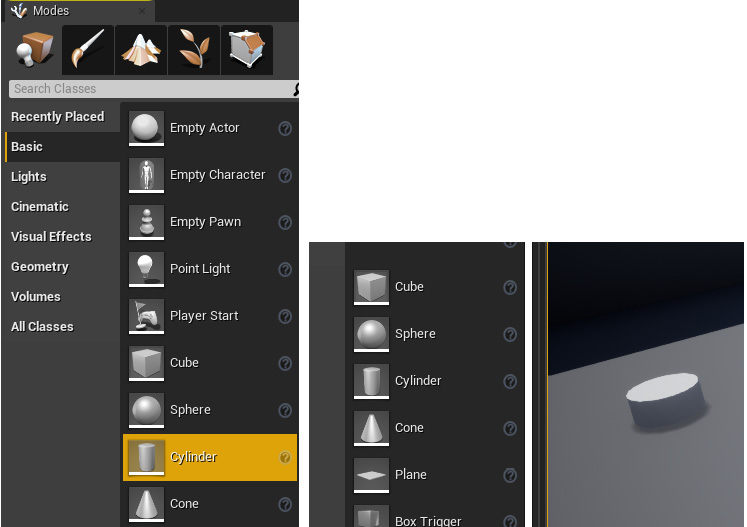
Figure 1.17: Dragging a Cylinder Actor to our level
- In order to delete an Actor, you can simply select the Actor and press the Delete key. You can also right-click on an Actor to take a look at the many other options available to you regarding that Actor.
Note
Although we won't be covering this topic in this book, one of the ways in which developers can populate their levels with simple boxes and geometry, for prototyping purposes, is BSP Brushes. These can be quickly molded into your desired shape as you build your levels. To find more information on BSP Brushes, go to this page: https://docs.unrealengine.com/en-US/Engine/Actors/Brushes.
And with this, we conclude this exercise and have learned how to add and remove Actors to and from our level.
Now that we know how to navigate the Viewport window, let's learn about Blueprint Actors.