Creating an Android Things project
Creating an Android Things project is very easy. Android Studio has included it as a form factor inside the default wizard for New Project.
So, let's go ahead and create a project. When we are asked about the target devices, we unselect Phone and Tablet and select Android Things instead:
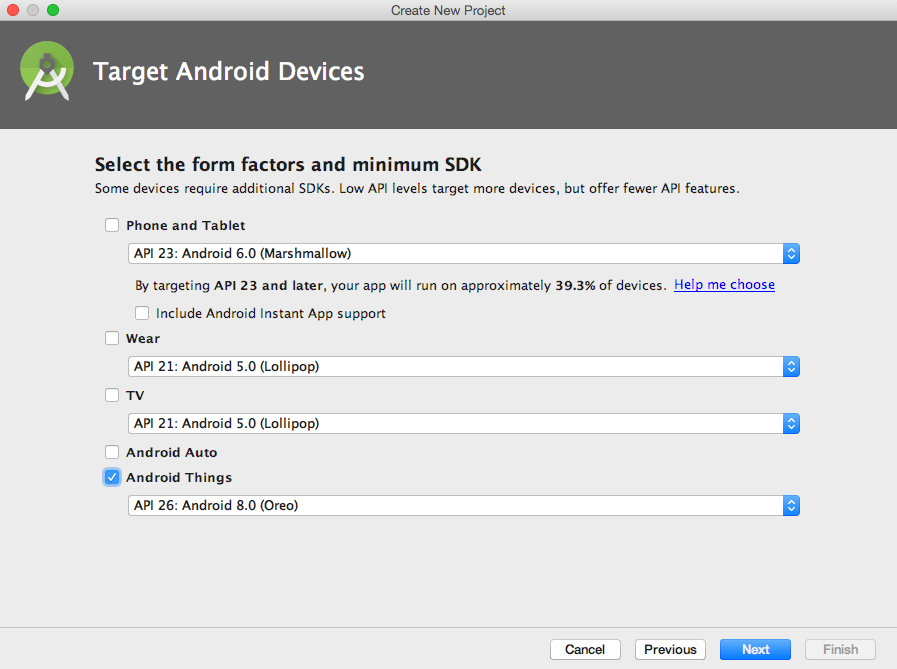
We can select Android Things as a form factor
The next step is to choose whether we want to have an Activity added to our project and, if so, of which kind. Here we have the first important difference because we have the option of an Empty Activity as well as a Peripheral Activity:
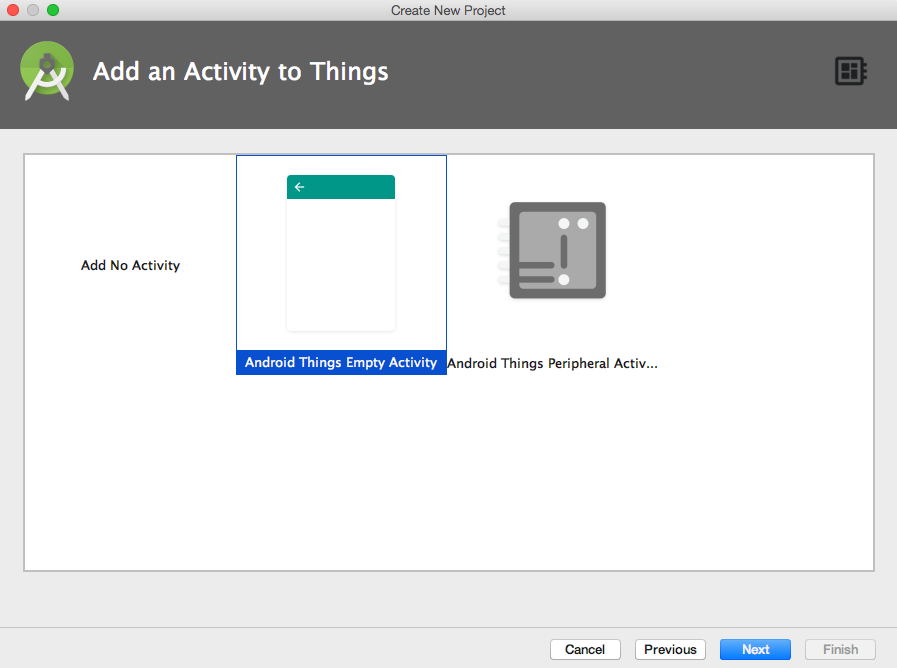
Several options to Add an Activity to Things
The main difference between the two types of activities is that in the case of Peripheral Activity, the last step allows us to configure several peripherals that are included in the contrib-drivers package and will insert initialization code for such devices in the Activity as well as the dependencies in gradle.
Another small difference is that an Empty Activity will add an onCreate method, while a Peripheral Activity (even if we do not add any drivers) will add both onCreate and onDestroy.
For now, we will create a Peripheral Activity with no peripherals.
Don't forget to select Kotlin as programming language. We will be using Kotlin because it is more modern than Java and allows us to write code that is more expressive and easier to follow. Kotlin is also meant to be the future of Android development and it makes a lot of sense to use it in the newest Android-based platform.
Android Studio also offers the possibility of creating an Android Things module to be added to an existing project. This is interesting when you are building an IoT device with a companion app. You can have a mobile module and an Android Things module, both inside the same project.
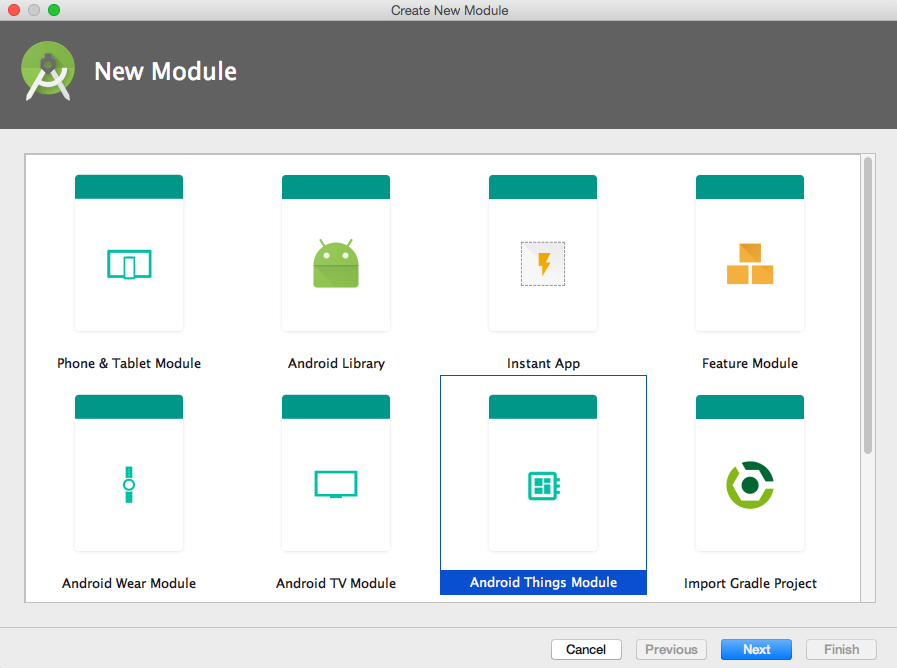
We can create an Android Things module at any time
Android Things projects have a few particularities that distinguish them from the standard Android ones. Let’s take a look at the code that has been generated and explore the differences.
Manifest
The place with most differences is the Manifest.
<?xml version="1.0" encoding="utf-8"?>
<manifest xmlns:android="http://schemas.android.com/apk/res/android"
 package="com.plattysoft.myapplication">

<uses-permission android:name="com.google.android.things.permission.USE_PERIPHERAL_IO" />

   <application>
<uses-library android:name="com.google.android.things" />

      <activity android:name=".MainActivity">
         <intent-filter>
            <action android:name="android.intent.action.MAIN" />
            <category android:name="android.intent.category.LAUNCHER" />
         </intent-filter>
         <intent-filter>
            <action android:name="android.intent.action.MAIN" />
            <category android:name="android.intent.category.HOME"/>
            <category android:name="android.intent.category.DEFAULT"/>
         </intent-filter>
      </activity>

   </application>
</manifest>
First, we have a new permission request: USE_PERIPHERAL_IO. This permission does not exist in the standard Android SDK; it is specific to Android Things and is required to open peripherals, which are essentially everything we will be working with.
Note
The wizard for Android Studio 3.1 does not add the permission request for USE_PERIPHERAL_IO automatically. It is expected to be fixed on version 3.2.
This permission was added on the release candidate, so many hobbyist projects that were created for earlier versions of Android Things do not have it. Pay attention if you are importing samples or drivers from the community, as this permission may be missing.
Note
Early developer previews of Android Things did not require this permission, so be careful if you are looking at the source of old projects
Inside the application tag, we see a uses-library declaration. This indicates a dependency on a library to allow installation. If the device does not have the Android Things library, it will not let us install the app on it. This is similar to what happens with the leanback library of Android TV. The library is part of the Android Things operating system, so we do not have to do anything; that code is there to prevent installation of IoT apps on phones by mistake.
A third difference is that the activity we have created has two intent filters, one for LAUNCHER and one for HOME. A normal Android app will not have the HOME category. As we mentioned earlier, Android Things is designed in a way that it launches a single application, and that application is marked with the category HOME. Earlier versions used the category IOT_LAUNCHER, but it was replaced with HOME on the release candidate.
The reason behind having a second intent filter is simply to allow us to launch the application from Android Studio. By marking an Activity with the category LAUNCHER, we can run it from the IDE. This simplifies development significantly, especially if you reuse the same board for several projects.
Note
Early developer previews of Android Things used thecategory IOT_LAUNCHER instead of HOME. You may still find it on outdated projects.
Gradle configuration
The second area that has some differences is the gradle configuration. Let's look at build.gradle.
Besides the dependencies and configuration to allow the use of Kotlin, we can see that a new library has been added to the dependencies:
compileOnly 'com.google.android.things:androidthings:+'
This is the counterpart of the library we have declared on the Manifest. The gradle dependency is marked as compileOnly, which means that the library is expected to be installed on the target device and will not be included in the code of the application.
Activity code
We can see that the Activity has just two methods, onCreate and onDestroy.
class MainActivity : Activity() {

    override fun onCreate(savedInstanceState: Bundle?) {
        super.onCreate(savedInstanceState)
    }

    override fun onDestroy() {
        super.onDestroy()
    }
}
It is noticeable that both methods are empty; while we are used to setting the layout using setContentView on standard Android applications, that code is not there. The explanation is, one again, that displays are optional on Android Things and, therefore, the creation of a layout is optional.
The second interesting point is that there are two methods. This is meant to enforce the lifecycle of peripherals.
The recommended way to work with peripherals is to open them inside onCreate, keep a reference to use them along the app, and close and release them inside onDestroy. Remember, peripherals are hardware that is still on once your application finishes, so if one app leaves them in a particular state, you’ll find them in the same state. If an app does not release them, you may not be able to open them and get an IOException.
Note
We will place the initialization of peripherals inside onCreate and we will release them inside onDestroy.
You can, however, open a peripheral, perform some operations with it, and close it straight away. It is less efficient but, in certain cases, can be handy.
Most peripheral drivers implement AutoCloseable, so they will close themselves even if you forget to do so once the application is destroyed, but it is best to stick to the recommended practices.
Note
Many community drivers have not been updated to fix the breaking changes on Android Things Developer Preview 7 and 8.
Throughout this book, we will be using drivers from the Google-maintained contrib-drivers repository and also from other community-maintained ones, although most will be from PlattyThings. On Android Things Developer Preview 7 and 8, breaking changes were introduced to the SDK, and many community drivers have not been updated to the latest version. I have made that repository to ensure that all the drivers work on Android Things 1.0.