Creating an Appium framework
We are going to structure our Appium framework in a very similar way to our Selenium framework. We will have a base method that our tests can inherit from, some familiar looking configuration classes and a very similar POM.xml to hold our dependencies. Let's start off with our POM file:
<?xml version="1.0" encoding="UTF-8"?>
<project xmlns="http://maven.apache.org/POM/4.0.0"
xmlns:xsi="http://www.w3.org/2001/XMLSchema-instance"
xsi:schemaLocation="http://maven.apache.org/POM/4.0.0
http://maven.apache.org/xsd/maven-4.0.0.xsd">
<groupId>com.masteringselenium.demo</groupId>
<artifactId>mastering-selenium-appium</artifactId>
<version>DEV-SNAPSHOT</version>
<modelVersion>4.0.0</modelVersion>
<name>Mastering Selenium with Appium</name>
<description>A basic Appium POM file</description>
<url>http://www.masteringselenium.com</url>
<properties>
<project.build.sourceEncoding>UTF-
8</project.build.sourceEncoding>
<project.reporting.outputEncoding>UTF-
8</project.reporting.outputEncoding>
<java.version>1.8</java.version>
<!-- Dependency versions -->
<appium-java.version>6.1.0</appium-java.version>
<selenium.version>3.12.0</selenium.version>
<testng.version>6.14.3</testng.version>
<assertj-core.version>3.10.0</assertj-core.version>
<query.version>1.2.0</query.version>
<!-- Plugin versions -->
<maven-compiler-plugin.version>3.7.0
</maven-compiler-plugin.version>
<!-- Configurable variables -->
<threads>1</threads>
<remote>false</remote>
<enableDebugMode>false</enableDebugMode>
<appiumServerURL/>
<screenshotDirectory>${project.build.directory}
/screenshots</screenshotDirectory>
</properties>
<build>
<plugins>
<plugin>
<groupId>org.apache.maven.plugins</groupId>
<artifactId>maven-compiler-plugin</artifactId>
<configuration>
<source>${java.version}</source>
<target>${java.version}</target>
</configuration>
<version>${maven-compiler-plugin.version}</version>
</plugin>
</plugins>
</build>
<dependencies>
<dependency>
<groupId>io.appium</groupId>
<artifactId>java-client</artifactId>
<version>${appium-java.version}</version>
<scope>test</scope>
</dependency>
<dependency>
<groupId>org.seleniumhq.selenium</groupId>
<artifactId>selenium-java</artifactId>
<version>${selenium.version}</version>
<scope>test</scope>
</dependency>
<dependency>
<groupId>org.testng</groupId>
<artifactId>testng</artifactId>
<version>${testng.version}</version>
<scope>test</scope>
</dependency>
<dependency>
<groupId>org.assertj</groupId>
<artifactId>assertj-core</artifactId>
<version>${assertj-core.version}</version>
<scope>test</scope>
</dependency>
<dependency>
<groupId>com.lazerycode.selenium</groupId>
<artifactId>query</artifactId>
<version>${query.version}</version>
<scope>test</scope>
</dependency>
</dependencies>
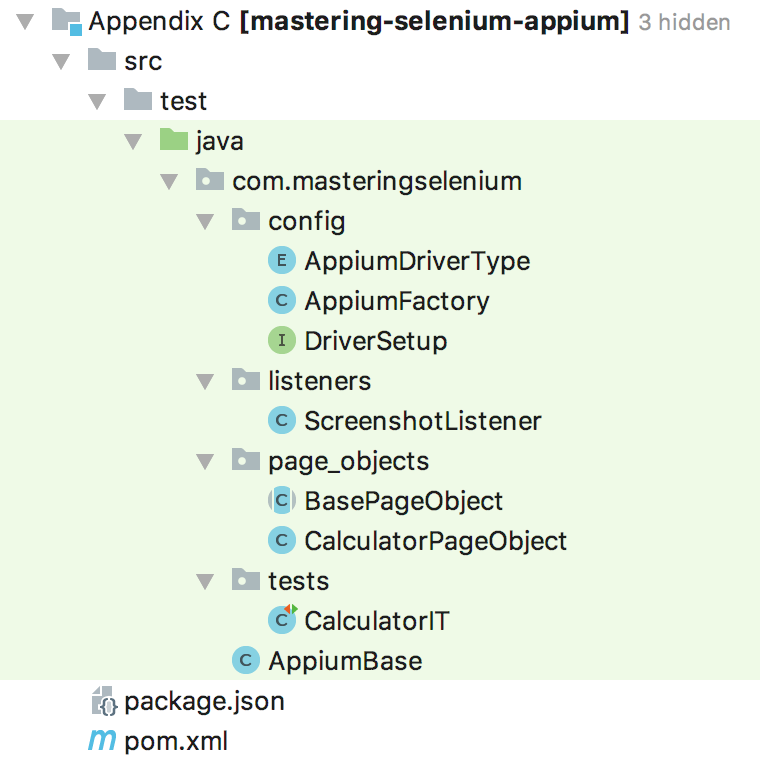
</project>This looks very similar to our Selenium POM file, we have a series of dependencies for the libraries that we are going to use in our framework. You will notice that most of them were also in our Selenium framework, the new one is the Appium dependency. Next we need to create a standard directory structure for a Maven project. We are working towards creating this file structure:
Let's get started on the configuration code. First of all we are going to create an interface called DriverSetup:
package com.masteringselenium.config;

import io.appium.java_client.AppiumDriver;
import io.appium.java_client.android.Activity;
import org.openqa.selenium.remote.DesiredCapabilities;

import java.net.URL;

public interface DriverSetup {
    DriverSetup createAppiumObject(URL appiumServerLocation,
    DesiredCapabilities capabilities);

DriverSetup setActivity(Activity activity);

AppiumDriver getAppiumDriver();
}
This sets up our three methods that each type of Appium driver is going to need to implement. Next, we have an AppiumDriverType class:
package com.masteringselenium.config;

import io.appium.java_client.AppiumDriver;
import io.appium.java_client.android.Activity;
import io.appium.java_client.android.AndroidDriver;
import io.appium.java_client.remote.AndroidMobileCapabilityType;
import io.appium.java_client.remote.AutomationName;
import io.appium.java_client.remote.MobileCapabilityType;
import org.openqa.selenium.Platform;
import org.openqa.selenium.remote.DesiredCapabilities;

import java.net.URL;

public enum AppiumDriverType implements DriverSetup {


ANDROID {
public AppiumDriverType createAppiumObject(URL
        appiumServerLocation, DesiredCapabilities desiredCapabilities)
        {
capabilities = desiredCapabilities;
serverLocation = appiumServerLocation;
capabilities.setCapability(MobileCapabilityType.
            PLATFORM_NAME, Platform.ANDROID);
capabilities.setCapability(MobileCapabilityType
           .AUTOMATION_NAME, AutomationName.APPIUM);
capabilities.setCapability(MobileCapabilityType.
            DEVICE_NAME, "Android Device");

            if (ENABLE_DEBUG_MODE) {
capabilities.setCapability(MobileCapabilityType.
                NEW_COMMAND_TIMEOUT, "3600");
}

return this;
}

public AppiumDriver getAppiumDriver() {
return new AndroidDriver(serverLocation, capabilities);
}

    };

    private static final boolean ENABLE_DEBUG_MODE =
    Boolean.getBoolean("enableDebugMode");
DesiredCapabilities capabilities;
URL serverLocation;

    public AppiumDriverType setActivity(Activity activity) {
capabilities.setCapability(AndroidMobileCapabilityType
        .APP_PACKAGE, activity.getAppPackage());
capabilities.setCapability(AndroidMobileCapabilityType
        .APP_ACTIVITY, activity.getAppActivity());

        return this;
}
}
For this example, we are just going to get up and running with Android. If you look for second-hand Android phones you can easily buy a relatively powerful Samsung phone that is ideal for practising your android scripts on. It's also less hassle to set up because you don't need to worry about creating an Apple developer account. Let's walk through the preceding code. First of all, we have some generic desired capabilities that need to be set all the time. PLATFORM_NAME let's Appium know what sort of device to expect. AUTOMATION_NAME lets Appium know what method to use when running the tests (so, for android, you could have APPIUM, ESPRESSO, SELENDROID, and so on.)
If a particular implementation doesn't work for you, you can always switch over to another one and see if you fare better. Finally, we set a device name; this is a Selenium requirement, the name can be anything as long as it is set.
You will then see that we check to see if we have a boolean flag set called ENABLE_DEBUG_MODE. By default, the Appium server will time out and shut itself down if it doesn't see any commands for 15 seconds. When you are stepping through code trying to work out what has gone wrong you probably want a bit more time than that. This updates the command timeout to be 5 minutes. That should be lots of time to pause for a ponder whilst debugging.
Finally, we have some Android-specific code. You can get Appium to install packages on your device for you, however this can be quite time consuming. If you know the package is already installed, you can also specify the activity to start. That's the method we are going to use.
Now we need to create our AppiumFactory class:
package com.masteringselenium.config;

import io.appium.java_client.AppiumDriver;
import io.appium.java_client.android.Activity;
import io.appium.java_client.remote.MobileCapabilityType;
import org.openqa.selenium.Platform;
import org.openqa.selenium.remote.DesiredCapabilities;

import java.net.MalformedURLException;
import java.net.URL;
import java.util.Optional;

import static com.masteringselenium.config.AppiumDriverType.ANDROID;

public class AppiumFactory {

private AppiumDriver driver;
    private AppiumDriverType selectedDriverConfiguration;
    private Activity currentActivity;

    private static final boolean USE_SELENIUM_GRID =
    Boolean.getBoolean("useSeleniumGrid");
    private static final String DEFAULT_SERVER_LOCATION =
    "http://127.0.0.1:4723/wd/hub";
    private static String APPIUM_SERVER_LOCATION =
    System.getProperty("appiumServerLocation",
    DEFAULT_SERVER_LOCATION);

    public AppiumFactory() {
        AppiumDriverType driverType = ANDROID;
String appiumConfig = System.getProperty("appiumConfig",
        driverType.toString()).toUpperCase();
        if (null == APPIUM_SERVER_LOCATION ||
        APPIUM_SERVER_LOCATION.trim().isEmpty()) {
APPIUM_SERVER_LOCATION = DEFAULT_SERVER_LOCATION;
}
try {
            driverType = AppiumDriverType.valueOf(appiumConfig);
} catch (IllegalArgumentException ignored) {
            System.err.println("Unknown driver specified,
            defaulting to '" + driverType + "'...");
} catch (NullPointerException ignored) {
            System.err.println("No driver specified,
            defaulting to '" + driverType + "'...");
}
selectedDriverConfiguration = driverType;
}

public AppiumDriver getDriver() throws Exception {
return getDriver(currentActivity);
}

public AppiumDriver getDriver(Activity desiredActivity)
    throws Exception {
if (null != currentActivity &&
        !currentActivity.equals(desiredActivity)) {
            quitDriver();
}
if (null == driver) {
currentActivity = desiredActivity;
instantiateWebDriver(selectedDriverConfiguration);
}

return driver;
}

public void quitDriver() {
if (null != driver) {
driver.quit();
driver = null;
currentActivity = null;
}
    }

private void instantiateWebDriver(AppiumDriverType
    appiumDriverType) throws MalformedURLException {
        System.out.println("Current Appium Config Selection: " +
        selectedDriverConfiguration);
System.out.println("Current Appium Server Location: " +
        APPIUM_SERVER_LOCATION);
System.out.println("Connecting to Selenium Grid: " +
        USE_SELENIUM_GRID);

DesiredCapabilities desiredCapabilities = new
        DesiredCapabilities();
        if (Boolean.getBoolean("enableDebugMode")) {
            desiredCapabilities.setCapability(MobileCapabilityType
            .NEW_COMMAND_TIMEOUT, "3600");
}
        Optional.ofNullable(System.getProperty("device_id", null))
                .ifPresent(deviceID -> desiredCapabilities.
                setCapability(MobileCapabilityType.UDID, deviceID));
        if (USE_SELENIUM_GRID) {
            URL seleniumGridURL = new
            URL(System.getProperty("gridURL"));
String desiredVersion =
            System.getProperty("desiredVersion");
String desiredPlatform =
            System.getProperty("desiredPlatform");

            if (null != desiredPlatform && !desiredPlatform.isEmpty())
            {
                desiredCapabilities.setPlatform
                (Platform.valueOf(desiredPlatform.toUpperCase()));
}

if (null != desiredVersion && !desiredVersion.isEmpty())
            {
                desiredCapabilities.setVersion(desiredVersion);
}

            desiredCapabilities.setBrowserName
           (selectedDriverConfiguration.toString());
driver = new AppiumDriver(seleniumGridURL,
            desiredCapabilities);
} else {
driver = appiumDriverType.createAppiumObject(new
            URL(APPIUM_SERVER_LOCATION), desiredCapabilities)
                    .setActivity(currentActivity)
                    .getAppiumDriver();
}
    }
}
This will look very similar to the driver factory we were working with previously. When we instantiate AppiumFactory, we look for an environment variable called appiumConfig. If we find it, we try to convert it into one of our AppiumDriverType objects. In our case, we only have a single type defined, our Android one. This will be useful in the future if we expand our implementation to support different devices. The other main thing we do on instantiation is work out where our Appium server is running. We have some error checking around this to make sure that at a minimum, we always try to run against an Appium instance running locally on the default port.
We then have a couple of getDriver() methods. One of them allows to start up a specific activity (for example, the Calculator app), or switch activity. The other one just returns the current driver object, we are already using. We next have a very similar quitDriver() method that closes everything down. Finally, we use our instantiateWebDriver method. This is the method that works out if we are connecting to a Selenium-Grid, or a local Appium server and instantiates our driver object.
We are still going to want to get a screenshot when our tests fail, so the next bit of setup that we need to perform is to create ScreenshotListener:
package com.masteringselenium.listeners;

import org.openqa.selenium.OutputType;
import org.openqa.selenium.TakesScreenshot;
import org.openqa.selenium.WebDriver;
import org.openqa.selenium.remote.Augmenter;
import org.testng.ITestResult;
import org.testng.TestListenerAdapter;

import java.io.File;
import java.io.FileOutputStream;
import java.io.IOException;

import static com.masteringselenium.AppiumBase.getDriver;

public class ScreenshotListener extends TestListenerAdapter {

private static boolean createFile(File screenshot) {
boolean fileCreated = false;

        if (screenshot.exists()) {
            fileCreated = true;
} else {
            File parentDirectory = new File(screenshot.getParent());
            if (parentDirectory.exists() || parentDirectory.mkdirs()) {
try {
                    fileCreated = screenshot.createNewFile();
} catch (IOException errorCreatingScreenshot) {
                    errorCreatingScreenshot.printStackTrace();
}
            }
        }

return fileCreated;
}

private static void writeScreenshotToFile(WebDriver driver,
File screenshot) {
try {
            FileOutputStream screenshotStream = new
            FileOutputStream(screenshot);
screenshotStream.write(((TakesScreenshot)
            driver).getScreenshotAs(OutputType.BYTES));
screenshotStream.close();
} catch (IOException unableToWriteScreenshot) {
            System.err.println("Unable to write " +
            screenshot.getAbsolutePath());
unableToWriteScreenshot.printStackTrace();
}
    }

public static void takeScreenshot(WebDriver driver,
    String filename) {
        String screenshotDirectory =
        System.getProperty("screenshotDirectory",
        "build/screenshots");
String screenshotAbsolutePath = screenshotDirectory +
        File.separator + System.currentTimeMillis() + "_" +
        filename + ".png";
File screenshot = new File(screenshotAbsolutePath);
        if (createFile(screenshot)) {
try {
writeScreenshotToFile(driver, screenshot);
} catch (ClassCastException weNeedToAugmentOurDriverObject)
            {
writeScreenshotToFile(new Augmenter().augment(driver),
                screenshot);
}
            System.out.println("Written screenshot to " +
            screenshotAbsolutePath);
} else {
            System.err.println("Unable to create " +
            screenshotAbsolutePath);
}
    }

@Override
public void onTestFailure(ITestResult failingTest) {
try {
takeScreenshot(getDriver(), failingTest.getName());
} catch (Exception ex) {
            System.err.println("Unable to capture screenshot...");
ex.printStackTrace();
}
    }
}
This is a standard TestNG listener and is virtually identical to the one we used before. It does exactly the same thing, when a test fails it takes a screenshot so that we can see what was on the device at the point of failure.
Now that we have all of our config setup we need to create our AppiumBase file:
package com.masteringselenium;

import com.masteringselenium.config.AppiumFactory;
import com.masteringselenium.listeners.ScreenshotListener;
import io.appium.java_client.AppiumDriver;
import io.appium.java_client.android.Activity;
import org.testng.annotations.AfterSuite;
import org.testng.annotations.BeforeSuite;
import org.testng.annotations.Listeners;

import java.util.ArrayList;
import java.util.Collections;
import java.util.List;

@Listeners(ScreenshotListener.class)
public class AppiumBase {

private static List<AppiumFactory> webDriverThreadPool =
    Collections.synchronizedList(new ArrayList<AppiumFactory>());
    private static ThreadLocal<AppiumFactory> appiumFactory;

@BeforeSuite
public static void instantiateDriverObject() {
appiumFactory = new ThreadLocal<AppiumFactory>() {
@Override
protected AppiumFactory initialValue() {
                AppiumFactory appiumFactory = new AppiumFactory();
webDriverThreadPool.add(appiumFactory);
                return appiumFactory;
}
        };
}

public static AppiumDriver getDriver() throws Exception {
return appiumFactory.get().getDriver();
}

public static AppiumDriver getDriver(Activity desiredActivity)
    throws Exception {
return appiumFactory.get().getDriver(desiredActivity);
}

@AfterSuite(alwaysRun = true)
public static void closeDriverObjects() {
for (AppiumFactory appiumFactory : webDriverThreadPool) {
            appiumFactory.quitDriver();
}
    }
}
This looks just like our previous DriverBase file. We have the same thread pool, the same clean up method and the same getDriver() method. The new method that we have is our secondary getDriver() method that allows us to switch to a specific activity as noted earlier.
We, now have everything we need to start writing some basic tests.
Automating the Android calculator
We are going to write a basic automation script that will enable us to perform some sums with the build in Android calculator. The first thing we are going to do is configure BasePageObject that all future page objects can extend as we did in our Selenium framework:
package com.masteringselenium.page_objects;

import com.masteringselenium.AppiumBase;
import io.appium.java_client.AppiumDriver;
import io.appium.java_client.TouchAction;
import org.openqa.selenium.support.ui.WebDriverWait;

public abstract class BasePageObject {

    AppiumDriver driver;
WebDriverWait webDriverWait;
TouchAction touchAction;

BasePageObject() {
    try {
    this.driver = AppiumBase.getDriver();
} catch (Exception ignored) {
        //This will be be thrown when the test starts
        //if it cannot connect to a RemoteWebDriver Instance
}

        this.webDriverWait = new WebDriverWait(driver, 30, 250);
        this.touchAction = new TouchAction(driver);
}
}
This is going to provide an easy way for our page objects to get an AppiumDriver instance as well as giving us a couple of useful objects that will probably be used more than once, a WebDriverWait object and a TouchAction object. The next job is to create CalculatorPageObject, but to do this we are going to need a way to examine the calculator object on a device. To do that we will need to download the Appium desktop application which is available at https://github.com/appium/appium-desktop/releases. While you are doing that you will also want to install ADB, this will be useful to query the device you are using to get hold of package names. You can get ADB at https://developer.android.com/studio/command-line/adb.
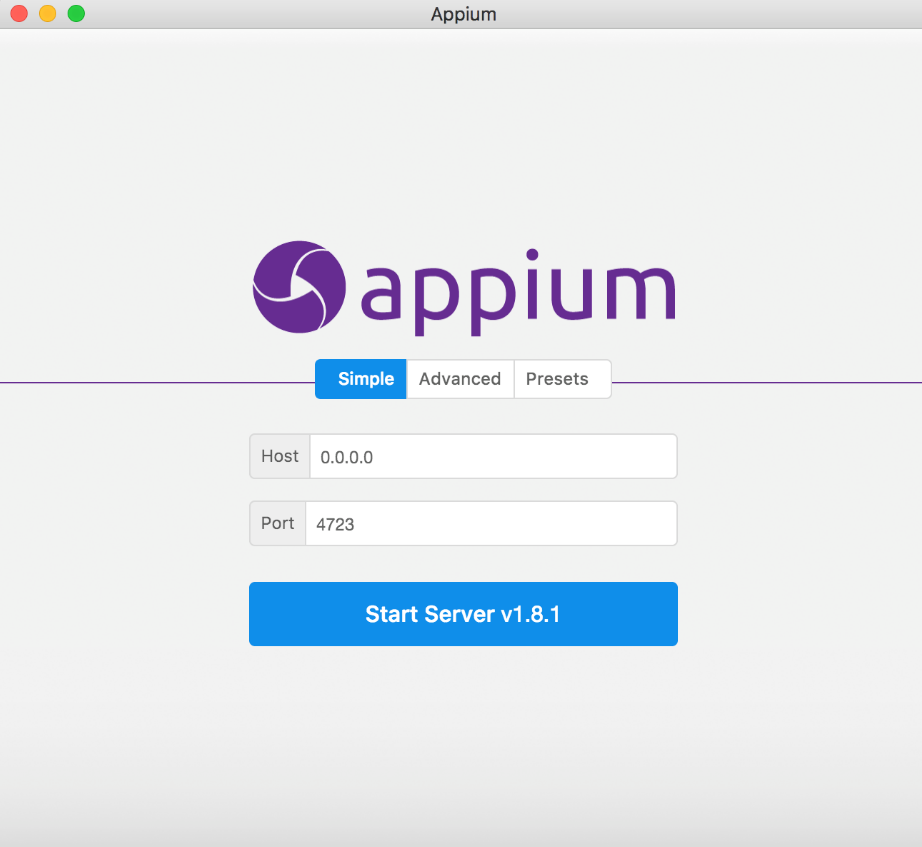
Once you have got these packages installed, you are ready to start up Appium desktop, it will look like this:
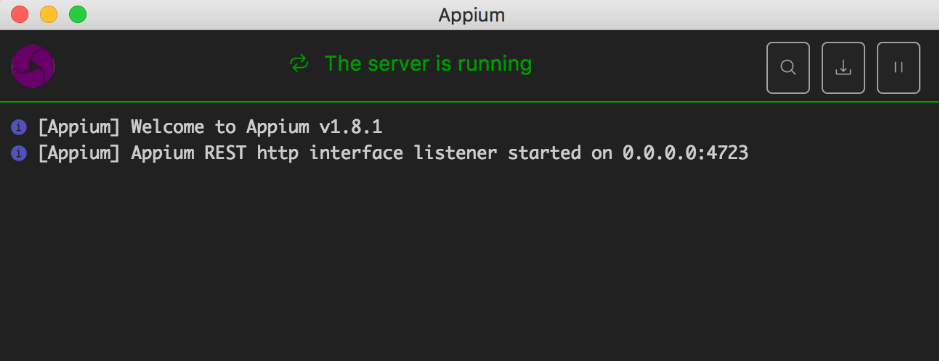
First of all you will want to click on Start Server, which will provide you with this screen:
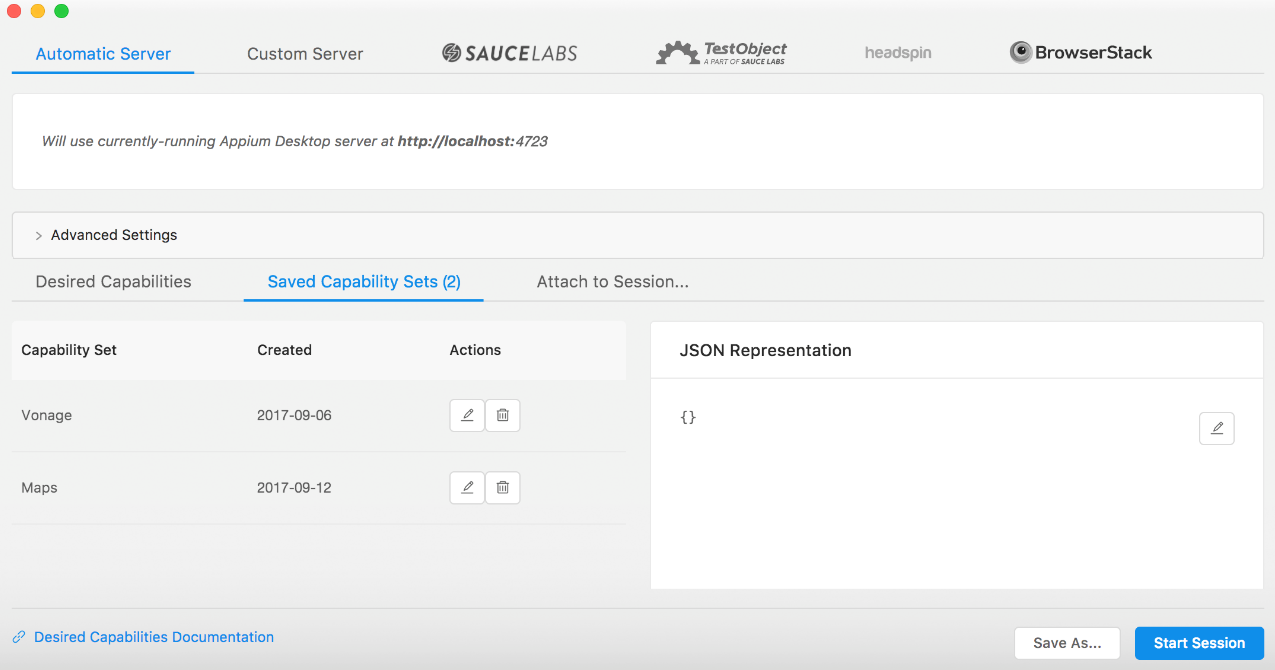
Next we want to click on the magnifying glass icon in the top left. This will pop up a box that looks like this:
To start a debug session, we need to configure DesiredCapabilities. We can do this by generating a JSON representation of DesiredCapabilities. To do this, we now need to connect our Android device to our machine via a USB cable and find out which calculator package is installed. Samsung bundles their own calculator app so if you are not using a Samsung device you may find a different package.
Note
Don't forget to put your test device into development mode before trying to use ADB commands. If it isn't in the development mode, it will just ignore the commands. To turn it on you normally go to Settings | About phone | Build number and then tap on the build number seven times, different devices may have slightly different way to enable it though.
The command you need to type into your Terminal is:
adb shell pm list packages -f |grep calcOn a Samsung S6 it returns the following:
package:/system/priv-app/SecCalculator_N/SecCalculator_N.apk=com.sec.android.
app.popupcalculator
We are now ready to use this information to configure our DesiredCapabilities:
{
"platformName": "Android",
"deviceName": "Samsung S6",
"appPackage": "com.sec.android.app.popupcalculator",
"appActivity": ".Calculator"
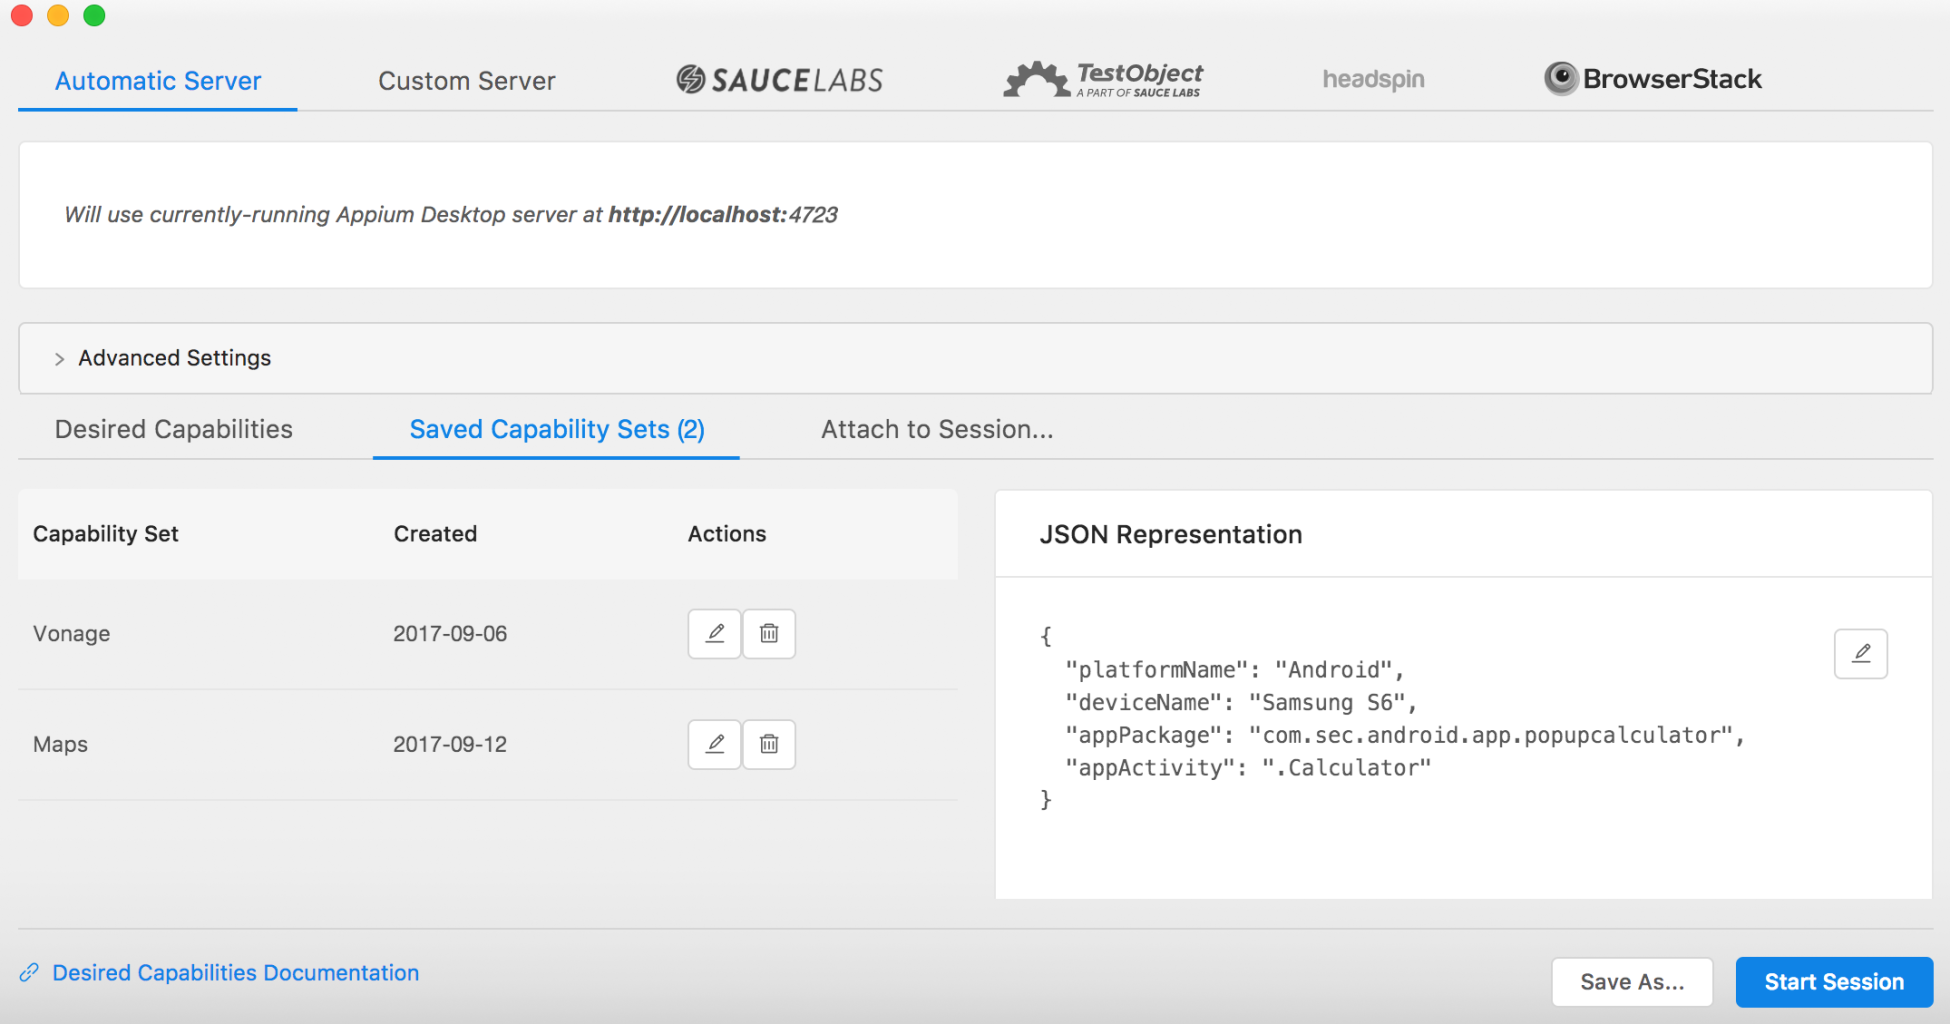
}We have an android device, so we are using platformName of Android. The deviceName can be anything, so I have used the name of the device we are connecting to. The appPackage is the one we found using our ADB command and the default appActivity for calculator apps in Android is .Calculator. Copy the preceding into your JSON representation block and you should have something that looks like this:
Now click on Start Session and Appium will launch the Calculator app, and load a view of what you can see on your device in the session window:
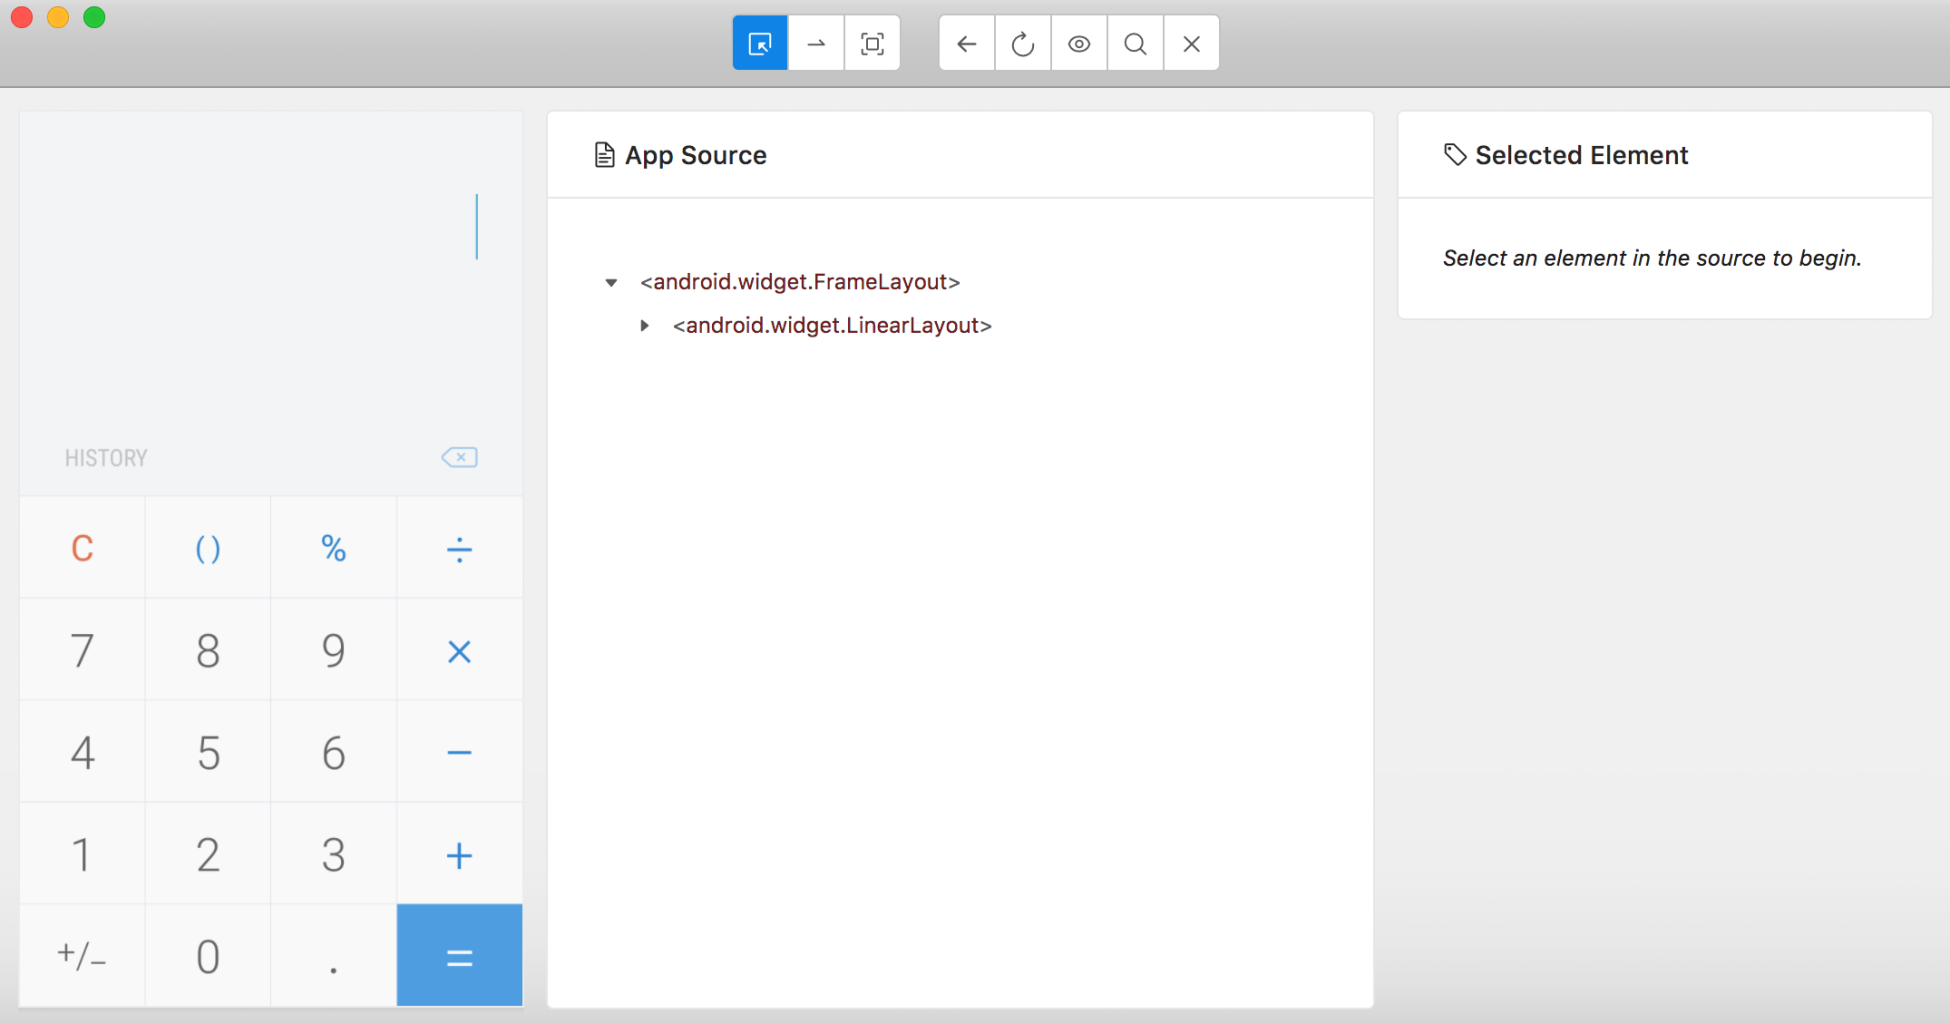
You can now select elements on the screen and get locator information. We are going to use this to build up our page object:
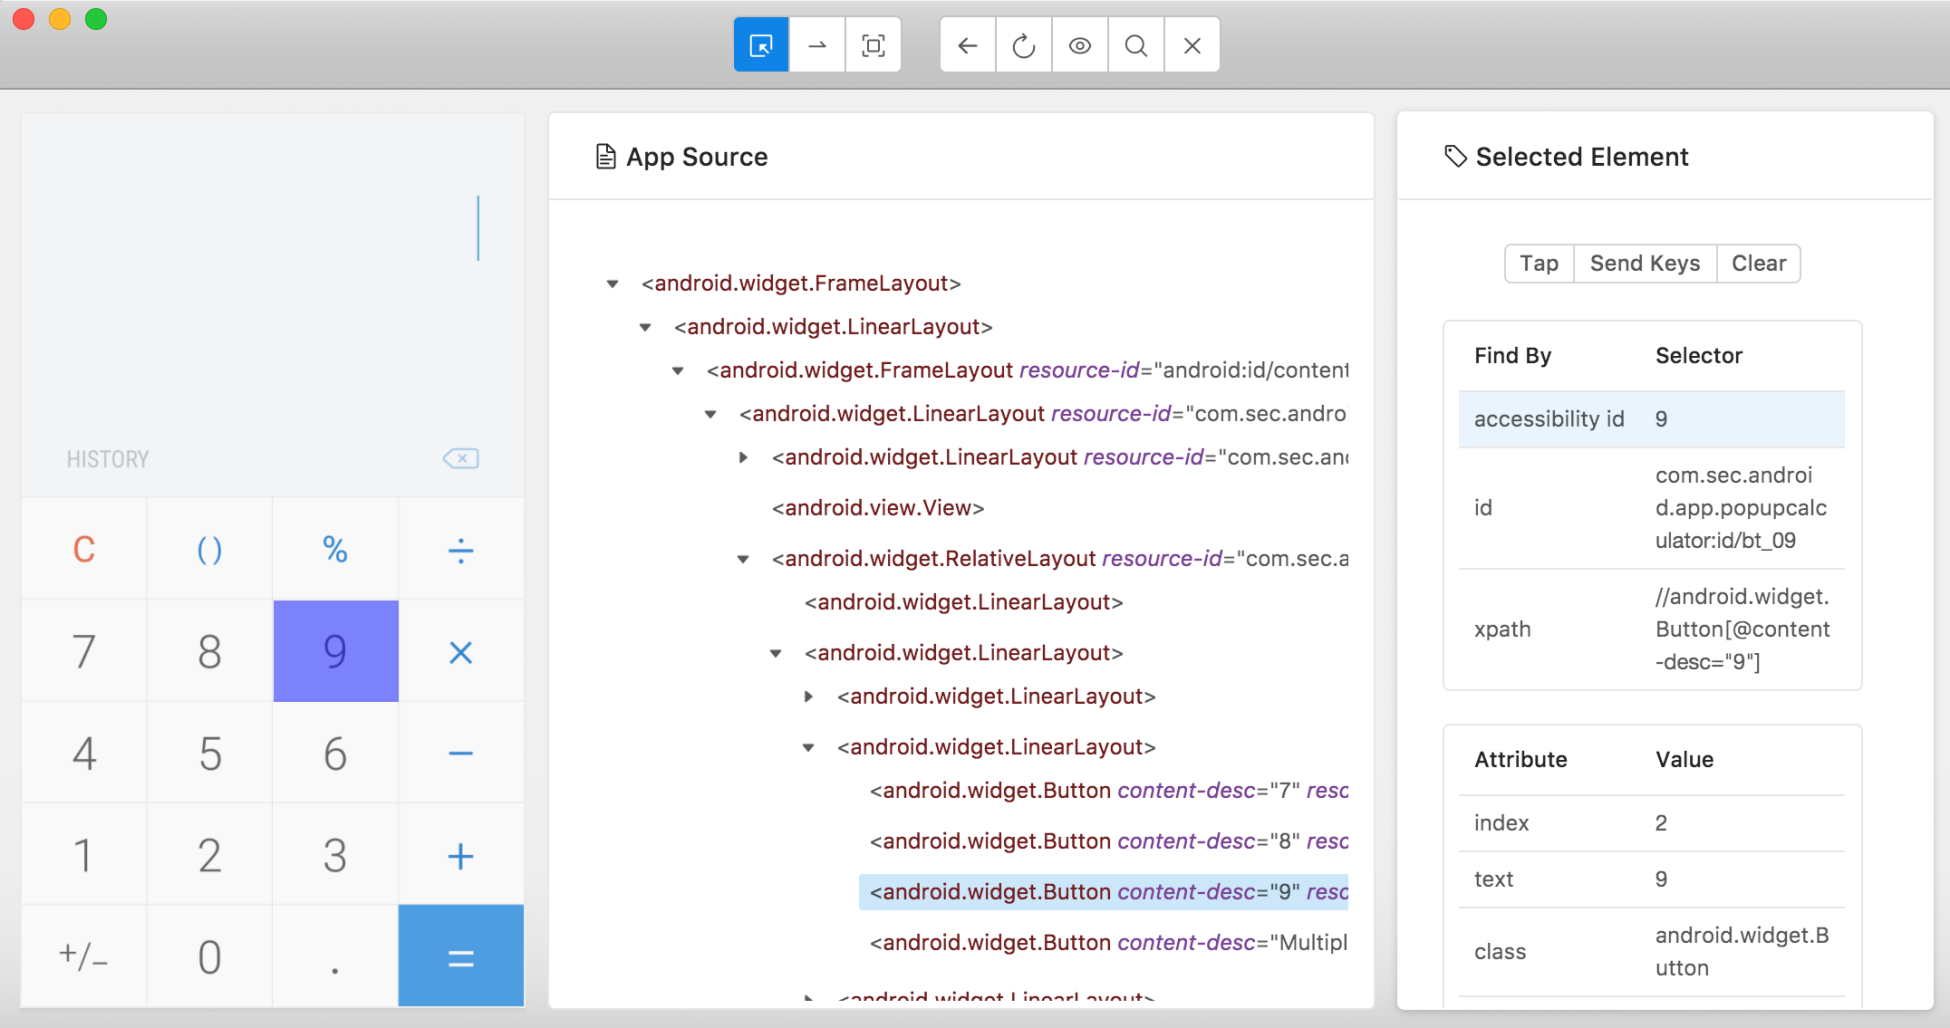
Here is our CalculatorPageObject, if you are not using a Samsung device you may have slightly different locators, but generally the page object should look very similar:
package com.masteringselenium.page_objects;

import com.lazerycode.selenium.util.Query;
import io.appium.java_client.MobileBy;
import io.appium.java_client.touch.offset.ElementOption;

import java.util.Collections;
import java.util.HashMap;
import java.util.Map;

import static io.appium.java_client.touch.TapOptions.tapOptions;

public class CalculatorPageObject extends BasePageObject {

private Query one = new Query(MobileBy.AccessibilityId("1"),
    driver);
    private Query two = new Query(MobileBy.AccessibilityId("2"),
    driver);
    private Query three = new Query(MobileBy.AccessibilityId("3"),
    driver);
    private Query four = new Query(MobileBy.AccessibilityId("4"),
    driver);
    private Query five = new Query(MobileBy.AccessibilityId("5"),
    driver);
    private Query six = new Query(MobileBy.AccessibilityId("6"),
    driver);
    private Query seven = new Query(MobileBy.AccessibilityId("7"),
    driver);
    private Query eight = new Query(MobileBy.AccessibilityId("8"),
    driver);
    private Query nine = new Query(MobileBy.AccessibilityId("9"),
    driver);
    private Query zero = new Query(MobileBy.AccessibilityId("0"),
    driver);
    private Query addButton = new
    Query(MobileBy.AccessibilityId("Plus"), driver);
    private Query subtractButton = new
    Query(MobileBy.AccessibilityId("Minus"), driver);
    private Query equalsButton = new
    Query(MobileBy.AccessibilityId("Equal"), driver);
    private Query result = new
    Query(MobileBy.id("com.sec.android.app.popupcalculator:id
    /txtCalc"), driver);

    private final Map<Character, Query> NUMBERS =
    Collections.unmodifiableMap(
new HashMap<Character, Query>() {{
                put('1', one);
put('2', two);
put('3', three);
put('4', four);
put('5', five);
put('6', six);
put('7', seven);
put('8', eight);
put('9', nine);
put('0', zero);
}});

    public CalculatorPageObject enterNumber(String number) {
for (Character digit : number.toCharArray()) {
touchAction.tap(tapOptions()
           .withElement(ElementOption.element(NUMBERS.
           get(digit).findMobileElement()))).perform();
}

return this;
}

public CalculatorPageObject add() {
touchAction.tap(tapOptions().withElement
        (ElementOption.element(addButton.findMobileElement())))
        .perform();

        return this;
}

public CalculatorPageObject subtract() {
touchAction.tap(tapOptions().withElement
       (ElementOption.element(subtractButton.findMobileElement())))
       .perform();

        return this;
}

public String equals() {
touchAction.tap(tapOptions().withElement
        (ElementOption.element(equalsButton.findMobileElement())))
        .perform();

        return result.findMobileElement().getText();
}

}
This is again fairly self explanatory. At the top, we have a series of Query elements that can be used to locate elements on the screen. Then we have a method that will take a number string and convert it into a series of tap events. Then we have some methods that will hit some individual buttons like plugin and minus. Finally, we have an equals method that will hit the equals button and then capture the value currently displayed on the screen. If you are still in your inspector session at this point, you can quit and go back to the running Appium server, we are about to use to run a test.
Before we can run that test, however, we are going to need to write it, but that's very straightforward now that we have our page object. Here it is:
package com.masteringselenium.tests;

import com.masteringselenium.AppiumBase;
import com.masteringselenium.page_objects.CalculatorPageObject;
import io.appium.java_client.android.Activity;
import org.testng.annotations.BeforeMethod;
import org.testng.annotations.Test;

import static org.assertj.core.api.AssertionsForClassTypes.assertThat;

public class CalculatorIT extends AppiumBase {

@BeforeMethod
public void setCorrectActivity() throws Exception {
        String appPackage = "com.sec.android.app.popupcalculator";
String appActivity = ".Calculator";
getDriver(new Activity(appPackage, appActivity));
}

@Test
public void AddNumbersTogether() {
        CalculatorPageObject calculatorPageObject = new
        CalculatorPageObject();

String result = calculatorPageObject.enterNumber("100")
                .add()
                .enterNumber("27")
                .equals();

assertThat(result).isEqualTo("127");
}
}
We have two pieces to our test. First of all before we start running the test, we invoke the calculator activity in @BeforeMethod. We could do this inside the test as well, but the advantage of doing it outside the test is if we have multiple tests, we would want to run them inside the same activity.
Our test is then quite self explanatory. We enter a number, tap add, enter another number, and then tap equals. Finally, we compare the value that was returned after we tapped equals to make sure it matches our expectation.
Congratulations, you have just written your first Appium test.
Running the tests through Maven
We currently have a test that works fine in IntelliJ, but we haven't put any configuration in our POM file yet to enable us to run this test through Maven. Let's create a Maven profile that will allow us to do that. First of all, we need to add a property to define our maven-failsafe-plugin version:
<maven-failsafe-plugin.version>2.21.0</maven-failsafe-plugin.version>
Then we need to add a new profile:
<profiles>
    <profile>
        <id>appiumAlreadyRunning</id>
        <activation>
            <property>
                <name>!invokeAppium</name>
            </property>
        </activation>
        <build>
            <plugins>
                <plugin>
                    <groupId>org.apache.maven.plugins</groupId>
                    <artifactId>maven-failsafe-plugin</artifactId>
                    <version>${maven-failsafe-plugin.version}</version>
                    <configuration>
                        <systemPropertyVariables>
                            <appiumServerLocation>${appiumServerURL}
                            </appiumServerLocation>
                            <enableDebugMode>${enableDebugMode}
                            </enableDebugMode>

                           <screenshotDirectory>
                           ${project.build.directory}
                           /screenshots</screenshotDirectory>
                            <remoteDriver>${remote}</remoteDriver>
                            <appiumConfig>${appiumConfig}
                            </appiumConfig>
                        </systemPropertyVariables>
                    </configuration>
                    <executions>
                        <execution>
                            <goals>
                                <goal>integration-test</goal>
                                <goal>verify</goal>
                            </goals>
                        </execution>
                    </executions>
                </plugin>
            </plugins>
        </build>
    </profile>
</profiles>
This will look very similar to maven-failsafe-plugin that we have set up in our Selenium framework. What is slightly different is the way we are using <activation> this time. We are looking to see if a property called invokeAppium has been set. If it hasn't, we run this profile. This means that by default this profile will always run. We will explain why we have used activation in this way later on in this chapter. For now, we can try running our tests through Maven.
First of all, we will need to start up our Appium server (if you don't still have it running). Then on the command line you will need to type:
mvn clean verifyYou should see the Maven build start up and it will connect to the Appium server that you have started. It will then successfully complete the tests. This is great, if you are happy starting and stopping an Appium server by yourself, but it's not yet a system that does everything for you. We can make this better.
Starting and stopping Appium with Maven
When we run our tests we want the ability to start and stop everything, so we are going to add another profile and a series of additional plugins. First of all, we need to add some properties into our <properties> block in preparation for this new profile with all these new plugins:
<appium-maven-plugin.version>0.2.0</appium-maven-plugin.version>
<maven-compiler-plugin.version>3.7.0</maven-compiler-plugin.version>
<frontend-maven-plugin.nodeVersion>v7.4.0</frontend-maven-plugin.nodeVersion>
<frontend-maven-plugin.npmVersion>4.1.1</frontend-maven-plugin.npmVersion>
<port-allocator-maven-plugin.version>1.2</port-allocator-maven-plugin.version>
Next we have our new profile, this is quite a big one:
<profile>
    <id>startAndStopAppium</id>
    <activation>
        <property>
            <name>invokeAppium</name>
        </property>
    </activation>
    <build>
        <plugins>
            <plugin>
                <groupId>com.github.eirslett</groupId>
                <artifactId>frontend-maven-plugin</artifactId>
                <version>1.5</version>
                <executions>
                    <execution>
                        <id>install node and npm</id>
                        <phase>process-resources</phase>
                        <goals>
                            <goal>install-node-and-npm</goal>
                        </goals>
                        <configuration>
                            <nodeVersion>${frontend-maven-
                            plugin.nodeVersion}</nodeVersion>
                            <npmVersion>${frontend-maven-
                            plugin.npmVersion}</npmVersion>
                        </configuration>
                    </execution>
                    <execution>
                        <id>npm install</id>
                        <phase>process-resources</phase>
                        <goals>
                            <goal>npm</goal>
                        </goals>
                        <configuration>
                            <arguments>install</arguments>
                        </configuration>
                    </execution>
                </executions>
            </plugin>
            <plugin>
                <groupId>org.sonatype.plugins</groupId>
                <artifactId>port-allocator-maven-plugin</artifactId>
                <version>${port-allocator-maven-plugin.version}
                </version>
                <executions>
                    <execution>
                        <phase>validate</phase>
                        <goals>
                            <goal>allocate-ports</goal>
                        </goals>
                        <configuration>
                            <ports>
                                <port>
                                    <name>appium.port</name>
                                </port>
                            </ports>
                        </configuration>
                    </execution>
                </executions>
            </plugin>
            <plugin>
                <groupId>org.apache.maven.plugins</groupId>
                <artifactId>maven-failsafe-plugin</artifactId>
                <version>${maven-failsafe-plugin.version}</version>
                <configuration>
                    <systemPropertyVariables>
                        <appiumServerLocation>http://localhost:
                        ${appium.port}/wd/hub</appiumServerLocation>
                        <enableDebugMode>${enableDebugMode}
                        </enableDebugMode>
                        <screenshotDirectory>${project.build.directory}
                        /screenshots</screenshotDirectory>
                        <remoteDriver>${remote}</remoteDriver>
                        <appiumConfig>${appiumConfig}</appiumConfig>
                    </systemPropertyVariables>
                </configuration>
                <executions>
                    <execution>
                        <goals>
                            <goal>integration-test</goal>
                            <goal>verify</goal>
                        </goals>
                    </execution>
                </executions>
            </plugin>
            <plugin>
                <groupId>com.lazerycode.appium</groupId>
                <artifactId>appium-maven-plugin</artifactId>
                <version>${appium-maven-plugin.version}</version>
                <configuration>
                    <nodeDefaultLocation>
                    ${basedir}/node</nodeDefaultLocation>
                    <appiumLocation>${basedir}
                    /node_modules/appium</appiumLocation>
                    <appiumPort>${appium.port}</appiumPort>
                </configuration>
                <executions>
                    <execution>
                        <id>start appium</id>
                        <phase>pre-integration-test</phase>
                        <goals>
                            <goal>start</goal>
                        </goals>
                    </execution>
                    <execution>
                        <id>stop appium</id>
                        <phase>post-integration-test</phase>
                        <goals>
                            <goal>stop</goal>
                        </goals>
                    </execution>
                </executions>
            </plugin>
        </plugins>
    </build>
</profile>
The first thing you will notice when you invoke this profile is that we have set a property called invokeAppium in the activation block. This is how we ensure that when we are running our Appium tests we, either used this profile or the previous one. We cannot run them both at the same time.
Next, we have frontend-maven-plugin. We are using this to install an isolated node and npm that is only used as part of the build for this project. We then use npm to download the Appium server. This also requires us to have package.json in the root of our project where we specify the version of Appium that we want to download:
{
"name": "mastering-selenium-appium",
"private": false,
"license": "Apache 2",
"version": "0.0.0",
"description": "Download appium for automated tests",
"devDependencies": {
"appium": "1.8.1",
"deviceconsole":"1.0.1"
},
"scripts": {
"prestart": "npm install",
"pretest": "npm install"
}
}
The next plugin we have configured is port-allocator-maven-plugin. This allows us to search for ports that are currently not in use so that we can ensure that when we start up our Appium server, it doesn't try to use a port that is already in use. We then have our failsafe-maven-plugin configuration. It's very similar to the configuration in the previous profile, but this time we need to make sure we are passing in the custom ports being used by the Appium server instance that has been started up as a part of this build. Finally, we have our appium-maven-plugin configuration. This has a simple job, it starts Appium before the integration-test phase and then shuts it down again afterwards.
We now have everything, we need to download Appium, start it up, run our tests, and then shut down the Appium server again. You can do this using:
mvn clean verify -PstartAndStopAppiumThis may be a bit slow the first time you run it because it has to download node and install it as well as Appium, but once the initial download is complete it will reuse it in future test runs.