Selenium is amazing – how can I help make it better?
There are lots of ways in which you can help the Selenium project. Believe it or not, it's not just hardcore coding skills that are required.
The first and the most important thing that you can do is find problems with Selenium and report them. The Selenium developers do an awesome job, but they are not infallible. They need your help to find problems and raise defects so that they can fix them and make Selenium even better.
The problem with a lot of bugs that occur in Selenium is that they are unclear and range from hard to impossible to replicate. One of the best things that you can supply when you report a defect is a Selenium script that reproduces the problem. This gives the developers a way to see the issue first-hand, and it helps massively with regard to debugging. It can also form the basis of a test to ensure that once fixed, the problem doesn't raise its ugly head again in the future.
That being said, you don't need to have a prewritten script that shows your problem. However, you do need to be very clear about your problem. Bugs that sound kind of valid, but don't really have enough information so that they can be replicated, are the worst. If a developer takes a day trying to make sense of a badly written bug report and gets so frustrated that they don't want to look at the Selenium code base again for another week, we all lose out.
One of the biggest annoyances is people not providing the Selenium code. Your Selenium code is not special and secret. It's almost guaranteed that somebody else has done it before, and there is a good chance that they have made improvements in some areas. Share your code if you want to get it fixed.
When you report bugs on Selenium, make sure that you do the following:
- Investigate the issue before you raise it! Don't waste people's time with a one-line bug, saying that it doesn't work. Explain exactly what doesn't work and what you did to get to this non-working state.
- Write down the version of Selenium used, the language bindings, the browser, and the OS that you are using.
- Add as much information as possible. Stack traces, screenshots, and HTML code are great. They give people more information so that they are able to diagnose the issue.
- Try to create a Selenium script that reproduces the issue (the smaller the script, the better).
Great bugs mean issues that are easy to reproduce and which can be identified and fixed quickly. Everybody loves well-written bugs.
Getting set up to contribute to a Selenium repository
Selenium has quite a few repositories of code that you can check out, explore, and contribute to. The first thing that you will need to do to get a local copy is to install Git (for more information, visit https://git-scm.com). Git is available on all the major operating systems, so installing it should be a relatively pain-free process. If you don't just want to use the command line, you may want to have a look at the following additional clients. Some people like them, whereas others are fine with a Terminal:
- TortoiseGit: https://code.google.com/p/tortoisegit/
- The GitHub Windows client: https://windows.github.com
- The GitHub Mac client: https://mac.github.com
Once you have installed Git, you can check out any of the Selenium code bases. When you first start looking at them, don't worry about forking local copies. You'll only need to do this if you want to raise pull requests. All Selenium code repositories are now held on GitHub (for more information, visit https://github.com/SeleniumHQ). First of all, the best thing to do is just check out an individual code base and have a play. Let's do this right now. We will start with the Selenium website, https://github.com/SeleniumHQ/www.seleniumhq.org:
git clone https://github.com/SeleniumHQ/www.seleniumhq.org.gitTo get everything up-and-running, we are going to need to install a couple of things:
- Maven
- Python (at least version 2.7.9 to ensure that
pipis bundled with it)
Then, you will need to install Sphinx, as follows:
pip install -U Sphinx Sphinx is a documentation generator that is used by the Selenium project to generate the Selenium website (visit http://sphinx-doc.org for more information). It will take reStructuredText files and convert them into other formats (in this case, HTML). Now you are ready to build the project:
mvn clean installAfter this, you can start up the site in exploded mode:
mvn jetty:run-explodedYou can now navigate to the Selenium website in your local browser by visiting http://localhost:8080/. If you make changes, they should be automatically updated since you are running in the exploded mode. All that you will need to do is refresh the browser. Have a look around and see how easy it is to change things.
Aiding the documentation effort
Selenium is a very old project. The original work on it started in 2004. As a result, there have been many changes over the years and, as with all big and old projects, the documentation hasn't always stayed up to date or been as clear as it could be.
If you spend time going through the documentation, you will probably encounter the following:
- Minor errors (such as typos, grammar mistakes, and so on)
- Gaps where some available functionality has never been written about
- Documentation that is either no longer correct or no longer relevant
Documentation always needs to be updated, and there are never enough people to do it. This is the perfect place to start contributing to the Selenium project. The documentation is roughly split into two areas. There is the existing Selenium HQ site, which contains the current documentation (for more information, visit http://docs.seleniumhq.org/docs/). There is also the new documentation project, which was created in 2013. The idea was to start writing the documentation from scratch (visit http://seleniumhq.github.io/docs/ for additional information).
Note
The Selenium HQ site is more than just documentation. Don't think that you are limited to just enhancing the documentation. You are quite welcome to contribute a change to any aspect of the site.
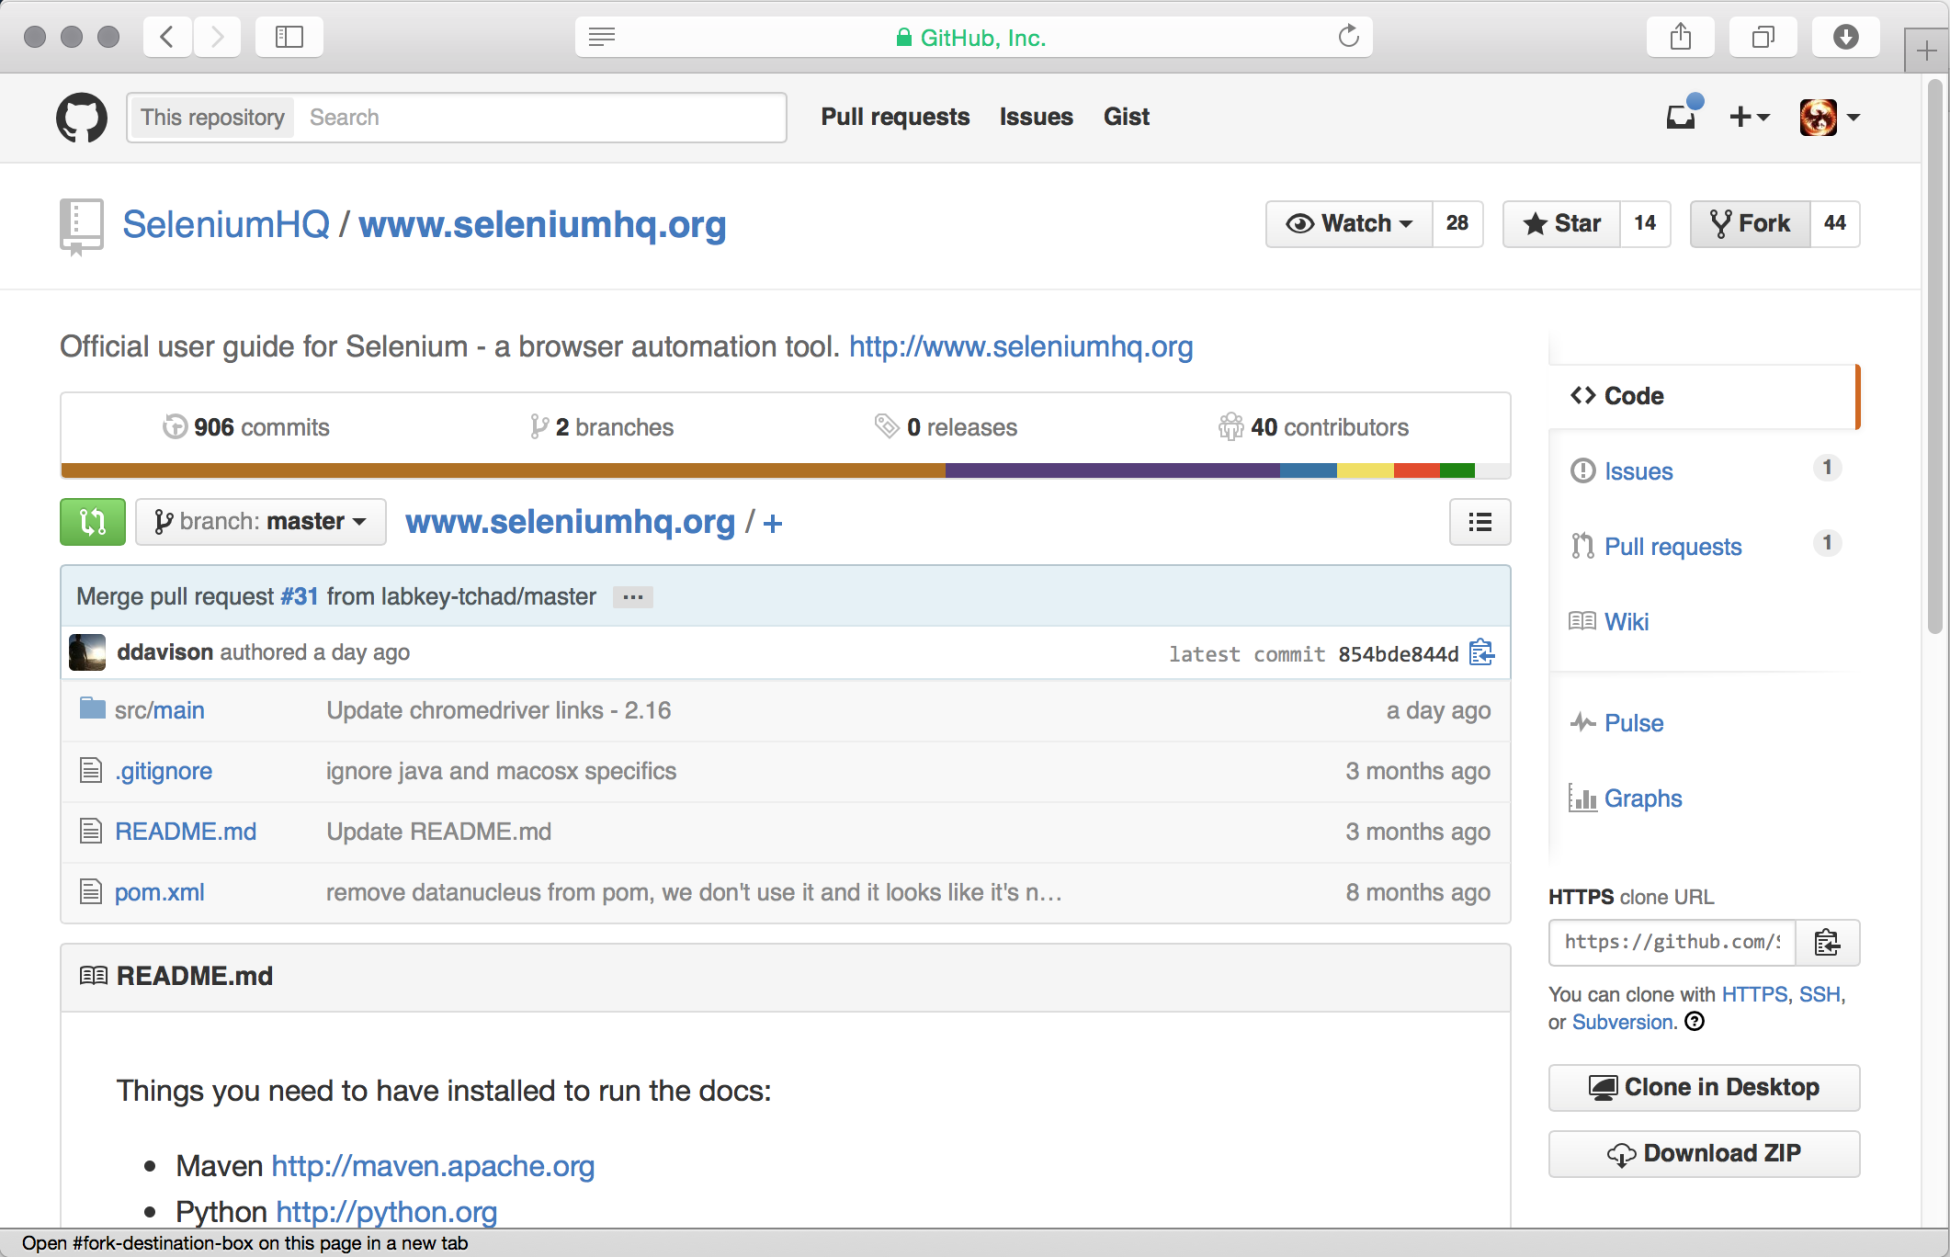
Earlier in this chapter, we cloned a copy of the existing SeleniumHQ website. Hopefully, you have already examined and played around with it a bit. If we now want to take the next step and start contributing, we will need to turn our clone into a fork. The process is very simple.
First of all, go to the GitHub page for the documentation and then click on the Fork button:
GitHub will then do all the work for you. When it has finished, it will load the forked version of the site:
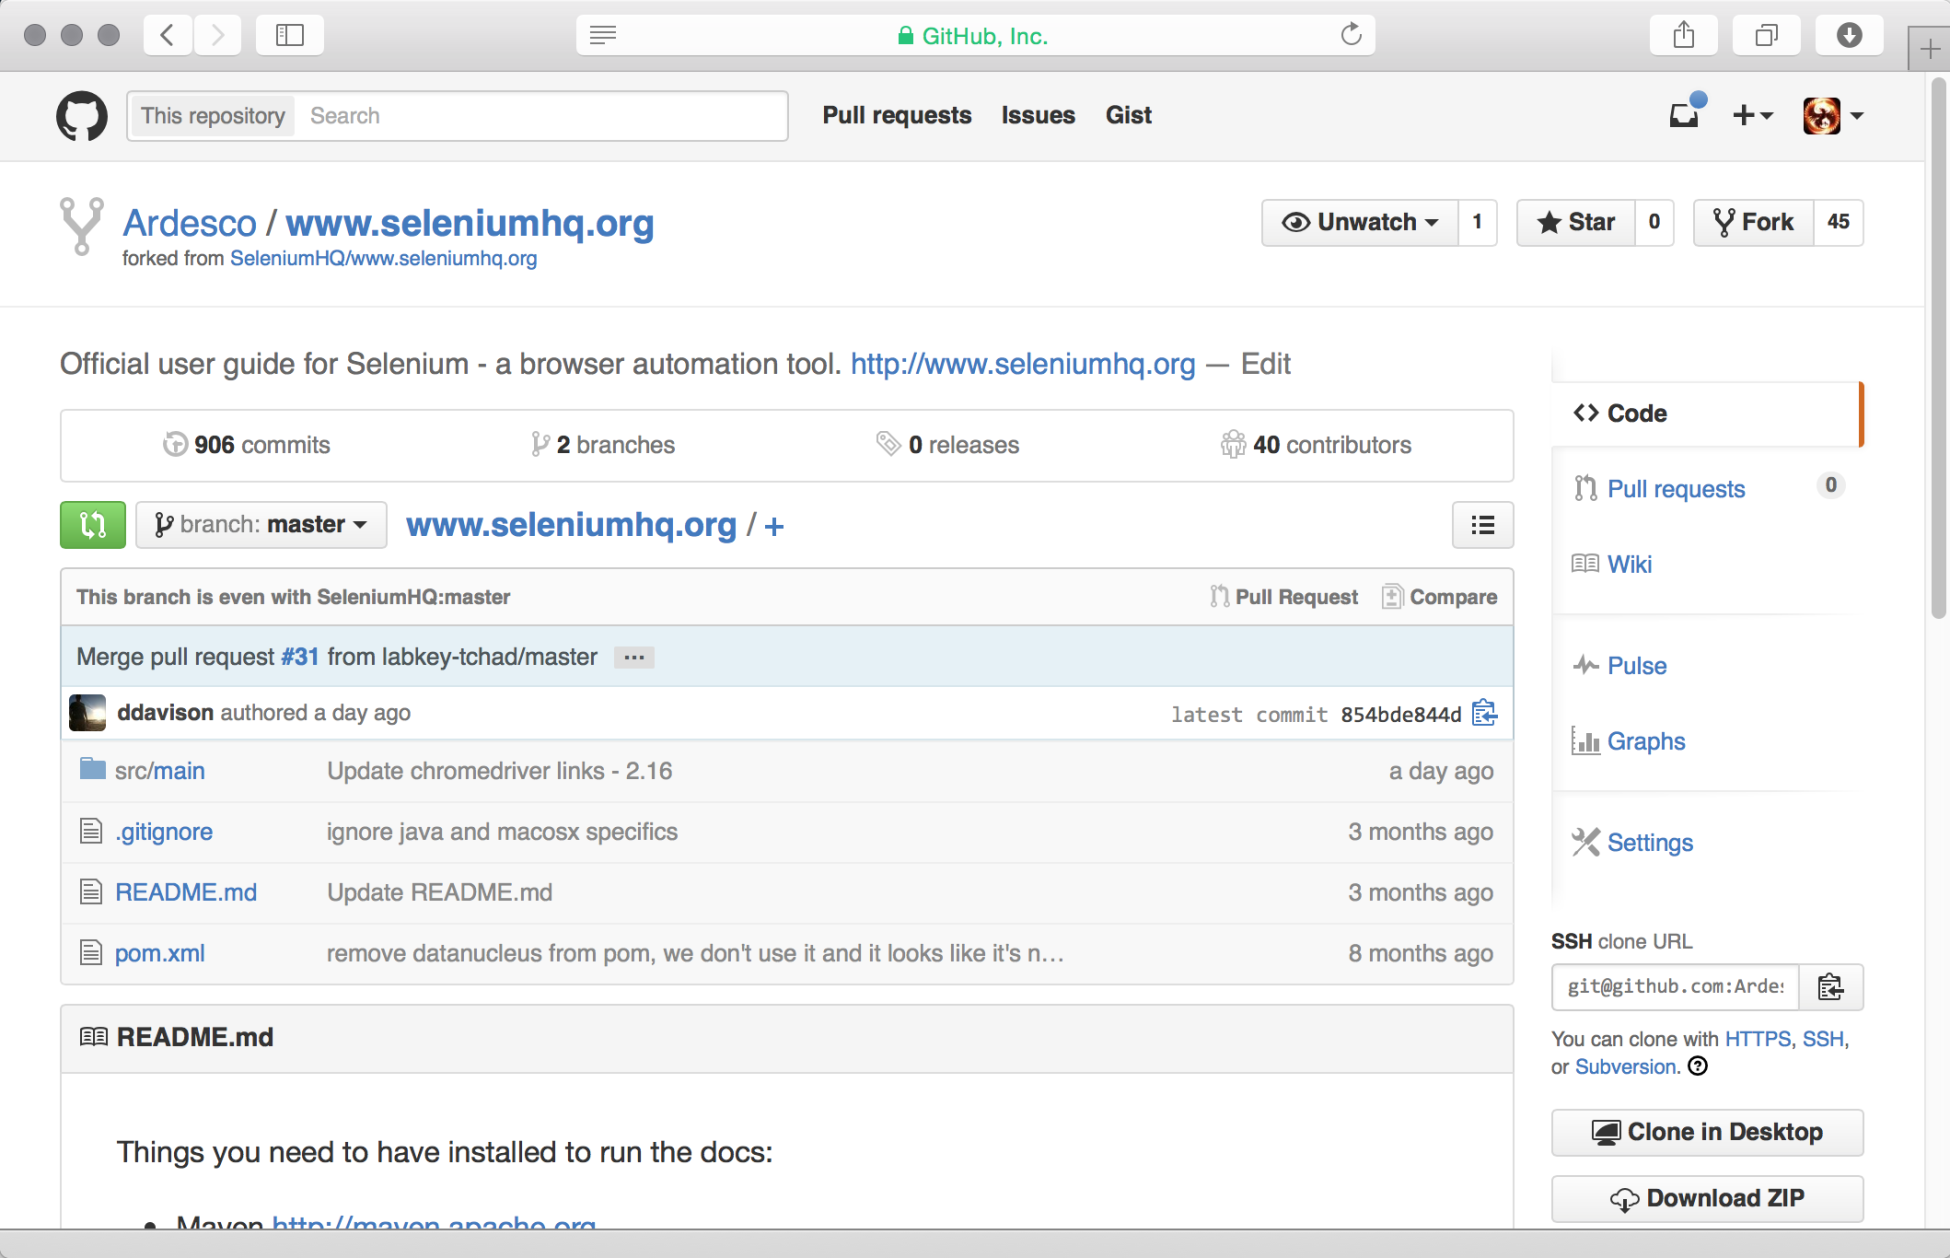
Note that on the right-hand side, you now have your own unique clone URL. There are two things that you can do at this point:
- Delete your existing local copy of the documentation and then clone your fork
- Change your
remoteto point at the new fork on GitHub
Deleting your local copy is easy. Just go to the parent directory that you originally ran your clone command in and use the following command:
rm -r www.seleniumhq.orggit clone <your personal clone url>
You will now have the forked version of the Selenium website cloned. You just need to set up an upstream remote, as shown in the following section.
Note
Be very careful whenever you use an rm -r or rm -rf command. The -r stands for recursive (that is, it will delete the directory that you have told it to delete along with the files and directories in the original directory that you specified). The -f stands for force. It will do everything it can to delete the files. If you aren't paying attention and you run the command with elevated privileges, it's very easy to remove the wrong thing, or even everything on your hard drive by mistake!
Let's assume that you have some changes that you don't want to lose. The easiest thing to do in this situation is just change your remote.
We are going to do this in a couple of steps. First of all, we need to have a look at what we currently have set up in Git. We can do this by using the following command to list our remotes:
git remote -vYou will get something that looks like this:

We are going to change the existing remote to upstream. This will allow us to pull down any changes that are made in SeleniumHQ's copy of the code:
git remote add upstream https://github.com/SeleniumHQ/www.seleniumhq.org.gitIf you check your remotes again, you will now have an upstream and an origin both pointing at the same thing:

Now, if you want to get your fork up-to-date with SeleniumHQ's copy of the code, all you need to do is use the following command:
git fetch upstreamgit rebase upstream/master
This will pull down the latest code from the origin and then rebase it onto your current branch (in this case, origin/master).
Note
We have used quite a few different Git commands so far; if you haven't used Git before you may be getting a bit lost. There is a good basic tutorial available at https://git-scm.com/docs/gittutorial which should give you most of the basics. Then you'll probably want to understand rebasing: https://git-scm.com/book/en/v2/Git-Branching-Rebasing. Git is a very powerful version control system, but it can be a little overwhelming at first if you don't know where to get more information.
The final step is to change our remote to point at the fork. First, copy the clone URL for your fork and then run the following command:
git remote set-url origin
[email protected]:Ardesco/www.seleniumhq.org.git
Your remotes should now look like this:

You are now ready to make changes to the documentation. When you are happy with a change, you can create a pull request to submit it back to the Selenium developers.
Note
It's always useful to create a new branch for the changes you make. When you perform a pull request, it is not for a static piece of code. You are requesting that the branch that you are currently working on should be pulled in. This means that if you make any changes to the branch after making your pull request, they will also be added to the list of things that are being offered. Having a separate branch for each pull request allows you to easily isolate changes.
So far, we have been looking at the old site. Also, we did briefly mention earlier that there is a new documentation project. If you want to add documentation, this is probably the best place to start. To do this, you will need to clone the new documentation project (for more information, visit https://github.com/SeleniumHQ/docs.git).
The process is basically identical to the one that we followed to clone the Selenium website. Once you are done, you are all ready to make changes to the document. Why not start updating the documentations and creating pull requests today?