Search icon CANCEL
Subscription
0
Cart icon
Your Cart (0 item)
Close icon
You have no products in your basket yet
Save more on your purchases! discount-offer-chevron-icon
Savings automatically calculated. No voucher code required.
Arrow left icon
All Products
Best Sellers
New Releases
Books
Videos
Audiobooks
Learning Hub
Newsletter Hub
Free Learning
Arrow right icon
timer SALE ENDS IN
0 Days
:
00 Hours
:
00 Minutes
:
00 Seconds
Arrow up icon
GO TO TOP
Arduino for Secret Agents

You're reading from   Arduino for Secret Agents Transform your tiny Arduino device into a secret agent gadget to build a range of espionage projects with this practical guide for hackers

Arrow left icon
Product type Paperback
Published in Nov 2015
Publisher
ISBN-13 9781783986088
Length 170 pages
Edition 1st Edition
Languages
Tools
Concepts
Arrow right icon
Author (1):
Arrow left icon
Marco Schwartz Marco Schwartz
Author Profile Icon Marco Schwartz
Marco Schwartz
Arrow right icon
View More author details
Toc

Table of Contents (16) Chapters Close

Arduino for Secret Agents
Credits
About the Author
About the Reviewer
www.PacktPub.com
Preface
1. A Simple Alarm System with Arduino FREE CHAPTER 2. Creating a Spy Microphone 3. Building an EMF Bug Detector 4. Access Control with a Fingerprint Sensor 5. Opening a Lock with an SMS 6. Building a Cloud Spy Camera 7. Monitoring Secret Data from Anywhere 8. Creating a GPS Tracker with Arduino 9. Building an Arduino Spy Robot Index

Testing the microphone


We are now going to make sure that the microphone is working correctly and especially check whether it can record voice levels, for example. I had a problem when I was testing the prototype of this project with a microphone that wasn't amplified; I just couldn't hear anything on the recording.

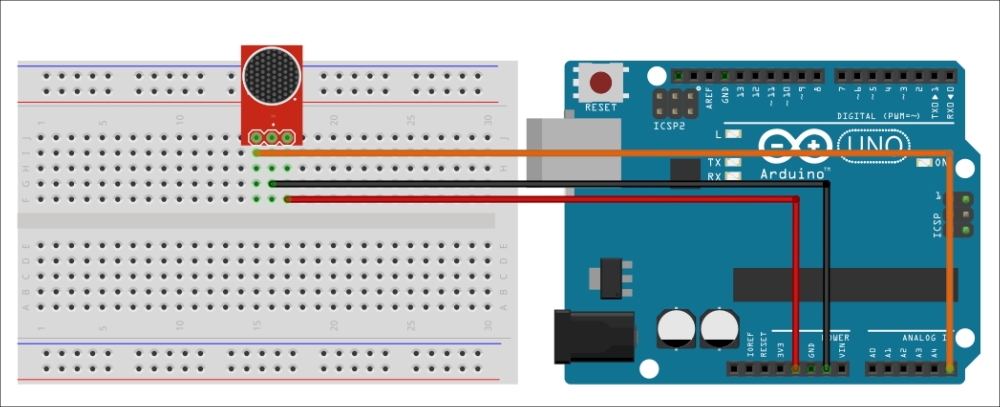
The first step is to plug the microphone into the Arduino board. There are 3 pins to connect the microphone: VCC, GND, and AUD. Connect VCC to the Arduino 5V pin, GND to the Arduino GND pin, and AUD to the Arduino analog pin A5.

The following is a schematic to help you out:

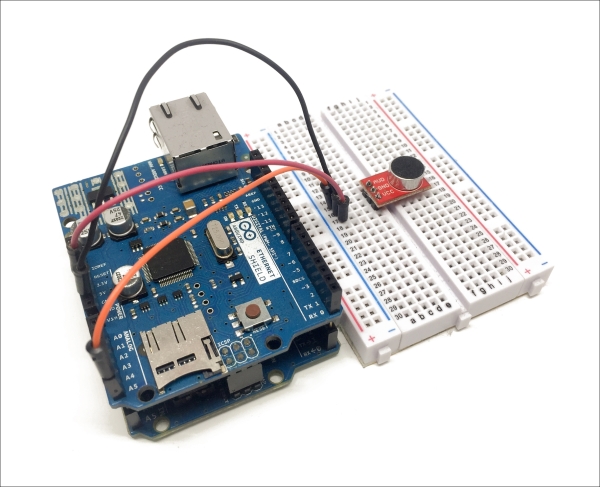
Here is an image of the final result:

We are now going to use a very simple sketch to read out the signal from the microphone and print it on the serial monitor:

// Microphone test

void setup() {
 
  // Start Serial
  Serial.begin(115200);
}

void loop() {
 
  // Read the input on analog pin 5:
  int sensorValue = analogRead(A5);
 
  // Print out the value you read:
  Serial.println(sensorValue);
  delay(1); ...
lock icon The rest of the chapter is locked
Register for a free Packt account to unlock a world of extra content!
A free Packt account unlocks extra newsletters, articles, discounted offers, and much more. Start advancing your knowledge today.
Unlock this book and the full library FREE for 7 days
Get unlimited access to 7000+ expert-authored eBooks and videos courses covering every tech area you can think of
Renews at £13.99/month. Cancel anytime
Visually different images