
Setting up the folder structure
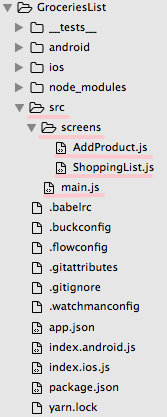
Our app only comprises of two screens: Shopping List and Add Products. Since the state for such a simple app should be easy to manage, we won't add any library for state management (for example, Redux), as we will send the shared state through the navigation component. This should make our folder structure rather simple:
We have to create an src folder where we will store all our React code. The self-created file index.js will have the following code:
/*** index.js ***/

import { AppRegistry } from 'react-native';
import App from './src/main';
AppRegistry.registerComponent('GroceriesList', () => App);
In short, these files will import the common root code for our app, store it in a variable named App and later pass this variable to the AppRegistry through the registerComponent method. AppRegistry is the component to which we should register our root components. Once we do this, React Native will generate a JS bundle for our app and then run the app when it's ready by invoking AppRegistry.runApplication.
Most of the code we will be writing, will be placed inside the src folder. For this app, we will create our root component (main.js) in this folder, and a screens subfolder, in which we will store our two screens (ShoppingList and AddProduct).
Now let's install all the initial dependencies for our app before continue coding. In our project's root folder, we will need to run the following command:
npm installRunning that command will install all the basic dependencies for every React Native project. Let's now install the three packages we will be using for this specific app:
npm install native-base --save
npm install react-native-prompt-android --save
npm install react-navigation --save
Further ahead in this chapter, we will explain what each package will be used for.