Spark Cluster on Google Compute Engine - DataProc
Cloud Dataproc is a Spark and Hadoop service running on Google Compute Engine. It is a managed service. Cloud Dataproc automation helps create clusters quickly, manage them easily, and save money by turning clusters off when you don't need them.
In this section, we will learn how to create a Spark cluster using DataProc and running a Sample app on it.
Make sure that you have created a Google Compute Engine account and installed Google Cloud SDK (https://cloud.google.com/sdk/gcloud/).
Hadoop and Spark Versions
DataProc supports the following Hadoop and Spark versions. Note that this will change with time as new versions come out:
- Spark 1.5.2
- Hadoop 2.7.1
- Pig 0.15.0
- Hive 1.2.1
- GCS connector 1.4.3-hadoop2
- BigQuery connector 0.7.3-hadoop2 (https://github.com/GoogleCloudPlatform/bigdata-interop)
Note
For more information, go to http://cloud.google.com/dataproc-versions.
In the following steps, we will use Google Cloud Console (the user interface used to create a Spark Cluster and submit a job).
Creating a Cluster
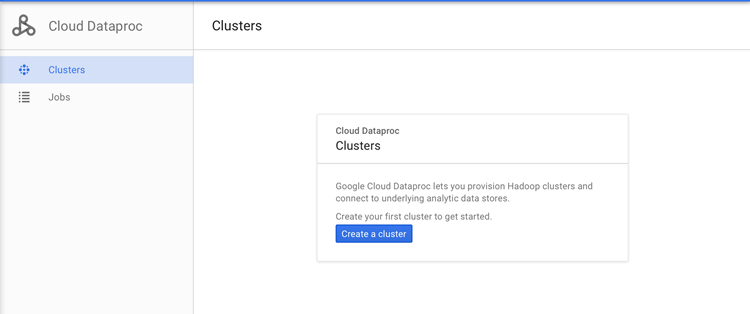
You can create a Spark cluster by going to the Cloud Platform Console. Select the project, and then click Continue to open the Clusters page. You would see the Cloud Dataproc clusters that belong to your project, if you have created any.
Click on the Create a cluster button to open the Create a Cloud Data pros cluster page. Refer to the following screenshot:
Once you click on Create a cluster, a detailed form, which is as shown in the following screenshot, shows up:
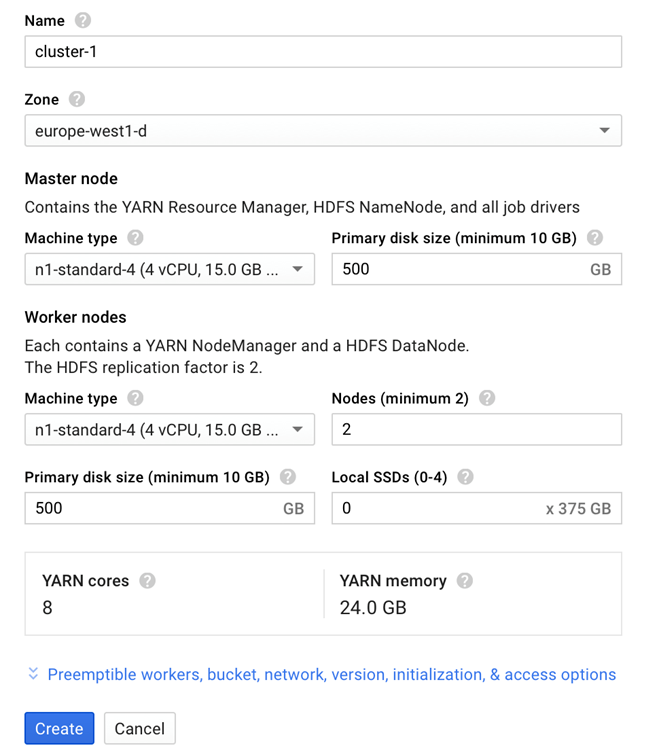
The previous screenshot shows the Create a Cloud Dataproc cluster page with the default fields automatically filled in for a new cluster-1 cluster. Take a look at the following screenshot:
You can expand the workers, bucket, network, version, initialization, and access options panel to specify one or more worker nodes, a staging bucket, network, initialization, the Cloud Dataproc image version, actions, and project-level access for your cluster. Providing these values is optional.
The default cluster is created with no worker nodes, an auto-created staging bucket, and a default network It also has the latest released Cloud Dataproc image version. You can change these default settings:
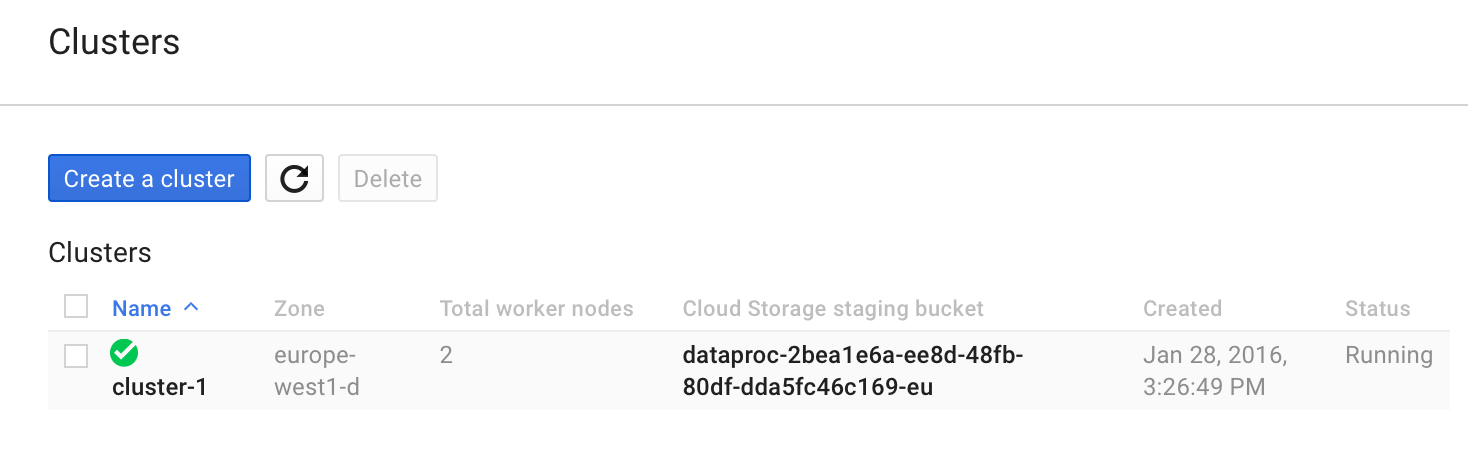
Once you have configured all fields on the page, click on the Create button to create the cluster. The cluster name created appears on the Clusters page. The status is updated to Running once the spark cluster is created.
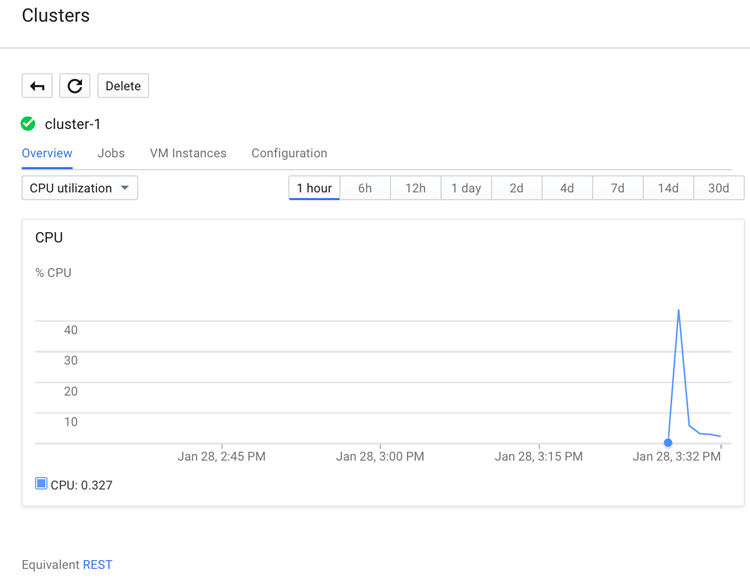
Click on the cluster name created earlier to open the cluster details page. It also has a Overview tab and the CPU utilization graph selected.
You can examine jobs, instances, and so on for the cluster from the other tabs.
Submitting a Job
To submit a job from the Cloud Platform Console to the cluster, go to the Cloud Platform UI. Select the appropriate project and then click on Continue. The first time you submit a job, the following dialog appears:
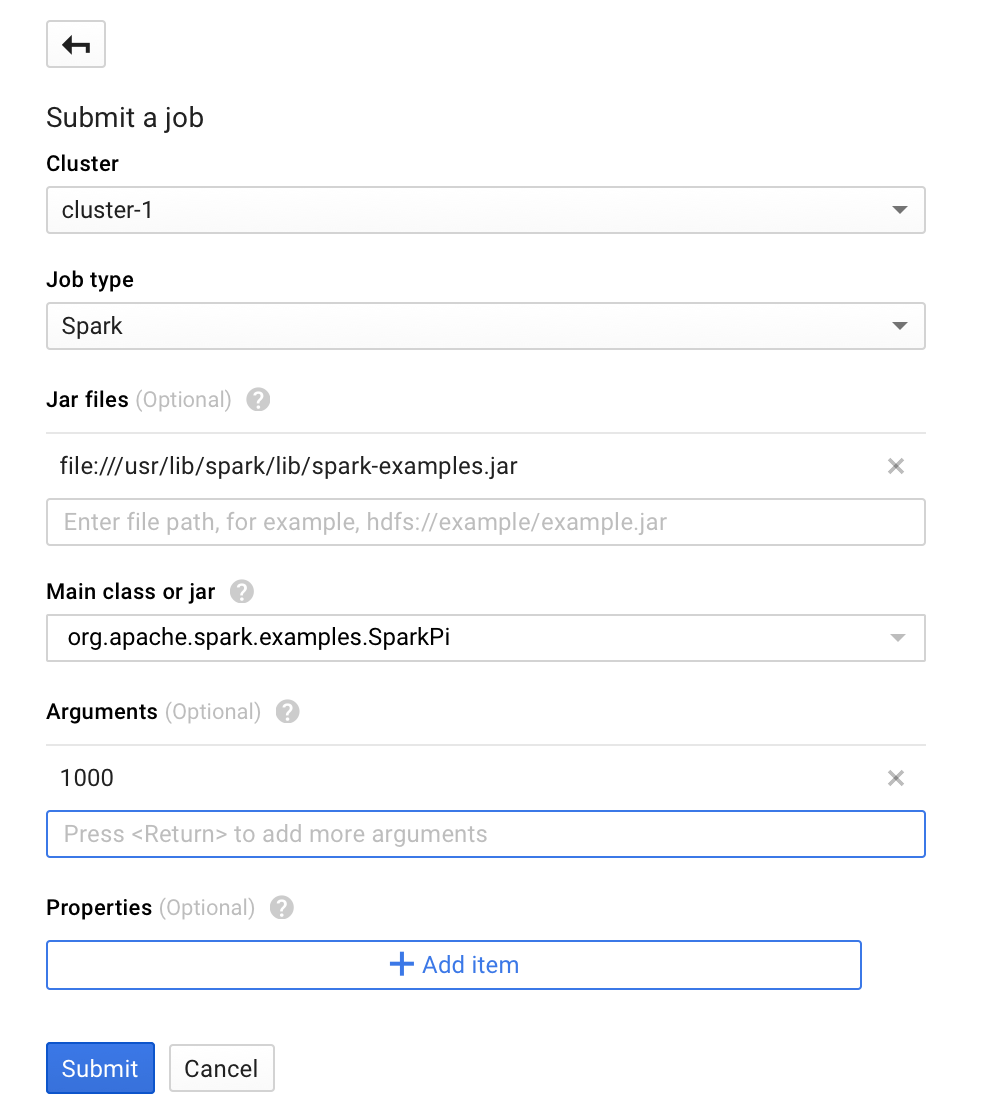
Click on Submit a job:

To submit a Spark sample job, fill the fields on the Submit a job page, as follows:
- Select a cluster name from the cluster list on the screen.
- Set
Job typetoSpark. - Add
file:///usr/lib/spark/lib/spark-examples.jarto Jar files. Here,file:///denotes a HadoopLocalFileSystemscheme; Cloud Dataproc installs/usr/lib/spark/lib/spark-examples.jaron the cluster's master node when it creates the cluster. Alternatively, you can specify a Cloud Storage path (gs://my-bucket/my-jarfile.jar) or anHDFSpath (hdfs://examples/myexample.jar) to one of the custom jars. - Set
Mainclass or jar toorg.apache.spark.examples.SparkPi. - Set
Argumentsto the single argument1000.
Click on Submit to start the job.
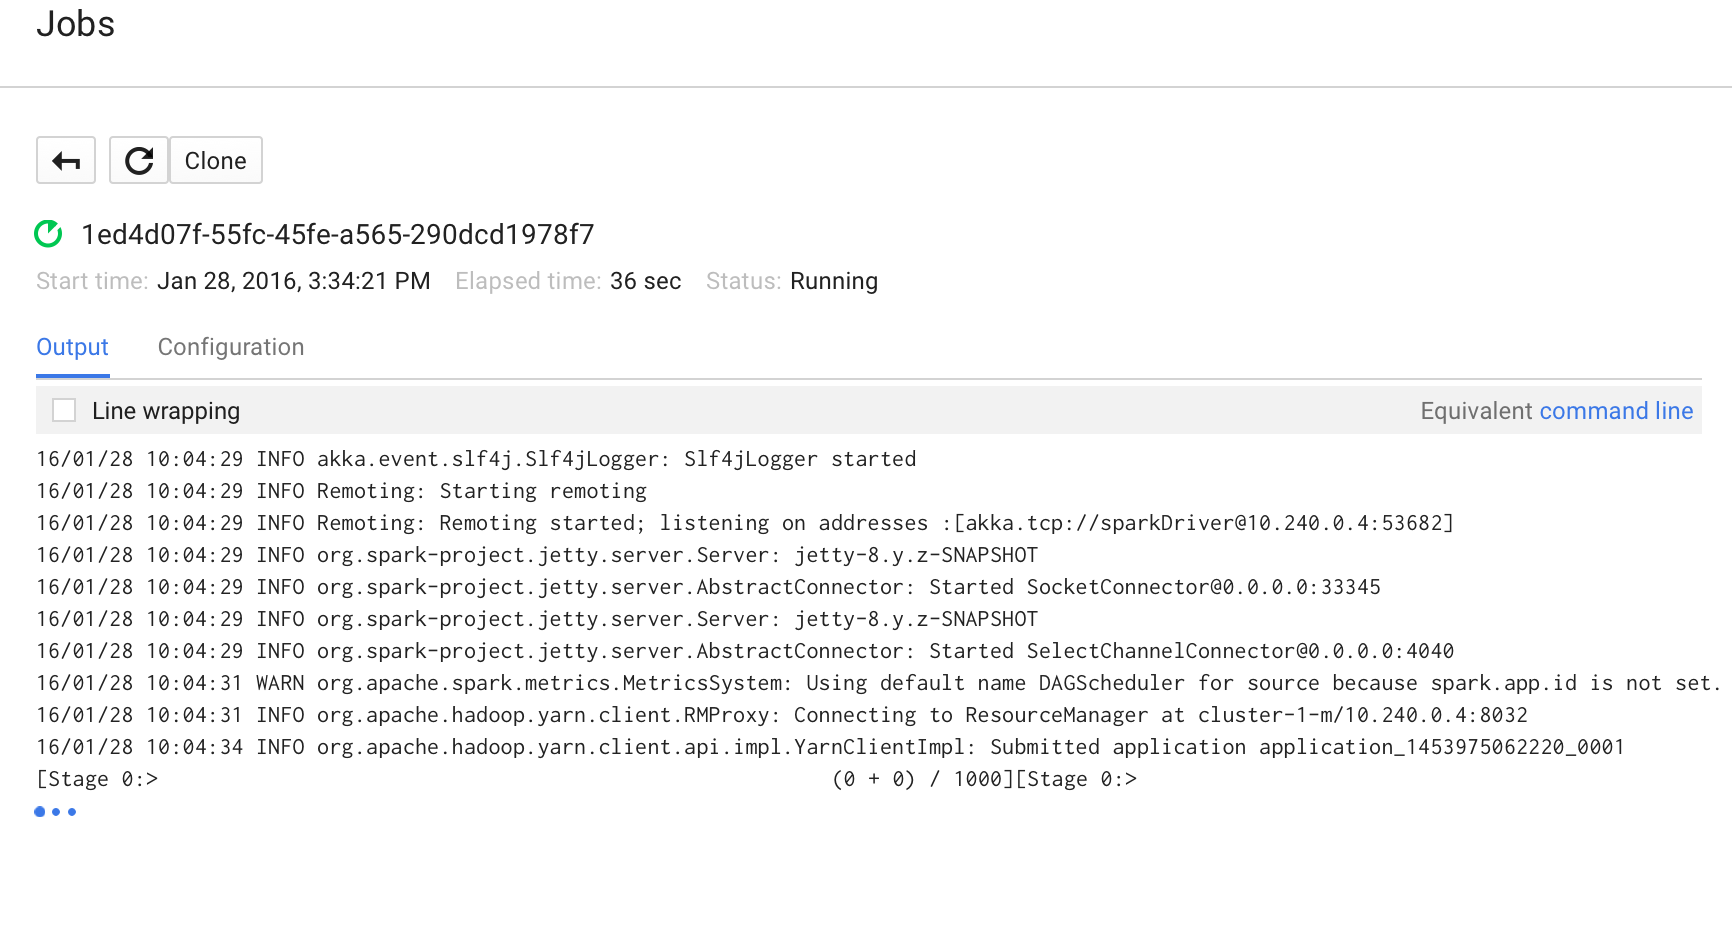
Once the job starts, it is added to the Jobs list. Refer to the following screenshot:
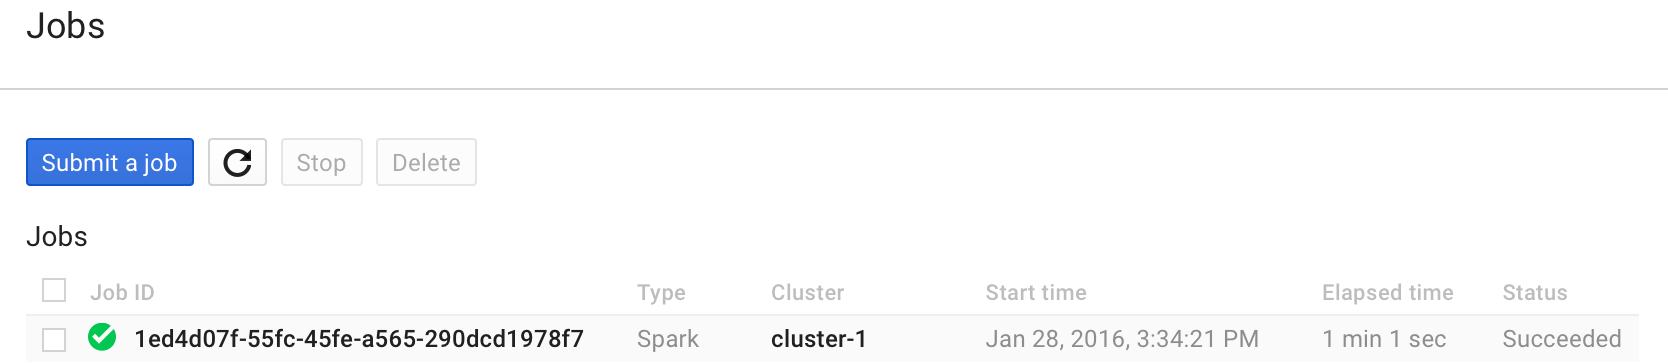
Once the job is complete, its status changes:
Take a look at the job output as listed here.
Execute the command from the terminal with the appropriate Job ID.
In our case, the Job ID was 1ed4d07f-55fc-45fe-a565-290dcd1978f7 and project-ID was rd-spark-1; hence, the command looks like this:
$ gcloud beta dataproc --project=rd-spark-1 jobs wait 1ed4d07f-
    55fc-45fe-a565-290dcd1978f7
The (abridged) output is shown here:
Waiting for job output...
16/01/28 10:04:29 INFO akka.event.slf4j.Slf4jLogger: Slf4jLogger
    started
16/01/28 10:04:29 INFO Remoting: Starting remoting
...
Submitted application application_1453975062220_0001
Pi is roughly 3.14157732
You can also SSH into the Spark Instance and run spark-shell in the interactive mode.