Using Git in the Eclipse IDE
Steps 1 to 3 are already explained in Chapter 1, Salesforce Development and Delivery Process:
- Eclipse installation
- Install the Force.com IDE plugin
- Configure Force.com project in Eclipse
We will continue with the next steps in the following sections.
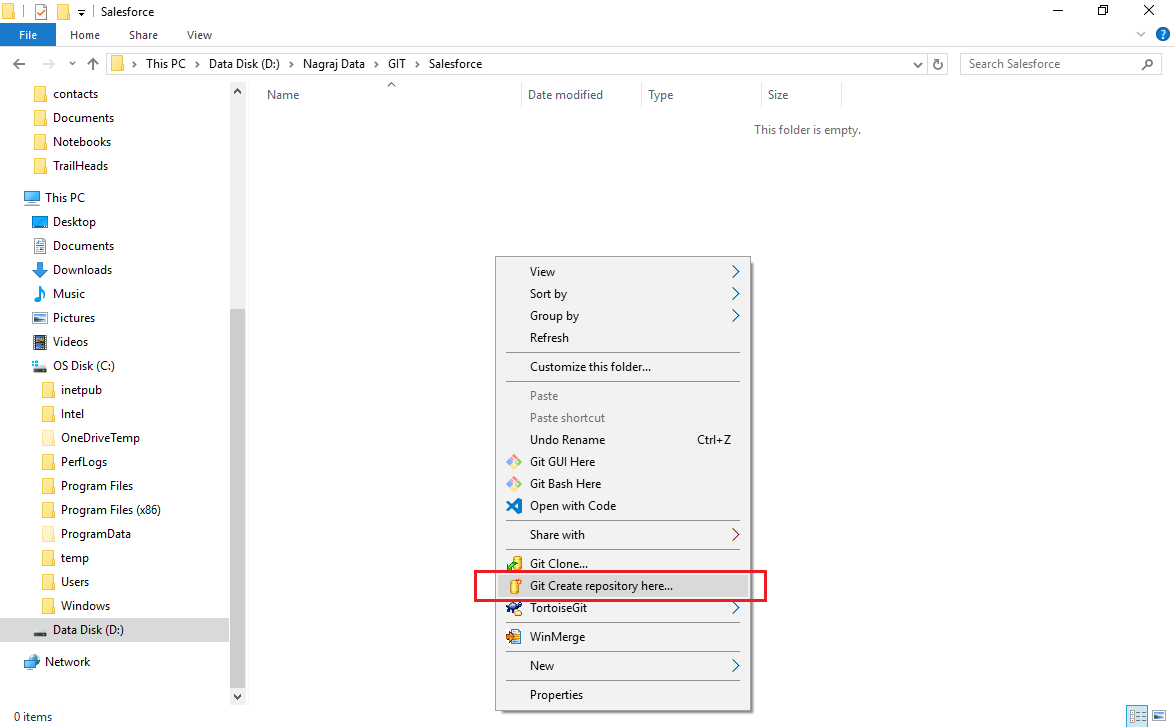
Configuring Git and pushing code to Git
Now we need to configure Git.
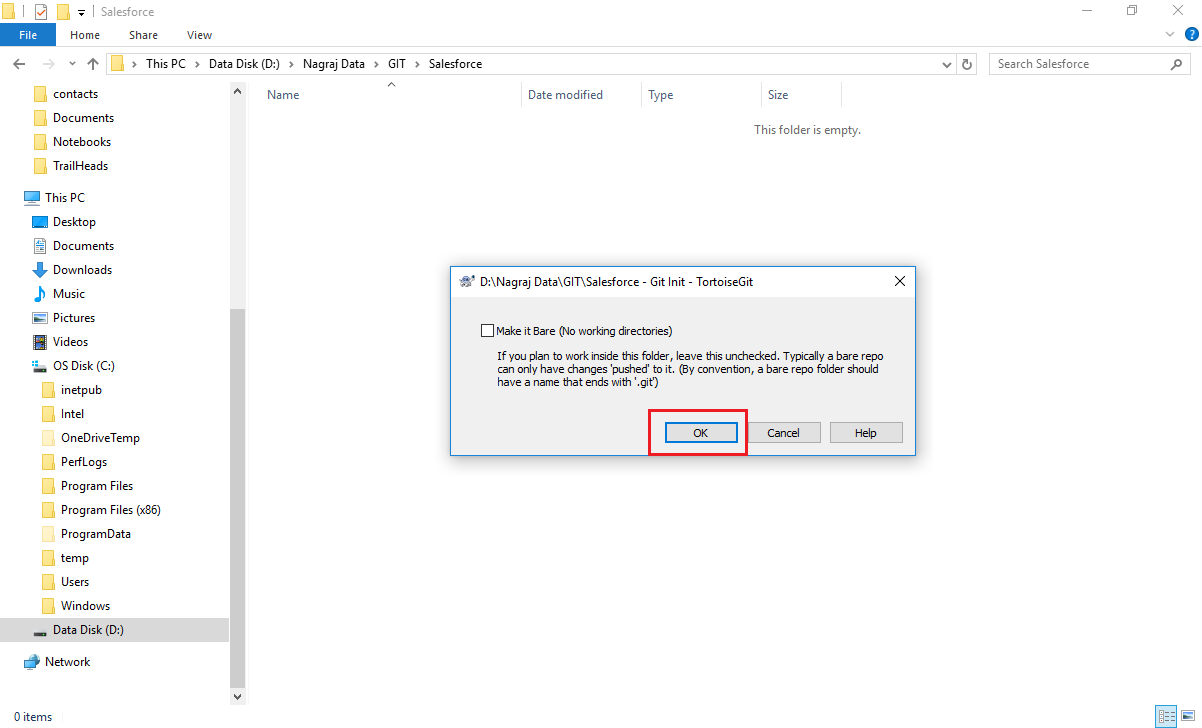
- Create the repository in a new folder by right-clicking on the folder and selecting
Git repository here...:
- Here, we are not selecting the
Make it Bareand click onOK:
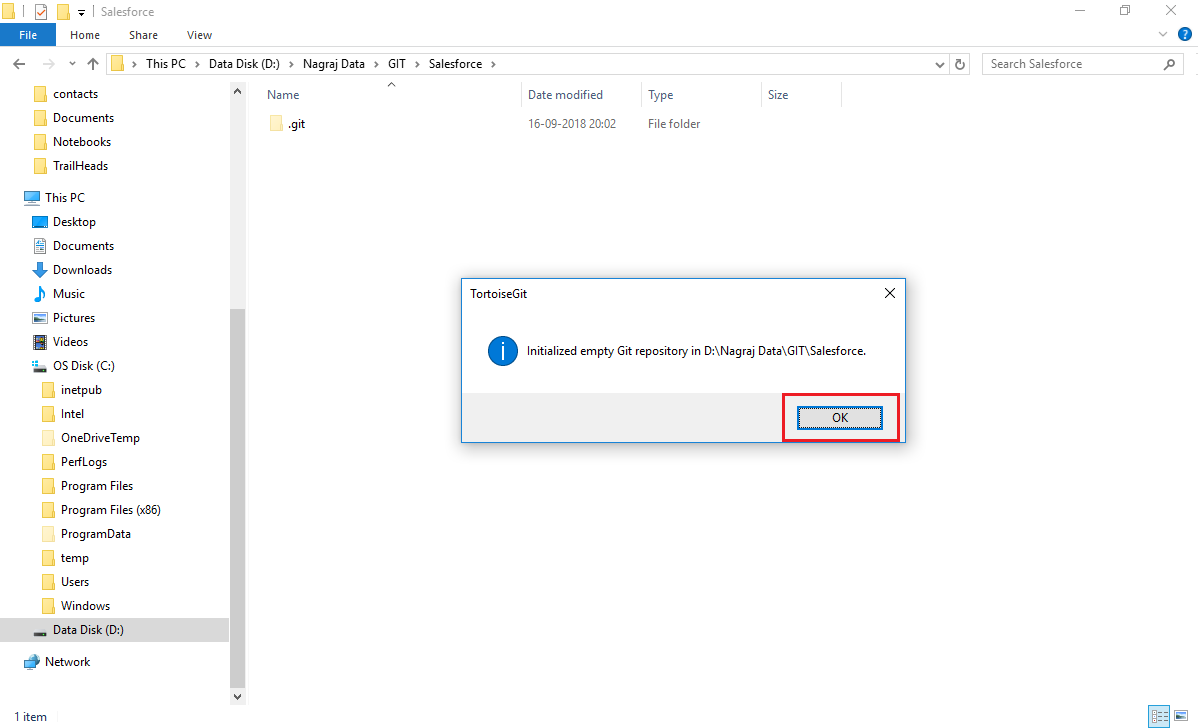
- You will see the next screen. Click on
OK:
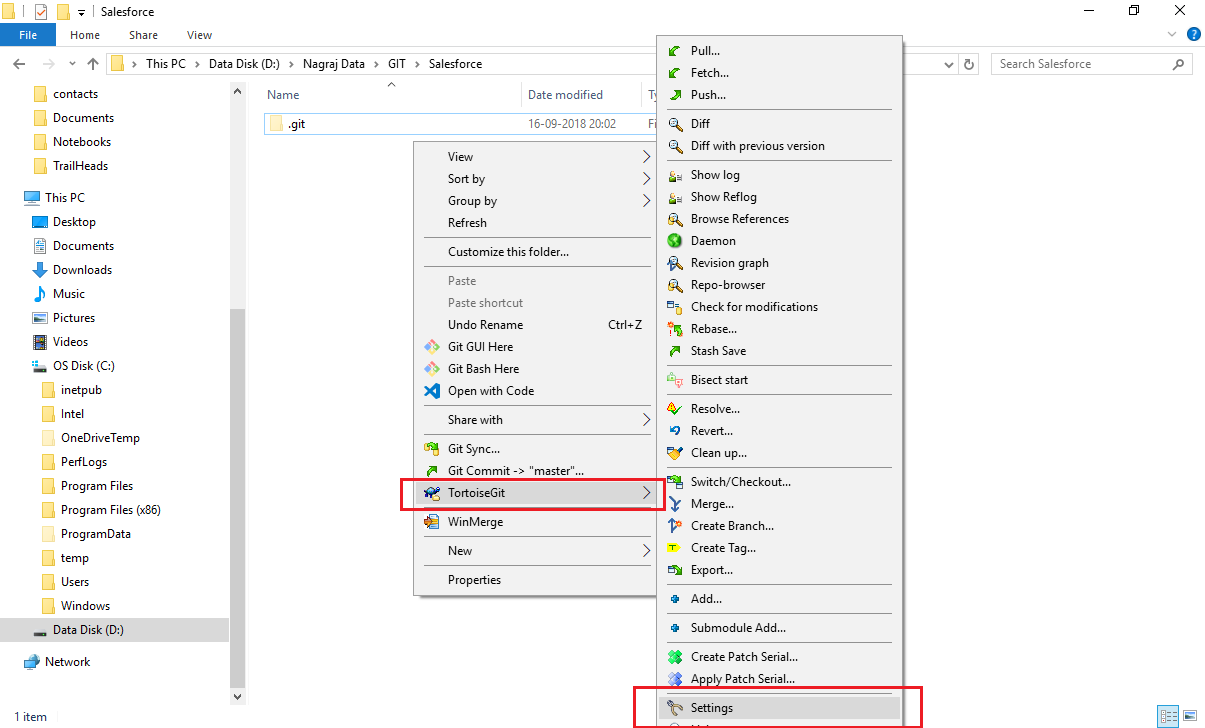
- Right-click on the folder and select
TortoiseGitand click onSettings:
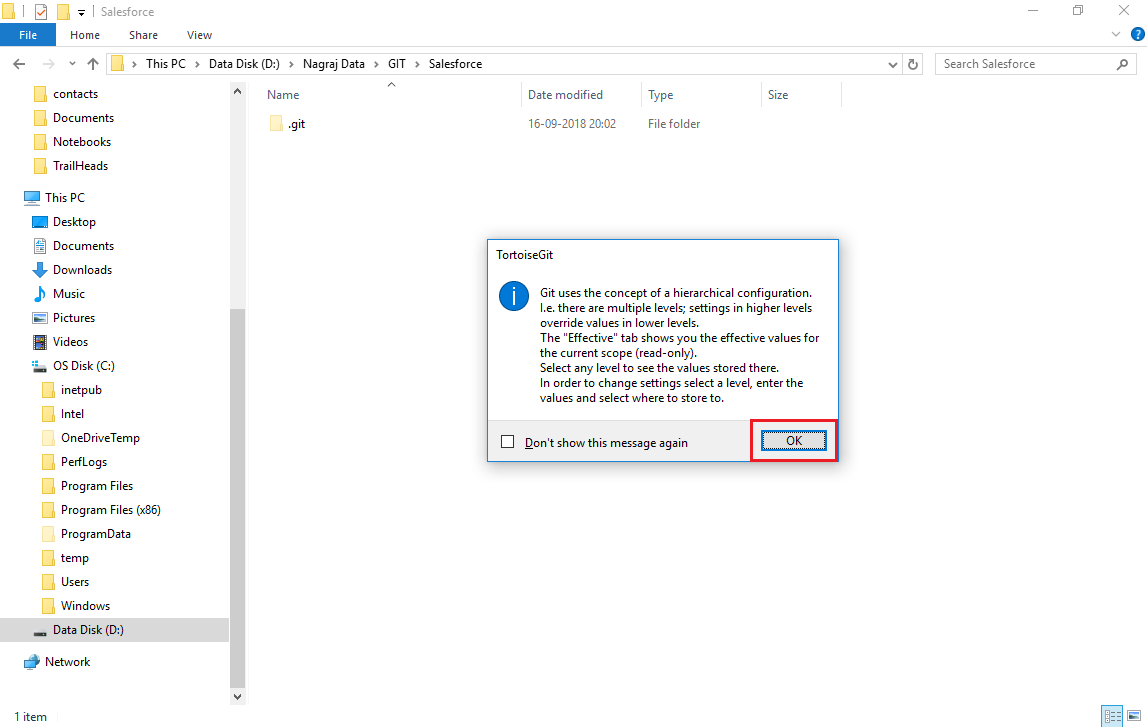
- You will see the next screen. Click on
OK:
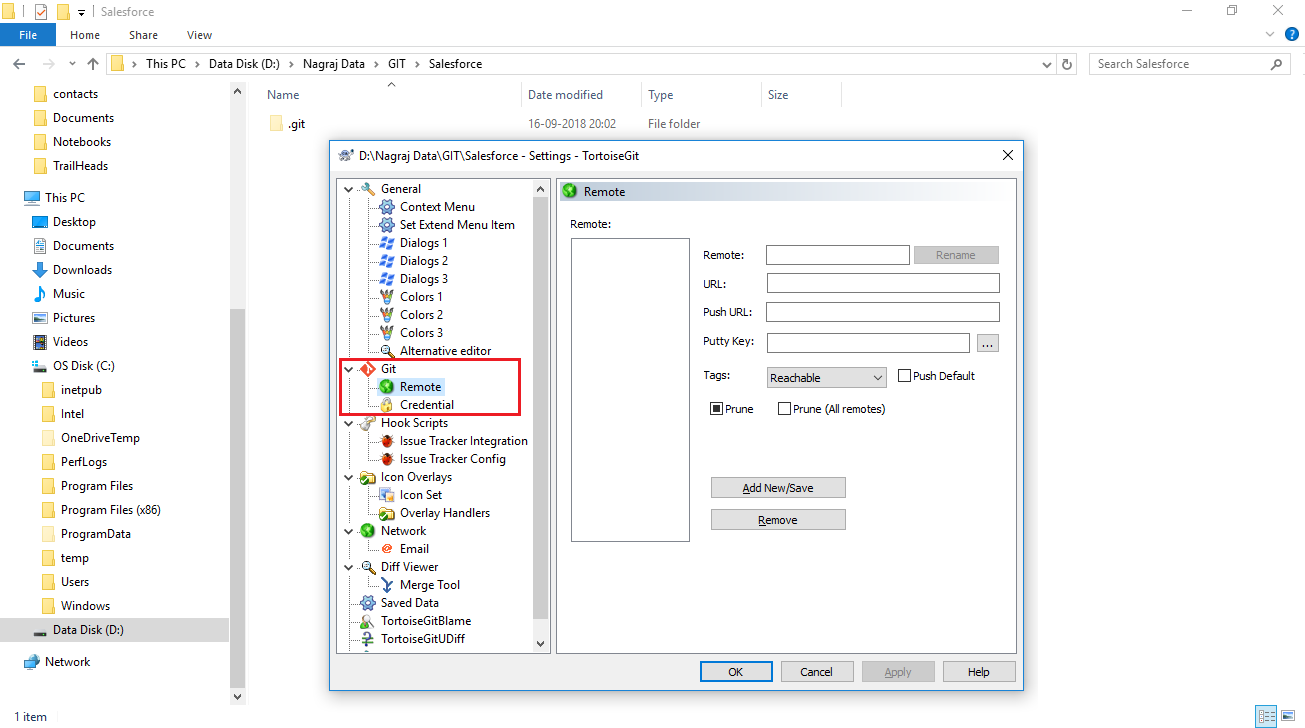
- Select the Git and enter the
NameandEmail:

- You will see the next screen. Select the Git and click on
Remote:
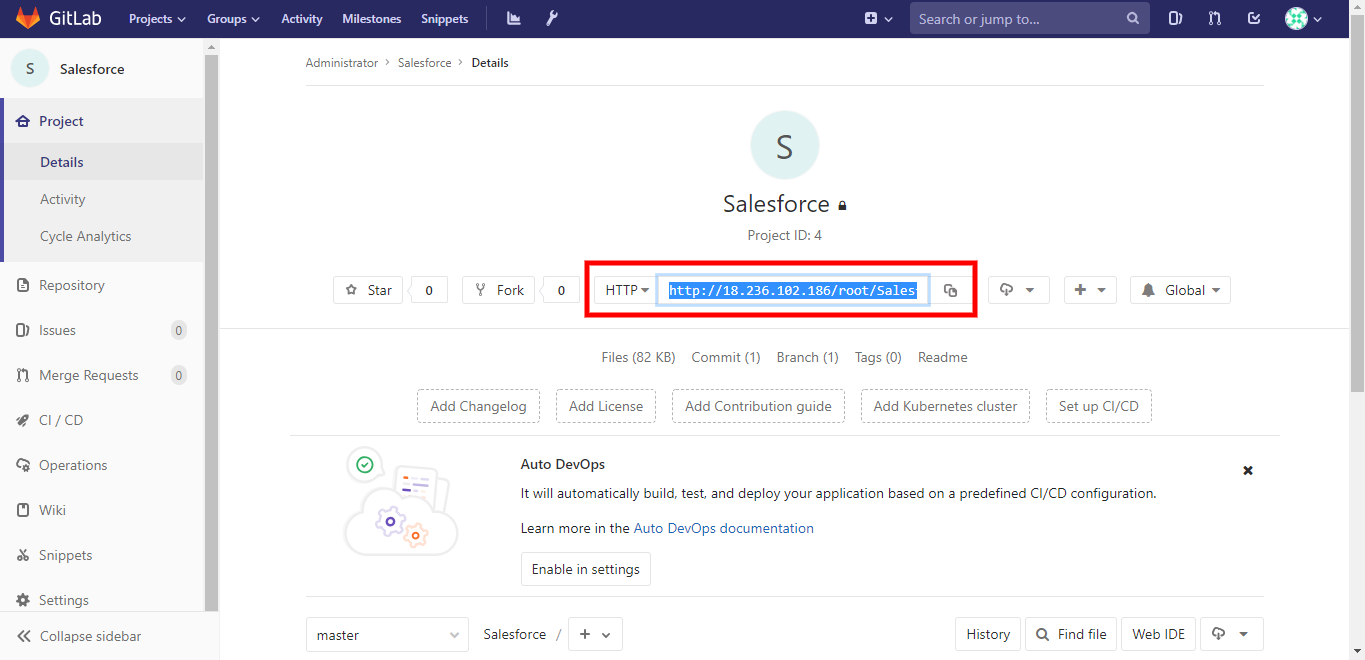
- Open the Git project in the browser and select the project.
- Copy the HTTP URL from the project:
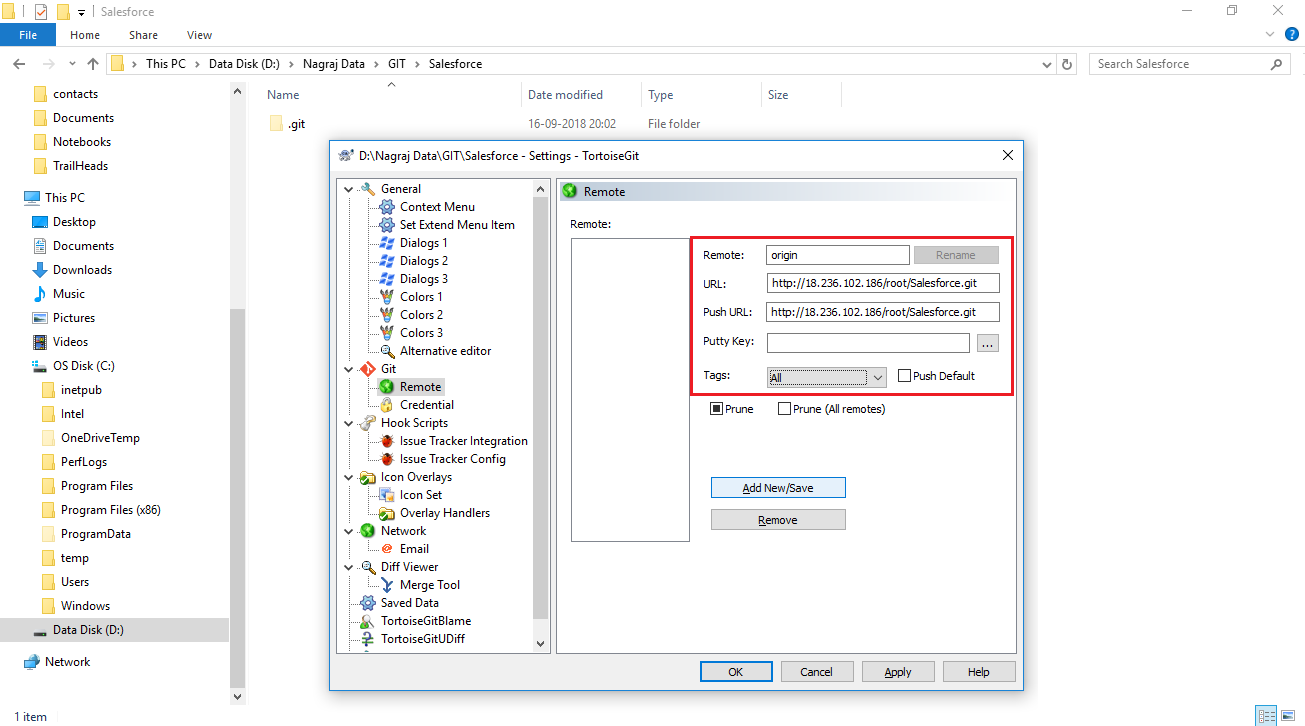
- Enter the copied URL in
URLandPush URL. SelectAllintheTagsfield and click on theAdd New/Savebutton:
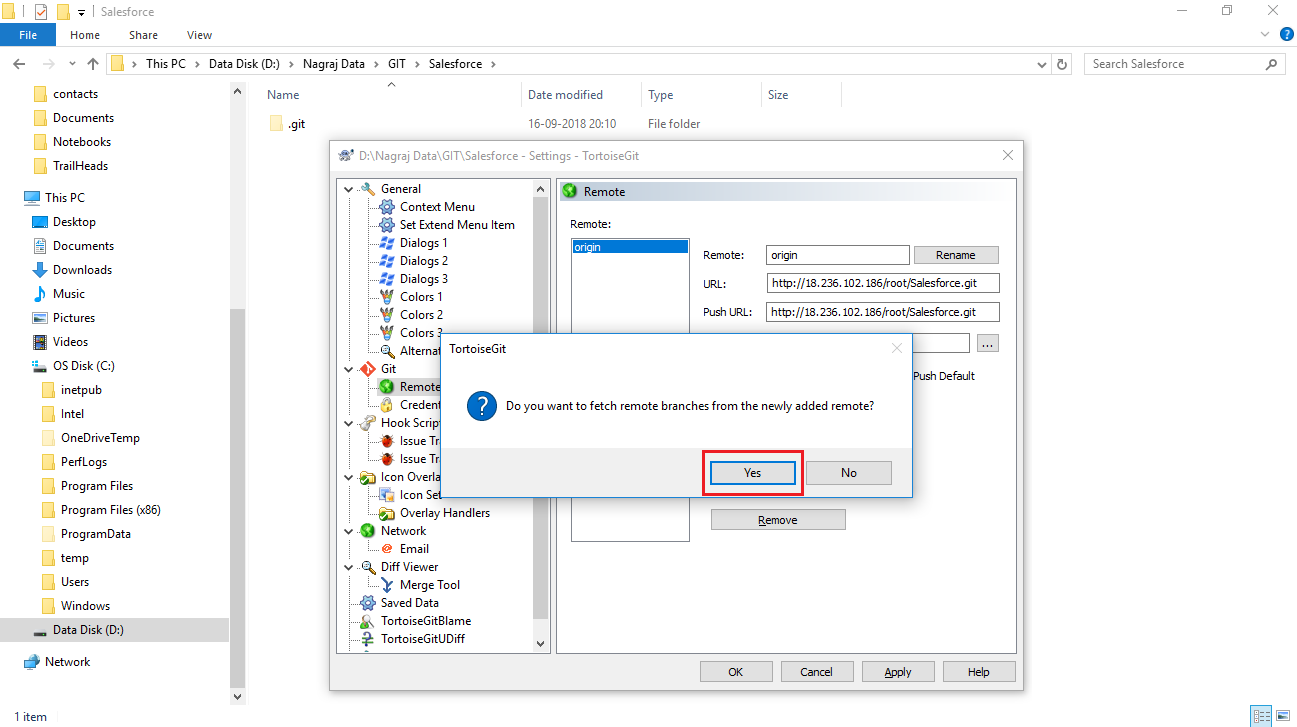
- Click on the
Yesbutton:
- You...