Chapter 6: Chaos Engineering
Activity 7: Chaos Experiment to Check the Resilience to Loss of a Function App
- Delete the OrdersApi function in the portal and observe the issue on the orders.html page by submitting orders. The errors will become visible in the developer tools of your browser:
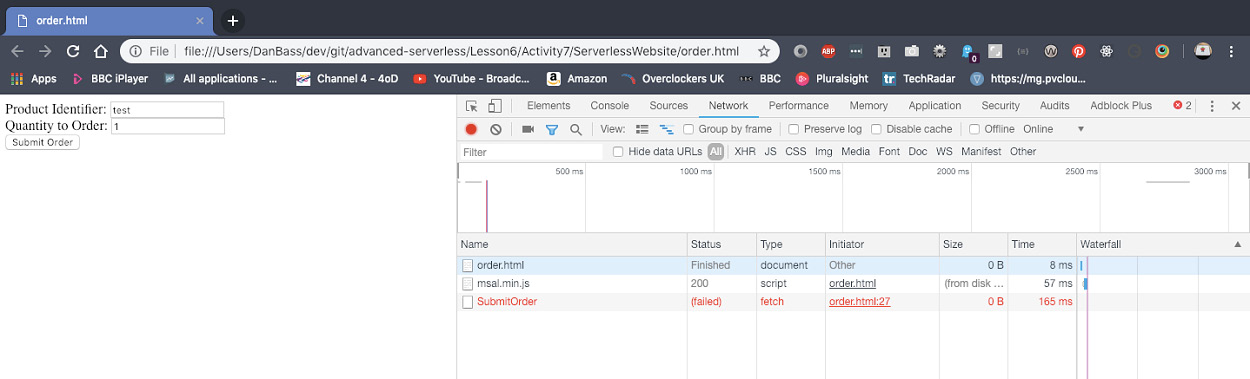
Figure 6.64: Failed request to order api
- Create a backup OrdersApi.
- Create a backup connection string on the orders.html file by using the JavaScript mentioned.
- Navigate to the builds page in Azure DevOps. Click on the build definition you already have, click on the ellipses, and click Clone:
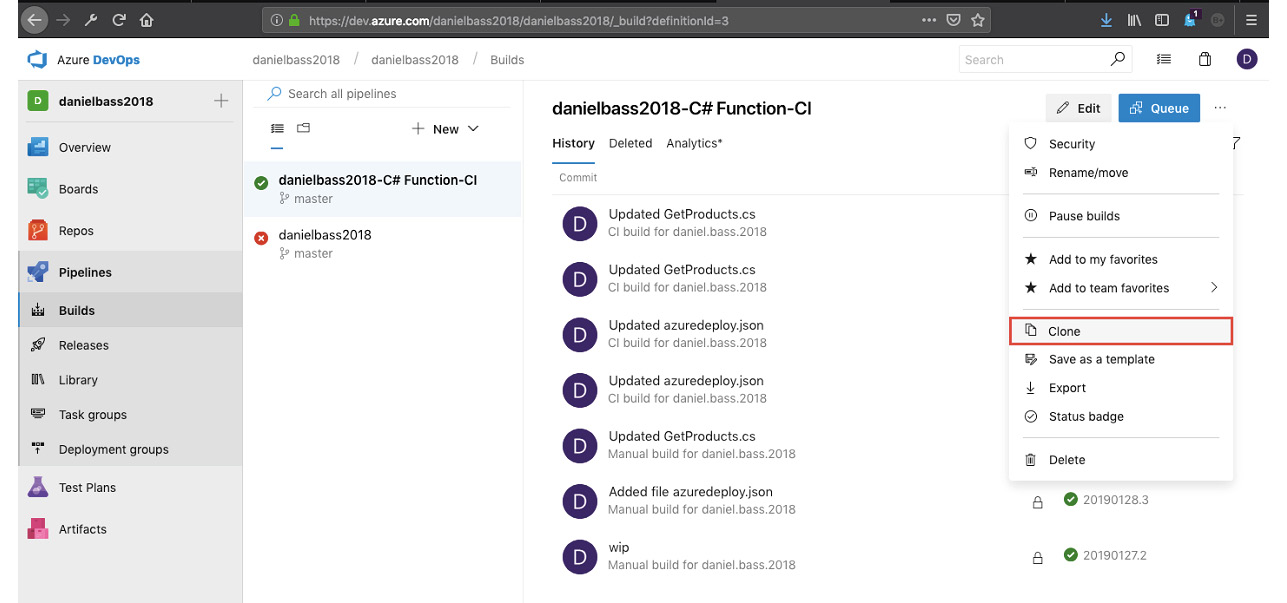
Figure 6.65: Build clone
- You will be taken to your new build pipeline. Click on Pipeline and change the Path to solution or packages.config field to point to the path of the OrdersApi function, Lesson6/Activity7/OrdersApi/*.csproj:

Figure 6.66: Modify the build path to the solution
- Click Save & queue and Save and Queue again. Click the build number to view the build progress:
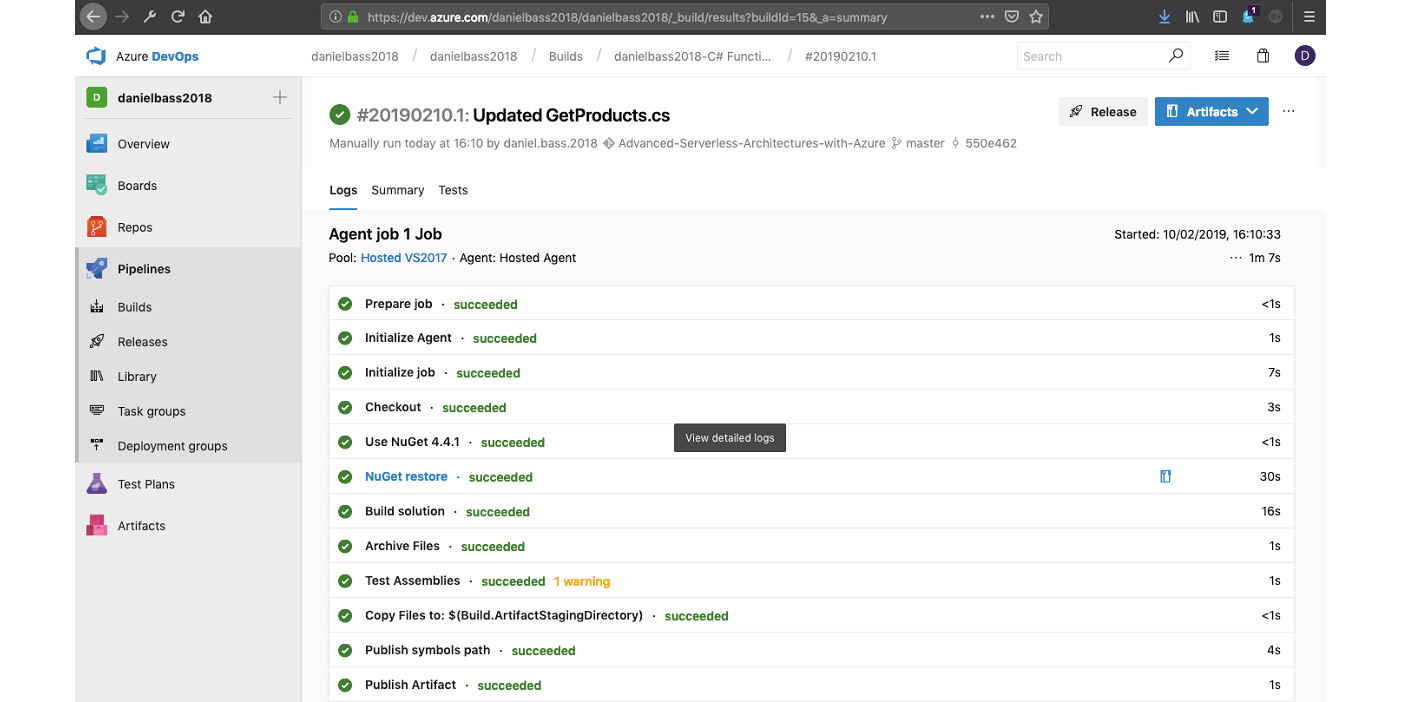
Figure 6.67: Build process successful
- Open the Releases page. Click the ellipses next to the existing release and click Clone:
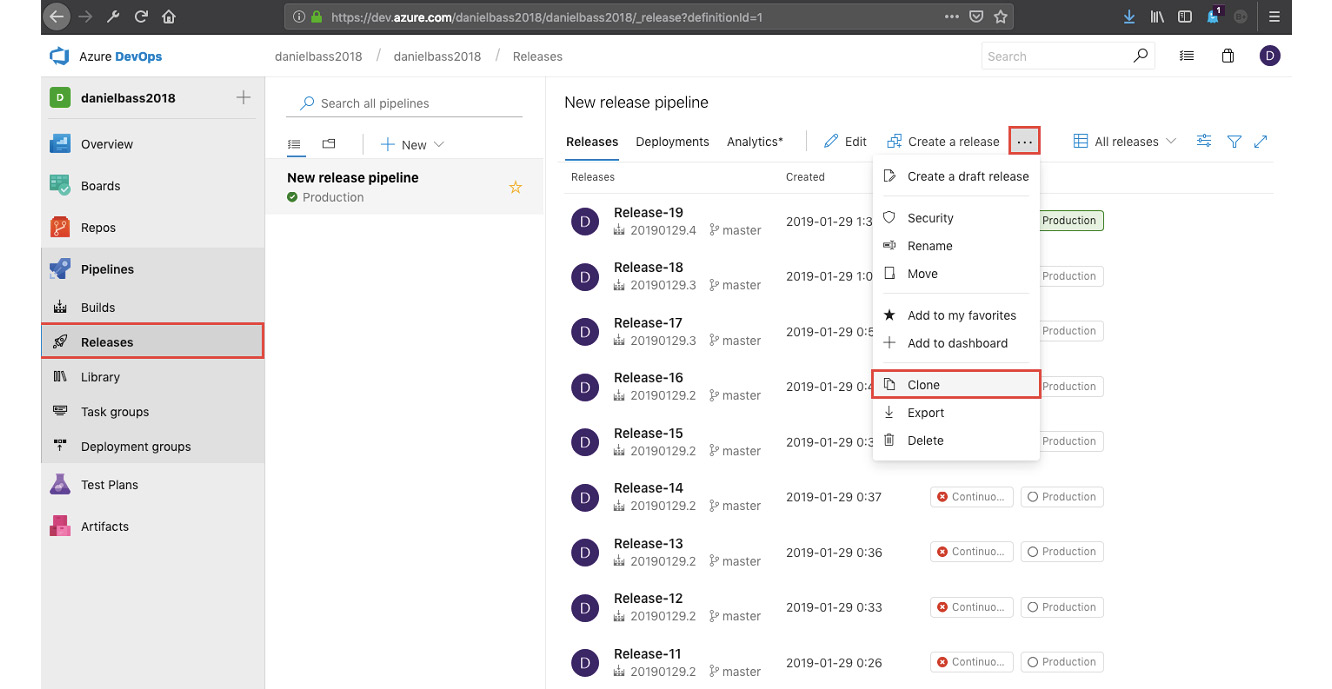
Figure 6.68: Clone release
- You will be taken to your pipeline screen. Open the Production stage. Modify the –appName value in the template parameters field on the Azure Deployment task to advancedserverlessorderapi:

Figure 6.69: -appName variable modified
- Right-click on the Azure deployment task and clone it:
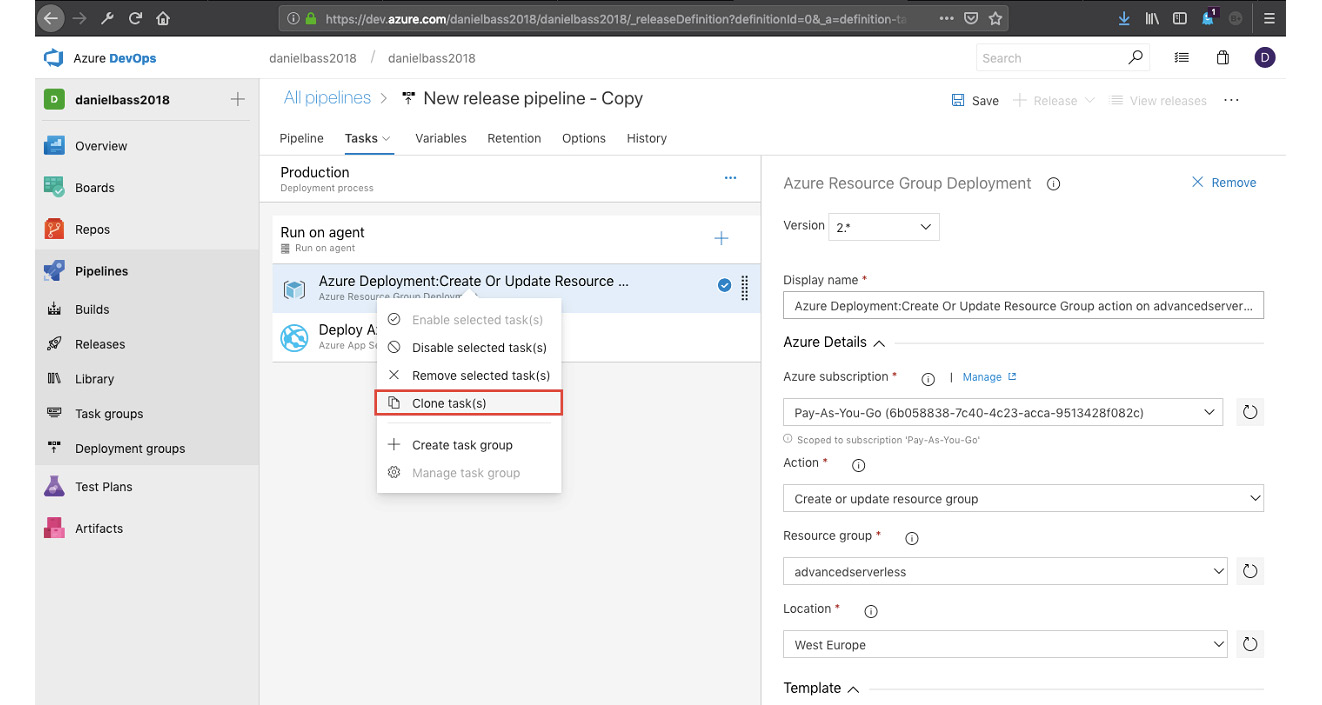
Figure 6.70: Clone task
- Again, modify the –appName value in the template parameters field on the Azure Deployment cloned task to advancedserverlessorderapibackup:
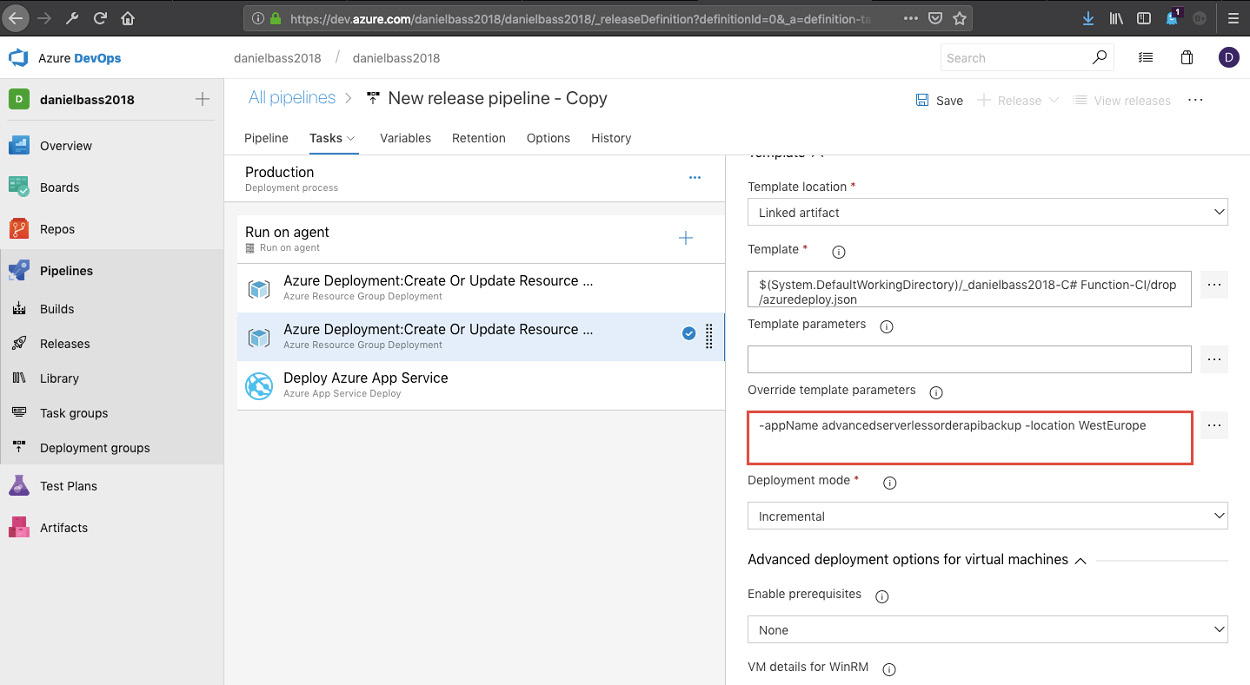
Figure 6.71: -appName template parameter
- Right-click on the Deploy Azure App Service task and click Remove Selected Tasks:
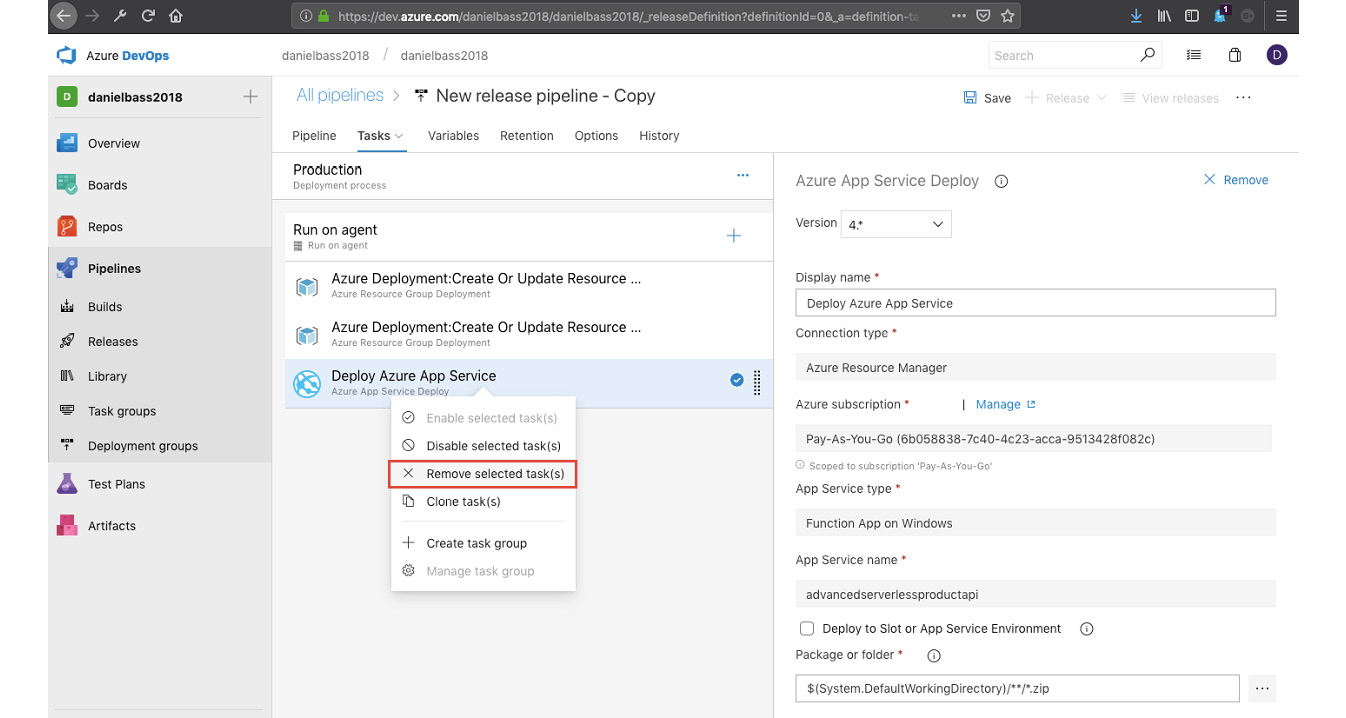
Figure 6.72: Clone release
- Click the + button and search for "Azure App Service Deploy". Click Add:
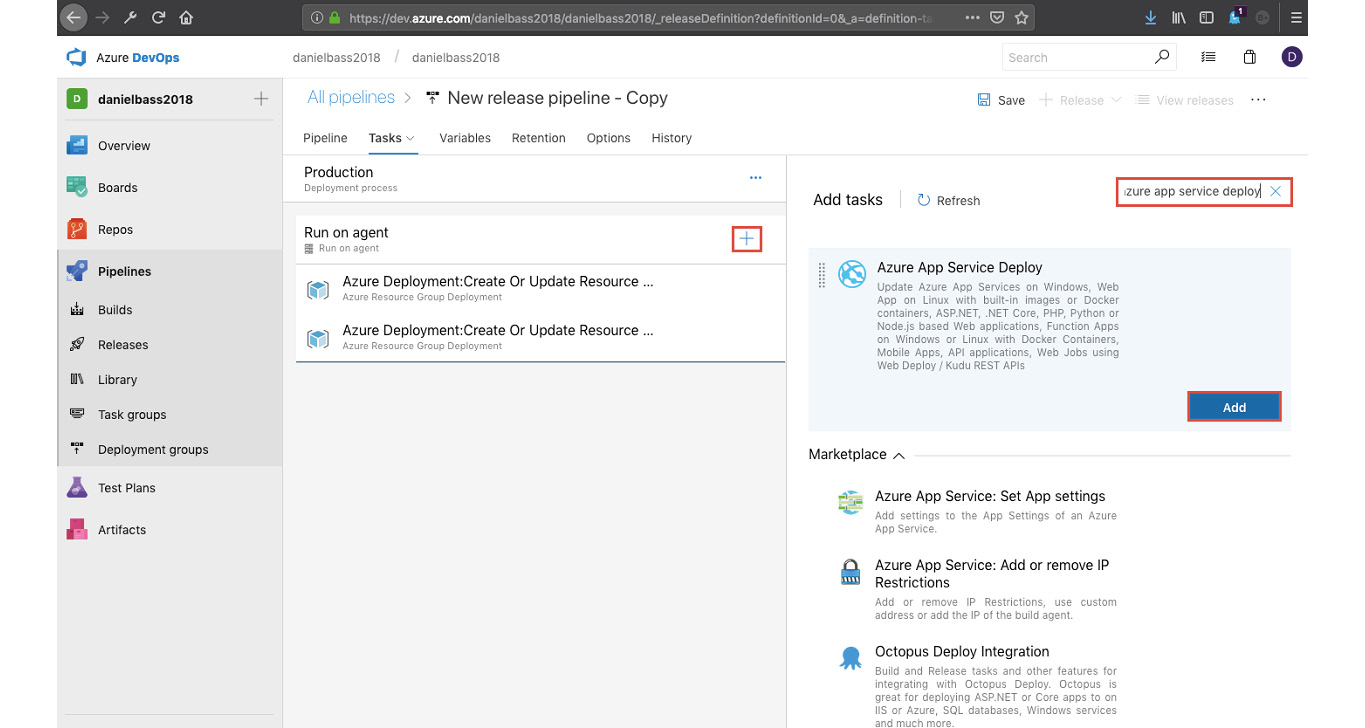
Figure 6.73: Azure App Service Deploy task
- Set the Azure subscription to advancedserverless, the App Service type to Function App on Windows, and the App Service name to advancedserverlessorderapi:
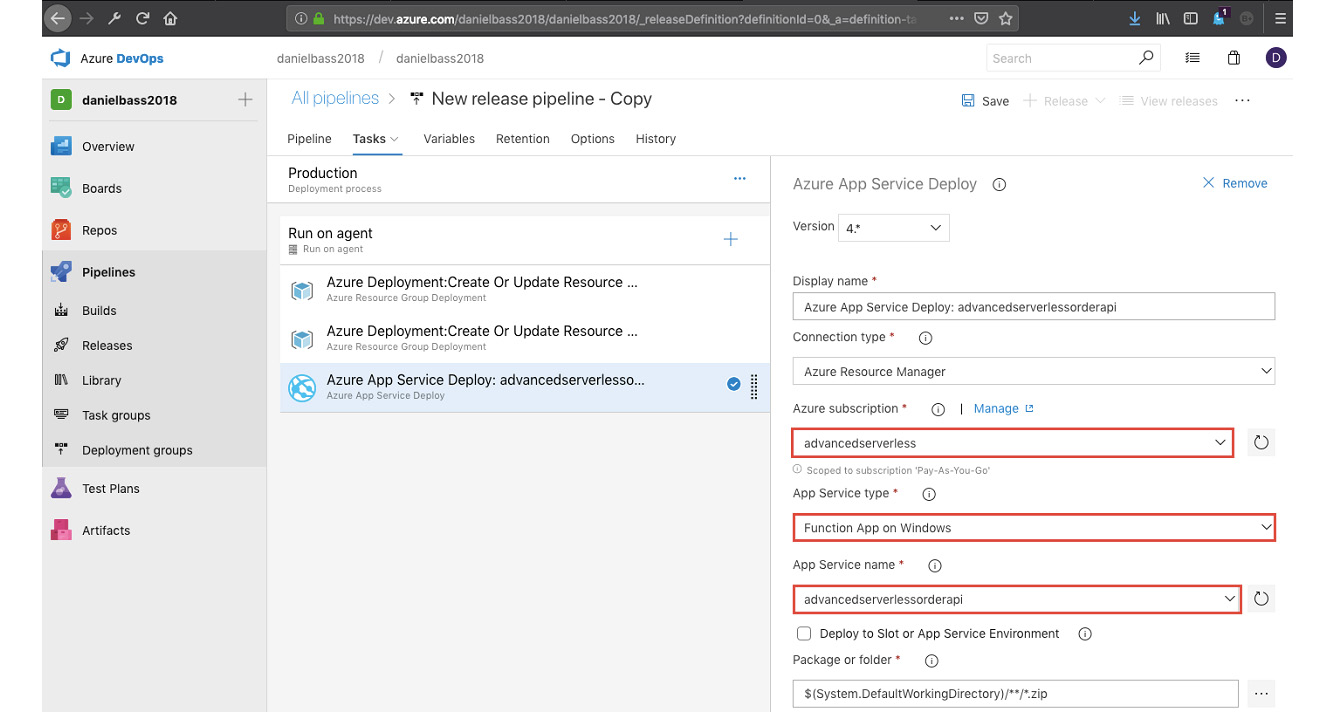
Figure 6.74: Setting up App Service task
- Right-click the Azure App Service Deploy task and click Clone task(s):
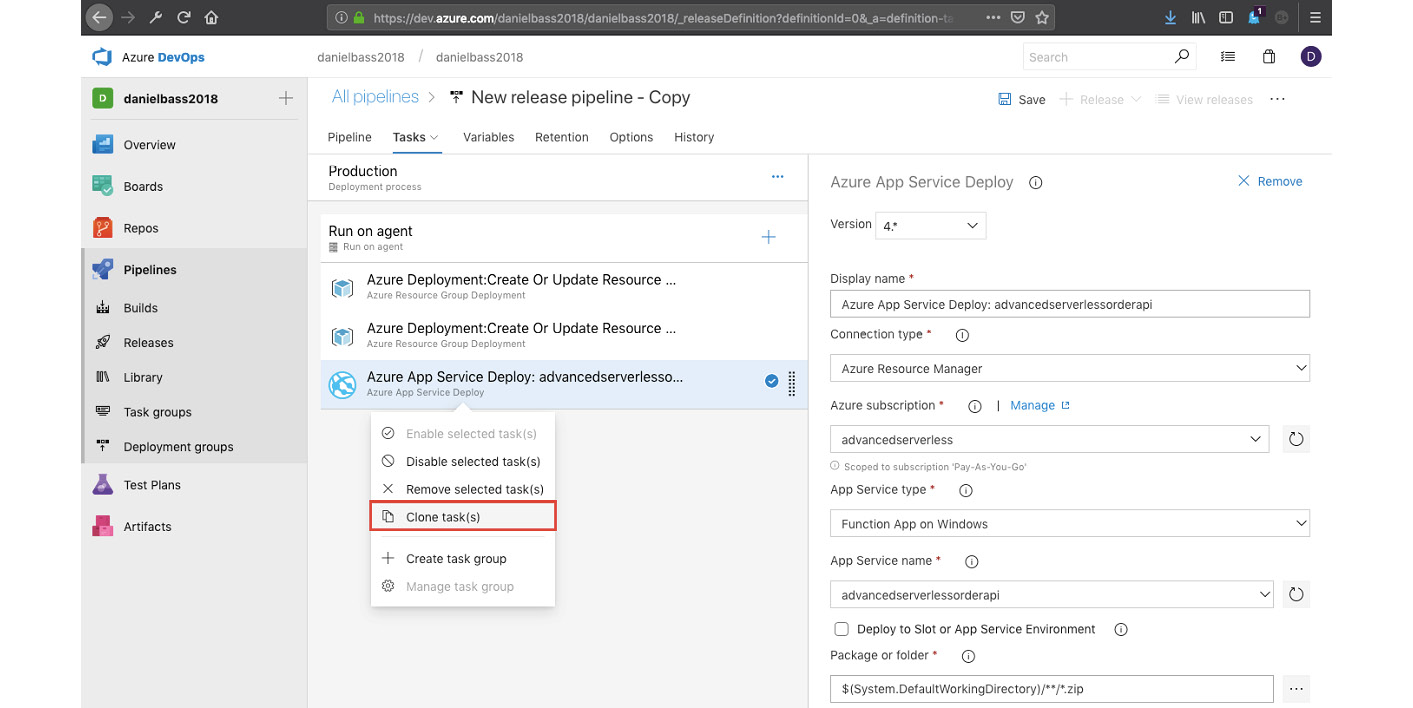
Figure 6.75: Clone tasks
- Modify the App Service Name on the cloned task to advancedserverlessorderapibackup:
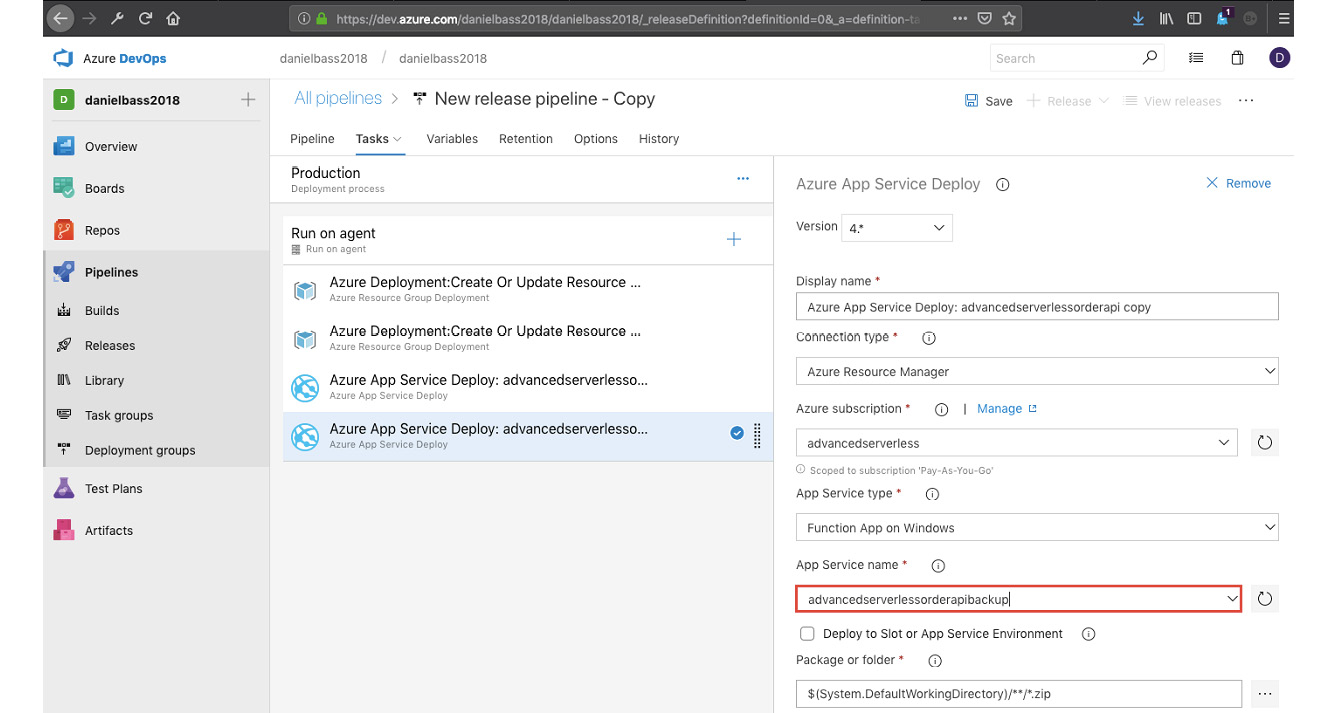
Figure 6.76: Backup App Service Name
- Click on Pipeline and click on the Add option next to Artifacts. Set the Source (build pipeline) to the cloned build pipeline:
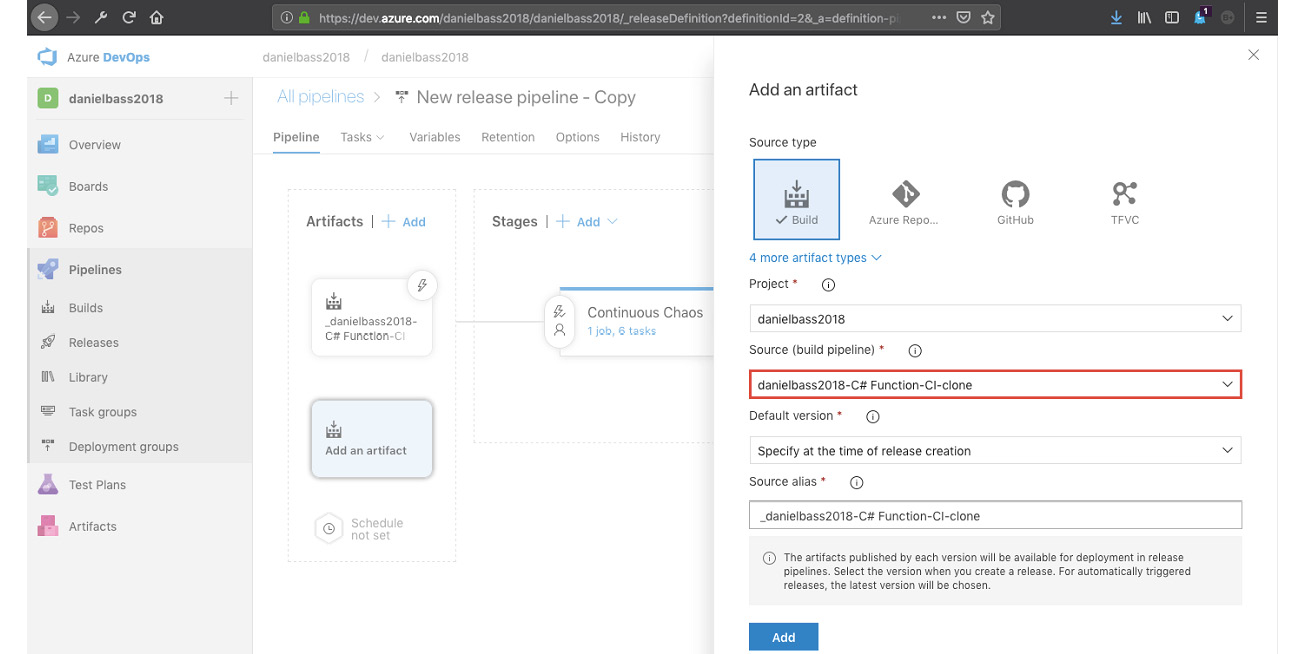
Figure 6.77: Add source pipeline
- Click Add. Select the other artifact and click Delete:
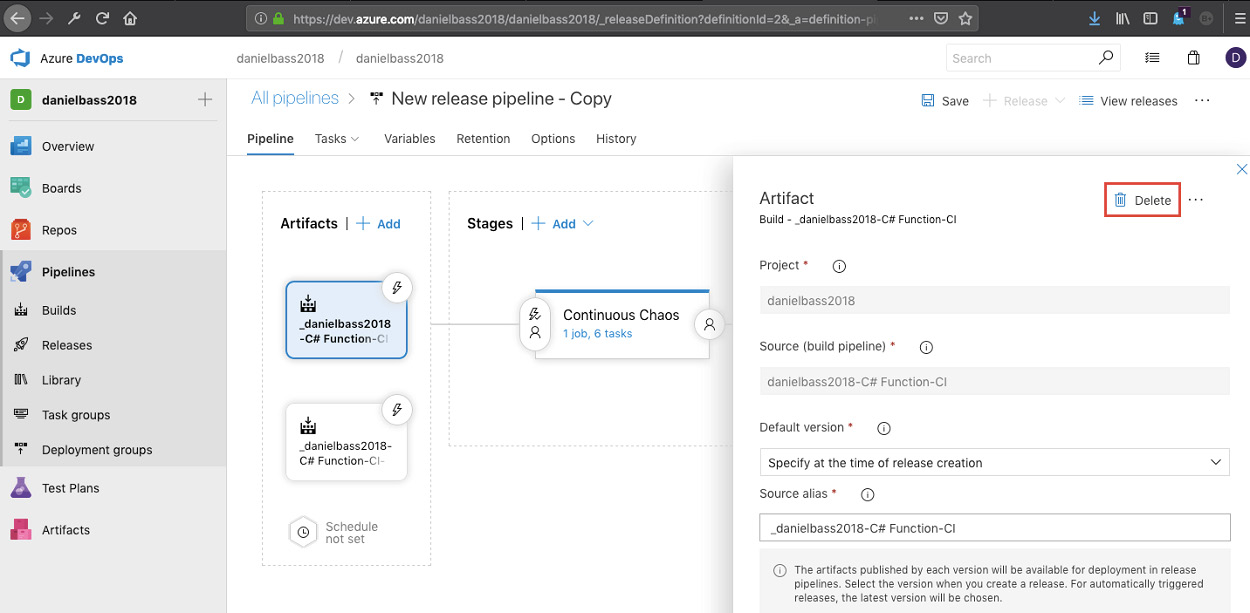
Figure 6.78: Delete original build artifact
- Change the Source alias field to remove the -clone on the end. This ensures all the tasks are looking in the correct place for the code:
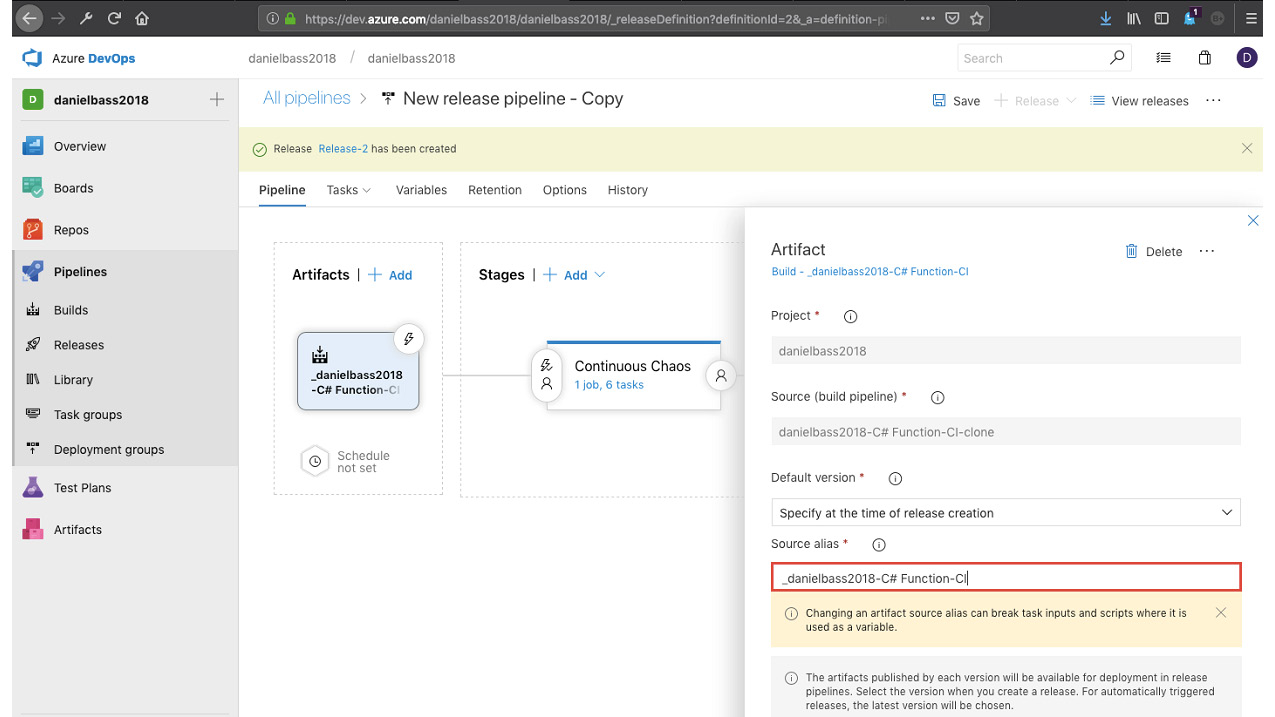
Figure 6.79: Rename build artifact alias
- Click Save. Click Release, and then Create a Release:
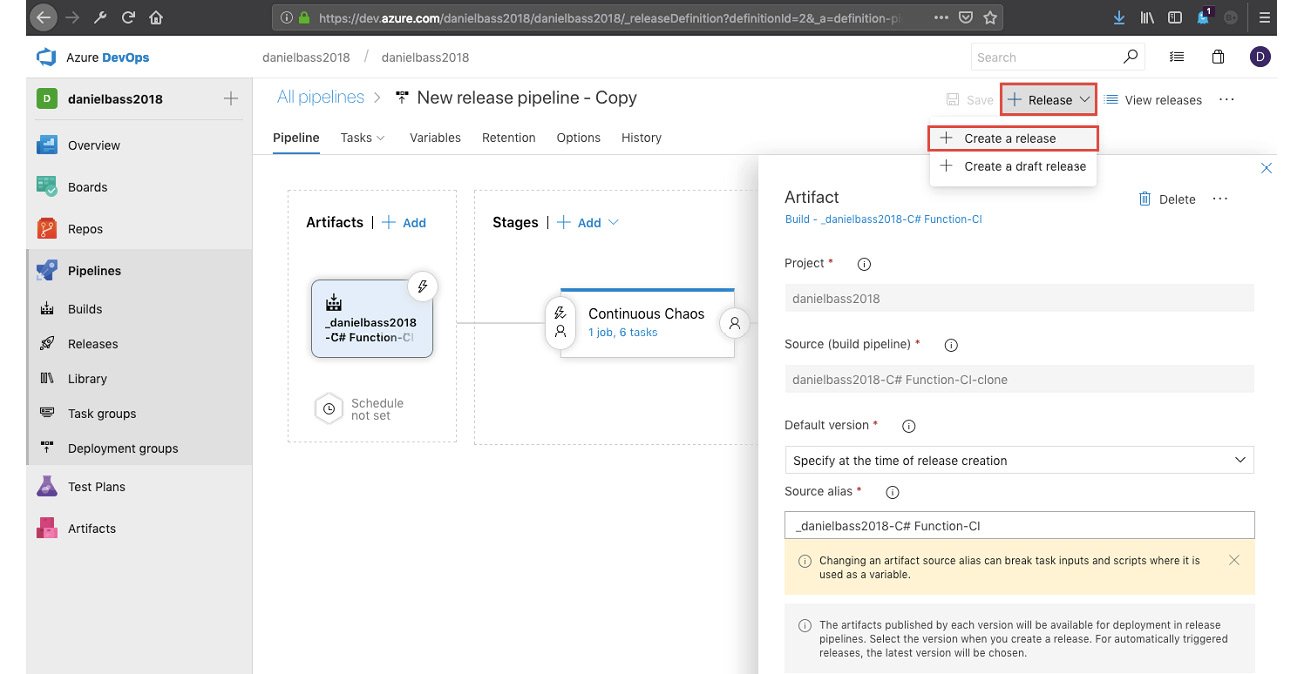
Figure 6.80: Create a release
- Click the Continuous Chaos stage to remove it from the automated release, as we haven't configured that stage. Select the latest build artifact. Click Create:
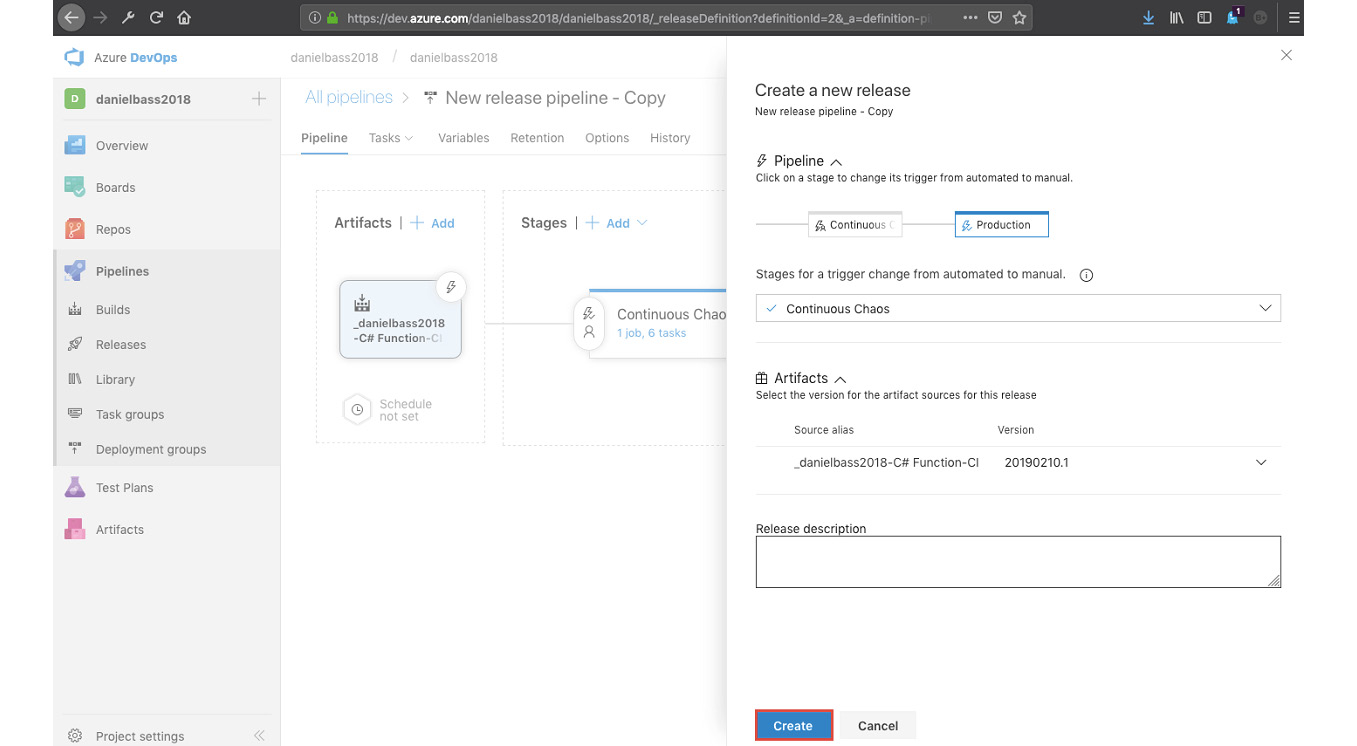
Figure 6.81: Configure release
- Click the link to the release that will appear at the top left of the screen. Click Deploy on the production stage. Click Deploy again. The release will start:
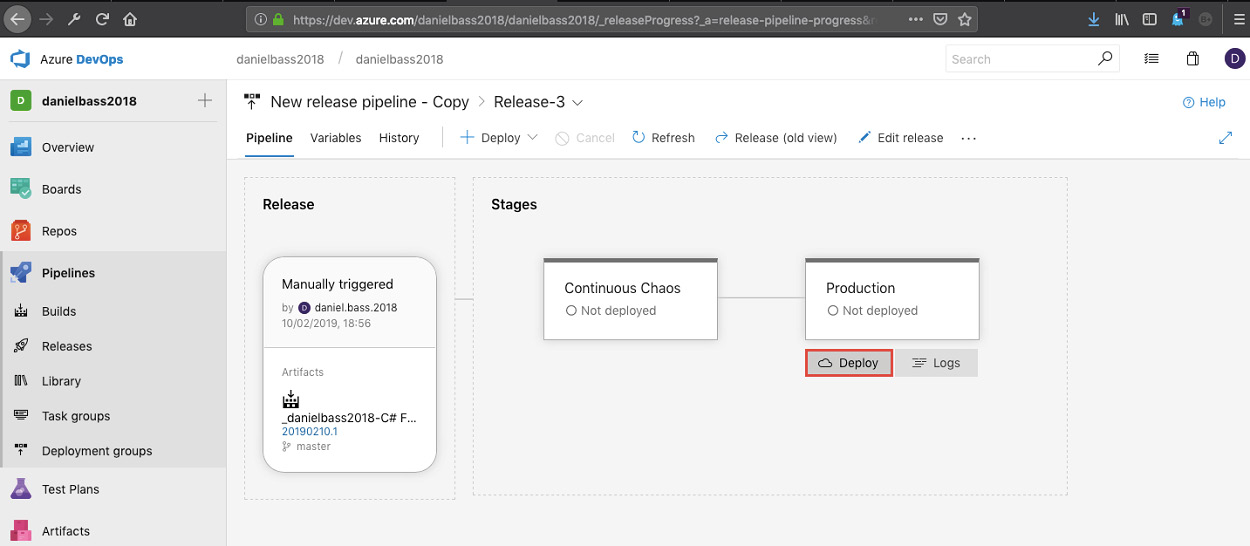
Figure 6.82: Release summary
- Now delete the advancedserverlessorderapi function app and visit the order.html page. Submit an order, and see it succeed: