Search icon CANCEL
Subscription
0
Cart icon
Your Cart (0 item)
Close icon
You have no products in your basket yet
Save more on your purchases! discount-offer-chevron-icon
Savings automatically calculated. No voucher code required.
Arrow left icon
All Products
Best Sellers
New Releases
Books
Videos
Audiobooks
Learning Hub
Newsletter Hub
Free Learning
Arrow right icon
timer SALE ENDS IN
0 Days
:
00 Hours
:
00 Minutes
:
00 Seconds

Tech News

3709 Articles
article-image-gnu-bash-5-0-is-here-with-new-features-and-improvements
Natasha Mathur
08 Jan 2019
2 min read
Save for later

Bash 5.0 is here with new features and improvements

Natasha Mathur
08 Jan 2019
2 min read
GNU project made version 5.0 of its popular POSIX shell Bash ( Bourne Again Shell) available yesterday. Bash 5.0 explores new improvements and features such as BASH_ARGV0, EPOCHSECONDS, and EPOCHREALTIME among others. Bash was first released in 1989 and was created for the GNU project as a replacement for their Bourne shell. It is capable of performing functions such as interactive command line editing, and job control on architectures that support it. It is a complete implementation of the IEEE POSIX shell and tools specification. Key Updates New features Bash 5.0 comes with a newly added EPOCHSECONDS variable, which is capable of expanding to the time in seconds. There is another newly added EPOCHREALTIME variable which is similar to EPOCHSECONDS in Bash 5.0. EPOCHREALTIME is capable of obtaining the number of seconds since the Unix Epoch, the only difference being that this variable is a floating point with microsecond granularity. BASH_ARGV0 is also a newly added variable in Bash 5.0 that expands to $0 and sets $0 on assignment. There is a newly defined config-top.h in Bash 5.0. This allows the shell to use a static value for $PATH. Bash 5.0 has a new shell option that can enable and disable sending history to syslog at runtime. Other Changes The `globasciiranges' option is now enabled by default in Bash 5.0 and can be set to off by default at configuration time. POSIX mode is now capable of enabling the `shift_verbose' option. The `history' builtin option in Bash 5.0 can now delete ranges of history entries using   `-d start-end'. A change that caused strings containing + backslashes to be flagged as glob patterns has been reverted in Bash 5.0. For complete information on bash 5.0, check out its official release notes. GNU ed 1.15 released! GNU Bison 3.2 got rolled out GNU Guile 2.9.1 beta released JIT native code generation to speed up all Guile programs
Read more
  • 0
  • 0
  • 9893

article-image-virtual-reality-solar-system-unity-google-cardboard
Sugandha Lahoti
25 Apr 2018
21 min read
Save for later

Build a Virtual Reality Solar System in Unity for Google Cardboard

Sugandha Lahoti
25 Apr 2018
21 min read
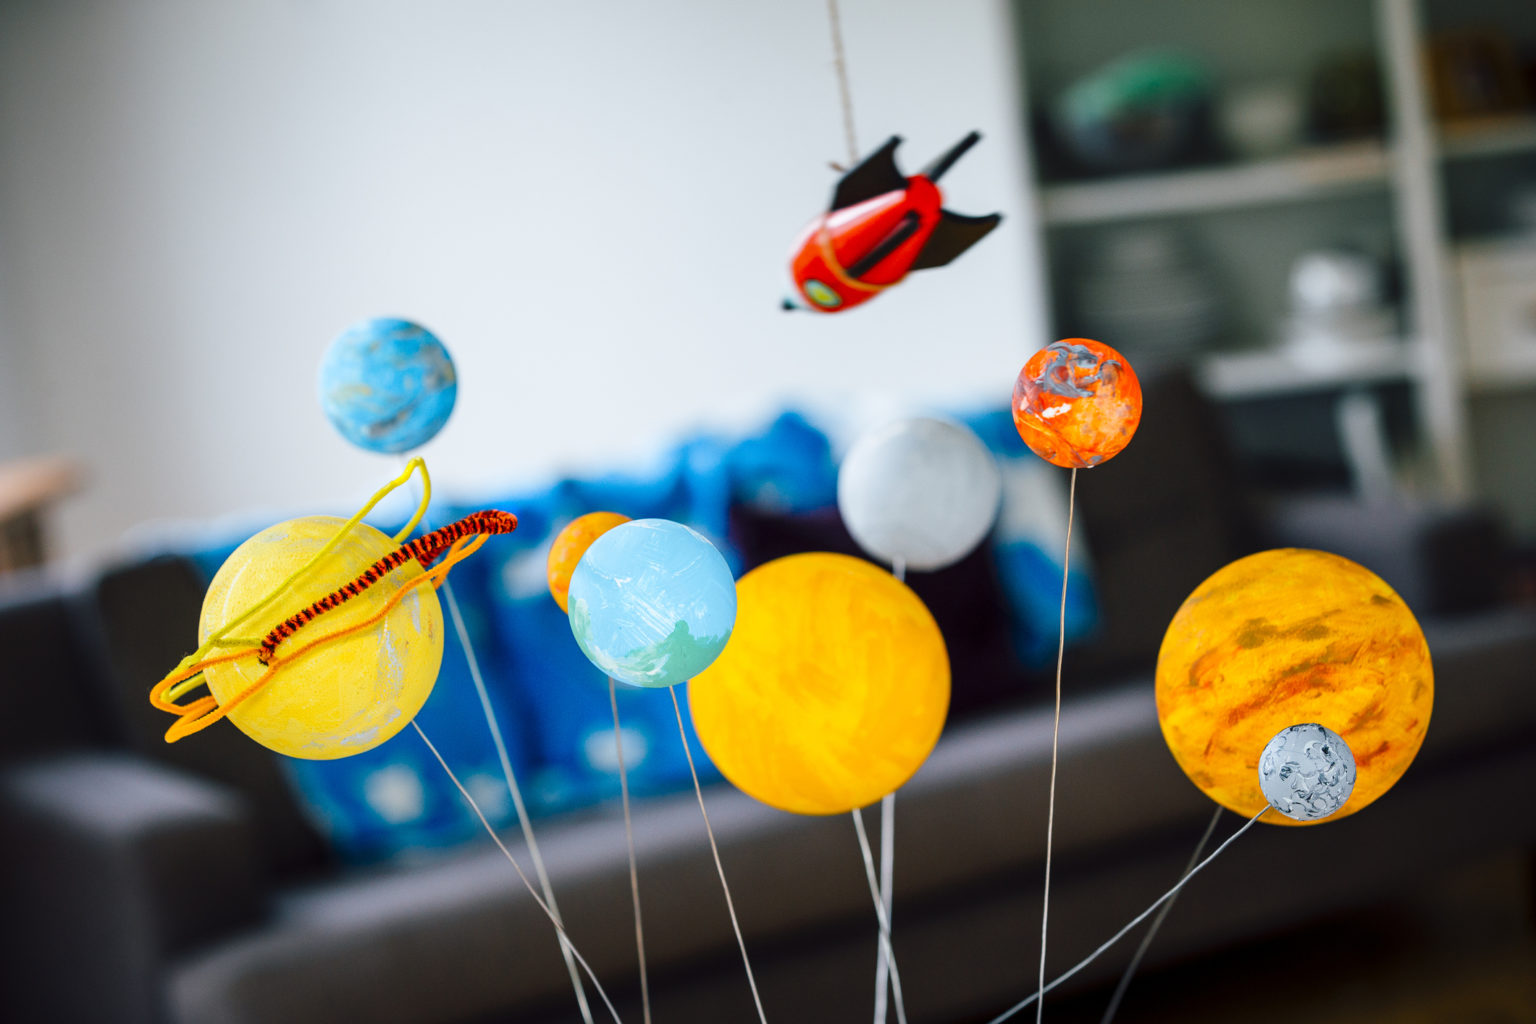
In today's tutorial, we will feature visualization of a newly discovered solar system. We will leverage the virtual reality development process for this project in order to illustrate the power of VR and ease of use of the Unity 3D engine. This project is dioramic scene, where the user floats in space, observing the movement of planets within the TRAPPIST-1 planetary system. In February 2017, astronomers announced the discovery of seven planets orbiting an ultra-cool dwarf star slightly larger than Jupiter. We will use this information to build a virtual environment to run on Google Cardboard (Android and iOS) or other compatible devices: We will additionally cover the following topics: Platform setup: Download and install the platform-specific software needed to build an application on your target device. Experienced mobile developers with the latest Android or iOS SDK may skip this step. Google Cardboard setup: This package of development tools facilitates display and interaction on a Cardboard device. Unity environment setup: Initializing Unity's Project Settings in preparation for a VR environment. Building the TRAPPIST-1 system: Design and implement the Solar System project. Build for your device: Build and install the project onto a mobile device for viewing in Google Cardboard. Platform setup Before we begin building the solar system, we must setup our computer environment to build the runtime application for a given VR device. If you have never built a Unity application for Android or iOS, you will need to download and install the Software Development Kit (SDK) for your chosen platform. An SDK is a set of tools that will let you build an application for a specific software package, hardware platform, game console, or operating system. Installing the SDK may require additional tools or specific files to complete the process, and the requirements change from year to year, as operating systems and hardware platforms undergo updates and revisions. To deal with this nightmare, Unity maintains an impressive set of platform-specific instructions to ease the setup process. Their list contains detailed instructions for the following platforms: Apple Mac Apple TV Android iOS Samsung TV Standalone Tizen Web Player WebGL Windows For this project, we will be building for the most common mobile devices: Android or iOS. The first step is to visit either of the following links to prepare your computer: Android: Android users will need the Android Developer Studio, Java Virtual Machine (JVM), and assorted drivers. Follow this link for installation instructions and files: https://docs.unity3d.com/Manual/Android-sdksetup.html. Apple iOS: iOS builds are created on a Mac and require an Apple Developer account, and the latest version of Xcode development tools. However, if you've previously built an iOS app, these conditions will have already been met by your system. For the complete instructions, follow this link: https://docs.unity3d.com/Manual/iphone-GettingStarted.html. Google Cardboard setup Like the Unity documentation website, Google also maintains an in-depth guide for the Google VR SDK for Unity set of tools and examples. This SDK provides the following features on the device: User head tracking Side-by-side stereo rendering Detection of user interactions (via trigger or controller) Automatic stereo configuration for a specific VR viewer Distortion correction Automatic gyro drift correction These features are all contained in one easy-to-use package that will be imported into our Unity scene. Download the SDK from the following link, before moving on to the next step: http://developers.google.com/cardboard/unity/download. At the time of writing, the current version of the Google VR SDK for Unity is version 1.110.1 and it is available via a GitHub repository. The previous link should take you to the latest version of the SDK. However, when starting a new project, be sure to compare the SDK version requirements with your installed version of Unity. Setting up the Unity environment Like all projects, we will begin by launching Unity and creating a new project. The first steps will create a project folder which contains several files and directories: Launch the Unity application. Choose the New option after the application splash screen loads. Create a new project by launching the Unity application. Save the project as Trappist1 in a location of your choice, as demonstrated in Figure 2.2: To prepare for VR, we will adjust the Build Settings and Player Settings windows. Open Build Settings from File | Build Settings. Select the Platform for your target device (iOS or Android). Click the Switch Platform button to confirm the change. The Unity icon in the right-hand column of the platform panel indicates the currently selected build platform. By default, it will appear next to the Standalone option. After switching, the icon should now be on Android or iOS platform, as shown in Figure 2.3: Note for Android developers: Ericsson Texture Compression (ETC) is the standard texture compression format on Android. Unity defaults to ETC (default), which is supported on all current Android devices, but it does not support textures that have an alpha channel. ETC2 supports alpha channels and provides improved quality for RBG textures on Android devices that support OpenGL ES 3.0. Since we will not need alpha channels, we will stick with ETC (default) for this project: Open the Player Settings by clicking the button at the bottom of the window. The PlayerSetting panel will open in the Inspector panel. Scroll down to Other Settings (Unity 5.5 thru 2017.1) or XR Settings and check the Virtual Reality Supported checkbox. A list of choices will appear for selecting VR SDKs. Add Cardboard support to the list, as shown in Figure 2.4: You will also need to create a valid Bundle Identifier or Package Name under Identification section of Other Settings. The value should follow the reverse-DNS format of the com.yourCompanyName.ProjectName format using alphanumeric characters, periods, and hyphens. The default value must be changed in order to build your application. Android development note: Bundle Identifiers are unique. When an app is built and released for Android, the Bundle Identifier becomes the app's package name and cannot be changed. This restriction and other requirements are discussed in this Android documentation link: http://developer.Android.com/reference/Android/content/pm/PackageInfo.html. Apple development note: Once you have registered a Bundle Identifier to a Personal Team in Xcode, the same Bundle Identifier cannot be registered to another Apple Developer Program team in the future. This means that, while testing your game using a free Apple ID and a Personal Team, you should choose a Bundle Identifier that is for testing only, you will not be able to use the same Bundle Identifier to release the game. An easy way to do this is to add Test to the end of whatever Bundle Identifier you were going to use, for example, com.MyCompany.VRTrappistTest. When you release an app, its Bundle Identifier must be unique to your app, and cannot be changed after your app has been submitted to the App Store. Set the Minimum API Level to Android Nougat (API level 24) and leave the Target API on Automatic. Close the Build Settings window and save the project before continuing. Choose Assets | Import Package | Custom Package... to import the GoogleVRForUnity.unitypackage previously downloaded from http://developers.google.com/cardboard/unity/download. The package will begin decompressing the scripts, assets, and plugins needed to build a Cardboard product. When completed, confirm that all options are selected and choose Import. Once the package has been installed, a new menu titled GoogleVR will be available in the main menu. This provides easy access to the GoogleVR documentation and Editor Settings. Additionally, a directory titled GoogleVR will appear in the Project panel: Right-click in the Project and choose Create | Folder to add the following directories: Materials, Scenes, and Scripts. Choose File | Save Scenes to save the default scene. I'm using the very original Main Scene and saving it to the Scenes folder created in the previous step. Choose File | Save Project from the main menu to complete the setup portion of this project. Building the TRAPPIST-1 System Now that we have Unity configured to build for our device, we can begin building our space themes VR environment. We have designed this project to focus on building and deploying a VR experience. If you are moderately familiar with Unity, this project will be very simple. Again, this is by design. However, if you are relatively new, then the basic 3D primitives, a few textures, and a simple orbiting script will be a great way to expand your understanding of the development platform: Create a new script by selecting Assets | Create | C# Script from the main menu. By default, the script will be titled NewBehaviourScript. Single click this item in the Project window and rename it OrbitController. Finally, we will keep the project organized by dragging OrbitController's icon to the Scripts folder. Double-click the OrbitController script item to edit it. Doing this will open a script editor as a separate application and load the OrbitController script for editing. The following code block illustrates the default script text: using System.Collections; using System.Collections.Generic; using UnityEngine; public class OrbitController : MonoBehaviour { // Use this for initialization void Start () { } // Update is called once per frame void Update () { } } This script will be used to determine each planet's location, orientation, and relative velocity within the system. The specific dimensions will be added later, but we will start by adding some public variables. Starting on line 7, add the following five statements: public Transform orbitPivot; public float orbitSpeed; public float rotationSpeed; public float planetRadius; public float distFromStar; Since we will be referring to these variables in the near future, we need a better understanding of how they will be used: orbitPivot stores the position of the object that each planet will revolve around (in this case, it is the star TRAPPIST-1). orbitalSpeed is used to control how fast each planet revolves around the central star. rotationSpeed is how fast an object rotates around its own axis. planetRadius represents a planet's radius compared to Earth. This value will be used to set the planet's size in our environment. distFromStar is a planet's distance in Astronomical Units (AU) from the central star. Continue by adding the following lines of code to the Start() method of the OrbitController script: // Use this for initialization void Start () { // Creates a random position along the orbit path Vector2 randomPosition = Random.insideUnitCircle; transform.position = new Vector3 (randomPosition.x, 0f, randomPosition.y) * distFromStar; // Sets the size of the GameObject to the Planet radius value transform.localScale = Vector3.one * planetRadius; } As shown within this script, the Start() method is used to set the initial position of each planet. We will add the dimensions when we create the planets, and this script will pull those values to set the starting point of each game object at runtime: Next, modify the Update() method by adding two additional lines of code, as indicated in the following code block: // Update is called once per frame. This code block updates the Planet's position during each // runtime frame. void Update () { this.transform.RotateAround (orbitPivot.position, Vector3.up, orbitSpeed * Time.deltaTime); this.transform.Rotate (Vector3.up, rotationSpeed * Time.deltaTime); } This method is called once per frame while the program is running. Within Update(), the location for each object is determined by computing where the object should be during the next frame. this.transform.RotateAround uses the sun's pivot point to determine where the current GameObject (identified in the script by this) should appear in this frame. Then this.transform.Rotate updates how much the planet has rotated since the last frame. Save the script and return to Unity. Now that we have our first script, we can begin building the star and its planets. For this process, we will use Unity's primitive 3D GameObject to create the celestial bodies: Create a new sphere using GameObject | 3D Object | Sphere. This object will represent the star TRAPPIST-1. It will reside in the center of our solar system and will serve as the pivot for all seven planets. Right-click on the newly created Sphere object in the Hierarchy window and select Rename. Rename the object Star. Using the Inspector tab, set the object to Position: 0,0,0 and Scale: 1,1,1. With the Star selected, locate the Add Component button in the Inspector panel. Click the button and enter orbitcontroller in the search box. Double-click on the OrbitController script icon when it appears. The script is now a component of the star. Create another sphere using GameObject | 3D Object | Sphere and position it anywhere in the scene, with the default scale of 1,1,1. Rename the object Planet b. Figure 2.5, from the TRAPPIST-1 Wikipedia page, shows the relative orbital period, distance from the star, radius, and mass of each planet. We will use these dimensions and names to complete the setup of our VR environment. Each value will be entered as public variables for their associated GameObjects: Apply the OrbitController script to the Planet b asset by dragging the script icon to the planet in the Scene window or the Planet b object in the Hierarchy window. Planet b is our first planet and it will serve as a prototype for the rest of the system. Set the Orbit Pivot point of Planet b in the Inspector. Do this by clicking the Selector Target next to the Orbit Pivot field (see Figure 2.6). Then, select Star from the list of objects. The field value will change from None (Transform) to Star (Transform). Our script will use the origin point of the select GameObject as its pivot point. Go back and select the Star GameObject and set the Orbit Pivot to Star as we did with Planet b. Save the scene: Now that our template planet has the OrbitController script, we can create the remaining planets: Duplicate the Planet b GameObject six times, by right-clicking on it and choosing Duplicate. Rename each copy Planet c through Planet h. Set the public variables for each GameObject, using the following chart: GameObject Orbit Speed Rotation Speed Planet Radius Dist From Star Star 0 2 6 0 Planet b .151 5 0.85 11 Planet c .242 5 1.38 15 Planet d .405 5 0.41 21 Planet e .61 5 0.62 28 Planet f .921 5 0.68 37 Planet g 1.235 5 1.34 45 Planet h 1.80 5 0.76 60 Table 2.1: TRAPPIST-1 gameobject Transform settings Create an empty GameObject by right clicking in the Hierarchy panel and selecting Create Empty. This item will help keep the Hierarchy window organized. Rename the item Planets and drag Planet b—through Planet h into the empty item. This completes the layout of our solar system, and we can now focus on setting a location for the stationary player. Our player will not have the luxury of motion, so we must determine the optimal point of view for the scene: Run the simulation. Figure 2.7 illustrates the layout being used to build and edit the scene. With the scene running and the Main Camera selected, use the Move and Rotate tools or the Transform fields to readjust the position of the camera in the Scene window or to find a position with a wide view of the action in the Game window; or a position with an interesting vantage point. Do not stop the simulation when you identify a position. Stopping the simulation will reset the Transform fields back to their original values. Click the small Options gear in the Transform panel and select Copy Component. This will store a copy of the Transform settings to the clipboard: Stop the simulation. You will notice that the Main Camera position and rotation have reverted to their original settings. Click the Transform gear again and select Paste Component Values to set the Transform fields to the desired values. Save the scene and project. You might have noticed that we cannot really tell how fast the planets are rotating. This is because the planets are simple spheres without details. This can be fixed by adding materials to each planet. Since we really do not know what these planets look like we will take a creative approach and go for aesthetics over scientific accuracy. The internet is a great source for the images we need. A simple Google search for planetary textures will result in thousands of options. Use a collection of these images to create materials for the planets and the TRAPPIST-1 star: Open a web browser and search Google for planet textures. You will need one texture for each planet and one more for the star. Download the textures to your computer and rename them something memorable (that is, planet_b_mat...). Alternatively, you can download a complete set of textures from the Resources section of the supporting website: http://zephyr9.pairsite.com/vrblueprints/Trappist1/. Copy the images to the Trappist1/Assets/Materials folder. Switch back to Unity and open the Materials folder in the Project panel. Drag each texture to its corresponding GameObject in the Hierarchy panel. Notice that each time you do this Unity creates a new material and assigns it to the planet GameObject: Run the simulation again and observe the movement of the planets. Adjust the individual planet Orbit Speed and Rotation Speed to feel natural. Take a bit of creative license here, leaning more on the scene's aesthetic quality than on scientific accuracy. Save the scene and the project. For the final design phase, we will add a space themed background using a Skybox. Skyboxes are rendered components that create the backdrop for Unity scenes. They illustrate the world beyond the 3D geometry, creating an atmosphere to match the setting. Skyboxes can be constructed of solids, gradients, or images using a variety of graphic programs and applications. For this project, we will find a suitable component in the Asset Store: Load the Asset Store from the Window menu. Search for a free space-themed skybox using the phrase space skybox price:0. Select a package and use the Download button to import the package into the Scene. Select Window | Lighting | Settings from the main menu. In the Scene section, click on the Selector Target for the Skybox Material and choose the newly downloaded skybox: Save the scene and the project. With that last step complete, we are done with the design and development phase of the project. Next, we will move on to building the application and transferring it to a device. Building the application To experience this simulation in VR, we need to have our scene run on a head-mounted display as a stereoscopic display. The app needs to compile the proper viewing parameters, capture and process head tracking data, and correct for visual distortion. When you consider the number of VR devices we would have to account for, the task is nothing short of daunting. Luckily, Google VR facilitates all of this in one easy-to-use plugin. The process for building the mobile application will depend on the mobile platform you are targeting. If you have previously built and installed a Unity app on a mobile device, many of these steps will have already been completed, and a few will apply updates to your existing software. Note: Unity is a fantastic software platform with a rich community and an attentive development staff. During the writing of this book, we tackled software updates (5.5 through 2017.3) and various changes in the VR development process. Although we are including the simplified building steps, it is important to check Google's VR documentation for the latest software updates and detailed instructions: Android: https://developers.google.com/vr/unity/get-started iOS: https://developers.google.com/vr/unity/get-started-ios Android Instructions If you are just starting out building applications from Unity, we suggest starting out with the Android process. The workflow for getting your project export from Unity to playing on your device is short and straight forward: On your Android device, navigate to Settings | About phone or Settings | About Device | Software Info. Scroll down to Build number and tap the item seven times. A popup will appear, confirming that you are now a developer. Now navigate to Settings | Developer options | Debugging and enable USB debugging. Building an Android application In your project directory (at the same level as the Asset folder), create a Build folder. Connect your Android device to the computer using a USB cable. You may see a prompt asking you to confirm that you wish to enable USB debugging on the device. If so, click OK. In Unity, select File | Build Settings to load the Build dialog. Confirm that the Platform is set to Android. If not choose Android and click Switch Platform. Note that Scenes/Main Scene should be loaded and checked in the Scenes In Build portion of the dialog. If not, click the Add Open Scenes button to add Main Scene to the list of scenes to be included in the build. Click the Build button. This will create an Android executable application with the .apk file extension. Invalid command Android error Some Android users have reported an error relating to the Android SDK Tools location. The problem has been confirmed in many installations prior to Unity 2017.1. If this problem occurs, the best solution is to downgrade to a previous version of the SDK Tools. This can be done by following the steps outlined here: Locate and delete the Android SDK Tools folder [Your Android SDK Root]/tools. This location will depend on where the Android SDK package was installed. For example, on my computer the Android SDK Tools folder is found at C:UserscpalmerAppDataLocalAndroidsdk. Download SDK Tools from http://dl-ssl.google.com/Android/repository/tools_r25.2.5-windows.zip. Extract the archive to the SDK root directory. Re-attempt the Build project process. If this is the first time you are creating an Android application, you might get an error indicating that Unity cannot locate your Android SDK root directory. If this is the case, follow these steps: Cancel the build process and close the Build Settings... window. Choose Edit | Preferences... from the main menu. Choose External Tools and scroll down to Android. Enter the location of your Android SDK root folder. If you have not installed the SDK, click the download button and follow the installation process. Install the app onto your phone and load the phone into your Cardboard device: iOS Instructions The process for building an iOS app is much more involved than the Android process. There are two different types of builds: Build for testing Build for distribution (which requires an Apple Developer License) In either case, you will need the following items to build a modern iOS app: A Mac computer running OS X 10.11 or later The latest version of Xcode An iOS device and USB cable An Apple ID Your Unity project For this demo, we will build an app for testing and we will assume you have completed the Getting Started steps (https://docs.unity3d.com/Manual/iphone-GettingStarted.html) from Section 1. If you do not yet have an Apple ID, obtain one from the Apple ID site (http://appleid.apple.com/). Once you have obtained an Apple ID, it must be added to Xcode: Open Xcode. From the menu bar at the top of the screen, choose Xcode | Preferences. This will open the Preferences window. Choose Accounts at the top of the window to display information about the Apple IDs that have been added to Xcode. To add an Apple ID, click the plus sign at the bottom left corner and choose Add Apple ID. Enter your Apple ID and password in the resulting popup box. Your Apple ID will then appear in the list. Select your Apple ID. Apple Developer Program teams are listed under the heading of Team. If you are using the free Apple ID, you will be assigned to Personal Team. Otherwise, you will be shown the teams you are enrolled in through the Apple Developer Program. Preparing your Unity project for iOS Within Unity, open the Build Settings from the top menu (File | Build Settings). Confirm that the Platform is set to iOS. If not choose iOS and click Switch Platform at the bottom of the window. Select the Build & Run button. Building an iOS application Xcode will launch with your Unity project. Select your platform and follow the standard process for building an application from Xcode. Install the app onto your phone and load the phone into your Cardboard device. We looked at the basic Unity workflow for developing VR experiences. We also provided a stationary solution so that we could focus on the development process. The Cardboard platform provides access to VR content from a mobile platform, but it also allows for touch and gaze controls. You read an excerpt from the book, Virtual Reality Blueprints, written by Charles Palmer and John Williamson. In this book, you will learn how to create compelling Virtual Reality experiences for mobile and desktop with three top platforms—Cardboard VR, Gear VR, and OculusVR. Read More Top 7 modern Virtual Reality hardware systems Virtual Reality for Developers: Cardboard, Gear VR, Rift, and Vive    
Read more
  • 0
  • 2
  • 9811

article-image-microsoft-announces-decentralized-identity-in-partnership-with-dif-and-w3c-credentials-community-group
Bhagyashree R
12 Oct 2018
3 min read
Save for later

Microsoft announces ‘Decentralized Identity’ in partnership with DIF and W3C Credentials Community Group

Bhagyashree R
12 Oct 2018
3 min read
Yesterday, Microsoft published a white paper on Decentralized Identity (DID) solution. These identities are user-generated, self-owned, globally unique identifiers rooted in decentralized systems. Over the past 18 months, Microsoft has been working towards building a digital identity system using blockchain and other distributed ledger technologies. With these identities aims to enhance personal privacy, security, and control. Microsoft has been actively collaborating with members of the Decentralized Identity Foundation (DIF), the W3C Credentials Community Group, and the wider identity community. They are working with these groups to identify and develop critical standards. Together they plan to establish a unified, interoperable ecosystem that developers and businesses can rely on to build more user-centric products, applications, and services. Why decentralized identity (DID) is needed? Nowadays, people use digital identity at work, at home, and across every app, service, and device. Access to these digital identities such as email addresses and social network IDs can be removed at any time by the email provider, social network provider, or other external parties. Users also give permissions to numerous apps and devices, which calls for a high degree of vigilance of tracking who has access to what information. This standards-based decentralized identity system empowers users and organizations to have greater control over their data. This system addresses the problem of users granting broad consent to countless apps and services. It provides them a secure encrypted digital hub where they can store their identity data and easily control access to it. What it means for users, developers, and organizations? Benefits for users It enables all users to own and control their identity Provides secure experiences that incorporate privacy by design Design user-centric apps and services Benefits for developers It allows developers to provide users personalized experiences while respecting their privacy Enables developers to participate in a new kind of marketplace, where creators and consumers exchange directly Benefits for organizations Organizations can deeply engage with users while minimizing privacy and security risks Provides a unified data protocol to organizations to transact with customers, partners, and suppliers Improves transparency and auditability of business operations To know more about decentralized identity, read the white paper published by Microsoft. Microsoft joins the Open Invention Network community, making 60,000 of its patents accessible to fellow members Microsoft invests in Grab; together aim to conquer the Southeast Asian on-demand services market with Azure’s Intelligent Cloud Microsoft announces Project xCloud, a new Xbox game streaming service, on the heels of Google’s Stream news last week
Read more
  • 0
  • 0
  • 9791

article-image-389-directory-server-set-to-replace-openldap-as-red-hat-and-suse-withdraw-support-for-openldap-in-their-enterprise-linux-offerings
Bhagyashree R
29 Aug 2018
2 min read
Save for later

389 Directory Server set to replace OpenLDAP as Red Hat and SUSE withdraw support for OpenLDAP in their Enterprise Linux offerings

Bhagyashree R
29 Aug 2018
2 min read
Red Hat and SUSE have withdrawn their support for OpenLDAP in their Enterprise Linux offers, which will be replaced by Red Hat’s own 389 Directory Server. The openldap-server packages were deprecated starting from Red Hat Enterprise Linux (RHEL) 7.4, and will not be included in any future major release of RHEL. SUSE, in their release notes, have mentioned that the OpenLDAP server is still available on the Legacy Module for migration purposes, but it will not be maintained for the entire SUSE Linux Enterprise Server (SLE) 15 lifecycle. What is OpenLDAP? OpenLDAP is an open source implementation of Lightweight Directory Access Protocol (LDAP) developed by the OpenLDAP Project. It is a collective effort to develop a LDAP suite of applications and development tools, which are robust, commercial-grade, and open source. What is 389 Directory Server? The 389 Directory Server is an LDAP server developed by Red Hat as a part of Red Hat’s community-supported Fedora Project. The name “389” comes from the port number used by LDAP. It supports many operating systems including Fedora, Red Hat Enterprise Linux 3 and above, Debian, Solaris 8 and above. The 389 Directory Server packages provide the core directory services components for Identity Management (IdM) in Red Hat Enterprise Linux and the Red Hat Directory Server (RHDS). The package is not supported as a stand-alone solution to provide LDAP services. Why Red Hat and SUSE withdrew their support? According to Red Hat, customers prefer Identity Management (IdM) in Red Hat Enterprise Linux solution over OpenLDAP server for enterprise use cases. This is why, they decided to focus on the technologies that Red Hat historically had deep understanding, and expertise in, and have been investing into, for more than a decade. By focusing on Red Hat Directory Server and IdM offerings, Red Hat will be able to better serve their customers of those solutions and increase the value of subscription. To know more on Red Hat and SUSE withdrawing their support for OpenLDAP, check out Red Hat’s announcement and SUSE release notes. Red Hat Enterprise Linux 7.6 Beta released with focus on security, cloud, and automation Red Hat Enterprise Linux 7.5 (RHEL 7.5) now generally available Google, IBM, RedHat and others launch Istio 1.0 service mesh for microservices
Read more
  • 0
  • 0
  • 9695

article-image-exploring-the%e2%80%afnew%e2%80%af-net-multi-platform-app-ui%e2%80%afmaui%e2%80%afwith-the-experts
Expert Network
25 May 2021
8 min read
Save for later

Exploring the new .NET Multi-Platform App UI (MAUI) with the Experts

Expert Network
25 May 2021
8 min read
During the 2020 edition of Build, Microsoft revealed its plan for a multi-platform framework called .NET MAUI. This latest framework appears to be an upgraded and transformed version of  Xamarin.Forms, enabling developers to build robust device applications and provide native features for Windows, Android, macOS, and iOS.   Microsoft has recently devoted efforts to unifying the .NET platform, in which MAUI plays a vital role. The framework helps developers access the native API (Application Programming Interface) for all modern operating systems by offering a single codebase with built-in resources. It paves the way for the development of multi-platform applications under the banner of one exclusive project structure with the flexibility of incorporating different source code files or resources for different platforms when needed.   .NET MAUI would bring the project structure to a sole source with single-click deployment for as many platforms as needed. Some of the prominent features in .NET MAUI will be XAML and Model-View-View-Model (MVVM). It will enable the developers to implement the Model-View-Update (MVU) pattern.  Microsoft also intends to offer ‘Try-N-Convert’ support and migration guides to help developers carry a seamless transition of existing apps to .NET MAUI. The performance continues to remain as the focal point in MAUI and the faster algorithms, advanced compilers, and advanced SDK Style project tooling experience.  Let us hear what our experts have to say about MAUI, a framework that holds the potential to streamline cross-platform app development. Which technology - native or cross-platform app development, is better and more prevalent? Gabriel: I always suggest that the best platform is the one that fits best with your team. I mean, if you have a C# team, for sure .NET development (Xamarin, MAUI, and so on) will be better. On the other hand, if you have a JavaScript / Typescript team, we do have several other options for native/cross-platform development.   Francesco: In general, saying “better” is quite difficult. The right choice always depends on the constraints one has, but I think that for most applications “cross-platform” is the only acceptable choice. Mobile and desktop applications have noticeably short lifecycles and most of them have lower budgets than server enterprise applications. Often, they are just one of the several ways to interact with an enterprise application, or with complex websites.  Therefore, both budget and time constraints make developing and maintaining several native applications unrealistic. However, no matter how smart and optimized cross-platform frameworks are, native applications always have better performance and take full advantage of the specific features of each device. So, for sure, there are critical applications that can be implemented just like natives.  Valerio: Both approaches have pros and cons: native mobile apps usually have higher performances and seamless user experience, thus being ideal for end-users and/or product owners with lofty expectations in terms of UI/UX. However, building them nowadays can be costly and time-consuming because you need to have a strong dev team (or multiple teams) that can handle both iOS, Android and Windows/Linux Desktop PCs. Furthermore, there is a possibility of having different codebases which can be quite cumbersome to maintain, upgrade and keep in synchronization. Cross-platform development can mitigate these downsides. However, everything that you will save in terms of development cost, time and maintainability will often be paid in terms of performance, limited functionalities and limited UI/UX; not to mention the steep learning curve that multi-platform development frameworks tend to have due to their elevated level of abstraction.   What are the prime differences between MAUI and the Uno Platform, if any?   Gabriel: I would also say that, considering MAUI has Xamarin.Forms, it will easily enable compatibility with different Operating Systems.  Francesco: Uno's default option is to style an application the same on all platforms, but gives an opportunity to make the application look and feel like a native app; whereas MAUI takes more advantage of native features. In a few words, MAUI applications look more like native applications. Uno also targets WASM in browsers, while MAUI does not target it, but somehow proposes Blazor. Maybe Blazor will still be another choice to unify mobile, desktop, and Web development, but not in the 6.0 .NET release.  Valerio: Both MAUI and Uno Platform try to achieve a similar goal, but they are based upon two different architectural approaches: MAUI, like Xamarin.Forms, will have their own abstraction layer above the native APIs, while Uno builds UWP interfaces upon them. Again, both approaches do have their pros and cons: abstraction layers can be costly in terms of performance (especially on mobile devices, since it will need to take care of the most layout-related tasks) but this will be useful to keep a small and versatile codebase.  Would MAUI be able to fulfill cross-platform app development requirements right from its launch, or will it take a few developments post-release for it to entirely meet its purpose?   Gabriel: The mechanism presented in this kind of technology will let us guarantee cross-platform even in cases where there are differences. So, my answer would be yes.  Francesco: Looking behind the story of all Microsoft platforms, I would say it is very unlikely that MAUI will fulfill all cross-platform app development requirements right from the time it is launched. It might be 80-90 percept effective and cater to the development needs. For MAUI to become a full-fledged platform equipped with all the tools for a cross-platform app, it might take another year.   Valerio: I hope so! Realistically speaking, I think this will be a tough task: I would not expect good cross-platform app compatibility right from the start, especially in terms of UI/UX. Such ambitious developments improvise and are gradually made perfect with accurate and relevant feedback that comes from the real users and the community.  How much time will it take for Microsoft to release MAUI?   Gabriel: Microsoft is continuously delivering versions of their software environments. The question is a little bit more complex because as a software developer you cannot only think about when Microsoft will release MAUI. You need to consider when it will be stable and with an LTS Version available. I believe this will take a little bit longer than the roadmap presented by Microsoft.  Francesco: According to the planned timeline, MAUI should be launched in conjunction with the November 2021 .NET 6 release. This timeline should be respected, but in the worst-case scenario, the release will be played and arrive a few months later. This is similar to what had happened with Blazor and the 3.1 .NET release.  Valerio: The MAUI official timeline sounds rather optimistic, but Microsoft seems to be investing a lot in that project and they have already managed to successfully deliver big releases without excessive delays (think of .NET 5): I think they will try their best to launch MAUI together with the first .NET 6 final release since it would be ideal in terms of marketing and could help to bring some additional early adopters.  Summary  The launch of Multi-Platform App UI (MAUI) will undoubtedly revolutionize the way developers build device applications. Developers can look forward to smooth and faster deployment and whether MAUI will offer platform-specific projects or it would be a shared code system, will eventually be revealed. It is too soon to estimate the extent of MAUI’s impact, but it will surely be worth the wait and now with MAUI moving into the dotnet Github, there is excitement to see how MAUI unfolds across the development platforms and how the communities receive and align with it. With every upcoming preview of .NET 6 we can expect numerous additions to the capabilities of .NET MAUI. For now, the developers are looking forward to the “dotnet new” experience.   About the authors  Gabriel Baptista is a software architect who leads technical teams across a diverse range of projects for retail and industry, using a significant array of Microsoft products. He is a specialist in Azure Platform-as-a-Service (PaaS) and a computing professor who has published many papers and teaches various subjects related to software engineering, development, and architecture. He is also a speaker on Channel 9, one of the most prestigious and active community websites for the .NET stack.  Francesco Abbruzzese has built the tool - MVC Controls Toolkit. He has also contributed to the diffusion and evangelization of the Microsoft web stack since the first version of ASP.NET MVC through tutorials, articles, and tools. He writes about .NET and client-side technologies on his blog, Dot Net Programming, and in various online magazines. His company, Mvcct Team, implements and offers web applications, AI software, SAS products, tools, and services for web technologies associated with the Microsoft stack.  Gabriel and Francesco are authors of the book Software Architecture with C# 9 and .NET 5, 2nd Edition. Valerio De Sanctis is a skilled IT professional with 20 years of experience in lead programming, web-based development, and project management using ASP.NET, PHP, Java, and JavaScript-based frameworks. He held senior positions at a range of financial and insurance companies, most recently serving as Chief Technology and Security Officer at a leading IT service provider for top-tier insurance groups. He is an active member of the Stack Exchange Network, providing advice and tips on the Stack Overflow, ServerFault, and SuperUser communities; he is also a Microsoft Most Valuable Professional (MVP) for Developer Technologies. He is the founder and owner of Ryadel. Valerio De Sanctis is the author of ASP.NET Core 5 and Angular, 4th Edition
Read more
  • 0
  • 0
  • 9409

article-image-googles-new-facial-recognition-patent-uses-your-social-network-to-identify-you
Melisha Dsouza
10 Aug 2018
3 min read
Save for later

Google’s new facial recognition patent uses your social network to identify you!

Melisha Dsouza
10 Aug 2018
3 min read
Google is making its mark in facial recognition technology. After two successful forays in facial identification patents in August 2017 and January 2018, Google is back with another charter. This time its huge and plans to use machine-learning technology for facial recognition of publicly available personal photos on the internet. It’s no secret that Google can crawl trillions of websites at once. Using this as an advantage, the new patent allows Google to source pictures and identify faces from personal communications, social networks, collaborative apps, blogs and much more! Why is facial recognition gaining importance? The internet is buzzing with people clicking and uploading their images. Whether it be profile pictures or group photographs, images on social networks is all the rage these days.  Apart from this, facial recognition also comes in handy while performing secure banking and financial transactions. ATMs and banks use this technology to make sure the user is who he/she says they are. From criminal tracking to identifying individuals in huge masses of people- facial recognition has applications everywhere! Clearly, Google has been taking full advantage of this tech. First, in the “Reverse Image Search” system, that allowed users to upload an image of a public figure to Google, the results would be a “best Guess” about who appears in the photo. And now, with the new patent, users can identify photos of less famous individuals. Imagine uploading a picture of a fifth-grade friend and coming back with the result of his/her email ID or occupation or for that matter, where they lives! The Workings of the Google Brain The process is simple and straightforward. First, the user uploads a photo, screenshot or scanned image The system analyzes the image and comes up with  both visually similar, and a potential match using advanced image recognition Google will find the best possible match  based partially on the data it pulled from your social accounts and other collaborative apps plus the aforementioned data sources The process of recognizing an image adopted by Google Source: CBInsights While all of this does sound exciting, there is a dark side left to be explored. Imagine you are out going about your own business. Someone who you don't even know happens to click your picture. This could later be used to find out all your personal details like where you live, what you do for a living, what your email address. All because everything is available on your social media accounts and on the internet these days!  Creepy much? This is where basic ethics and privacy concerns come into play. The only solace here is that the patent states, in certain scenarios, a person would have to opt-in to have his/identity appear in search results. Need to know more? Check out the perspective on thenextweb.com. Admiring the many faces of Facial Recognition with Deep Learning Google’s second innings in China: Exploring cloud partnerships with Tencent and others Google’s Smart Display – A push towards the new OS, Fuchsia
Read more
  • 0
  • 46
  • 9356
Unlock access to the largest independent learning library in Tech for FREE!
Get unlimited access to 7500+ expert-authored eBooks and video courses covering every tech area you can think of.
Renews at $15.99/month. Cancel anytime
article-image-kali-linux-2019-4-released-with-xfce-a-new-desktop-environment-a-new-gtk3-theme-and-much-more
Savia Lobo
27 Nov 2019
3 min read
Save for later

Kali Linux 2019.4 released with Xfce, a new desktop environment, a new GTK3 theme, and much more!

Savia Lobo
27 Nov 2019
3 min read
On November 26, the Kali Linux team announced its fourth and final release of 2019, Kali Linux 2019.4, which is readily available for download. A few features of Kali Linux 2019.4 include a new default desktop environment, Xfce; a new GTK3 theme (for Gnome and Xfce); Kali Undercover” mode, the kernel has been upgraded to version 5.3.9, and much more. Talking about ARM the team highlighted, “2019.4 is the last release that will support 8GB sdcards on ARM. Starting in 2020.1, a 16GB sdcard will be the minimum we support.” What’s new in Kali Linux 2019.4? New desktop environment, Xfce and GTK3 theme The much-awaited desktop environment update is here. The older versions had certain performance issues resulting in fractured user experience. To address this, they developed a new theme running on Xfce. Its lightweight design can run on all levels of Kali installs. The new theme can handle various needs of the average user with no changes. It uses standard UI concepts and there is no learning curve to it. It looks great with modern UI elements that make efficient use of screen space. Kali Undercover mode For pentesters doing their work in a public environment, the team has made a little script that will change the user’s Kali theme to look like a default Windows installation. This way, users can work a bit more incognito. “After you are done and in a more private place, run the script again and you switch back to your Kali theme. Like magic!”, the official blog post reads. BTRFS during setup Another significant new addition to the documentation is the use of BTRFS as a root file system. This gives users the ability to do file system rollbacks after upgrades. In cases when users are in a VM and about to try something new, they will often take a snapshot in case things go wrong. However, running Kali bare metal is not easy. There is also a manual clean up included. With BTRFS, users can have a similar snapshot capability on a bare metal install! NetHunter Kex – Full Kali Desktop on Android phones With NetHunter Kex, users can attach their Android devices to an HDMI output along with Bluetooth keyboard and mouse and get a full, no compromise, Kali desktop from their phones. To get a full breakdown on how to use NetHunter Kex, check out its official documents on the Kali Linux website. Kali Linux users are excited about this release and look forward to trying the newly added features. https://twitter.com/firefart/status/1199372224026861568 https://twitter.com/azelhajjar/status/1199648846470615040 To know more about other features in detail, read the Kali Linux 2019.4  official release on Kali Linux website. Glen Singh on why Kali Linux is an arsenal for any cybersecurity professional [Interview] Kali Linux 2019.1 released with support for Metasploit 5.0 Kali Linux 2018 for testing and maintaining Windows security – Wolf Halton and Bo Weaver [Interview]
Read more
  • 0
  • 0
  • 9170

article-image-the-tor-project-on-browser-fingerprinting-and-how-it-is-taking-a-stand-against-it
Bhagyashree R
06 Sep 2019
4 min read
Save for later

The Tor Project on browser fingerprinting and how it is taking a stand against it

Bhagyashree R
06 Sep 2019
4 min read
In a blog post shared on Wednesday, Pierre Laperdrix, a postdoctoral researcher in the Secure Web Applications Group at CISPA, talked about browser fingerprinting, its risks, and the efforts taken by the Tor Project to prevent it. He also talked about his Fingerprint Central website, which is officially a part of the Tor project since 2017. What is browser fingerprinting Browser fingerprinting is the systematic collection of information about a remote computing device for the purposes of identification. There are several techniques through which a third-party can get a “rich fingerprint.” These include the availability of JavaScript or other client-side scripting languages, the user-agent and the accept headers, HTML5 Canvas element, and more. The browser fingerprints may include information like browser and operating system type and version, active plugins, timezone, language, screen resolution and various other active settings. Some users may think that these are too generic to identify a particular person. However, a study by Panopticlick, a browser fingerprinting test website, says that only 1 in 286,777 other browsers will share its fingerprint. Here’s an example of fingerprint Pierre Laperdrix shared in his post: Source: The Tor Project As with any technology, browser fingerprinting can be used or misused. The fingerprints can enable a remote application to prevent potential frauds or online identity thefts. On the other hand, these can also be used to track users across websites and collect information about their online behavior, without their consent. Advertisers and marketers can use this data for targeted advertising. Read also: All about Browser Fingerprinting, the privacy nightmare that keeps web developers awake at night Steps taken by the Tor Project to prevent browser fingerprinting Laperdrix said that Tor was the very first browser to understand and address the privacy threats browser fingerprinting poses. The Tor browser, which goes by the tagline “anonymity online”, is designed to reduce online tracking and identification of users. The browser takes a very simple approach to prevent the identification of users. “In the end, the approach chosen by Tor developers is simple: all Tor users should have the exact same fingerprint. No matter what device or operating system you are using, your browser fingerprint should be the same as any device running Tor Browser,” Laperdrix wrote. There are many other changes that have been made to the Tor browser over the years to prevent the unique identification of users. Tor warns users when they maximize their browser window as it is also one attribute that can be used to identify them. It has introduced default fallback fonts to prevent font and canvas fingerprinting. It has all the JS clock sources and event timestamps set to a specific resolution to prevent JS from measuring the time intervals of things like typing to produce a fingerprint. Talking about his contribution towards preventing browser fingerprinting, Laperdrix wrote, “As part of the effort to reduce fingerprinting, I also developed a fingerprinting website called FP Central to help Tor developers find fingerprint regressions between different Tor builds.” As a part of Google Summer of Code 2016, Laperdrix proposed to develop a website called Fingerprint Central, which is now officially included in the Tor Project. Similar to AmIUnique.org or Panopticlick, FP Central is developed to study the diversity of browser fingerprints. It runs a fingerprinting test suite and collects data from Tor browsers to help developers design and test new fingerprinting protection. They can also use it to ensure that fingerprinting-related bugs are correctly fixed with specific regression tests. Explaining the long-term goal of the website he said, “The expected long-term impact of this project is to reduce the differences between Tor users and reinforce their privacy and anonymity online.” There are a whole lot of modifications made under the hood to prevent browser fingerprinting that you can check out using the “tbb-fingerprinting” tag in the bug tracker. These modifications will also make their way into future releases of Firefox under the Tor Uplift program. Many organizations have taken a step against browser fingerprinting including browser companies Mozilla and Brave. Earlier this week, Firefox 69 was shipped with browser fingerprinting blocked by default. Brave also comes with a Fingerprinting Protection Mode enabled by default. In 2018, Apple updated Safari to only share a simplified system profile making it difficult to uniquely identify or track users. Read also: Firefox 69 allows default blocking of third-party tracking cookies and cryptomining for all users Check out Laperdrix’s post on Tor blog to know more in detail about browser fingerprinting. Other news in Web JavaScript will soon support optional chaining operator as its ECMAScript proposal reaches stage 3 Google Chrome 76 now supports native lazy-loading #Reactgate forces React leaders to confront the community’s toxic culture head on
Read more
  • 0
  • 0
  • 9112

article-image-rusts-original-creator-graydon-hoare-on-the-current-state-of-system-programming-and-safety
Bhagyashree R
20 Jun 2019
4 min read
Save for later

Rust’s original creator, Graydon Hoare on the current state of system programming and safety

Bhagyashree R
20 Jun 2019
4 min read
Back in July 2010, Graydon Hoare showcased the Rust programming language for the very first time at Mozilla Annual Summit. Rust is an open-source system programming language that was created with speed, memory safety, and parallelism in mind. Looking at Rust’s memory and thread safety guarantees, a supportive community, a quickly evolving toolchain, many major projects are being rewritten in Rust. And, one of the major ones was Servo, an HTML rendering engine that will eventually replace Firefox’s rendering engine. Mozilla is also using Rust for rewriting many other key parts of Firefox under Project Quantum. Fastly chose Rust to implement Lucet, its native WebAssembly compiler and runtime. More recently, Facebook also chose Rust to implement its controversial Libra blockchain. As the 9th anniversary of the day when Hoare first presented Rust in front of a large audience is approaching, The New Stack took a very interesting interview with him. In the interview, he talked about the current state of system programming, how safe he considers our current complex systems are, how they can be made safer, and more. Here are the key highlights from the interview: Hoare on a brief history of Rust Hoare started working on Rust as a side-project in 2006. Mozilla, his employer at that time, got interested in the project and provided him a team of engineers to help him in the further development of the language. In 2013, he experienced burnout and decided to step down as a technical lead. After working on some less-time-sensitive projects, he quit Mozilla and worked for the payment network, Stellar. In 2016, he got a call from Apple to work on the Swift programming language. Rust is now being developed by the core teams and an active community of volunteer coders. This programming language that he once described as “spare-time kinda thing” is being used by many developers to create a wide range of new software applications from operating systems to simulation engines for virtual reality. It was also "the most loved programming language" in the Stack Overflow Developer Survey for four years in a row (2016-2019). Hoare was very humble about the hard work and dedication he has put into creating the Rust programming language. When asked to summarize Rust’s history he simply said that “we got lucky”.  He added, “that Mozilla was willing to fund such a project for so long; that Apple, Google, and others had funded so much work on LLVM beforehand that we could leverage; that so many talented people in academia, industry and just milling about on the internet were willing to volunteer to help out.” The current state of system programming and safety Hoare considers the state of system programming language “healthy” as compared to the starting couple of decades in his career. Now, it is far easier to sell a language that is focused on performance and correctness. We are seeing more good languages coming into the market because of the increasing interaction between academia and industry. When asked about safety, Hoare believes that though we are slowly taking steps towards better safety, the overall situation is not getting better. He attributes building a number of new complex computing systems is making it worse. He said, “complexity beyond comprehension means we often can’t even define safety, much less build mechanisms that enforce it.” Another reason according to him is the huge number of vulnerable software present in the field that can be exploited anytime by a bad actor. For instance, on Tuesday, a zero-day vulnerability was fixed in Firefox that was being “exploited in the wild” by attackers. “Like much of the legacy of the 20th century, there’s just a tremendous mess in software that’s going to take generations to clean up, assuming humanity even survives that long,” he adds. How system programming can be made safer Hoare designed Rust with safety in mind. Its rich type system and ownership model ensures memory and thread safety. However, he suggests that we can do a lot better when it comes to safety in system programming. He listed a bunch of new improvements that we can implement, “information flow control systems, effect systems, refinement types, liquid types, transaction systems, consistency systems, session types, unit checking, verified compilers and linkers, dependent types.” Hoare believes that there are already many features suggested by academia. The main challenge for us is to implement these features “in a balanced, niche-adapted language that’s palatable enough to industrial programmers to be adopted and used.” You can read Hoare’s full interview on The New Stack. Rust 1.35.0 released Rust shares roadmap for 2019 Rust 1.34 releases with alternative cargo registries, stabilized TryFrom and TryInto, and more
Read more
  • 0
  • 0
  • 8960

article-image-introducing-opendrop-an-open-source-implementation-of-apple-airdrop-written-in-python
Vincy Davis
21 Aug 2019
3 min read
Save for later

Introducing OpenDrop, an open-source implementation of Apple AirDrop written in Python

Vincy Davis
21 Aug 2019
3 min read
A group of German researchers recently published a paper “A Billion Open Interfaces for Eve and Mallory: MitM, DoS, and Tracking Attacks on iOS and macOS Through Apple Wireless Direct Link”, at the 28th USENIX Security Symposium (August 14–16), USA. The paper reveals security and privacy vulnerabilities in Apple’s AirDrop file-sharing service as well as denial-of-service (DoS) attacks which leads to privacy leaks or simultaneous crashing of all neighboring devices. As part of the research, Milan Stute and Alexander Heinrich, two researchers have developed an open-source implementation of Apple AirDrop written in Python - OpenDrop. OpenDrop is like a FOSS implementation of AirDrop. It is an experimental software and is the result of reverse engineering efforts by the Open Wireless Link project (OWL). It is compatible with Apple AirDrop and used for sharing files among Apple devices such as iOS and macOS or on Linux systems running an open re-implementation of Apple Wireless Direct Link (AWDL). The OWL project consists of researchers from the Secure Mobile Networking Lab at TU Darmstadt looking into Apple’s wireless ecosystem. It aims to assess security, privacy and enables cross-platform compatibility for next-generation wireless applications. Currently, OpenDrop only supports Apple devices. However, it does not support all features of AirDrop and may be incompatible with future AirDrop versions. It uses the current version of OpenSSL and libarchive and requires Python 3.6+ version. OpenDrop is licensed under the GNU General Public License v3.0. It is not affiliated with or endorsed by Apple Inc. Limitations in OpenDrop Triggering macOS/iOS receivers via Bluetooth Low Energy: Since Apple devices begin their AWDL interface and AirDrop server only after receiving a custom advertisement via Bluetooth LE, it is possible that Apple AirDrop receivers may not be discovered. Sender/Receiver authentication and connection state: Currently, OpenDrop does not conduct peer authentication. It does not verify that the TLS certificate is signed by Apple's root or not. Also, OpenDrop accepts any file that it receives automatically. Sending multiple files: OpenDrop does not support sending multiple files for sharing, a feature supported by Apple’s AirDrop. Users are excited to try the new OpenDrop implementation. A Redditor comments, “Yesssss! Will try this out soon on Ubuntu.” Another comment reads, “This is neat. I did not realize that enough was known about AirDrop to reverse engineer it. Keep up the good work.” Another user says, “Wow, I can’t wait to try this out! I’ve been in the Apple ecosystem for years and AirDrop was the one thing I was really going to miss.” Few Android users wish to see such implementations in an Android app. A user on Hacker News says, “Would be interesting to see an implementation of this in the form of an Android app, but it looks like that might require root access.” A Redditor comments, “It'd be cool if they were able to port this over to android as well.” To know how to send and receive files using OpenDrop, check out its Github page. Apple announces expanded security bug bounty program up to $1 million; plans to release iOS Security Research Device program in 2020 Google Project Zero reveals six “interactionless” bugs that can affect iOS via Apple’s iMessage ‘FaceTime Attention Correction’ in iOS 13 Beta 3 uses ARKit to fake eye contact
Read more
  • 0
  • 0
  • 8924
article-image-meet-yuzu-an-experimental-emulator-for-the-nintendo-switch
Sugandha Lahoti
17 Jul 2018
3 min read
Save for later

Meet yuzu – an experimental emulator for the Nintendo Switch

Sugandha Lahoti
17 Jul 2018
3 min read
The makers of Citra, an emulator for the Nintendo 3DS, have released a new emulator called yuzu. This emulator is made for the Nintendo Switch, which is the 7th major video game console from Nintendo. The journey so far for yuzu Yuzu was initiated as an experimental setup by Citra’s lead developer bunnei after he saw that there were signs of the Switch’s operating system being based on the 3DS’s operating system. yuzu has the same core code as Citra and much of the same OS High-Level Emulation (HLE). The core emulation and memory management of yuzu are based on Citra, albeit modified to work with 64-bit addresses. It also has a loader for the Switch games and Unicorn integration for CPU emulation. Yuzu uses Reverse Engineering process to figure out how games work, and how the Switch GPU works. Switch’s GPU is more advanced than 3DS’ used in Citra and poses multiple challenges to reverse engineer it. However, the RE process of yuzu is essentially the same as Citra. Most of their RE and other development is being done in a trial-and-error manner. OS emulation The Switch’s OS is based Nintendo 3DS’s OS. So the developers used a large part of Citra’s OS HLE code for yuzu OS. The loader and file system service was reused from Citra and modified to support Switch game dump files. The Kernel OS threading, scheduling, and synchronization fixes for yuzu were also ported from Citra’s OS implementation. The save data functionality, which allowed games to read and write files to the save data directory was also taken from 3DS. Switchbrew helped them create libnx, a userland library to write homebrew apps for the Nintendo Switch. (Homebrew is a popular term used for applications that are created and executed on a video game console by hackers, programmers, developers, and consumers.) The Switch IPC (Inter-process communication) process is much more robust and complicated than the 3DS’s. Their system has different command modes, a typical IPC request response, and a Domain to efficiently conduct multiple service calls. Yuzu uses the Nvidia services to configure the video driver to get the graphics output. However, Nintendo re-purposed the Android graphics stack and used it in the Switch for rendering. And so yuzu developers had to implement this even to get homebrew applications to display graphics. The Next Steps Being at a nascent stage, yuzu still has a long way to go. The developers still have to add HID (user input support) such as support for all 9 controllers, rumble, LEDs, layouts etc. Currently, the Audio HLE is in progress, but they still have to implement audio playback. Audio playback, if implemented properly, would be a major breakthrough as most complicated games often hang or go into a deadlock because of this issue. They are also working on resolving minor fixes to help them boot further in games like Super Mario Odyssey, 1-2-Switch, and The Binding of Issac. Be sure to read the entire progress report on the yuzu blog. AI for game developers: 7 ways AI can take your game to the next level AI for Unity game developers: How to emulate real-world senses in your NPC agent behavior Unity 2018.2: Unity release for this year 2nd time in a row!
Read more
  • 0
  • 0
  • 8909

article-image-watermelon-db-a-new-relational-database-to-make-your-react-and-react-native-apps-highly-scalable
Bhagyashree R
11 Sep 2018
2 min read
Save for later

Introducing Watermelon DB: A new relational database to make your React and React Native apps highly scalable

Bhagyashree R
11 Sep 2018
2 min read
Now you can store your data in Watermelon! Yesterday, Nozbe released Watermelon DB v0.6.1-1, a new addition to the database world. It aims to help you build powerful React and React Native apps that scale to large number of records and remain fast. Watermelon architecture is database-agnostic, making it cross-platform. It is a high-level layer for dealing with data, but can be plugged in to any underlying database, depending on platform needs. Why choose Watermelon DB? Watermelon DB is optimized for building React and React Native complex applications. Following are the factors that help in ensuring high speed of applications: It makes your application highly scalable by using lazy loading, which means Watermelon DB loads data only when it is requested. Most queries resolve in less than 1ms, even with 10,000 records, as all querying is done on SQLite database on a separate thread. You can launch your app instantly irrespective of how much data you have. It is supported on iOS, Android, and the web. It is statically typed keeping Flow, a static type checker for JavaScript, in mind. It is fast, asynchronous, multi-threaded, and highly cached. It is designed to be used with a synchronization engine to keep the local database up to date with a remote database. Currently, Watermelon DB is in active development and cannot be used in production. Their roadmap states that, migrations will soon be added to allow the production use of Watermelon DB. Schema migrations is the mechanism by which you can add new tables and columns to the database in a backward-compatible way. To know how you can install it and to try few examples, check out Watermelon DB on GitHub. React Native 0.57 coming soon with new iOS WebViews What’s in the upcoming SQLite 3.25.0 release: windows functions, better query optimizer and more React 16.5.0 is now out with a new package for scheduling, support for DevTools, and more!
Read more
  • 0
  • 0
  • 8905

article-image-now-there-is-a-deepfake-that-can-animate-your-face-with-just-your-voice-and-a-picture-using-temporal-gans
Savia Lobo
24 Jun 2019
6 min read
Save for later

Now there is a Deepfake that can animate your face with just your voice and a picture using temporal GANs

Savia Lobo
24 Jun 2019
6 min read
Last week, researchers from the Imperial College in London and Samsung’s AI research center in the UK revealed how deepfakes can be used to generate a singing or talking video portrait by from a still image of a person and an audio clip containing speech. In their paper titled, “Realistic Speech-Driven Facial Animation with GANs”, the researchers have used temporal GAN which uses 3 discriminators focused on achieving detailed frames, audio-visual synchronization, and realistic expressions. Source: arxiv.org “The generated videos are evaluated based on sharpness, reconstruction quality, lip-reading accuracy, synchronization as well as their ability to generate natural blinks”, the researchers mention in their paper. https://youtu.be/9Ctm4rTdVTU Researchers used the GRID, TCD TIMIT, CREMA-D and LRW datasets. The GRID dataset has 33 speakers each uttering 1000 short phrases, containing 6 words randomly chosen from a limited dictionary. The TCD TIMIT dataset has 59 speakers uttering approximately 100 phonetically rich sentences each. The CREMA-D dataset includes 91 actors coming from a variety of different age groups and races utter 12 sentences. Each sentence is acted out by the actors multiple times for different emotions and intensities. Researchers have used the recommended data split for the TCD TIMIT dataset but exclude some of the test speakers and use them as a validation set. Researchers performed data augmentation on the training set by mirroring the videos. Metrics used to assess the quality of generated videos Researchers evaluated the videos using traditional image reconstruction and sharpness metrics. These metrics can be used to determine frame quality; however, they fail to reflect other important aspects of the video such as audio-visual synchrony and the realism of facial expressions. Hence they have also proposed alternative methods capable of capturing these aspects of the generated videos. Reconstruction Metrics This method uses common reconstruction metrics such as the peak signal-to-noise ratio (PSNR) and the structural similarity (SSIM) index to evaluate the generated videos. However, the researchers reveal that “reconstruction metrics will penalize videos for any facial expression that does not match those in the ground truth videos”. Sharpness Metrics The frame sharpness is evaluated using the cumulative probability blur detection (CPBD) measure, which determines blur based on the presence of edges in the image. For this metric as well as for the reconstruction metrics larger values imply better quality. Content Metrics The content of the videos is evaluated based on how well the video captures the identity of the target and on the accuracy of the spoken words. The researchers have verified the identity of the speaker using the average content distance (ACD), which measures the average Euclidean distance of the still image representation, obtained using OpenFace from the representation of the generated frames. The accuracy of the spoken message is measured using the word error rate (WER) achieved by a pre-trained lip-reading model. They used the LipNet model which exceeds the performance of human lip-readers on the GRID dataset. For both content metrics, lower values indicate better accuracy. Audio-Visual Synchrony Metrics Synchrony is quantified in Joon Son Chung and Andrew Zisserman’s “Out of time: automated lip sync in the wild”. In this work Chung et al. propose the SyncNet network which calculates the euclidean distance between the audio and video encodings on small (0.2 second) sections of the video. The audio-visual offset is obtained by using a sliding window approach to find where the distance is minimized. The offset is measured in frames and is positive when the audio leads the video. For audio and video pairs that correspond to the same content, the distance will increase on either side of the point where the minimum distance occurs. However, for uncorrelated audio and video, the distance is expected to be stable. Based on this fluctuation they further propose using the difference between the minimum and the median of the Euclidean distances as an audio-visual (AV) confidence score which determines the audio-visual correlation. Higher scores indicate a stronger correlation, whereas confidence scores smaller than 0.5 indicate that Limitations and the possible misuse of Deepfake The limitation of this new Deepfake method is that it only works for well-aligned frontal faces. “the natural progression of this work will be to produce videos that simulate in wild conditions”, the researchers mention. While this research appears the next milestone for GANs in generating videos from still photos, it also may be misused for spreading misinformation by morphing video content from any still photograph. Recently, at the House Intelligence Committee hearing, Top House Democrat Rep. Adam Schiff (D-CA) issued a warning on Thursday that deepfake videos could have a disastrous effect on the 2020 election cycle. “Now is the time for social media companies to put in place policies to protect users from this kind of misinformation not in 2021 after viral deepfakes have polluted the 2020 elections,” Schiff said. “By then it will be too late.” The hearing came only a few weeks after a real-life instance of a doctored political video, where the footage was edited to make House Speaker Nancy Pelosi appear drunk, that spread widely on social media. “Every platform responded to the video differently, with YouTube removing the content, Facebook leaving it up while directing users to coverage debunking it, and Twitter simply letting it stand,” The Verge reports. YouTube took the video down; however, Facebook refused to remove the video. Neil Potts, Public Policy Director of Facebook had stated that if someone posted a doctored video of Zuckerberg, like one of Pelosi, it would stay up. After this, on June 11, a fake video of Mark Zuckerberg was posted on Instagram, under the username, bill_posters_uk. In the video, Zuckerberg appears to give a threatening speech about the power of Facebook. https://twitter.com/motherboard/status/1138536366969688064 Omer Ben-Ami, one of the founders of Canny says that the video is made to educate the public on the uses of AI and to make them realize the potential of AI. Though Zuckerberg’s video was to retain the educational value of Deepfakes, this shows the potential of how it can be misused. Although some users say it has interesting applications, many are concerned that the chances of misusing this software are more than putting it into the right use. https://twitter.com/timkmak/status/1141784420090863616 A user commented on Reddit, “It has some really cool applications though. For example in your favorite voice acted video game, if all of the characters lips would be in sync with the vocals no matter what language you are playing the game in, without spending tons of money having animators animate the characters for every vocalization.” To know more about this new Deepfake, read the official research paper. Lawmakers introduce new Consumer privacy bill and Malicious Deep Fake Prohibition Act to support consumer privacy and battle deepfakes Worried about Deepfakes? Check out the new algorithm that manipulate talking-head videos by altering the transcripts Machine generated videos like Deepfakes – Trick or Treat?
Read more
  • 0
  • 0
  • 8681
article-image-aws-announces-more-flexibility-its-certification-exams-drops-its-exam-prerequisites
Melisha Dsouza
18 Oct 2018
2 min read
Save for later

AWS announces more flexibility its Certification Exams, drops its exam prerequisites

Melisha Dsouza
18 Oct 2018
2 min read
Last week (on 11th October), the AWS team announced that they are removing the exam-prerequisites to give users more flexibility on the AWS Certification Program. Previously, it was a prerequisite for a customer to pass the foundational or Associate level exam before appearing for the Professional or Specialty certification. AWS has now eliminated this prerequisite, taking into account customers requests for flexibility. Customers are no longer required to have an Associate certification before pursuing a Professional certification. Nor do they need to hold a Foundational or Associate certification before pursuing Specialty certification. The professional level exams are pretty tough to pass. Until a customer has a complete deep knowledge of the AWS platform, passing the professional exam is difficult. If a customer skips the Foundational or Associate level exams and directly appears for the professional level exams, he will not have the practice and knowledge necessary to fare well in them. Instead, if he/she fails the exam, backing up to the Associate level can be demotivating. The AWS Certification demonstrates helps individuals obtain an expertise to design, deploy, and operate highly available, cost-effective, and secure applications on AWS. They will gain a  proficiency with AWS which will help them earn tangible benefits This exam will help Employers Identify skilled professionals that can use  AWS technologies to lead IT initiatives. Moreover, the exams will help them reduce risks and costs to implement their workloads and projects on the AWS platform. AWS dominates the cloud computing market and the AWS Certified Solutions Architect exams can help candidates secure their career in this exciting field. AWS offers digital and classroom training build cloud skills and prepare for certification exams. To know more about this announcement, head over to their official Blog. ‘AWS Service Operator’ for Kubernetes now available allowing the creation of AWS resources using kubectl Machine Learning as a Service (MLaaS): How Google Cloud Platform, Microsoft Azure, and AWS are democratizing Artificial Intelligence AWS machine learning: Learning AWS CLI to execute a simple Amazon ML workflow [Tutorial]  
Read more
  • 0
  • 0
  • 8670

article-image-cloudflare-finally-launches-warp-and-warp-plus-after-a-delay-of-more-than-five-months
Vincy Davis
27 Sep 2019
5 min read
Save for later

Cloudflare finally launches Warp and Warp Plus after a delay of more than five months

Vincy Davis
27 Sep 2019
5 min read
More than five months after announcing Warp, Cloudflare has finally made it available to the general public, yesterday. With two million people on the waitlist to try Warp, the Cloudflare team says that it took them harder than they thought to build a next-generation service to secure consumer mobile connections, without compromising on speed and power usage. Along with Warp, Cloudflare is also launching Warp Plus. Warp is a free VPN to the 1.1.1.1 DNS resolver app which will speed up mobile data using the Cloudflare network to resolve DNS queries at a faster pace. It also comes with end-to-end encryption and does not require users to install a root certificate to observe encrypted internet traffic. It is built around a UDP-based protocol that is optimized for the mobile internet and offers excellent performance and reliability. Why Cloudflare delayed the Warp release? A few days before Cloudflare announced Warp on April 1st, Apple released its new version iOS 12.2 with significant changes in its underlying network stack implementation. This made the Warp network unstable thus making the Cloudflare team arrange for workarounds in their networking code, which took more time. Cloudflare adds, “We had a version of the WARP app that (kind of) worked on April 1. But, when we started to invite people from outside of Cloudflare to use it, we quickly realized that the mobile Internet around the world was far more wild and varied than we'd anticipated.” As the internet is made up of diverse network components, the Cloudflare team found it difficult to include all the diversity of mobile carriers, mobile operating systems, and mobile device models in their network. The Cloudflare team also found it testing to include users’ diverse network settings in their network. Warp uses a technology called Anycast to route user traffic to the Cloudflare network, however, it moves the users’ data between entire data centers, which made the Warp functioning complex.  To overcome all these barriers, the Cloudflare team has now changed its approach by focussing more on iOS. The team has also solidified the shared underpinnings of the app to ensure that it would even work with future network stack upgrades. The team has also tested Warp with network-based users to discover as many corner cases as possible. Thus, the Cloudflare team has successfully invented new technologies to keep the session state stable even with multiple mobile networks. Cloudflare introduces Warp Plus - an unlimited version of Warp Along with Warp, the Cloudflare team has also launched Warp Plus, an unlimited version of WARP for a monthly subscription fee. Warp Plus is faster than Warp and uses Cloudflare’s Argo Smart Routing to achieve a higher speed than Warp. The official blog post states, “Routing your traffic over our network often costs us more than if we release it directly to the internet.” To cover these costs, Warp Plus will charge a monthly fee of $4.99/month or less, depending on the user location. The Cloudflare team also added that they will be launching a test tool within the 1.1.1.1 app in a few weeks to make users “see how your device loads a set of popular sites without WARP, with WARP, and with WARP Plus.” Read Also: Cloudflare plans to go public; files S-1 with the SEC  To know more details about Warp Plus, read the technical post by Cloudflare team. Privacy features offered by Warp and Warp Plus The 1.1.1.1 DNS resolver app provides strong privacy protections such as all the debug logs will be kept only long enough to ensure the security of the service. Also, Cloudflare will only retain the limited transaction data for legitimate operational and research purposes.  Warp will not only maintain the 1.1.1.1 DNS protection layers but will also ensure: User’s-identifiable log data will be written to disk The user’s browsing data will not be sold for advertising purposes Warp will not demand any personal information (name, phone number, or email address) to use Warp or Warp Plus Outside editors will regularly regulate Warp’s functioning The Cloudflare team has also notified users that the newly available Warp will have bugs present in them. The blog post also specifies that the most popular bug currently in Warp is due to traffic misroute, which is making the Warp function slower than the speed of non-Warp mobile internet.  Image Source: Cloudflare blog The team has made it easier for users to report bugs as they have to just click on the little bug icon near the top of the screen on the 1.1.1.1 app or shake their phone with the app open and send a bug report to Cloudflare. Visit the Cloudflare blog for more information on Warp and Warp Plus. Facebook will no longer involve third-party fact-checkers to review the political content on their platform GNOME Foundation’s Shotwell photo manager faces a patent infringement lawsuit from Rothschild Patent Imaging A zero-day pre-auth vulnerability is currently being exploited in vBulletin, reports an anonymous researcher
Read more
  • 0
  • 0
  • 8644