Working with network interfaces
Elastic Network Interface (ENI) in AWS is a network interface that can be attached to an EC2 instance. Based on its capacity, one EC2 instance can have number of ENIs attached to it. Each ENI comes with its own MAC and IP addresses. You can't move the ENI to another subnet after it is created. You can attach an ENI to an EC2 in the same AZ.
Getting ready
We need an AWS account and user with proper permissions for creating an ENI.
How to do it...
Here are the steps to follow:
- Log in to the AWS account and browse to https://console.aws.amazon.com/ec2/. In the left navigation menu, choose
Network Interfaces.

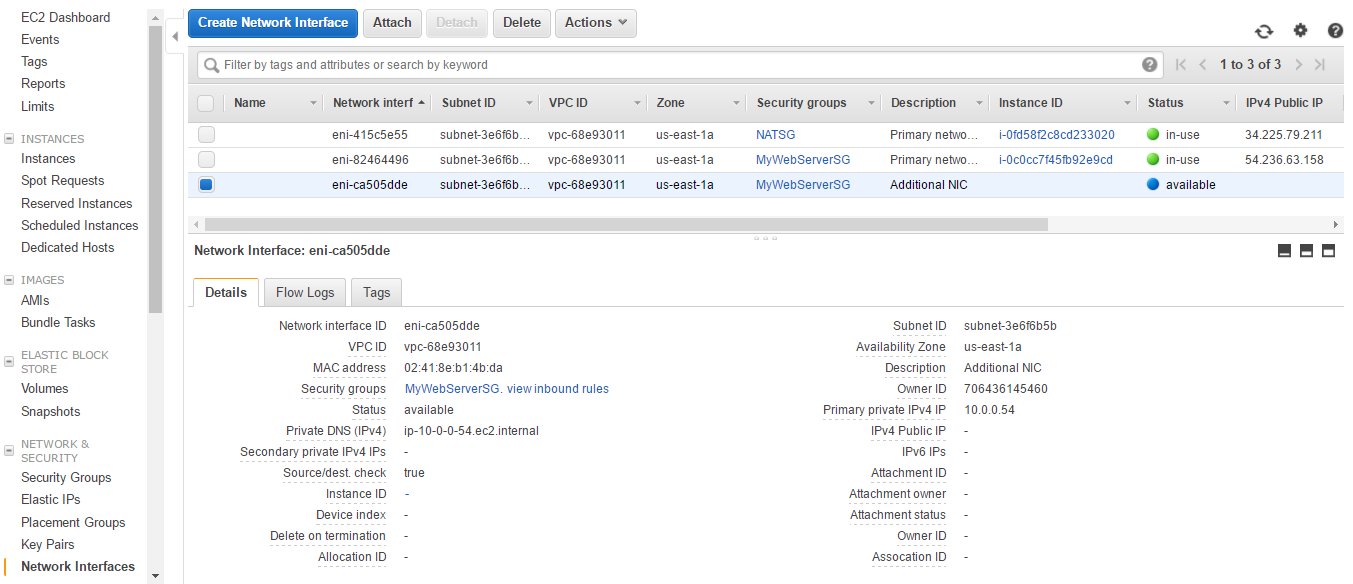
Network Interface Dashboard
- Click on
Create Network Interface.

Network Interface Creation Details
- In
Description, provide the name. InSubnet, choose subnet where the NIC needs to be created. LeaveIPv4 Private IPandIPv6 IP; they will be created as per CIDR range of subnet. SelectSecurity Group. Otherwise, you can mention the IP address from the CIDR range. Click onYes, Create.
Network Interface Detail
- You can see that only one network interface is created. However, its status is available as it is not attached to any instance. Click on the
Attachbutton.

Network Interface Creation
- Choose the EC2
Instance IDwith which you want to attach it. ClickAttach.

Network Interface attached
- You can see that the interface is in use. You can
Detachit and attach it to some other instance. From theActionmenu you can manage the ENI. Click onInstance ID.

EC2 with two Network Interface
- You can see two private IPs and two network interfaces
eth0andeth1.