Creating Kotlin Android project
Getting started with Kotlin is really easy, especially after Google has added official support for the language. You can use Kotlin directly with Android Studio 3. Android Studio 3 is still in Beta version at the time of writing this book. The best thing about using Kotlin for Android is that it is interoperable with your existing code, be it Java or C++. While working with Kotlin, you will realize that code in Kotlin is concise, extensible, and powerful. It really makes Android development more fun. Let's see how we can start working in Kotlin by first creating a Kotlin project in Android Studio 3.
Getting ready
To get started with this recipe, you will need Android Studio installed on your computer. Android Studio has both Android SDK and Android Virtual device in it. Ensure that you have Java Development Kit installed on your system. You will need an android phone or Emulator for debugging your project. You will also need at least one Android Virtual Device installed, of your desired specifications if you are not using an Android phone.
So basically, here's the checklist of the things that need to be installed before you move on to the next section:
- Java Development Kit (use the latest)
- Android Studio 3+
- Android phone or emulator
How to do it...
Creating a project in Android Studio is very simple and to create it in Kotlin just requires one extra click. Here's a step-by-step process of doing it:
- In Android Studio, in the menu, click on
File|New|New Project. Alternatively, if you've just opened Android Studio and see the Welcome to Android Studio window, click onStart a new Android Studio project.
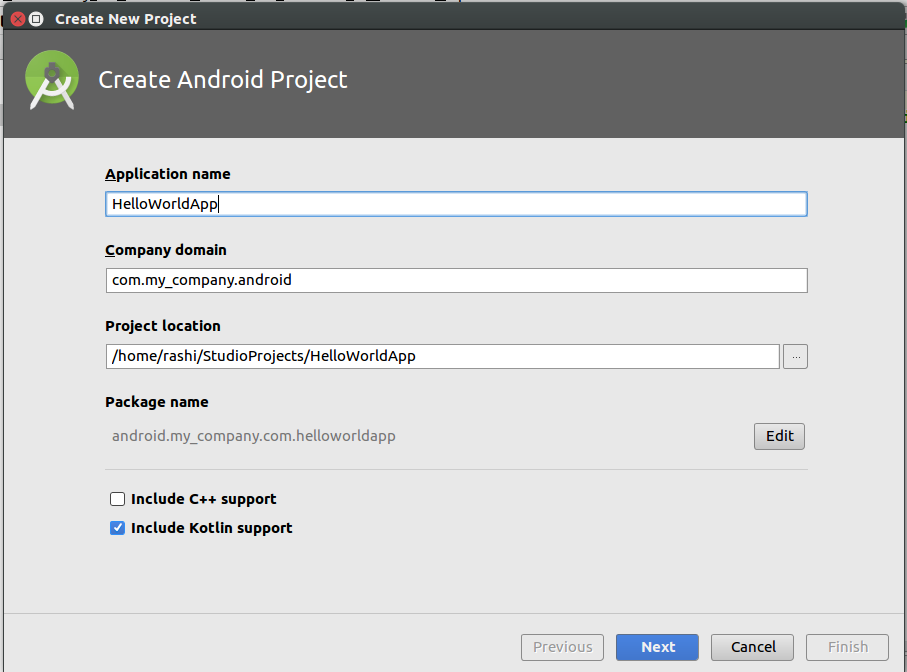
- In the wizard, add your Application name and Company domain, and simply check the box that says
Include Kotlin support. Click onNext:
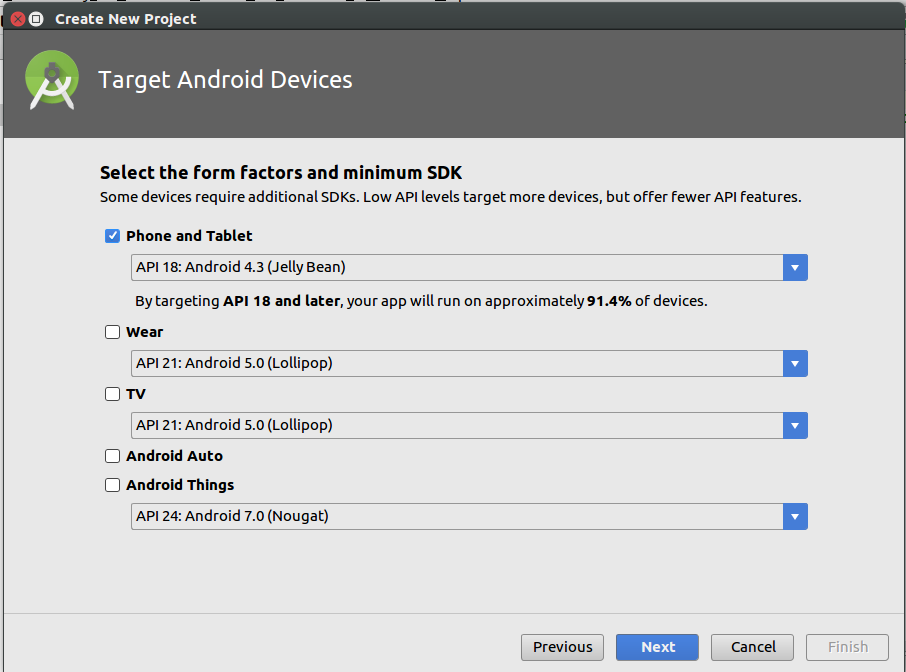
- On the next screen, you will be asked to choose your target devices and the minimum SDK support. So basically, it asks things like, "Do you want the application to run on both phone and android wear?" and "Do you want to support from Jelly Bean up or KitKat and up?":
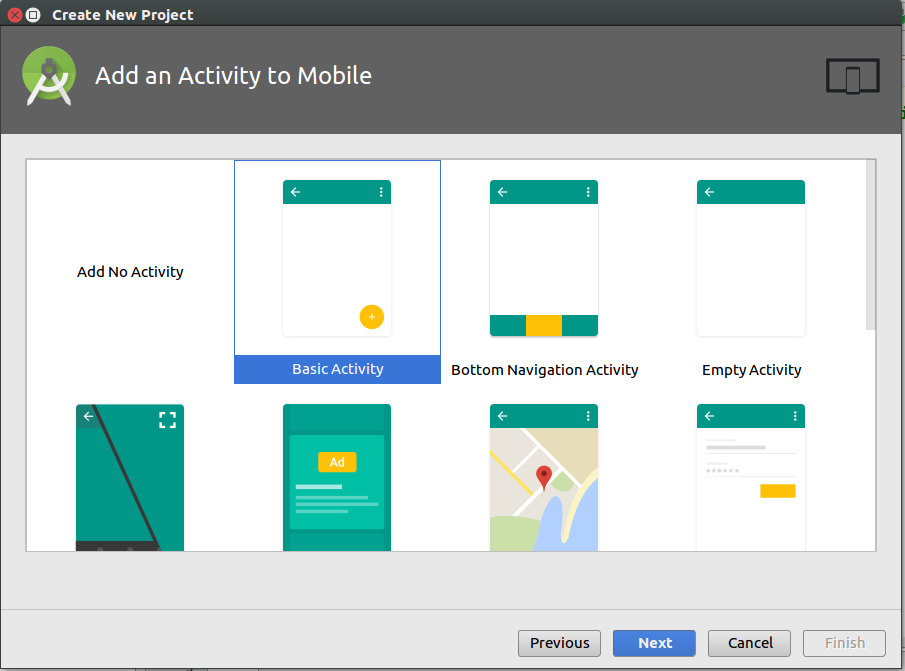
- On the next screen, you will be prompted to
Add an Activityto the project. You can also skip this step and add an activity later, but for now, just click on aBasic Activityand click onNext. If you have also chosenWearor any other option, you will be prompted to add activity for those components as well:
- Next, you will be prompted to Configure the Activity you added. Basically, what you have to do is to provide Activity Name, Layout Name, and Title. After this, click on
Finish, because you are done with creating your first project in Kotlin. - Run project on your device: You need to follow these steps:
- Connect your device to your development machine with a USB cable.
- Enable USB debugging on your device by going to
Settings|Developer options.
Note
On Android 4.2 and newer, Developer options are hidden by default. To make it available, go to Settings | About phone and tap on Build number seven times. Return to the previous screen to find Developer options.
Now in your Android Studio, click on the app module in the Project window and then select Run (or click on Run in the toolbar).
In the Select Deployment Target window, select your device, and click on OK. After a while, you will see the application running on your mobile or an emulator.
There's more...
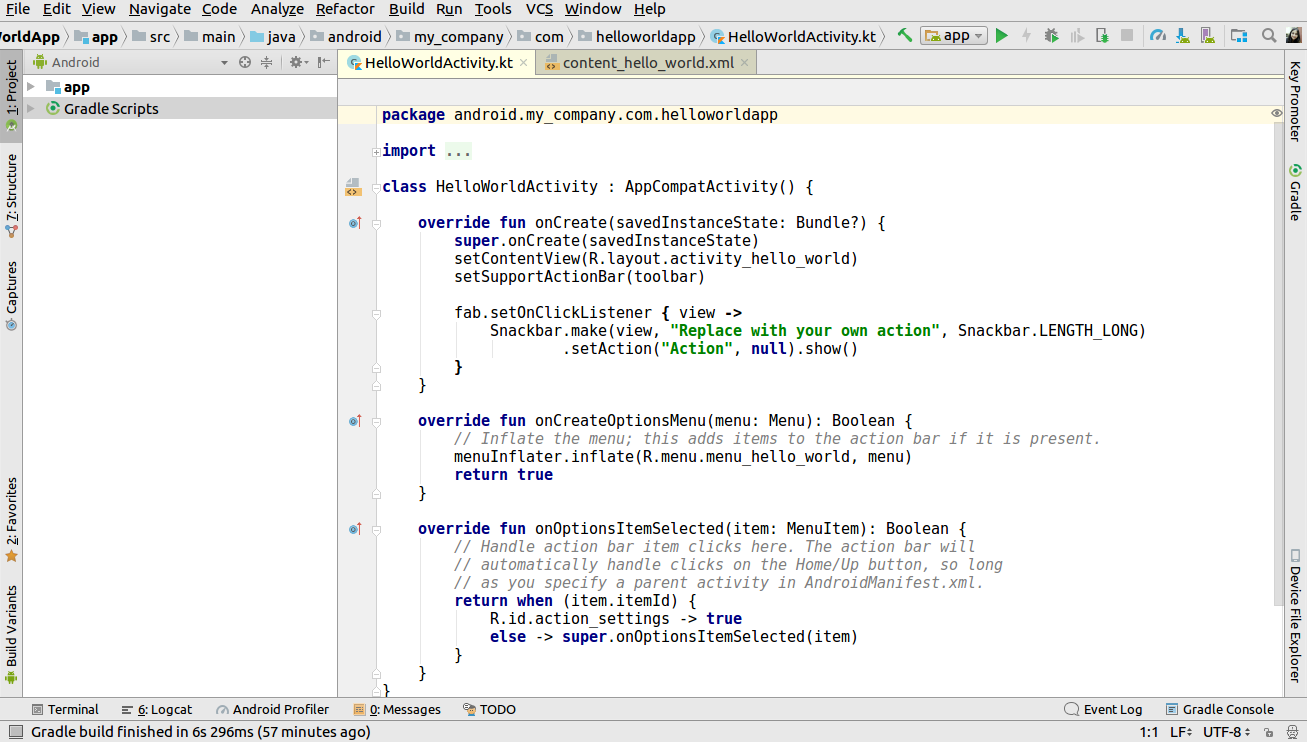
After clicking on the Finish button in the Create New Project window, Android Studio will configure things and create your project. If you added an activity as mentioned in Step 4, you will be greeted with the boilerplate code of the activity. It looks something like this: