
Setting up Android emulators
Android SDK comes with emulators capable of running applications we develop. We will need it for our project! The purpose of an emulator is to simulate a device and displays all its activity windowed on your computer. What can we do with it? We can prototype, develop, and test--all this without a hardware device. You can emulate phones, tablets, wearables, and TV devices. You can create your own device definitions, or you can use predefined emulators.
The good thing about emulators is that they are fast. In many situations, it will take less time to run an application on an emulator instance than on a real hardware device.
Working with the emulators is just as easy with a real hardware device. For gestures, you use your mouse, and for input, your keyboard.
Emulators can do anything a real phone does! You can easily send incoming phone calls and text messages! You can specify the location of the device, send fingerprint scans, adjust network speed and status, or even simulate battery properties. Emulators can have a virtual SD card and internal data storage, both of them you can use to send real files to that space.
Android Virtual Device (AVD) configuration is used to define an emulator. Each AVD instance works as a completely independent device! For the purpose of creating and management of AVDs, we use the AVD Manager. An AVD definition holds a hardware profile, system image, storage area, skin, and other important properties.
Let's play with it! To run the AVD Manager, do one of the following:
Select Tools | Android | AVDManager or click on the AVDManager icon in the toolbar:
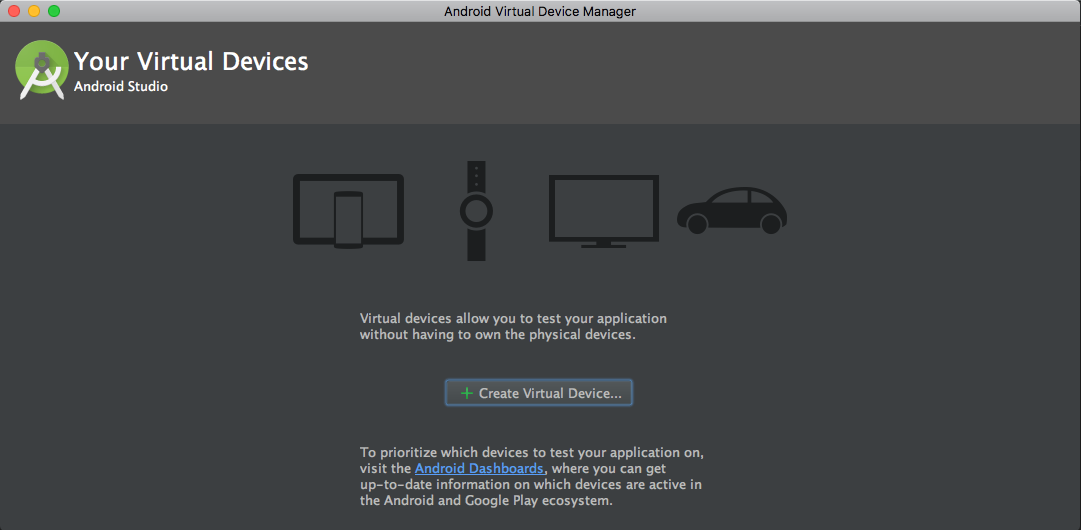
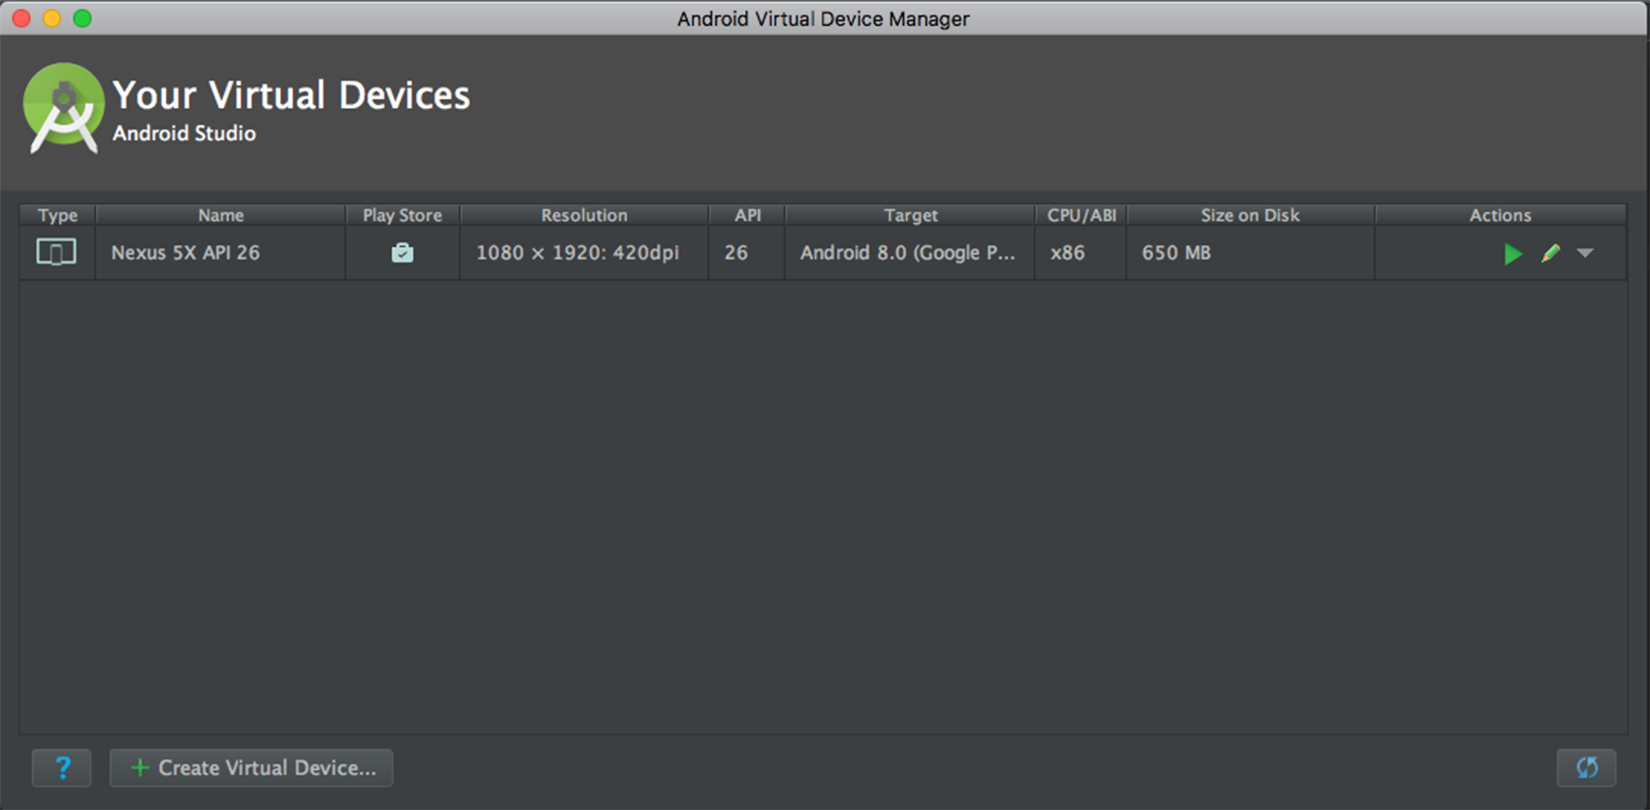
It displays all AVDs you've already defined. As you can see, we don't have any yet!
What can we do here? We can do the following:
- Create a new AVD
- Edit an existing AVD
- Delete the existing AVD
- Create hardware profiles
- Edit an existing hardware profile
- Delete an existing hardware profile
- Import/export definitions
- Start or stop the AVD
- Clear data and reset the AVD
- Access the AVD
.iniand.imgfiles on the filesystem - View the AVD configuration details
To obtain the AVD instance, you can either create a new AVD from the beginning or duplicate an existing AVD and modify it by need.
Creating a new AVD instance
From the Your Virtual Devices of the AVD Manager, click on Create Virtual Device (you can do the same as you run your app from within Android Studio by clicking on the Run icon, and then, in the Select Deployment Target dialog, choose Create New Emulator). Please refer to the following screenshot:
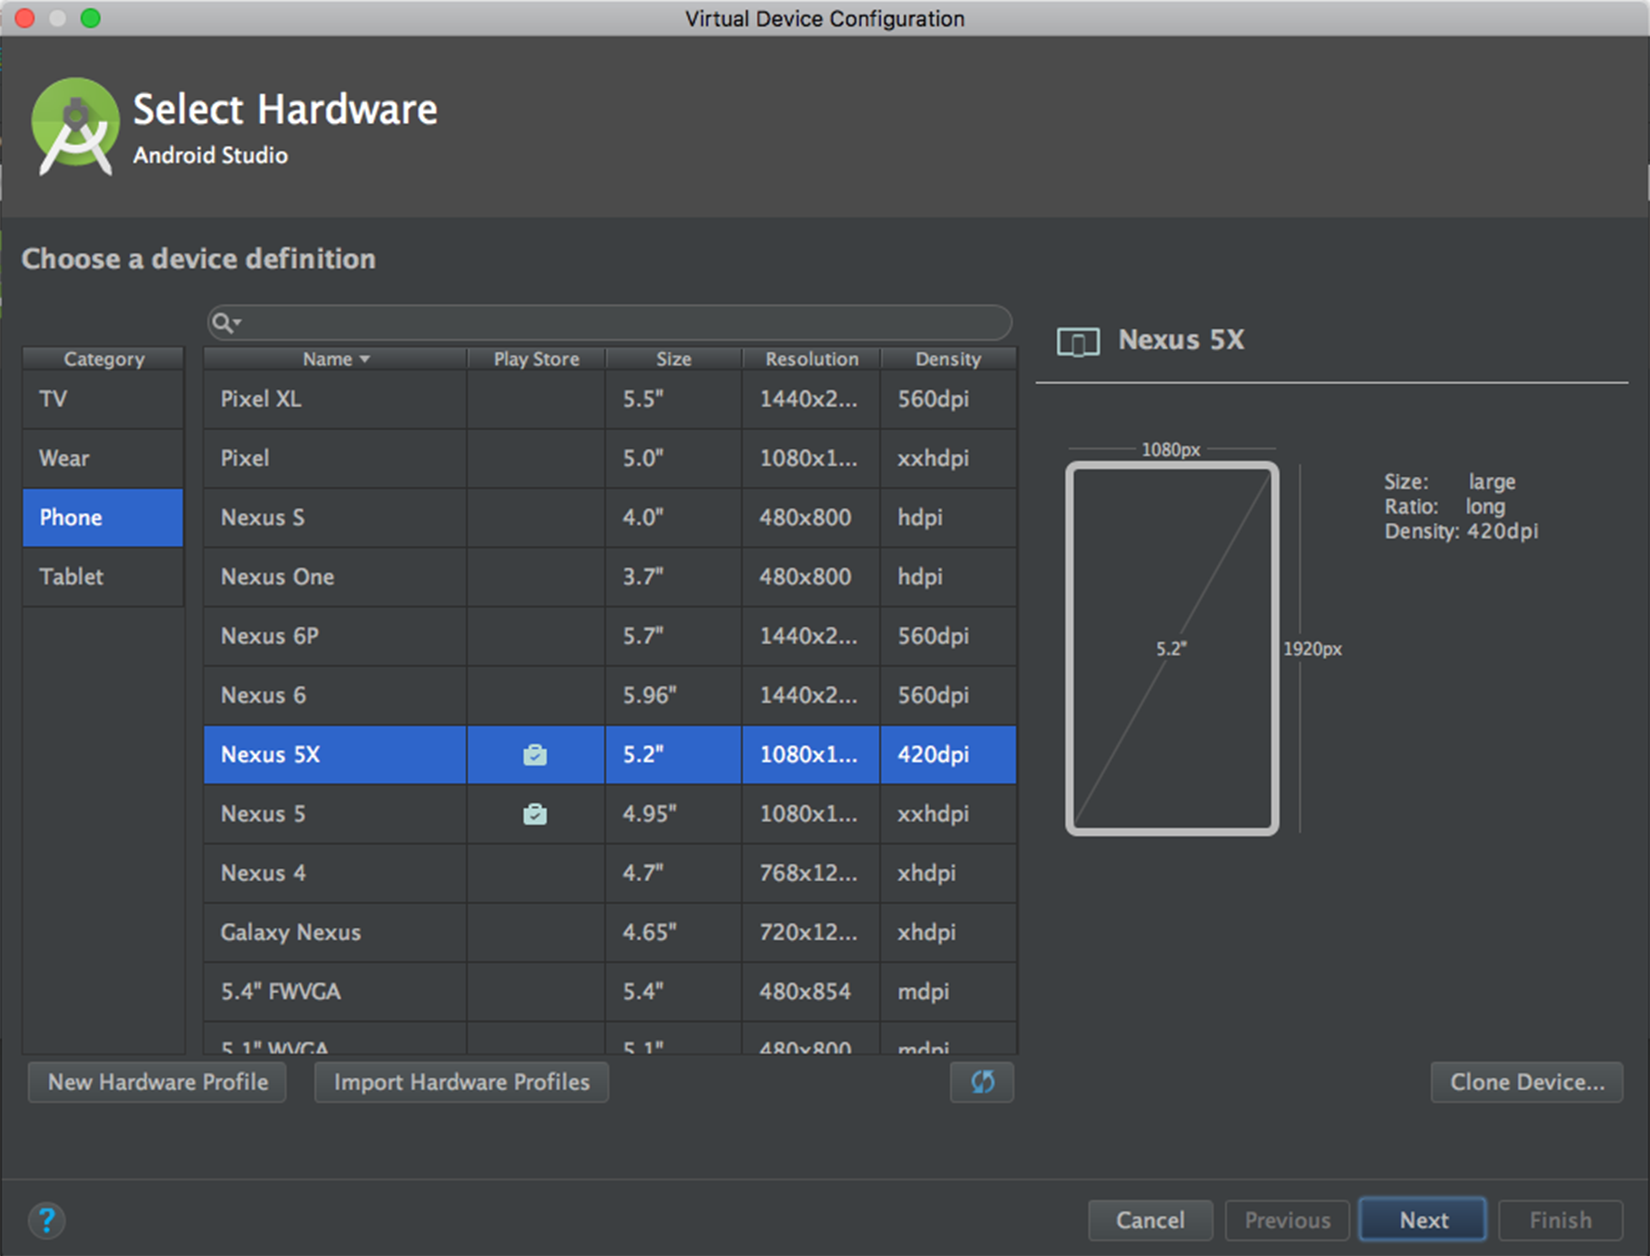
Select a hardware profile and then click on Next, as shown in the previous screenshot.
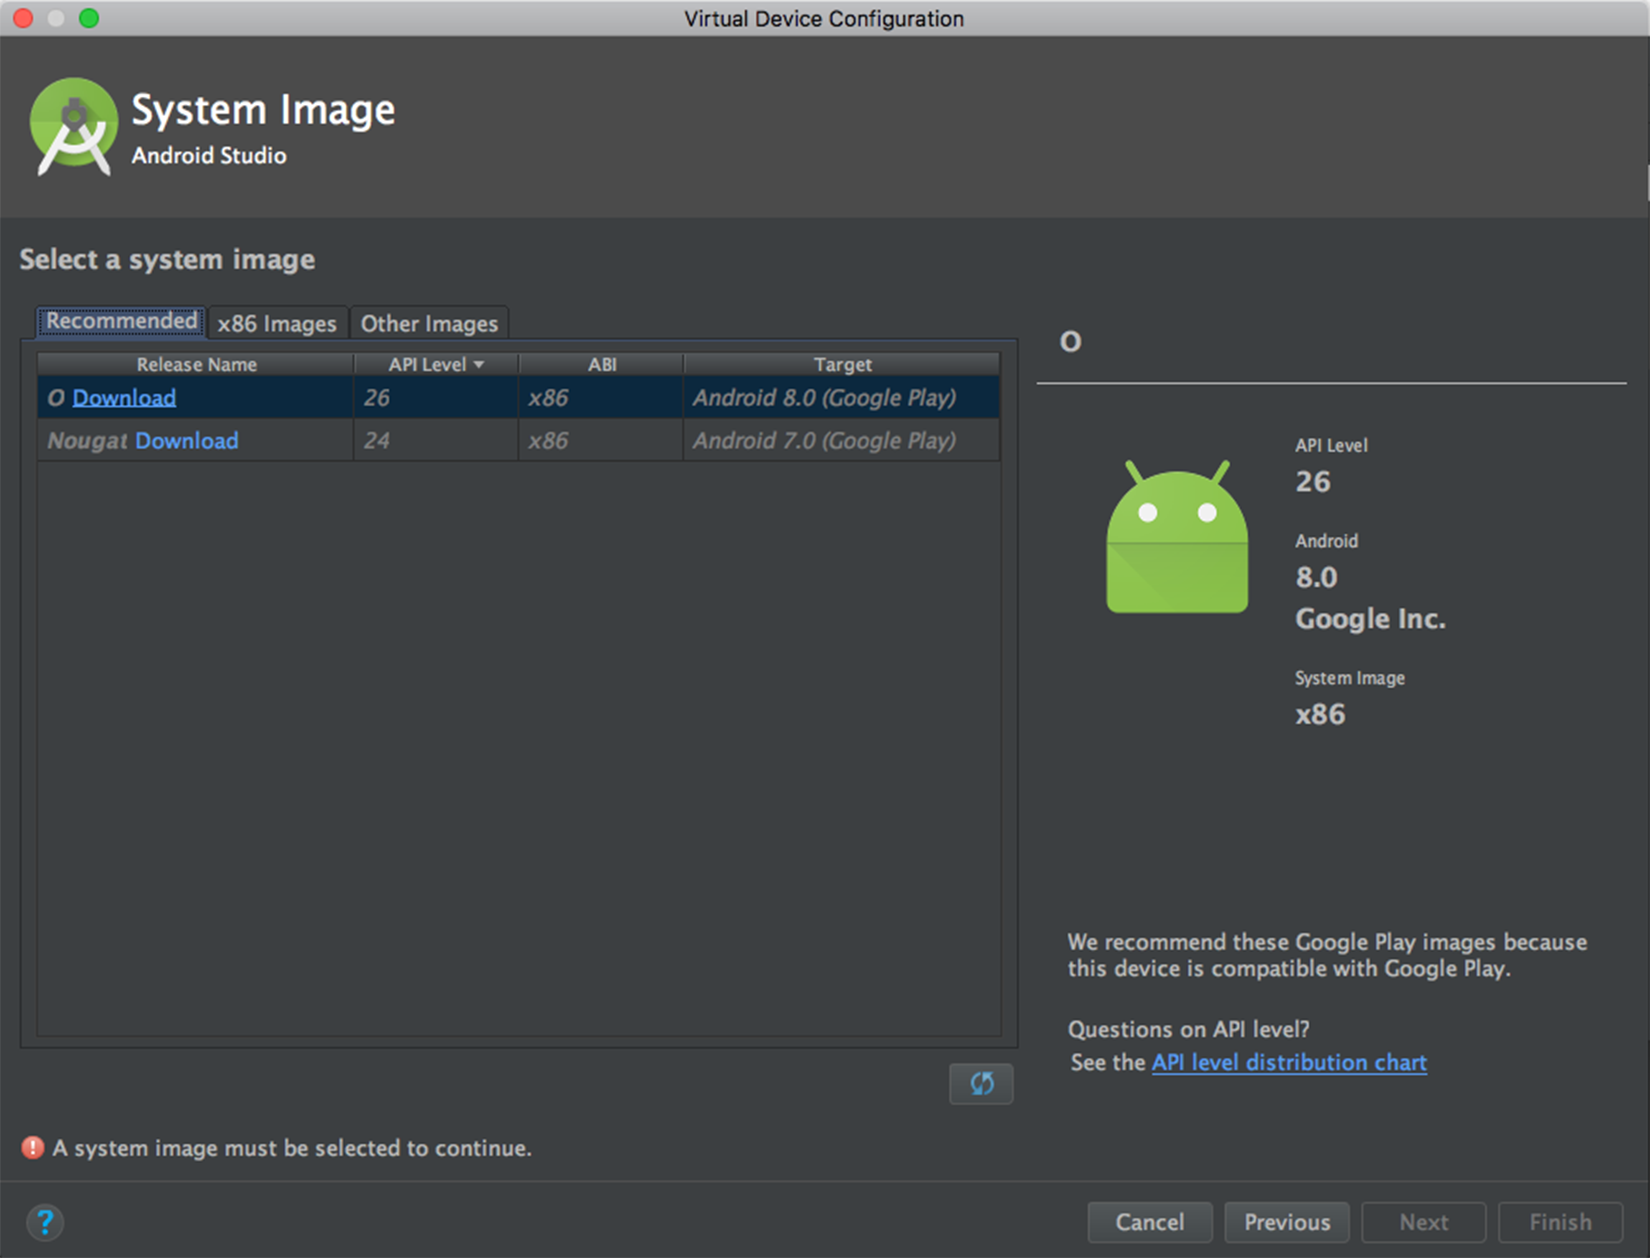
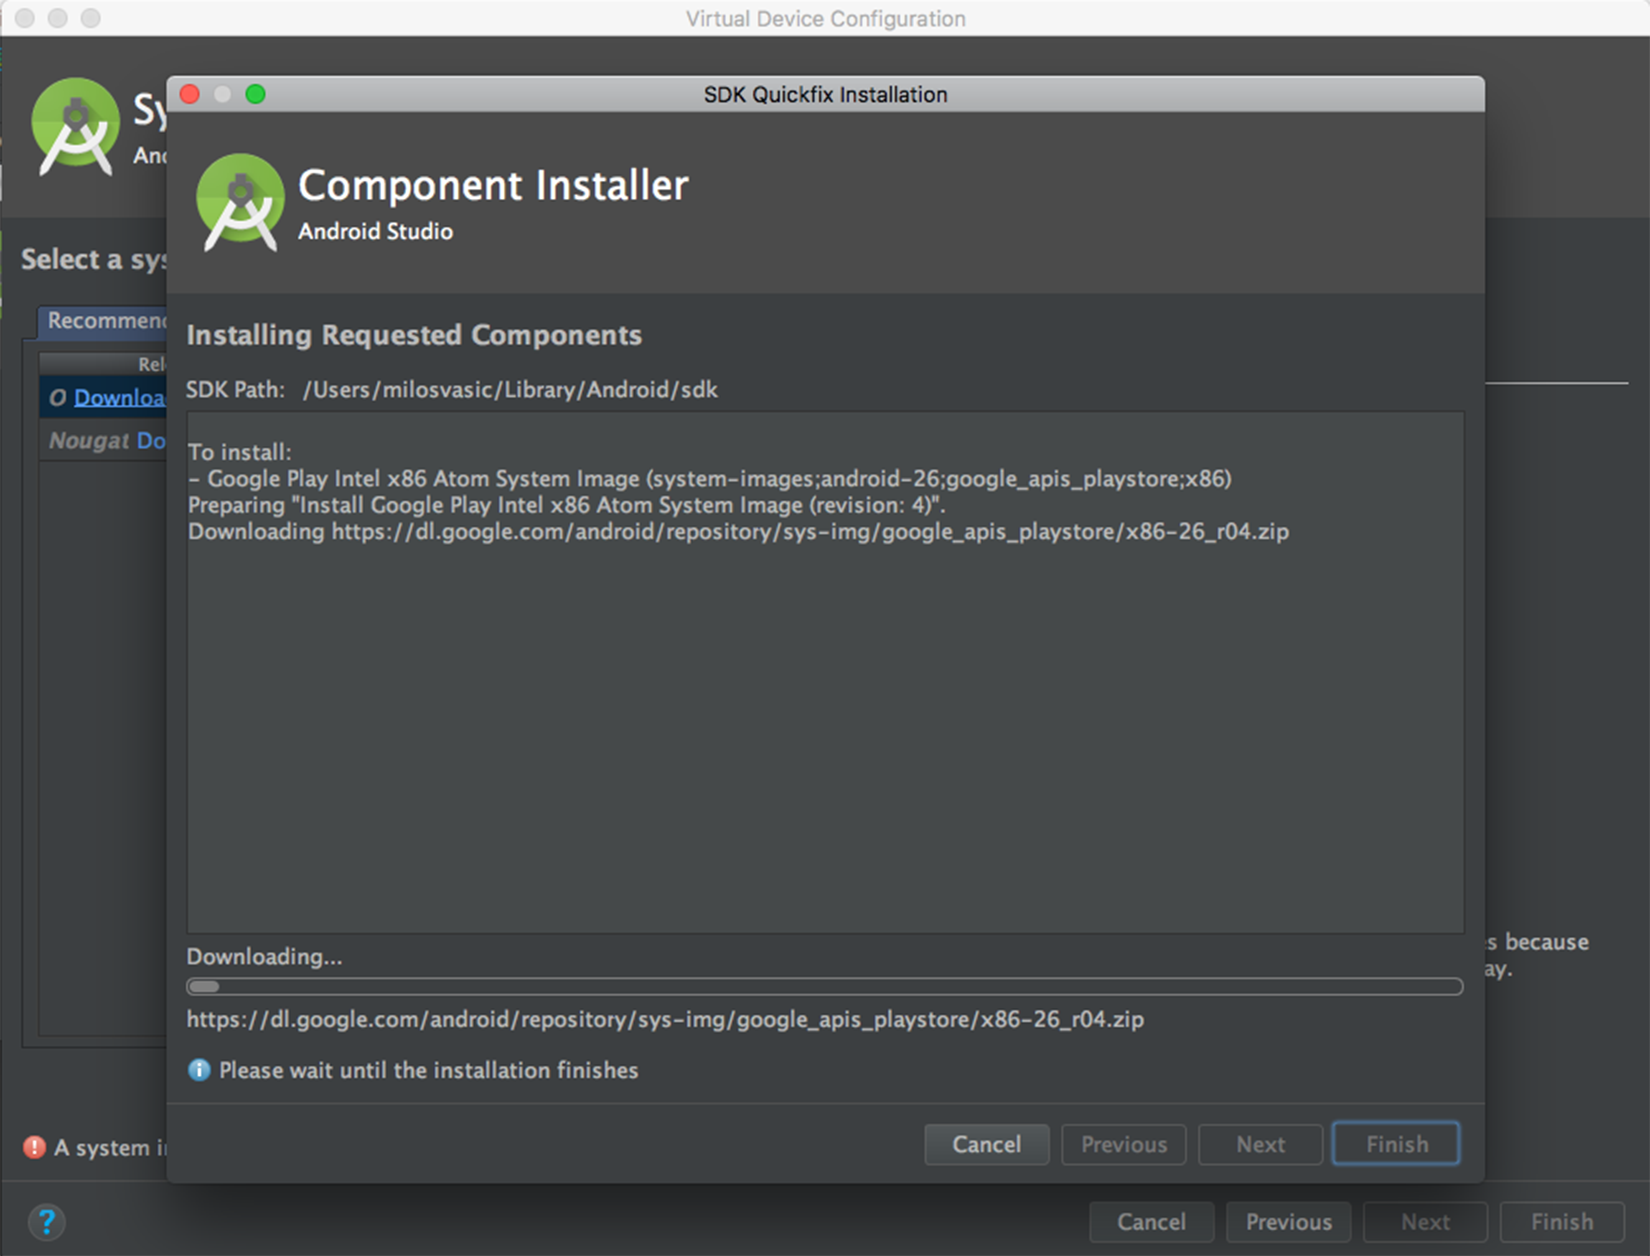
If you notice the Download link next to the system image, you have to click on it. The download process starts, as you can see in the following screenshot:
We must note that the API level of the target device is very important! Your application can't run on a system image whose API level is less than the one required by your application. That attribute is specified in your Gradle configuration. We will deal with Gradle in detail later.
Finally, Verify Configuration appears:
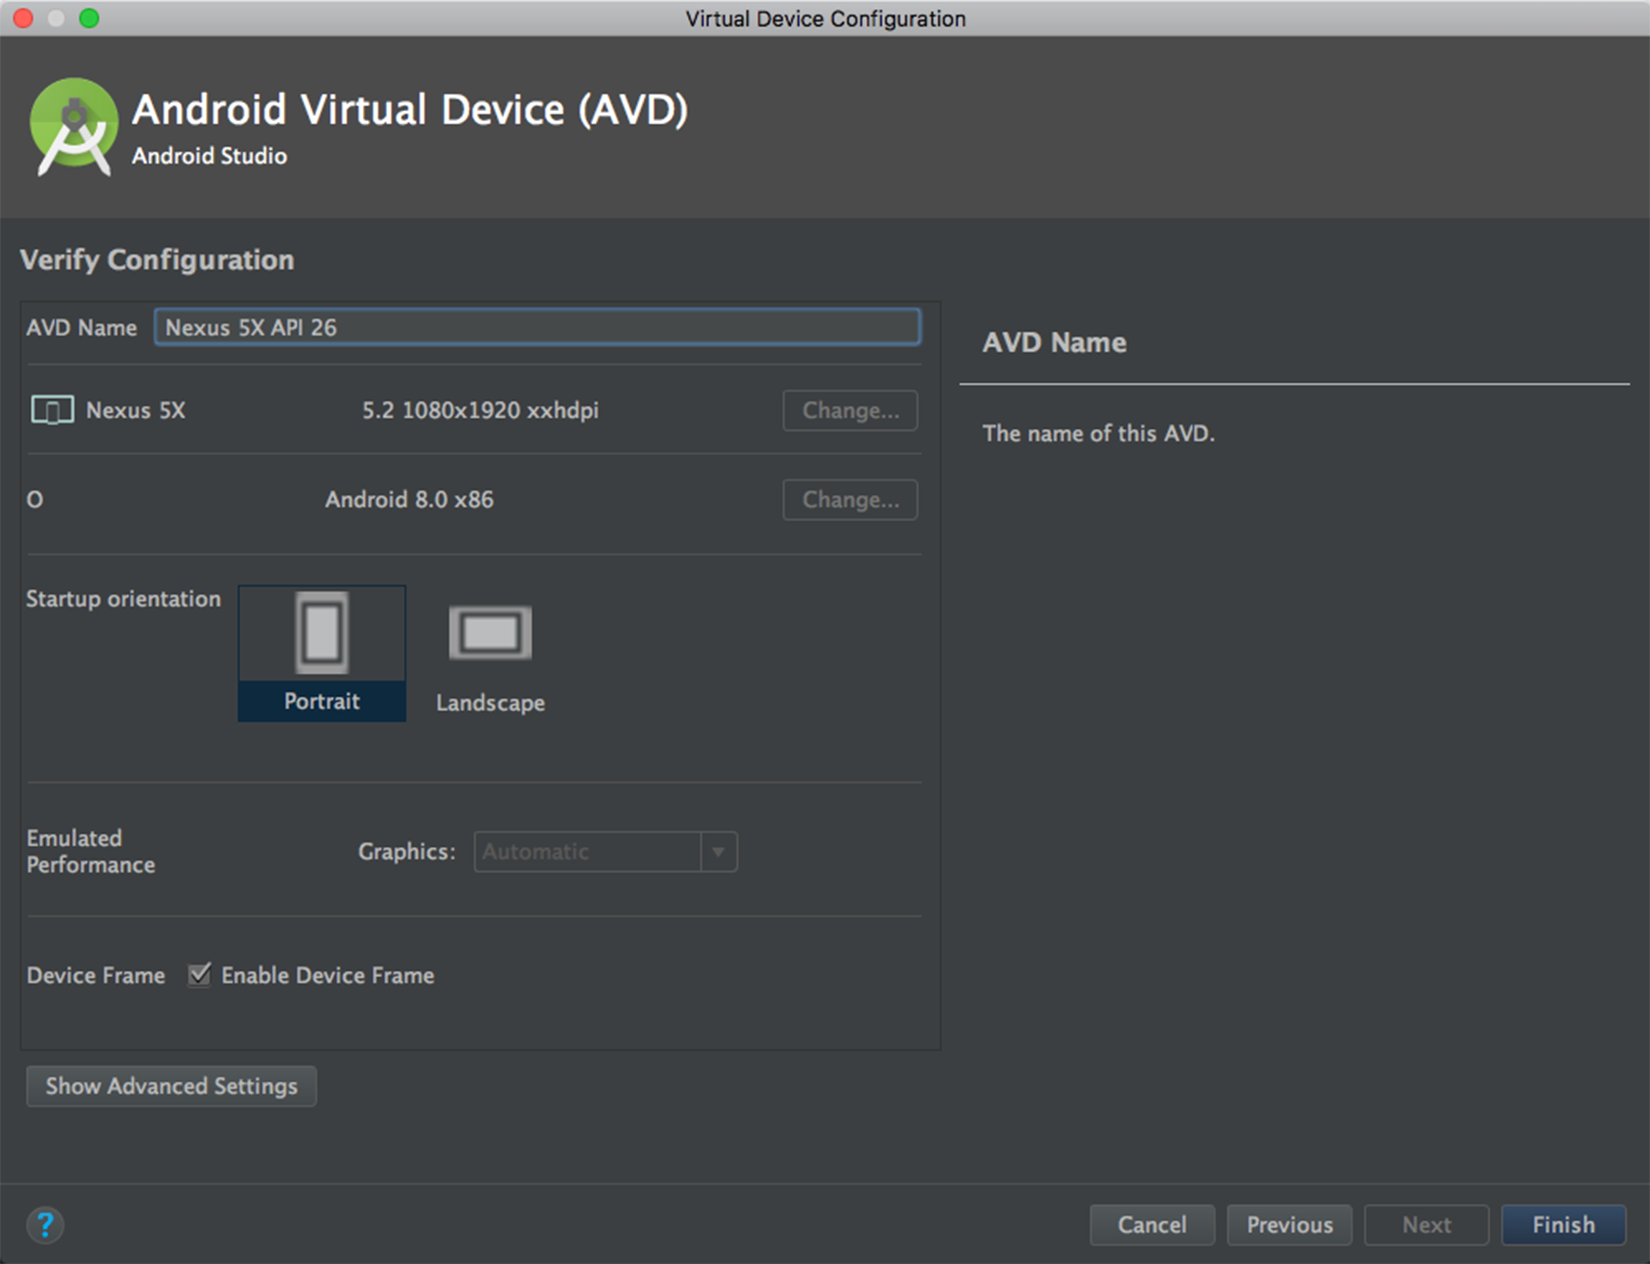
Change the AVD properties if needed and then click on Finish to complete the wizard. The newly created AVD appears in the Your Virtual Devices list or the Select Deployment Target dialog, depending on where you accessed the wizard from.
If you need to create a copy of the existing AVD, follow these instructions:
- Open AVD Manager, right-click on the AVD instance, and select
Duplicate. - Follow the wizard, and, after you modified what you needed, click on
Finish. - A new modified version appears in our AVD list.
We will demonstrate dealing with hardware profiles by creating a new one from scratch. To create a new hardware profile, follow these instructions. In Select Hardware, click on New Hardware Profile. Please refer to the following screenshot:

Configure Hardware Profile appears. Adjust the hardware profile properties as needed. Click on Finish. Your newly created hardware profile appears.
Duplicating an existing AVD and modifying it by need
If you need a hardware profile based on an existing one, follow these instructions:
- Select an existing
hardware profileand click onClone Device. - Update the
hardware profileproperties by your needs. To complete the wizard, click onFinish. - Your profile appears in the
hardware profilelist.
Let's go back to the AVD list. Here, you can perform the following operations on any existing AVD:
- Edit it by clicking on
Edit - Delete by right-clicking and choosing
Delete - Access the
.iniand.imgfiles on the disk by right-clicking on an AVD instance and choosingShow on Disk - To view the AVD configuration details, right-click on an AVD instance and choose
ViewDetails
Since we covered this, let's go back to the hardware profile list. Here, we can do the following:
- Edit a hardware profile by selecting it and choosing
Edit Device - Delete a hardware profile by right-clicking on it and choosing
Delete
Note
You can't edit or delete the predefined hardware profiles!
Then, we can run or stop an emulator or clear its data as follows:
- To run an emulator that uses an AVD, double-click on the AVD or just choose
Launch - To stop it, right-click on it and choose
Stop - To clear the data for an emulator, and return it to the same state as when it was first defined, right-click on an AVD and choose
Wipe Data
We will continue our emulators' journey with the explanation of command-line features that you can use with *-.
To start an emulator, use the emulator command. We will show you some basic command-line syntax to start a virtual device from a terminal:
emulator -avd avd_name [ {-option [value]} ... ]Another command-line syntax is as follows:
emulator @avd_name [ {-option [value]} ... ]Let's take a look at the following example:
$ /Users/vasic/Library/Android/sdk/tools/emulator -avd Nexus_5X_API_23 -netdelay none -netspeed fullYou can specify startup options when you start the emulator; later, you can't set these options.
If you need a list of available AVDs, use this command:
emulator -list-avdsThe result is a list of AVD names from the Android home directory. You can override the default home directory by setting the ANDROID_SDK_HOME environment variable.
Stopping an emulator is simple--just close its window.
Note
It is important to note that we can run AVDs from Android Studio UI as well!