Installing Bootstrap 4 to Cloud9 IDE via Git
There is an alternative approach to install Bootstrap via npm and then by running the npm install command. This alternative involves downloading the latest Bootstrap release from the official GitHub repository. Contrary to the npm installation approach, this installation contains many additional files and folders, for example, the nuget folder. This means that you have downloaded all the available tools for all the platforms supported by Bootstrap. Depending on what you are trying to accomplish, installing via Git might be your preferred approach, as it gives you more options out of the box.
Getting ready
The process starts similarly to the previous recipe. You begin by clicking on Create a new workspace at the Cloud9 IDE dashboard.
Note
Alternatively, for Windows, you can follow along using the exact same commands below starting from the tip in step 3, and then from step 6 , provided that you use Cygwin or Git Bash for Windows to execute those commands.
How to do it...
- Fill out the
Workspace nameandDescription.
Note
If you are following this recipe in Windows, start from step 3.
- In the
Clone from Git or Mercurial URLinput field, enter the address of the official Bootstrap repo on GitHub at https://github.com/twbs/bootstrap: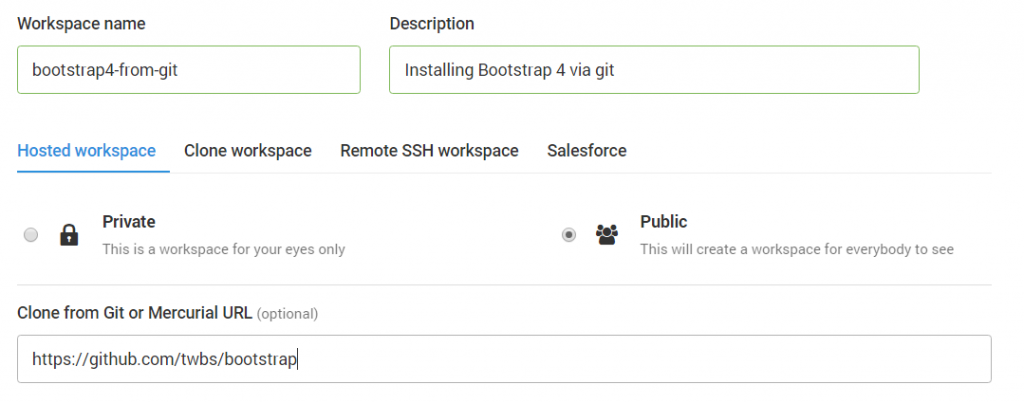
Click on
Create workspace. After clicking onCreate workspace, a new container will be spun up. Once the environment is ready, you'll be greeted with the tree structure of Bootstrap 3.3.7, cloned from GitHub.
Note
Windows users should open Cygwin or Git Bash in the folder where you plan to install Bootstrap 4 via git. Execute the git clone https://github.com/twbs/bootstrap command. Type dir to see the current directory structure. You should see only one directory, titled bootstrap. Go into that directory by running the cd bootstrap command. Then skip step 4 and go to step 5.
- Run
git fetch:
git fetch
- Checkout the v4-dev branch:
git checkout v4-dev
Running the preceding command will result in the following notifications in Bash:
         Branch v4-dev set up to track remote branch v4-dev from
         origin. Switched to a new branch 'v4-dev'
In other words, you have now switched to a branch that has the latest installation of Bootstrap 4.
- Install
grunt-cli:
npm install -g grunt-cli
- Run the
package.jsonfile:
npm install
Running the preceding command will install PhantomJS, as well as a number of dependencies. At this point, we have the dist folder available with all the compiled .css and .js files. However, to be able to work with Bootstrap docs, we still need to install Bundler and Jekyll, which is explained in the next recipe.