Connecting to a running instance with VNC
In this recipe, we are going to connect to a running KVM instance using a VNC client. Once connected, we are going to log in and check the CPU type and available memory of the instance. We've already seen how to start QEMU/KVM instances with VNC support in the previous recipes, but we are going to do it again, in case you are not reading this book from cover to cover.
Virtual Network Computing (VNC) uses the Remote Frame Buffer (RFB) protocol to remotely control another system. It relays the screen from the remote computer back to the client, allowing the full keyboard and mouse control.
There are many different VNC client and server implementations, but for this recipe, we are going to use a freely available version named chicken of the VNC for macOS. You can download the client from https://sourceforge.net/projects/cotvnc/.
Getting ready
In order to complete this recipe, you will need the following:
- The QEMU binaries, provided after following the Installing and configuring QEMU recipe
- The custom raw Debian image we built in the Installing a custom OS on the image with debootstrap recipe
- A processor that supports virtualization
- The loaded KVM kernel modules
- The chicken of the VNC client, installed, as described in the previous section
How to do it...
- Start a new KVM-accelerated
qemuinstance:
root@kvm:~# qemu-system-x86_64 -name debian -vnc 146.20.141.254:0 -cpu Nehalem -m 1024 -drive format=raw,index=2,file=debian.img -daemonize
root@kvm:~#
- Ensure that the instance is running:
root@kvm:~# pgrep -lfa qemu
4987 qemu-system-x86_64 -name debian -vnc 146.20.141.254:0 -cpu Nehalem -m 1024 -drive format=raw,index=2,file=debian.img -daemonize
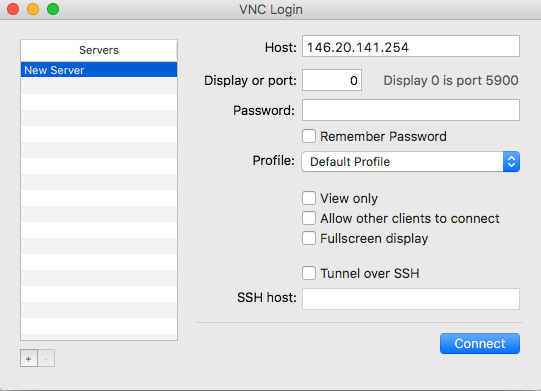
root@kvm:~#- Start the VNC client and connect to the VNC server on the IP address and display port you specified in step 1:

The VNC login screen
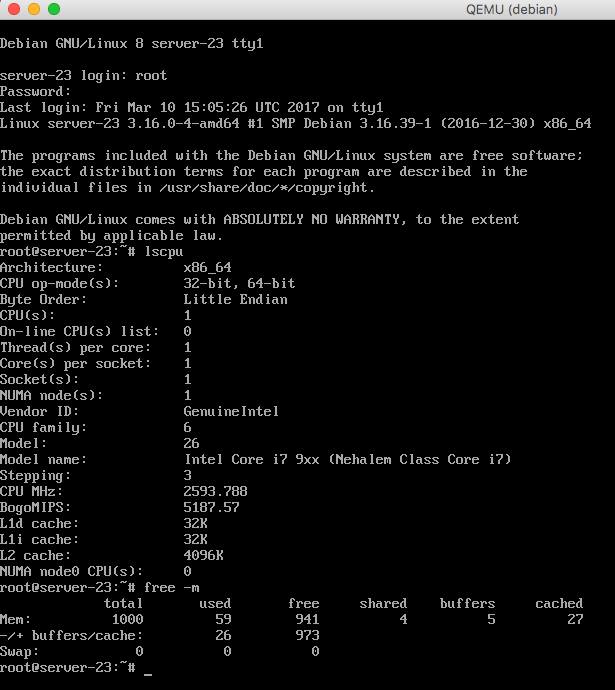
- Log in to the instance using the root user, then check the CPU type and available memory as shown here:

VNC session
How it works...
In step 1, we started a new QEMU instance with KVM acceleration and enabled a VNC server on it with the specified IP address and display port. We specified the amount of available memory and the CPU model name.
In step 4, we logged in the instance using the root user and the password we created when building the image, then obtained the CPU information by running the lscpu command. Note how the CPU model name matches what we specified with the -cpu flag when we started the virtual machine. Next, we checked the allocated memory with the free command, which also matches what we previously specified with the -m parameter.


