Search icon CANCEL
Subscription
0
Cart icon
Your Cart (0 item)
Close icon
You have no products in your basket yet
Save more on your purchases! discount-offer-chevron-icon
Savings automatically calculated. No voucher code required.
Arrow left icon
All Products
Best Sellers
New Releases
Books
Videos
Audiobooks
Learning Hub
Newsletter Hub
Free Learning
Arrow right icon
timer SALE ENDS IN
0 Days
:
00 Hours
:
00 Minutes
:
00 Seconds
Arrow up icon
GO TO TOP
PostgreSQL for Data Architects

You're reading from   PostgreSQL for Data Architects Discover how to design, develop, and maintain your database application effectively with PostgreSQL

Arrow left icon
Product type Paperback
Published in Mar 2015
Publisher
ISBN-13 9781783288601
Length 272 pages
Edition 1st Edition
Arrow right icon
Author (1):
Arrow left icon
Jayadevan M Jayadevan M
Author Profile Icon Jayadevan M
Jayadevan M
Arrow right icon
View More author details
Toc

Table of Contents (19) Chapters Close

PostgreSQL for Data Architects
Credits
About the Author
About the Reviewers
www.PacktPub.com
Preface
1. Installing PostgreSQL FREE CHAPTER 2. Server Architecture 3. PostgreSQL – Object Hierarchy and Roles 4. Working with Transactions 5. Data Modeling with SQL Power Architect 6. Client Tools 7. SQL Tuning 8. Server Tuning 9. Tools to Move Data in and out of PostgreSQL 10. Scaling, Replication, and Backup and Recovery 11. PostgreSQL – Troubleshooting 12. PostgreSQL – Extras Index

Generating SQL


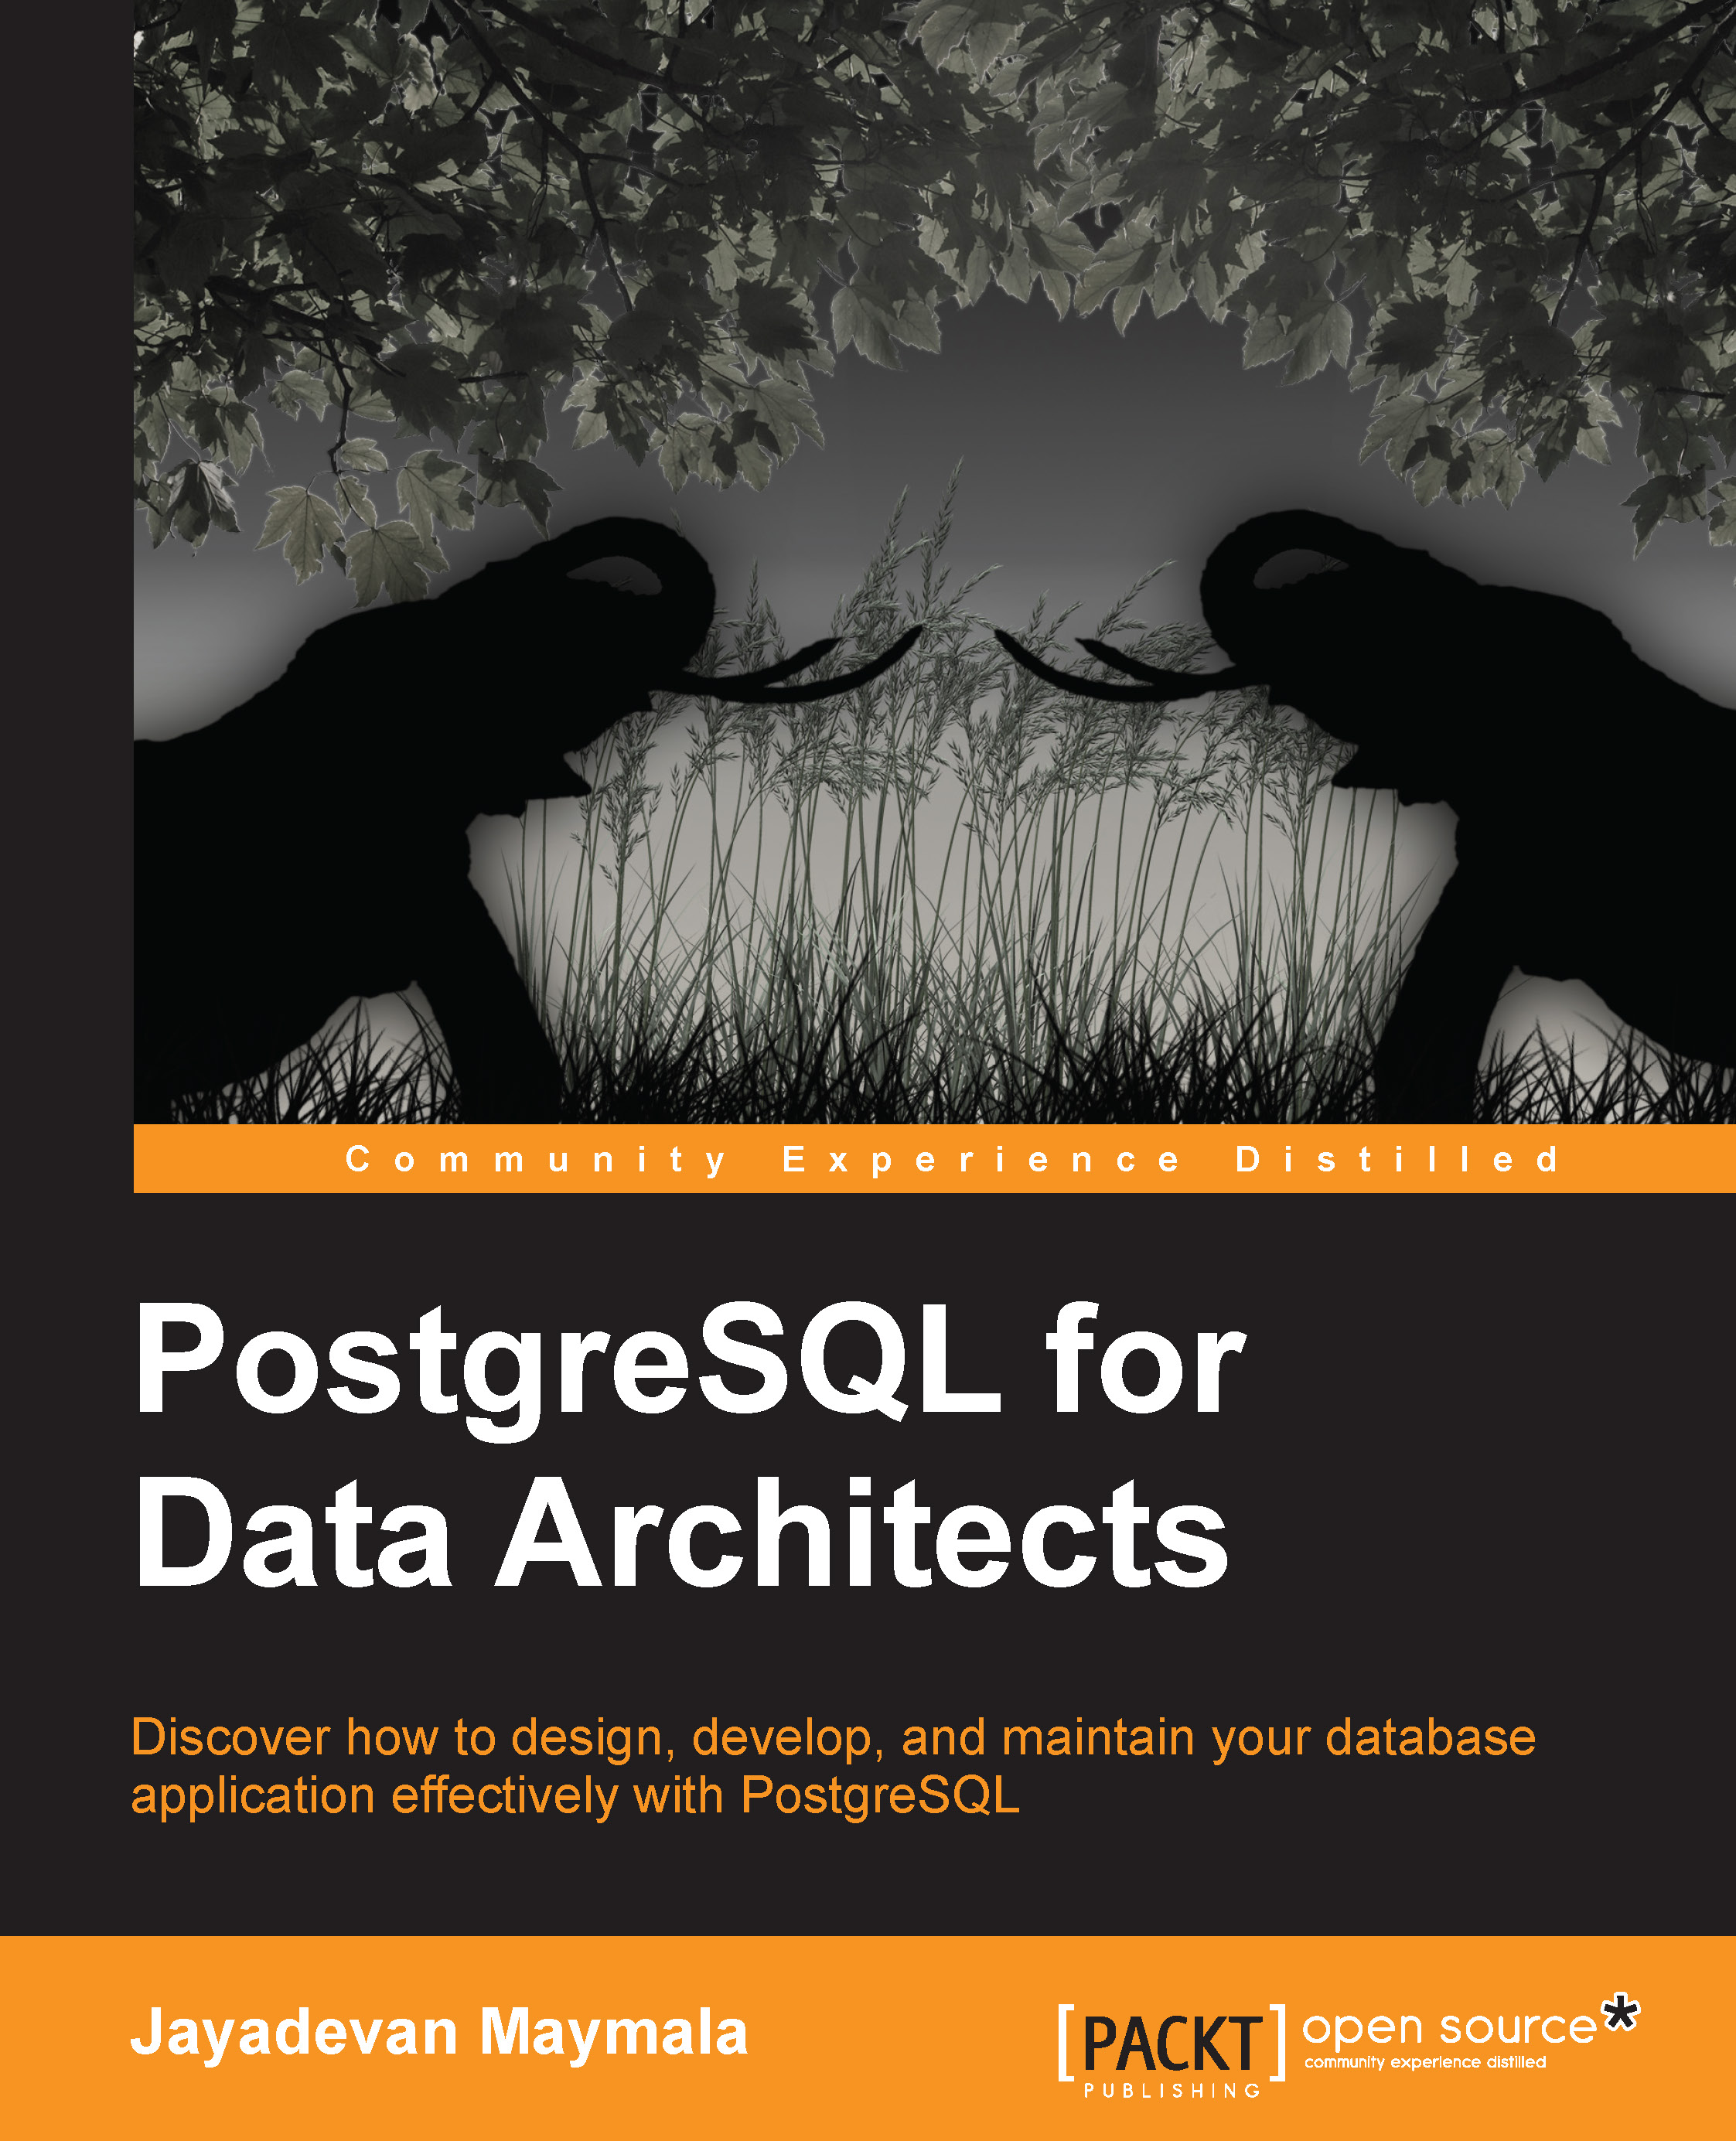
Next, let's try generating SQL for the two tables we just created. Click on Tools and select Forward Engineer. Then, choose Create in the Playpen Database and PostgreSQL as the Database Type. You will also notice the Liquibase option, mentioned earlier as a version control tool for databases. Once you click on OK, you can see the SQL generated for PostgreSQL. The SQL generated will vary depending on the database we choose. The SQL generated for PostgreSQL and Liquibase XML generated is shown in the following screenshot:

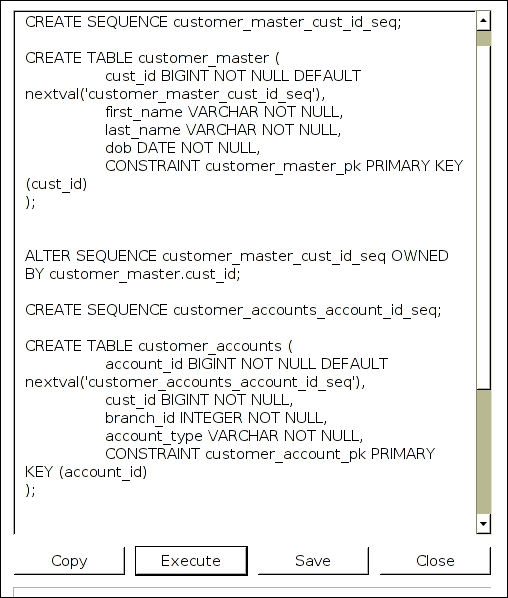
The XML generated is as follows:

Now let's connect to a database to create the tables.

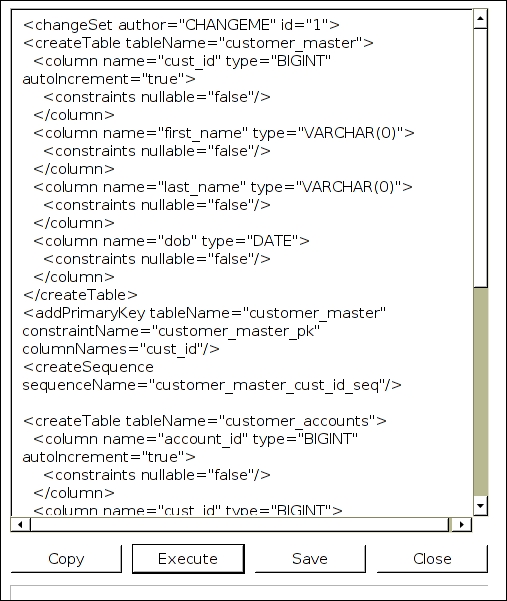
Navigate to Connections | Add Source Connection | New Connection. Fill in the appropriate values and click on Test Connection. If all is well, you should see Connection test successful, as shown in the following screenshot:

Now, we can again use the Forward Engineer option and create the tables in the newly added database. The option of saving the SQL is also there.

We can also...

lock icon The rest of the chapter is locked
Register for a free Packt account to unlock a world of extra content!
A free Packt account unlocks extra newsletters, articles, discounted offers, and much more. Start advancing your knowledge today.
Unlock this book and the full library FREE for 7 days
Get unlimited access to 7000+ expert-authored eBooks and videos courses covering every tech area you can think of
Renews at £13.99/month. Cancel anytime
Visually different images