Managing Odoo server databases
When working with Odoo, all the data in your instance is stored in a PostgreSQL database. All the standard database management tools you are used to are available, but Odoo also proposes a web interface for some common operations.
Getting ready
We are assuming that your work environment is set up and that you have an instance running.
How to do it...
The Odoo database management interface provides tools to create, duplicate, remove, back up, and restore a database. There is also a way to change the master password, which is used to protect access to the database management interface.
Accessing the database management interface
To access the database, perform the following steps:
- Go to the login screen of your instance (if you are authenticated, log out).
- Click on the Manage Databases link. This will navigate to
http://localhost:8069/web/database/manager(you can also point your browser directly to that URL):
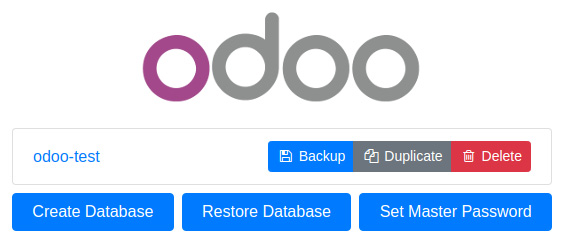
Figure 1.3 – Database manager
Setting or changing the master password
If you've set up your instance with default values and haven't modified it yet, as we will explain in the following section, the database management screen will display a warning, telling you that the master password hasn't been set and will advise you to set one with a direct link:
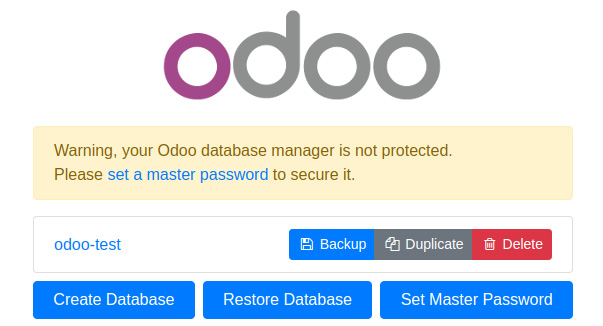
Figure 1.4 – Master password warning
To set the master password, perform the following steps:
- Click on the Set Master Password button. You will get a dialog box asking you to fill in the New Master Password field:
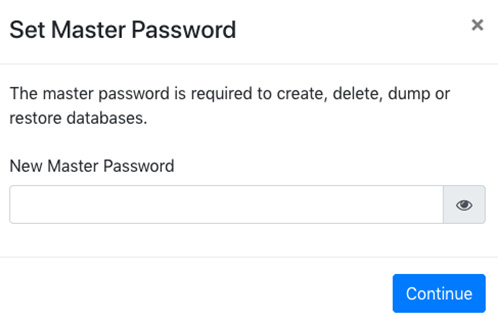
Figure 1.5 – Setting a new master password dialog
- Type in a non-straightforward new password and click Continue.
If the master password is already set, click on the Set Master Password button at the bottom of the screen to change it. In the displayed dialog box, type the previous master password and the new one and then click on Continue.
Note
The master password is the server configuration file under the admin_password key. If the server was started without specifying a configuration file, a new one will be generated in ~/.odoorc. Refer to the next recipe for more information about the configuration file.
Creating a new database
This dialog box can be used to create a new database instance that will be handled by the current Odoo server:
- In the database management window, click on the Create Database button, which can be found at the bottom of the screen. This will bring up the following dialog:
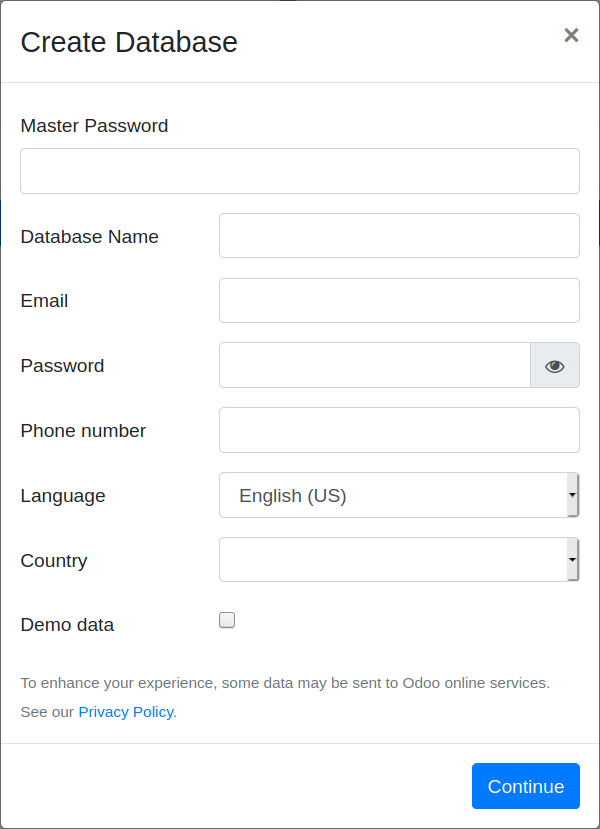
Figure 1.6 – Creating a new database dialog
- Fill in the form, as follows:
- Master Password: This is the master password for this instance.
- Database Name: Input the name of the database you wish to create.
- Email: Add your email address here; this will be your username later.
- Password: Type in the password you want to set for the admin user of the new instance.
- Phone Number: Set the phone number (optional).
- Language: Select the language you wish to be installed by default in the new database in the drop-down list. Odoo will automatically load the translations for the selected language.
- Country: Select the country of the main company in the drop-down list. Selecting this will automatically configure a few things, including company currency.
- Demo data: Check this box to obtain demonstration data. This is useful for running interactive tests or setting up a demonstration for a customer, but it should not be checked for a database that is designed to contain production data.
Note
If you wish to use the database to run the automated tests of the modules (refer to Chapter 7, Debugging Modules), you need to have the demonstration data, as the vast majority of the automated tests in Odoo depend on these records in order to run successfully.
- Click on the Continue button and wait for a while until the new database is initialized. You will then be redirected to the instance and connected as the administrator.
Troubleshooting
If you are redirected to a login screen, this is probably because the
--db-filteroption was passed to Odoo and the new database name didn't match the new database name. Note that theodoo-bin startcommand does this silently, making only the current database available. To work around this, simply restart Odoo without thestartcommand, as shown in the Easy installation of Odoo from source recipe of this chapter. If you have a configuration file (refer to the Storing the instance configuration in a file recipe later in this chapter), and then check that thedb_filteroption is unset or set to a value matching the new database name.
Duplicating a database
Often, you will have an existing database, and you will want to experiment with it to try a procedure or run a test, but without modifying the existing data. The solution here is simple: duplicate the database and run the test on the copy. Repeat this as many times as required:
- In the database management screen, click on the Duplicate Database link next to the name of the database you wish to clone:
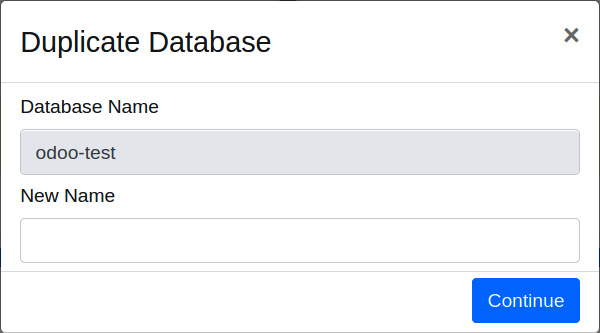
Figure 1.7 – Duplicate Database dialog
- Fill in the form as follows:
- Master Password: This is the master password of the Odoo server.
- New Name: The name you want to give to the copy.
- Click on the Continue button.
- You can then click on the name of the newly created database in the database management screen to access the login screen for that database.
Removing a database
When you have finished your tests, you will want to clean up the duplicated databases. To do this, perform the following steps:
- In the database management screen, you will find the Delete button next to the name of the database. Clicking on it will bring up a dialog like the following screenshot:
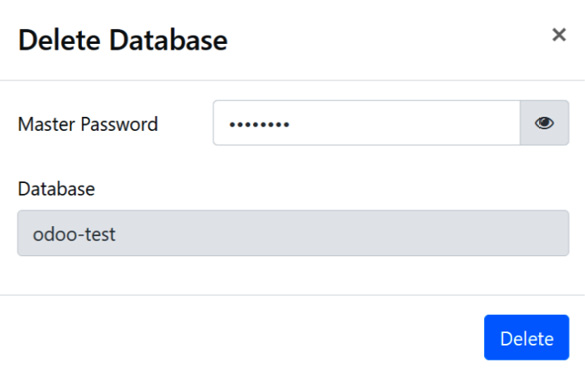
Figure 1.8 – Delete Database dialog
- Fill in the form and complete the Master Password field, which is the master password of the Odoo server.
- Click on the Delete button.
Caution! Potential data loss!
If you selected the wrong database, and have no backup, there is no way to recover the lost data.
Backing up a database
To create a backup, perform the following steps:
- In the database management screen, you will find the Backup button next to the database name. Clicking on it will bring up dialog like the following screenshot:
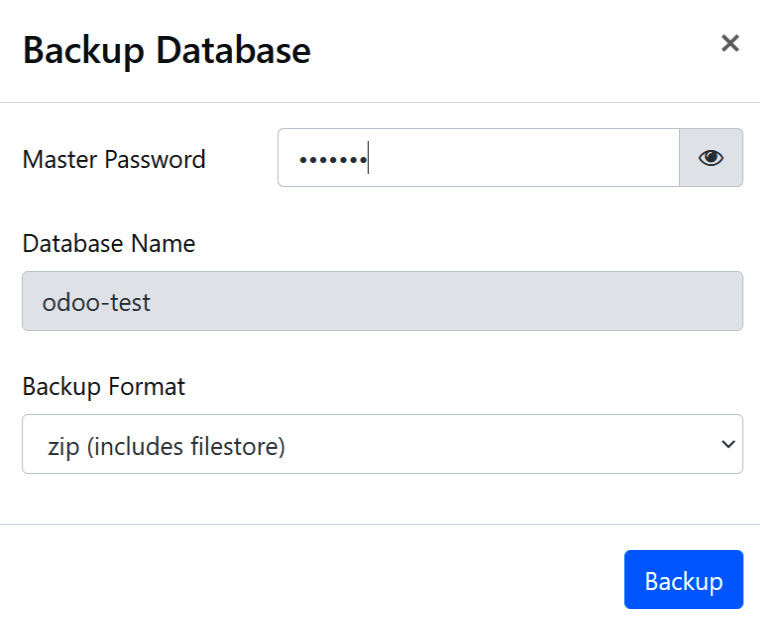
Figure 1.9 – Backup Database dialog
- Fill in the form as follows:
- Master Password: This is the master password of the Odoo server.
- Backup Format: Always use zip for a production database, as this is the only real full backup format. Only use the
pg_dumpformat for a development database when you don't really care about the file store.
- Click on the Backup button. The backup file will then be downloaded to your browser.
Restoring a database backup
If you need to restore a backup, this is what you need to do:
- In the database management screen, you will find a Restore Database button at the bottom of the screen. Clicking on it will bring up a dialog like the following screenshot:
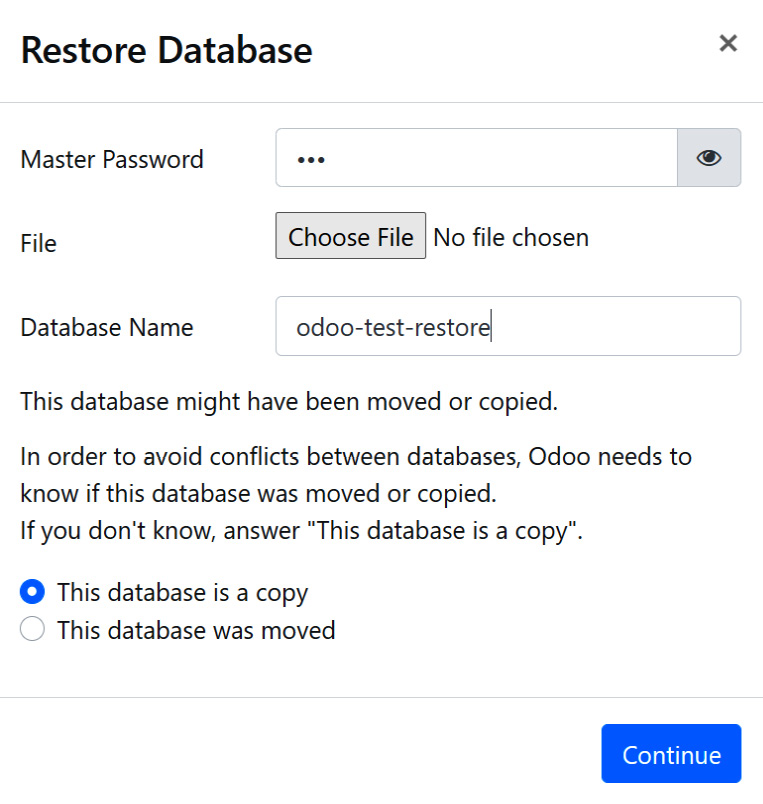
Figure 1.10 – Restore Database dialog
- Fill in the form as follows:
- Master Password: This is the master password of the Odoo server.
- File: This is a previously downloaded Odoo backup.
- Database Name: Provide the name of the database in which the backup will be restored. The database must not exist on the server.
- This database might have been moved or copied: Choose This database was moved if the original database was on another server or if it has been deleted from the current server. Otherwise, choose This database is a copy, which is the safe default option.
- Click on the Continue button.
Note
It isn't possible to restore a database on top of itself. If you try to do this, you will get an error message (Database restore error: Database already exists). You need to remove the database first.
How it works...
These features, apart from the Change master password screen, run PostgreSQL administration commands on the server and report back through the web interface.
The master password is a very important piece of information that only lives in the Odoo server configuration file and is never stored in the database. There used to be a default value of admin, but using this value is a security liability, which is well-known. In Odoo v9 and later, this is identified as an unset master password, and you are urged to change it when accessing the database administration interface. Even if it is stored in the configuration file under the admin_passwd entry, this is not the same as the password of the admin user; these are two independent passwords. The master password is set for an Odoo server process, which itself can handle multiple database instances, each of which has an independent admin user with their own password.
Security considerations
Remember that we are considering a development environment in this chapter. The Odoo database management interface is something that needs to be secured when you are working on a production server, as it gives access to a lot of sensitive information, especially if the server hosts Odoo instances for several different clients.
To create a new database, Odoo uses the PostgreSQL createdb utility and calls the internal Odoo function to initialize the new database in the same way as when you start Odoo on an empty database.
To duplicate a database, Odoo uses the --template option of createdb, passing the original database as an argument. This essentially duplicates the structure of the template database in the new database using internal and optimized PostgreSQL routines, which is much faster than creating a backup and restoring it (especially when using the web interface, which requires downloading the backup file and uploading it again).
Backup and restore operations use the pg_dump and pg_restore utilities, respectively. When using the zip format, the backup will also include a copy of the file store that contains a copy of the documents when you configure Odoo to not keep these in the database, which is the default option in 14.0. Unless you change it, these files reside in ~/.local/share/Odoo/filestore.
If the backup gets large, downloading it may fail. This is either because the Odoo server itself is unable to handle the large file in memory or because the server is running behind a reverse proxy because there is a limit to the size of HTTP responses that were set in the proxy. Conversely, for the same reasons, you will likely experience issues with the database restore operation. When you start running into these issues, it is time to invest in a more robust external backup solution.
There's more...
Experienced Odoo developers generally don't use the database management interface and perform operations from the command line. To initialize a new database with demo data, for instance, the following single-line command can be used:
$ createdb testdb && odoo-bin -d testdb
The additional bonus of this command line is that you can request the installation of add-ons while you are using, for instance, -i sale,purchase,stock.
To duplicate a database, stop the server and run the following commands:
$ createdb -T dbname newdbname
$ cd ~/.local/share/Odoo/filestore # adapt if you have changed the data_dir
$ cp -r dbname newdbname
$ cd -
Note that, in the context of development, the file store is often omitted.
Note
The use of createdb -T only works if there are no active sessions on the database, which means that you have to shut down your Odoo server before duplicating the database from the command line.
To remove an instance, run the following command:
$ dropdb dbname
$ rm -rf ~/.local/share/Odoo/filestore/dbname
To create a backup (assuming that the PostgreSQL server is running locally), use the following command:
$ pg_dump -Fc -f dbname.dump dbname
$ tar cjf dbname.tgz dbname.dump ~/.local/share/Odoo/filestore/dbname
To restore the backup, run the following command:
$ tar xf dbname.tgz
$ pg_restore -C -d dbname dbname.dump
Caution!
If your Odoo instance uses a different user to connect to the database, you need to pass -U username so that the correct user is the owner of the restored database.