Configuring pfSense as a firewall
Let's connect to the pfSense server via a browser:
- Navigate to
192.168.1.1, which is the internal LAN IP address for the pfSense server. - Enter the credentials to log in to the pfSense server. Here, the
adminuser has logged in successfully.
We allocated an additional network interface to the virtual machine, but have not configured it yet. So, let's take care of that now.
- Click Interfaces on the top toolbar, and select
LAN2. There you can configure the LAN2 with a static IP address as you did for earlier LAN interface we configured previously. - After setting the configurations for
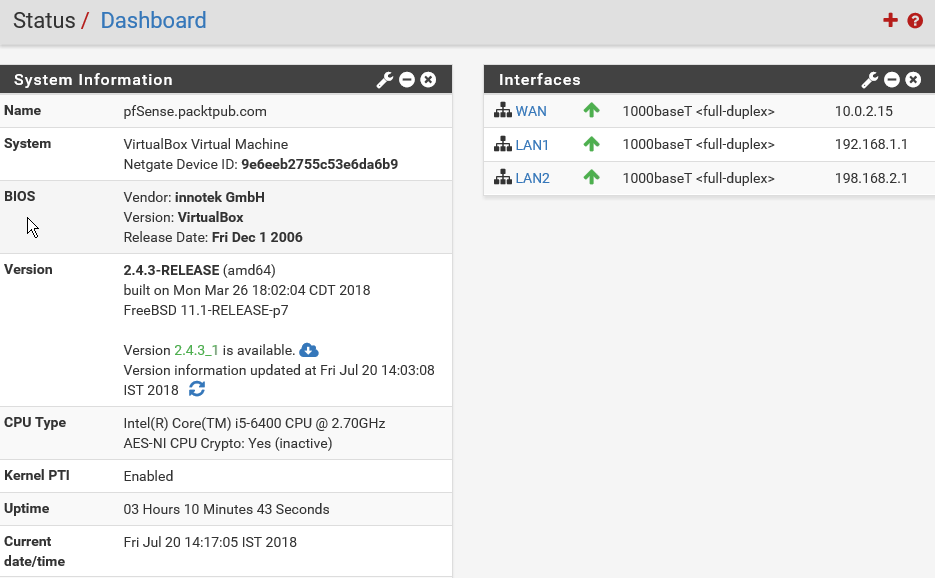
LAN2, let's click theApply Changesbutton to save the configuration. You can see that the changes have been successfully saved. Let's go back to the main pfSenseDashboard:

And you will see that LAN2 is up and running with an IP address of 192.168.2.1. This is a separate LAN2 segment that is different from LAN1. The WAN interface has a public IP address of 10.0.2.15. There are two segments...


