Getting a filmic look using grain, vignetting, and depth of field
Now that we have the Post Processing Stack installed, we can create our first Post-processing Volume. The new Post Processing Stack relies on using volumes that describe how things should be drawn, either globally or within a certain area.
One of the most common appearances people like projects to have is that of a film. This is used quite frequently in titles such as the Uncharted series and Grand Theft Auto V. It's also used quite effectively in the Left 4 Dead series, as its creator are trying to emulate the B-movie zombie films that the games are based on.
Getting ready
Make sure you have completed the Installing the Post Processing Stack recipe before starting this one.
How to do it...
- We first create a new
Post Processing Profileby right-clicking within theAssets|Chapter 1folder in theProjectwindow and then selectingCreate|Post Processing Profile. Once selected, it will allow us to rename the item. Go ahead and set the name toFilmicProfile:

Note
If you happen to not enter the name correctly, you can rename an item from the Project tab by clicking on the name and then clicking again.
- Once created, you should notice that, when selected, the
Inspectorwindow will now contain a button that saysAdd effect...(as you can see in the preceding image), which will allow us to augment what is normally drawn on the screen. - From the
Hierarchytab, select thePost-process Volumeobject again and from theInspectortab go to thePost Process Volumecomponent and assign theProfileproperty to theFilmicProfliewe just created:

Notice that, once the Profile has been set, the Add effect... button shows up here as well. We can use this at either place and the changes will be saved in the file.
- To get started, click on the
Add effect...button and select theUnity|Grainoption. By default, you'll only see theGrainoption with a check, so click on the arrow to expand its contents:
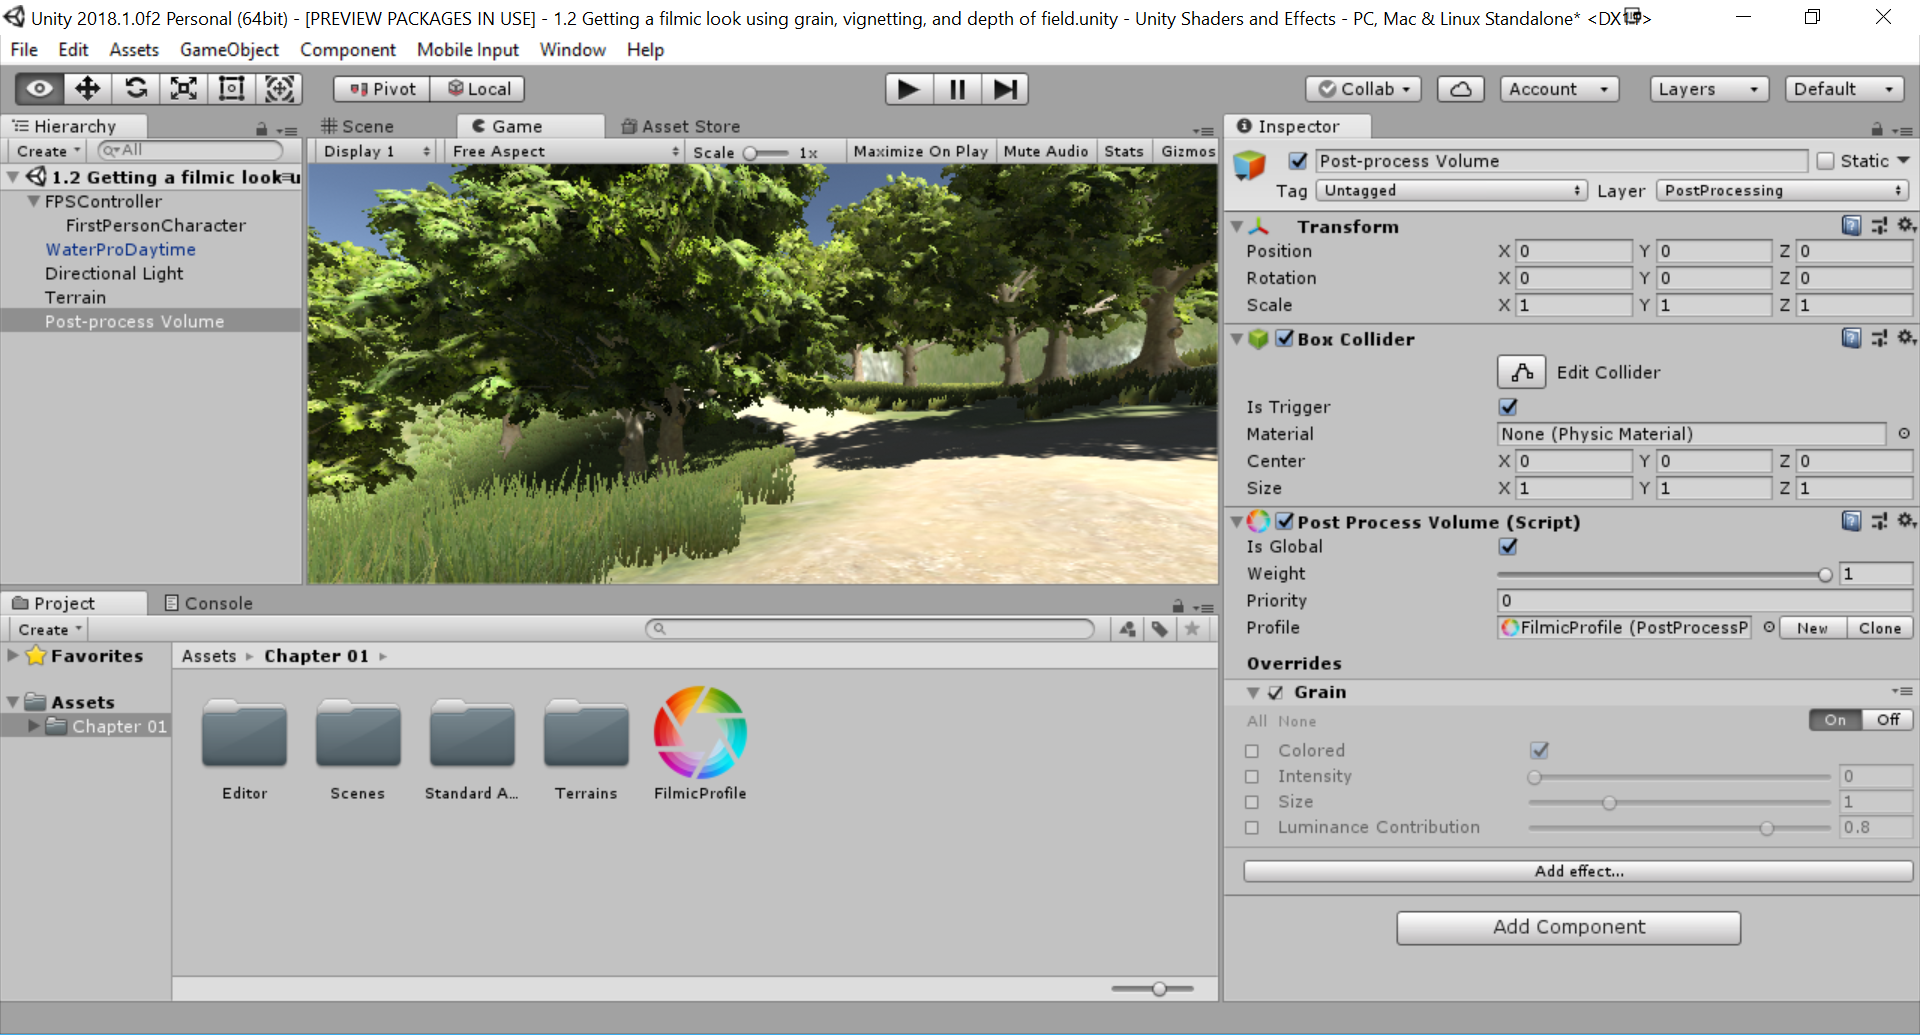
By default, you'll see that everything is greyed out. In order to have it affect anything, you have to click on the checkbox on the left-hand side. You can quickly turn them all on or off by pressing the All or None buttons on the screen.
- In our case, check the
Intensityoption and set it to0.2. Then, check theSizeproperty and set it to0.3. Afterward, switch to theGametab to see a representation of what our tweaks have done:

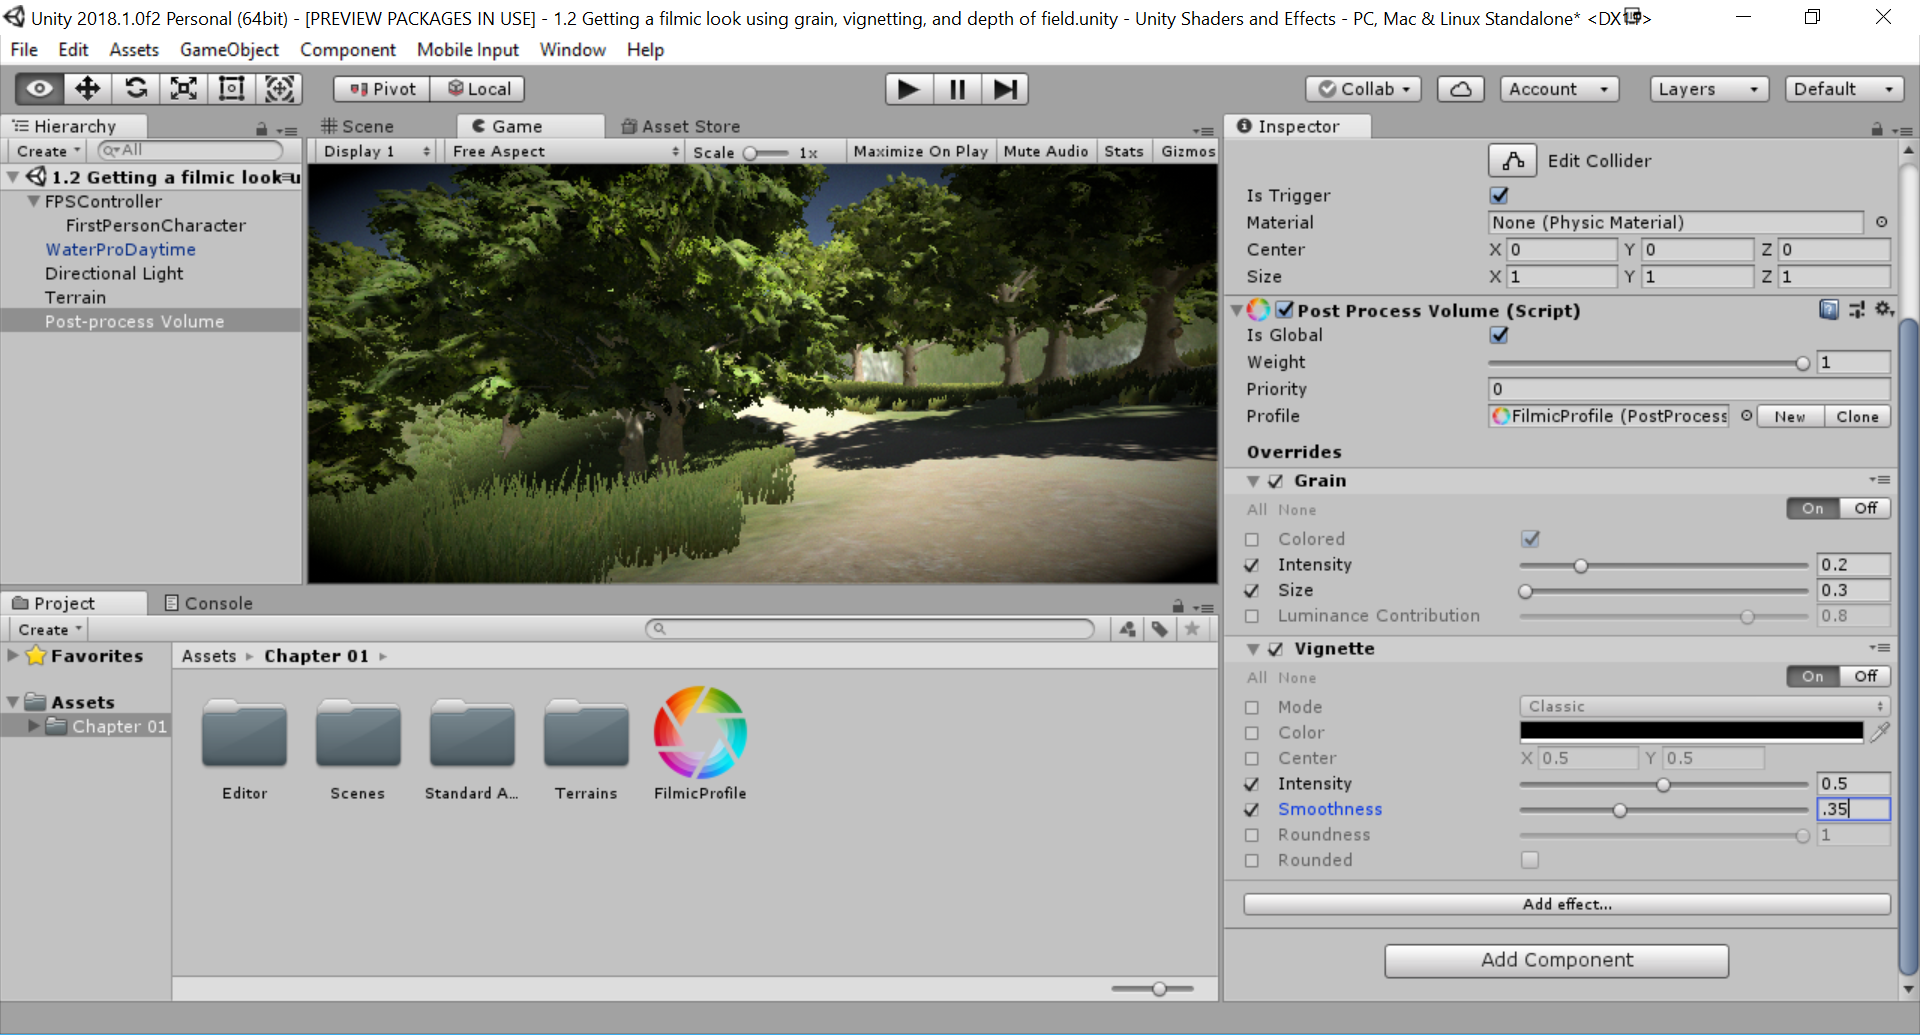
- You will notice that the screen has become much fuzzier than before. Decrease the
Intensityto0.2, theSizeto0.3, and uncheck theColoredoption.
Note
Unlike how users typically work in Unity, due to Post Processing Profiles being filed, you can modify them while playing your game and, upon stopping the game, the values are still saved. This can be useful for tweaking values to achieve the exact look that you're after.
- The next property we want to tweak is the
Vignetteproperty. Note the blackened edges around the screen. Click onAdd effect...and selectUnity|Vignette. Open up the properties and change theIntensityto0.5and theSmoothnessto0.35:
- Next, select
Add effect...again and, this time, selectUnity|Depth of Field. Check theDepth of Fieldoption. It may be difficult to see a change right off the bat, but change theFocus Distanceto6andFocal Lengthto80and you should notice the grass in front of the background and the mountain in the distance are now blurred:

- Now, if we go into the game itself, you should see our filmic look in action:

The final result of the filmic look
And with that, we now have a scene that looks much more like a film than what we had to begin with!
How it works...
Each time we add an effect to a Post-processing Volume, we are overriding what would normally be put onto the screen.
If you've been to a movie theater that still uses film, you may have noticed how there were little specks in the filmstock while the film was playing. The grain effect simulates this film grain, causing the effect to become more pronounced the more the movie is played. This is often used in horror games to obscure the player's vision.
Note
For more information on the grain effect, check out: https://github.com/Unity-Technologies/PostProcessing/wiki/Grain.
In the film world, vignetting can be an unintended effect of using the wrong type of lens for the type of shot you are trying to achieve or the aspect ratio that you are shooting for. In game development, we typically use vignetting for dramatic effect or to have players focus on the center of the screen by darkening and/or desaturating the edges of the screen compared to the center.
Note
For more information on the vignette effect, check out: https://github.com/Unity-Technologies/PostProcessing/wiki/Vignette.
The depth of field setting basically determines what is blurry and what isn't. The idea is to have items of importance in focus while items in the background are not.
Note
For more information on the depth of field effect, check out: https://github.com/Unity-Technologies/PostProcessing/wiki/Depth-of-Field.