Integrating Firebase in iOS applications
Integrating Firebase our iOS application involves adding the Firebase package similar to any other package you have probably worked with in the past.
Getting ready
In order to create and integrate Firebase within your application, you will need to have a MacBook Pro or one of Apple's computer variants so that you can follow the upcoming steps; you will also need to install Xcode.
How to do it...
In order to create an iOS application, open Xcode and follow the given steps:
- Create a new project or open your already created project (Figure 17):

Figure 17: Xcode project opening/creation
- In our case, we're about to start a new project called
firebasecookbook. It's going to be based on the Xcode single-view application project template.
Note
In our application--or when it comes to an example provided in this book regarding Firebase and iOS--we will work with Swift instead. It's just a personal preference, but you can use the one that suits you best.

Figure 18: Xcode project creation
Don't forget to copy that Bundle Identifier, because we will need it in the next step. In this case, our Bundle Identifier is hcodex.firebasecookbook.
- Go to your Firebase dashboard and click on the
Add Firebase to your iOS appbutton. After clicking on it, you will get a configuration model with some steps that will guide you in your Firebase iOS integration (Figure 19).

Figure 19: Xcode project creation
- Remember that
bundle idorBundle Identifier? Copy and paste that ID in its designated place and add a nickname for your application if you wish. Click on theREGISTER APPbutton. - Next, we will need to download a special
plistfile called theGoogleService-info.plistfile. This file will have all the necessary metadata that will be included in your project (Figure 20).
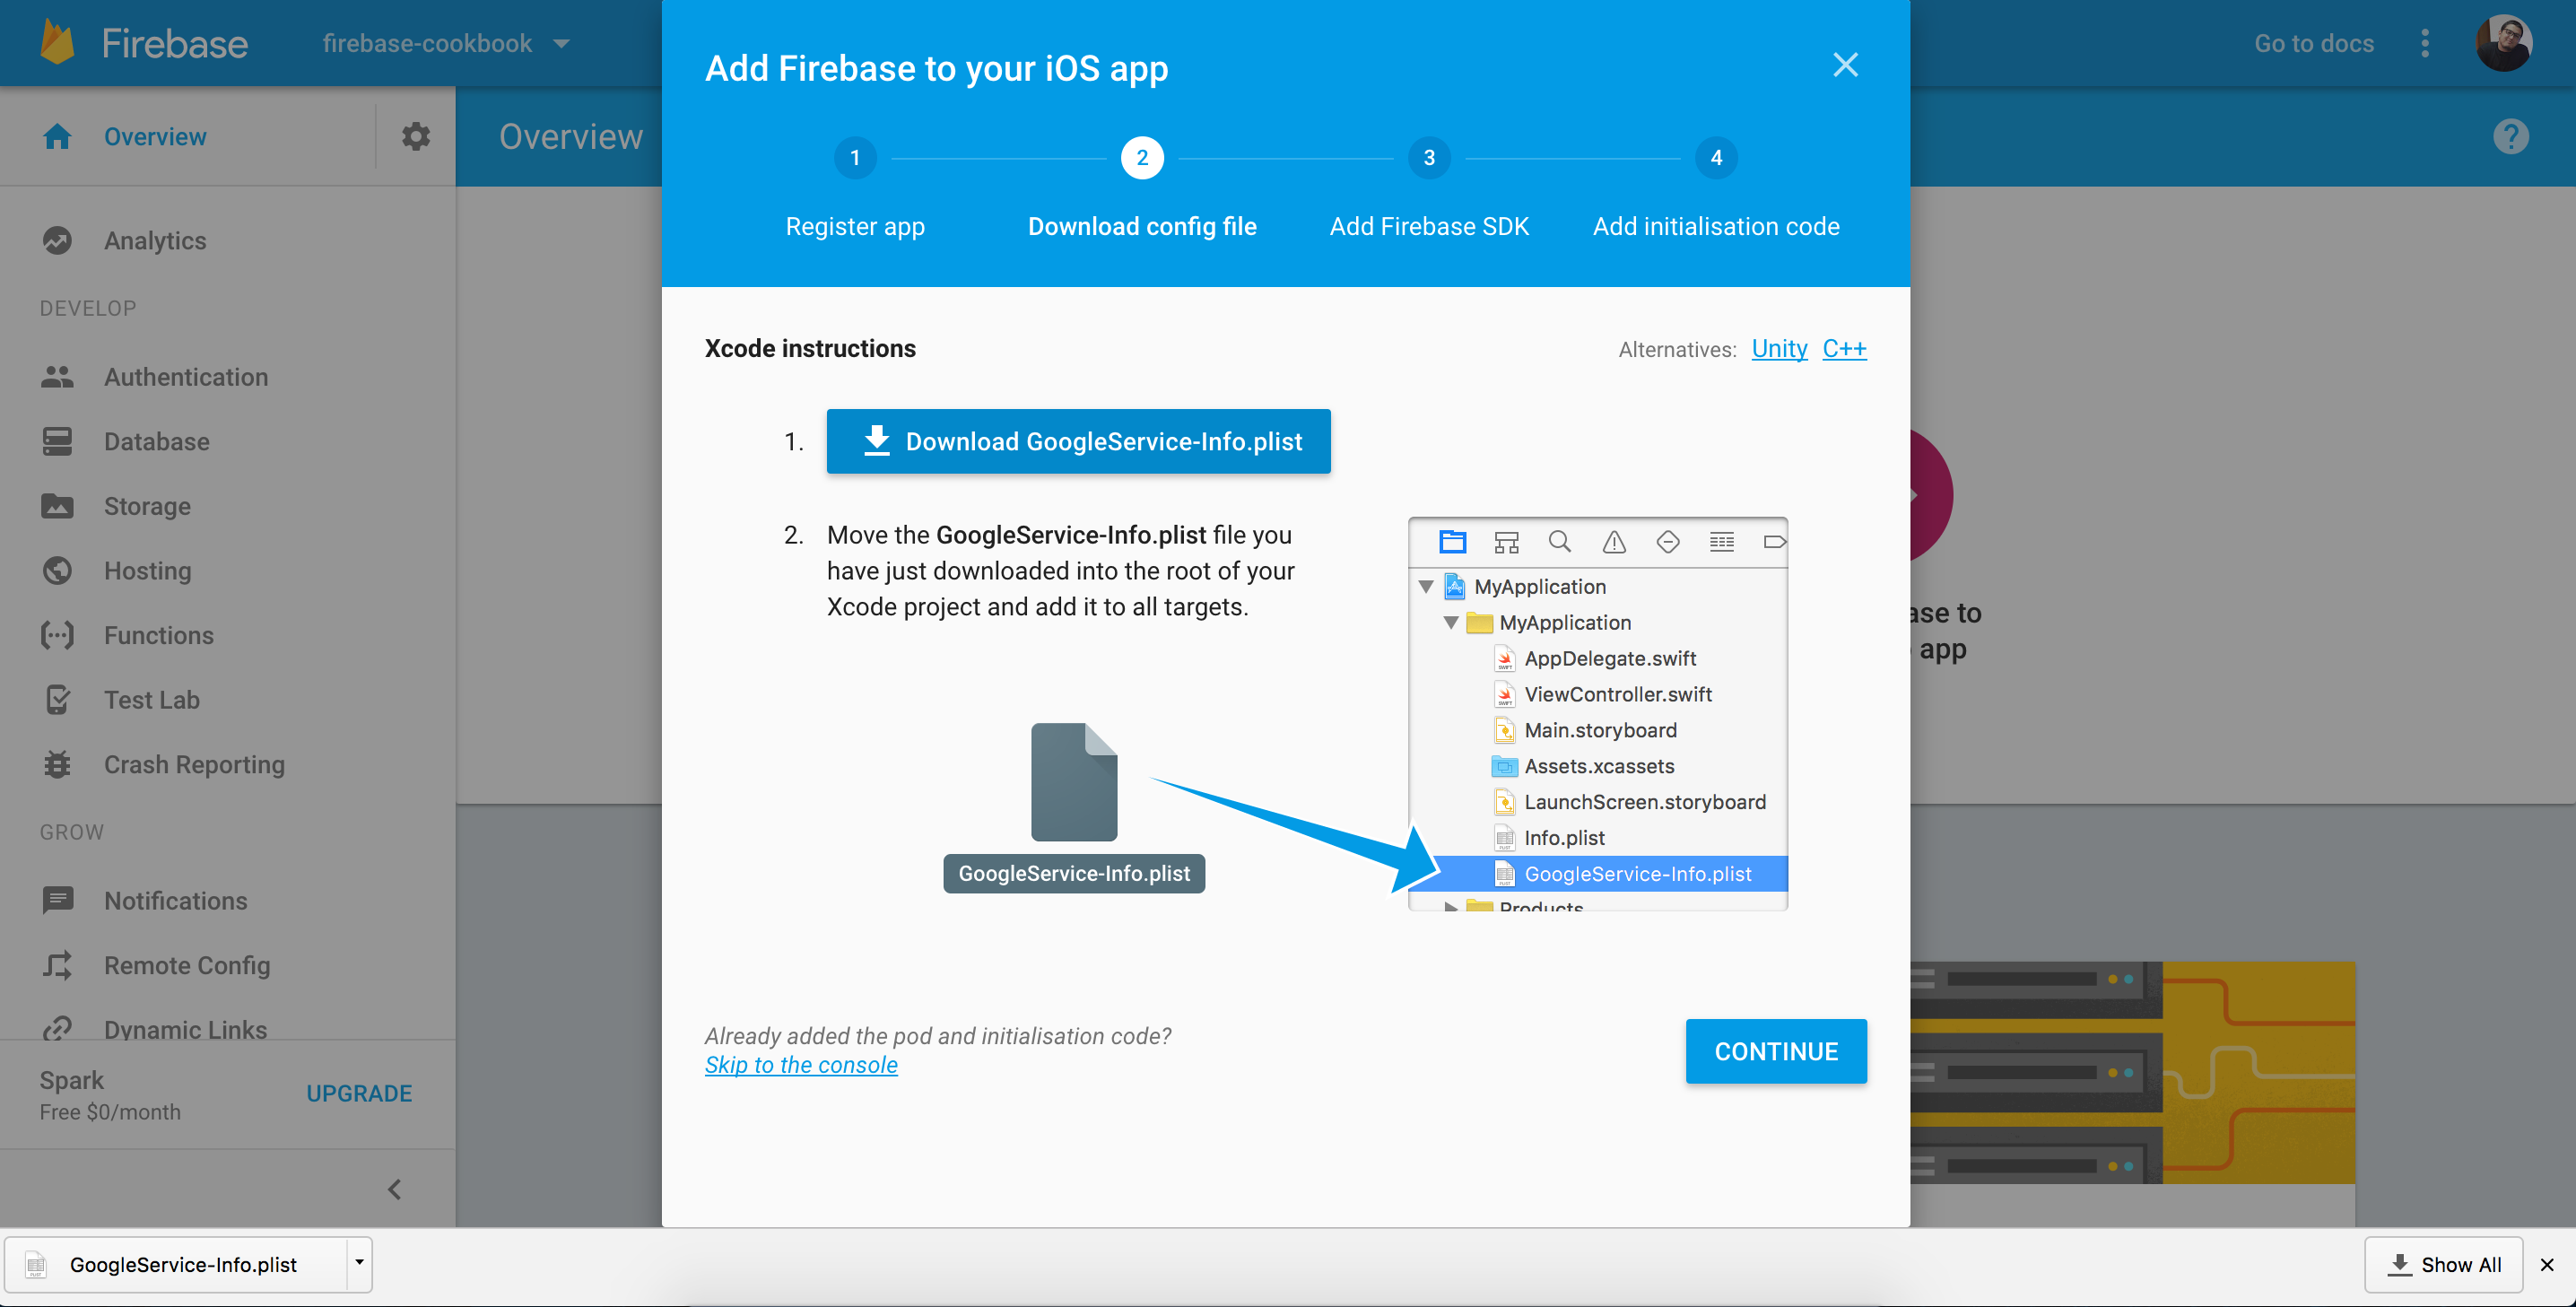
Figure 20: Firebase GoogleService-info.plist download
- Now simply copy and paste that file into your project (Figure 21):

Figure 21: Firebase GoogleService-info.plist in our application.
- After we have finished the file download and file integration, let's just install some dependencies. In this process, we will use CocoaPods as our package manager. Head directly to your project using your terminal:
      ~ cd project-directory
      ~/project-directory ~> pod init
Note
To download and install CocoaPods on your macOS development machine, please follow the steps mentioned on the official website: https://guides.cocoapods.org/using/getting-started.html.
After you initialize your project with CocoaPods, you will find a newly created file named Podfile.
Note
The Podfile is a specification that describes the dependencies of the targets of one or more Xcode projects.
- Now, you will need to edit the
Podfileusing your favorite code or text editor and add the following line:
pod 'Firebase/Core'
- Now, save the file, go back to your terminal, and write down the following command:
~/project-directory ~> pod installThis command will download and install all the required libraries and modules that Firebase needs to fire up within your application.
- Now, instead of your regular project, open another special project extension, as the following command shows:
~/project-directory ~> open project-name.xcworkspace- We're one step behind. Now, in your application, go directly to your
AppDelegateand simply import Firebase using the following code snippet:
importFirebase
- Now, in the
didFinishLaunchingWithOptionsmethod, add the following code:
FIRApp.configure()
Congratulations! You've successfully integrated Firebase with your iOS application.