Populating data with Eventgen
Machine data is produced by the many functions carried out by computers and other mechanical machines. If you work in an environment that is rich in machine data, you will most likely have many sources of readily available data inputs for Splunk. However, to facilitate learning in this book, we will use a Splunk add-on called the Splunk Eventgen to easily build real-time and randomized web log data. This is the type of data that would be produced by a web-based e-commerce company.
Note
If you need more detailed information about Eventgen, you can follow the project's GitHub repository at https://github.com/splunk/eventgen/.
Using the CLI to configure Eventgen
Here's an important tip for Windows users. Make it a habit to always launch your Command Prompt in administrator mode. This allows you to use commands that are unhindered by Windows security:
- Right-click on the Windows start menu icon and select
Search. In Windows 7, you can click on the Windows icon and the search window will be directly above it. In Windows 10, there is a search bar namedCortananext to the Windows icon that you can type into. They both have the same underlying function. - In the search bar, type
cmd. - In the search results, look for
command.exe(Windows 7) or Command Prompt (Windows 10), right-click on it, and then selectRun as administrator.
Note
Familiarize yourself with this step. Throughout the rest of the book, you will be frequently asked to open Command Prompt in administrator mode. You will know if you are in administrator mode, as it will say administrator: Command Prompt in the title of the Command Prompt window.
Installing the Eventgen add-on (Windows and Linux)
A Splunk add-on extends and enhances the base functionality of Splunk. An add-on typically enriches data using prebuilt rules for a specific source to enable faster analysis. In this section, you will be installing your first add-on, called Splunk Eventgen, which will help us pre-populate Splunk with real-time simulated web data:
- Download the ZIP file from the Eventgen public repository, http://github.com/splunk/eventgen. Click on the green
Cloneordownloadbutton. For Linux users, we've placed a copy of the Eventgen files used in this book at our download site: https://github.com/PacktPublishing/Splunk-7-Essentials-Third-Edition. - Extract the ZIP file to the root location for your environment.
- Rename the extracted folder to
SA-Eventgen. In Windows, this can be done with the Windows GUI, or via themvcommand in Linux. - Open an administrator Command Prompt or Linux shell and execute the following command (the slashes are important):
Windows:C:> xcopy SA-Eventgen C:\Splunk\etc\apps\SA-Eventgen /O /X /E /H /K
Linux:mv SA-Eventgen /$SPLUNK_HOME/etc/apps/
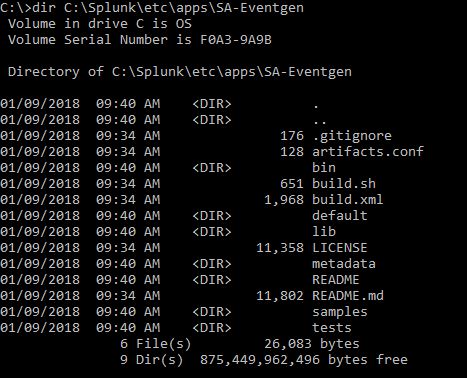
- In the prompt, type the following directory command to verify that the copy works properly and the contents are in the folder:
Windows: C:> dir C:\Splunk\etc\apps\SA-Eventgen
Linux:ls -l /$SPLUNK_HOME/etc/apps/
These are the contents of the recently copied SA-Eventgen folder, as shown in the following (Windows) screenshot, the same as what would appear in the similar location on Linux:
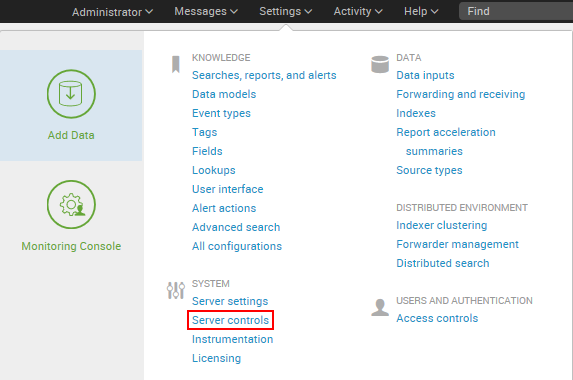
Return to the Splunk interface in your web browser and restart Splunk by selecting the
Settingsdropdown; under theSYSTEMsection, click onServer controls:
- On the
Server controlspage, click on theRestart Splunkbutton. Click onOKwhen asked to confirm the restart. - The web interface will first notify you that Splunk is restarting in the background, then it will tell you that the restart has been successful. Every time Splunk is restarted, you will be prompted to log in with your credentials. Go ahead and log in.
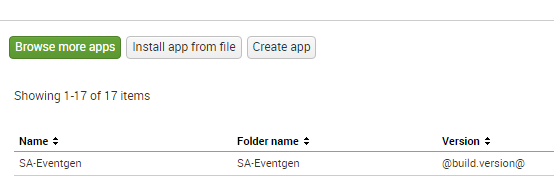
- After logging in, you will now see the Eventgen app in the Splunk Enterprise landing page. Go to the
Manage Appspage and confirm that theSA-EventGenapplication is installed:
You have successfully installed a Splunk add-on.