Search icon CANCEL
Subscription
0
Cart icon
Your Cart (0 item)
Close icon
You have no products in your basket yet
Save more on your purchases! discount-offer-chevron-icon
Savings automatically calculated. No voucher code required.
Arrow left icon
All Products
Best Sellers
New Releases
Books
Videos
Audiobooks
Learning Hub
Newsletter Hub
Free Learning
Arrow right icon
timer SALE ENDS IN
0 Days
:
00 Hours
:
00 Minutes
:
00 Seconds
Arrow up icon
GO TO TOP
OpenStack Essentials

You're reading from   OpenStack Essentials Demystify the cloud by building your own private OpenStack cloud

Arrow left icon
Product type Paperback
Published in May 2015
Publisher
ISBN-13 9781783987085
Length 182 pages
Edition 1st Edition
Arrow right icon
Author (1):
Arrow left icon
Dan Radez Dan Radez
Author Profile Icon Dan Radez
Dan Radez
Arrow right icon
View More author details
Toc

Table of Contents (20) Chapters Close

OpenStack Essentials
Credits
About the Author
About the Reviewers
www.PacktPub.com
Preface
1. Architecture and Component Overview FREE CHAPTER 2. RDO Installation 3. Identity Management 4. Image Management 5. Network Management 6. Instance Management 7. Block Storage 8. Object Storage 9. Telemetry 10. Orchestration 11. Scaling Horizontally 12. Monitoring 13. Troubleshooting Index

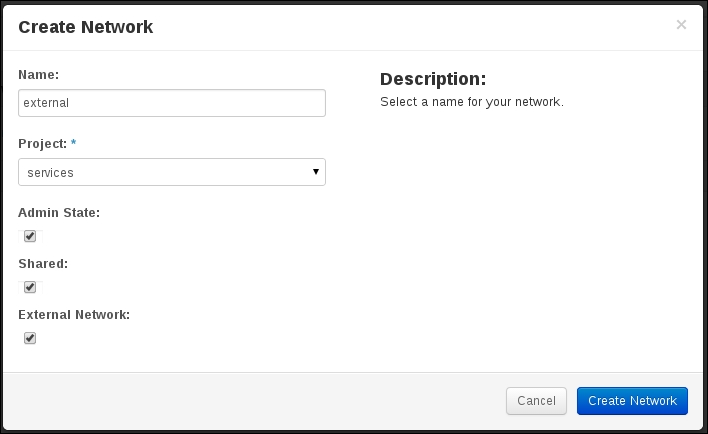
Web interface external network setup


Previously, there was preparation done to tie eth1 and br-ex together. This preparation must be done on the command line. Because it is external configuration to OpenStack, it cannot be completed through the OpenStack web interface. You can, however, complete the external network creation through the web interface by performing the following steps:

  1. Start by logging in to the web interface at the Admin user to create the external network and subnet. Select the Networks submenu from the Admin menu and click on Create Network. Give the network a name and flag it as external and shared. This step is encapsulated in the following screenshot:

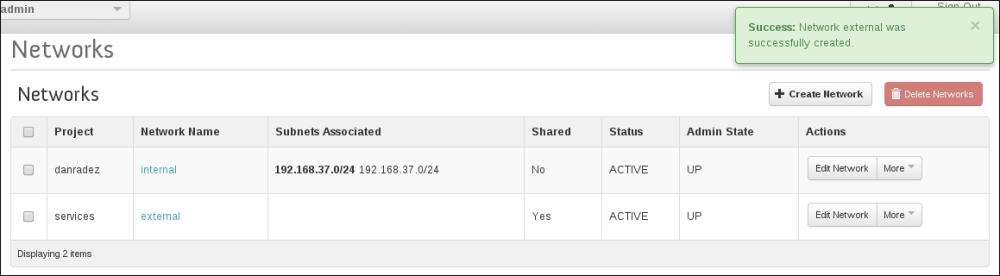
  2. Once you have created the network, select the network by its name and click on Create Subnet, as shown in the following screenshot:

  3. Fill out the form with the network information for the external pool of IP addresses. Make sure the correct gateway is specified. The following screenshot captures this step:

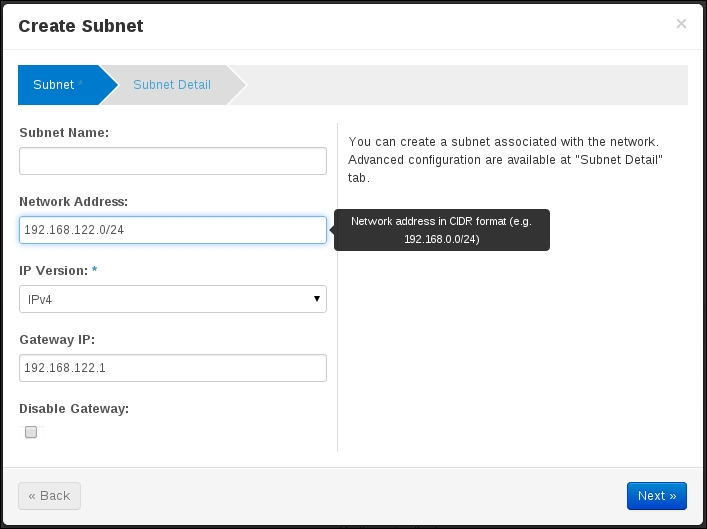
  4. Move to the Subnet...

lock icon The rest of the chapter is locked
Register for a free Packt account to unlock a world of extra content!
A free Packt account unlocks extra newsletters, articles, discounted offers, and much more. Start advancing your knowledge today.
Unlock this book and the full library FREE for 7 days
Get unlimited access to 7000+ expert-authored eBooks and videos courses covering every tech area you can think of
Renews at $15.99/month. Cancel anytime
Visually different images