
Understanding the React frontend
It's time to turn our attention to the React frontend. In this section, we'll inspect the frontend code, starting with the entry point, which is a single HTML page. We will explore how the frontend is executed in development mode and how it is built in preparation for deployment. We will then learn how the frontend dependencies are managed and also understand why it took over a minute to run the app for the first time. Finally, we will explore how React components fit together and how they access the ASP.NET Core backend.
Understanding the frontend entry point
We have a good clue as to where the entry point is from our examination of the Startup class in the ASP.NET Core backend. In the Configure method, the SPA middleware is set up with the source path set to ClientApp:
app.UseSpa(spa =>
{
  spa.Options.SourcePath = "ClientApp";
  if (env.IsDevelopment())
  {
    spa.UseReactDevelopmentServer(npmScript: "start");
  }
});
If we look in the ClientApp folder, we'll see a file called package.json. This is a file that is often used in React apps and contains information about the project, its npm dependencies, and the scripts that can be run to perform tasks.
Important Note
npm is a popular package manager for JavaScript. The dependencies in package.json reference the packages in the npm registry.
If we open the package.json file, we will see react listed as a dependency:
"dependencies": {
  "react": "^16.0.0",
  ...
  "react-scripts": "^3.4.1",
  ...
},
A version is specified against each package name. The versions in your package.json file may be different to the ones shown in the preceding code snippet. The ^ symbol in front of the version means that the latest minor version can be safely installed, according to semantic versioning.
Important Note
A semantic version has three parts: Major.Minor.Patch. A major version increment happens when an API breaking change is made. A minor version increment happens when backward-compatible features are added. Finally, a patch version happens when backward-compatible bug fixes are added. More information can be found at https://semver.org.
So, react 16.14.0 can be safely installed because this is the latest minor version of React 16 at the time of writing this book.
The react-scripts dependency gives us a big clue as to how React was scaffolded. react-scripts is a set of scripts from the popular Create React App (CRA) tool that was built by the developers at Facebook. This tool has done a huge amount of configuration for us, including creating a development server, bundling, linting, and unit testing. We'll learn more about CRA in the next chapter.
The root HTML page for an app scaffolded by CRA is index.html, which can be found in the public folder in the ClientApp folder. It is this page that hosts the React app. The root JavaScript file that is executed for an app scaffolded by CRA is index.js, which is in the ClientApp folder. We'll examine both the index.html and index.js files later in this chapter.
Next, we will learn how the React frontend is executed in development mode.
Running in development mode
In the following steps, we'll examine the ASP.NET Core project file to see what happens when the app runs in development mode:
- We can open the project file by right-clicking on the web application project in Solution Explorer and selecting the Edit Project File option:

Figure 1.10 – Opening the project file in Visual Studio
This is an XML file that contains information about the Visual Studio project.
- Let's look at the
Targetelement, which has aNameattribute ofDebugEnsureNodeEnv:<Target Name="DebugEnsureNodeEnv" BeforeTargets="Build" Condition=" '$(Configuration)' == 'Debug' And !Exists('$(SpaRoot)node_modules') "> <!-- Ensure Node.js is installed --> <Exec Command="node --version" ContinueOnError="true"> <Output TaskParameter="ExitCode" PropertyName="ErrorCode" /> </Exec> <Error Condition="'$(ErrorCode)' != '0'" Text="Node.js is required to build and run this project. To continue, please install Node.js from https://nodejs.org/, and then restart your command prompt or IDE." /> <Message Importance="high" Text="Restoring dependencies using 'npm'. This may take several minutes..." /> <Exec WorkingDirectory="$(SpaRoot)" Command="npm install" /> </Target>This executes tasks when the
ClientApp/node-modulesfolder doesn't exist and the Visual Studio project is run in debug mode, which is the mode that's used when we press F5. - The first task that is run in the
Targetelement is the execution of the following command via anExectask:> node --version
This command returns the version of Node that is installed. This may seem like an odd thing to do, but its purpose is to determine whether node is installed. If Node is not installed, the command will error and be caught by the
Errortask, which informs the user that Node needs to the installed and where to install it from. - The next task in the
Targetelement uses aMessagecommand, which outputsRestoring dependencies using 'npm'. This may take several minutes...to the Output window. We'll see this message when we run the project for the first time:
Figure 1.11 – Restoring npm dependencies message when running a project for the first time
- The final task that is carried out when the project is run in debug mode is another
Exectask. This executes the followingnpmcommand:> npm install
This command downloads all the packages that are listed as dependencies in package.json into a folder called node_modules:
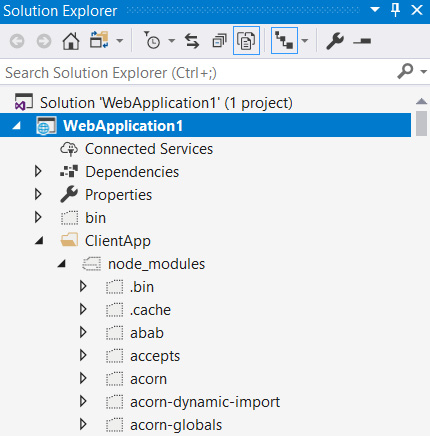
Figure 1.12 – The node_modules folder
We can see this in the Solution Explorer window if the Show All Files option is on. Notice that there are a lot more folders in node_modules than dependencies listed in package.json. This is because the dependencies will have dependencies. So, the packages in node_modules are all the dependencies in the dependency tree.
At the start of this section, we asked ourselves why it took such a long time for the project to run the app for the first time. The answer is that this last task takes a while because there are a lot of dependencies to download and install. On subsequent runs, node_modules will have been created, so these sets of tasks won't get invoked.
Earlier in this chapter, we learned that ASP.NET Core invokes an npm start command when the app is in development mode. If we look at the scripts section in package.json, we'll see the definition of this command:
"scripts": {
  "start": "rimraf ./build && react-scripts start",
  ...
}
This command deletes a folder called build and runs a Webpack development server.
Important Note
Webpack is a tool that transforms, bundles, and packages up files for use in a browser. Webpack also has a development server. The CRA tool has configured Webpack for us so that all the transformation and bundling configuration is already set up for us.
Why would we want to use the Webpack development server when we already have our ASP.NET Core backend running in IIS Express? The answer is a shortened feedback loop, which will increase our productivity. Later, we'll see that we can make a change to a React app running in the Webpack development server and that those changes are automatically loaded. There is no stopping and restarting the application, so there's a really quick feedback loop and great productivity.
Publishing process
The publishing process is the process of building artifacts to run an application in a production environment.
Let's continue and inspect the XML ASP.NET Core project file by looking at the Target element, which has a Name attribute of PublishRunWebPack. The following code executes a set of tasks when the Visual Studio project is published:
<Target Name="PublishRunWebpack" AfterTargets="ComputeFilesToPublish">
  <!-- As part of publishing, ensure the JS resources are
  freshly built in production mode -->

  <Exec WorkingDirectory="$(SpaRoot)" Command="npm install"
   />
  <Exec WorkingDirectory="$(SpaRoot)" Command="npm run
   build" />
  <!-- Include the newly-built files in the publish output -->
  <ItemGroup>
    <DistFiles Include="$(SpaRoot)build\**" />
    <ResolvedFileToPublish Include="@(DistFiles-
     >'%(FullPath)')"
     Exclude="@(ResolvedFileToPublish)">
      <RelativePath>%(DistFiles.Identity)</RelativePath>
      <CopyToPublishDirectory>PreserveNewest
        </CopyToPublishDirectory>
    </ResolvedFileToPublish>
  </ItemGroup>
</Target>
The first task that is run is the execution of the npm install command via an Exec task. This will ensure that all the dependencies are downloaded and installed. Obviously, if we've already run our project in debug mode, then the dependencies should already be in place.
The next task is an Exec task that runs the following npm command:
> npm run build
This task will run an npm script called build. If we look in the package.json file again, we'll see this script in the scripts section:
"scripts": {
  "start": "rimraf ./build && react-scripts start",
  "build": "react-scripts build",
  "test": "cross-env CI=true react-scripts test --
   env=jsdom",
  "eject": "react-scripts eject",
  "lint": "eslint ./src/"
}
This references the create-react-app scripts, which bundle the React app ready for production, optimizing it for great performance, and outputting the content into a folder called build.
The next set of tasks defined in the ItemGroup element take their content from the build folder and place it in the publish location, along with the rest of the content to publish.
Let's give this a try and publish our app:
- In the Solution Explorer window, right-click on the project and select the Publish... option.
- Choose Folder as the target and click Next:

Figure 1.13 – Publishing to a folder
- Enter a folder location to output the content to and click Finish:

Figure 1.14 – Publish location
- A publish profile is then created. Click the Publish button to start the publishing process on the screen that appears:
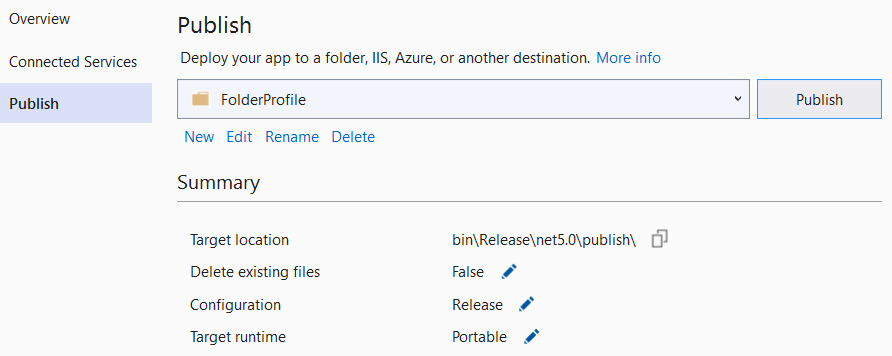
Figure 1.15 – Publish profile screen
After a while, we'll see the content appear in the folder we specified, including a ClientApp folder. If we look in this ClientApp folder, we'll see a build folder containing the React app, ready to be run in a production environment. Notice that the build folder contains index.html, which is the single page that will host the React app in production.
Important Note
It is important to note that publishing from a developer's machine is not ideal. Instead, it is good practice to carry out this process on a build server to make sure that built applications are consistent, and that code that's committed to the repository goes into the build. We'll cover this in Chapter 15, Implementing CI and CD with Azure DevOps.
Understanding the frontend dependencies
Earlier, we learned that frontend dependencies are defined in package.json. Why not just list all the dependencies as script tags in index.html? Why do we need the extra complexity of npm package management in our project? The answer is that a long list of dependencies is hard to manage. If we used script tags, we'd need to make sure these are ordered correctly. We'd also be responsible for downloading the packages, placing them locally in our project, and keeping them up to date. We have a huge list of dependencies in our scaffolded project already, without starting work on any functionality in our app. For these reasons, managing dependencies with npm has become an industry standard.
Let's open package.json again and look at the dependencies section:
"dependencies": {
  "bootstrap": "^4.1.3",
  "jquery": "3.4.1",
  "merge": "^1.2.1",
  "oidc-client": "^1.9.0",
  "react": "^16.0.0",
  "react-dom": "^16.0.0",
  "react-router-bootstrap": "^0.24.4",
  "react-router-dom": "^4.2.2",
  "react-scripts": "^3.0.1",
  "reactstrap": "^6.3.0",
  "rimraf": "^2.6.2"
},
We've already observed the react dependency, but what is the react-dom dependency? Well, React doesn't just target the web; it also targets native mobile apps. This means that react is the core React library that is used for both web and mobile, and react-dom is the library that's specified for targeting the web.
The react-router-dom package is the npm package for React Router and helps us manage the different pages in our app in the React frontend, without us needing to do a round trip to the server. We'll learn more about React Router in Chapter 5, Routing with React Router. The react-router-bootstrap package allows Bootstrap to work nicely with React Router.
We can see that this React app has a dependency for Bootstrap 4.1 with the bootstrap npm package. So, Bootstrap CSS classes and components can be referenced to build the frontend in our project. The reactstrap package is an additional package that allows us to consume Bootstrap nicely in React apps. Bootstrap 4.1 has a dependency on jQuery, which is the reason why we have the jquery package dependency.
The merge package contains a function that merges objects together, while oidc-client is a package for interacting with OpenID Connect (OIDC) and OAuth2.
The final dependency that we haven't covered yet is rimraf. This simply allows files to be deleted, regardless of the host operating system. We can see that this is referenced in the start script:
"scripts": {
  "start": "rimraf ./build && react-scripts start",
  ...
}
Earlier in this chapter, we learned that this script is invoked when our app is running in development mode. So, rimraf ./build deletes the build folder and its contents before the development server starts.
If we look further down, we'll see a section called devDependencies. These are dependencies that are only used during development and not in production:
"devDependencies": {
  "ajv": "^6.9.1",
  "cross-env": "^5.2.0",
  "eslint": "^6.8.0",
  "eslint-config-react-app": "^5.2.1",
  "eslint-plugin-flowtype": "^4.6.0",
  "eslint-plugin-import": "^2.20.0",
  "eslint-plugin-jsx-a11y": "^6.2.3",
  "eslint-plugin-react": "^7.18.3"
},
The following is a brief description of these dependencies:
ajvallows us to validate JSON files.cross-envallows us to set environment variables, regardless of the host operating system. If you look at thetestscript in thescriptssection of thepackage.jsonfile, you'll see that it usescross-envto set aCIenvironment variable.- The remaining dependencies are all designed to enable linting with ESLint. The linting process checks for problematic patterns in code according to a set of rules. We'll learn more about ESLint in Chapter 3, Getting Started with React and TypeScript.
Let's move on and learn how the single page is served and how the React app is injected into it.
Understanding how the single page is served
We know that the single page that hosts the React app is index.html, so let's examine this file. This file can be found in the public folder of the ClientApp folder. The React app will be injected into the div tag, which has an id of root:
<div id="root"></div>
Let's run our app again in Visual Studio to confirm that this is the case by pressing F5. If we open the developer tools in the browser page that opens and inspect the DOM in the Elements panel, we'll see this div tag with the React content inside it:
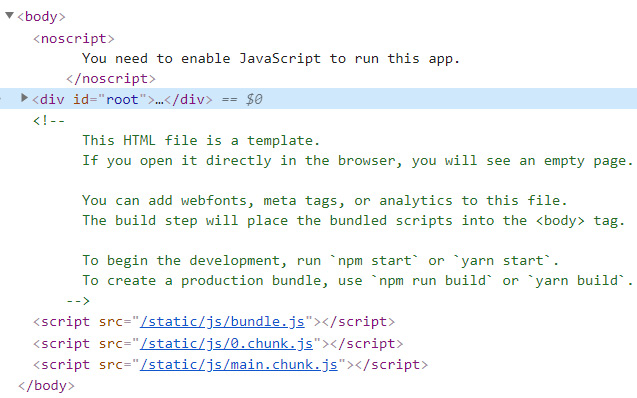
Figure 1.16 – Root div element and script elements
Notice the script elements at the bottom of the body element. This contains all the JavaScript code for our React app, including the React library itself. However, these script elements don't exist in the source index.html file, so how did they get there in the served page? Webpack added them after bundling all the JavaScript together and splitting it up into optimal chunks that can be loaded on demand. If we look in the ClientApp folder and subfolders, we'll see that the static folder doesn't exist. The JavaScript files don't exist either. What's going on? These are virtual files that are created by the Webpack development server. Remember that when we run the app with Visual Studio debugger, the Webpack development server serves index.html. So, the JavaScript files are virtual files that the Webpack development server creates.
Now, what happens in production mode when the Webpack development server isn't running? Let's have a closer look at the app we published earlier in this chapter. Let's look in the index.html file in the Build folder, which can be found in the ClientApp folder. The script elements at the bottom of the body element will look something like the following:
<script>
  !function(e){...}([])
</script>
<script src="/static/js/2.f6873cc5.chunk.js"></script>
<script src="/static/js/main.61537c83.chunk.js"></script>
Carriage returns have been added in the preceding code snippet to make it more readable. The highlighted parts of the filenames may vary each time the app is published. The filenames are unique in order to break browser caching. If we look for these JavaScript files in our project, we'll find that they do exist. So, in production mode, the web server will serve this physical JavaScript file.
If we open this JavaScript file, we'll see it contains all the JavaScript for our app. This JavaScript is minified so that the file can be downloaded to the browser nice and quickly.
Important Note
Minification is the process of removing unnecessary characters in files without affecting how it is processed by the browser. This includes code comments and formatting, unused code, using shorter variable and function names, and so on.
However, the file isn't small and contains a lot of JavaScript. What's going on here? Well, the file contains not only our JavaScript app code but also the code from all the dependencies, including React itself.
Understanding how components fit together
Now, it's time to start looking at the React app code and how components are implemented. Remember that the root JavaScript file is index.js in the ClientApp folder. Let's open this file and look closely at the following block of code:
const rootElement = document.getElementById('root');
ReactDOM.render(
  <BrowserRouter basename={baseUrl}>
    <App />
  </BrowserRouter>,
  rootElement);
The first statement selects the div element we discovered earlier, which contains the root ID and stores it in a variable called rootElement.
The next statement extends over multiple lines and calls the render function from the React DOM library. It is this function that injects the React app content into the root div element. The rootElement variable, which contains a reference to the root div element, is passed into this function as the second parameter.
The first parameter that is passed into the render function is more interesting. In fact, it doesn't even look like legal JavaScript! This is, in fact, JSX, which we'll learn about in detail in Chapter 3, Getting Started with React and TypeScript.
Important Note
JSX is transformed into regular JavaScript by Webpack using a tool called Babel. This is one of many tasks that CRA configured for us when our app was scaffolded.
So, the first parameter passes in the root React component called BrowserRouter, which comes from the React Router library. We'll learn more about this component in Chapter 5, Routing with React Router.
Nested inside the BrowserRouter component is a component called App. If we look at the top of the index.js file, we will see that the App component is imported from a file called App.js:
import App from './App';
Important Note
import statements are used to import items that have been exported by another JavaScript module. The module is specified by its file location, with the js extension omitted.
The import statements that import items from npm packages don't need the path to be specified. This is because CRA has configured a resolver in Webpack that automatically looks in the node_modules folder during the bundling process.
So, the App component is contained in the App.js file. Let's have a quick look. A class called App is defined in this file:
export default class App extends Component {
  static displayName = App.name;
  render () {
    return (
      <Layout>
        <Route exact path='/' component={Home} />
        <Route path='/counter' component={Counter} />
        <Route path='/fetch-data' component={FetchData} />
      </Layout>
    );
  }
}
Notice the export and default keywords before the class keyword.
Important Note
The export keyword is used to export an item from a JavaScript module. The default keyword defines the export as the default export, which means it can be imported without curly braces. So, a default export can be imported as import App from './App' rather than import {App} from './App'.
A method called render defines the output of the component. This method returns JSX, which, in this case, references a Layout component in our app code and a Route component from React Router.
So, we are starting to understand how React components can be composed together to form a UI.
Now, let's go through the React development experience by making a simple change:
- Run the app in Visual Studio by pressing F5, if it's not already running.
- Open the
Home.jsfile, which can be found atClientApp\src\components. This contains the component that renders the home page. - With the app still running, in the
rendermethod, change theh1tag in the JSX so that it renders a different string:render () { return ( <div> <h1>Hello, React!</h1> <p>Welcome to your new single-page application, built with: </p> ... </div> ); } - Save the file and look at the running app:
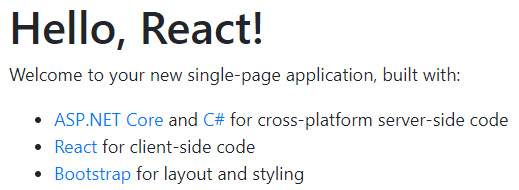
Figure 1.17 – The home page is automatically updated in the browser
The app is automatically updated with our change. The Webpack development server automatically updated the running app with the change when the file was saved. The experience of seeing our changes implemented almost immediately gives us a really productive experience when developing our React frontend.
Understanding how components access the backend web API
The final topic we'll cover in this chapter is how the React frontend consumes the backend web API. If the app isn't running, then run it by pressing F5 in Visual Studio. If we click on the Fetch data option in the top navigation bar in the app that opens in the browser, we'll see a page showing weather forecasts:
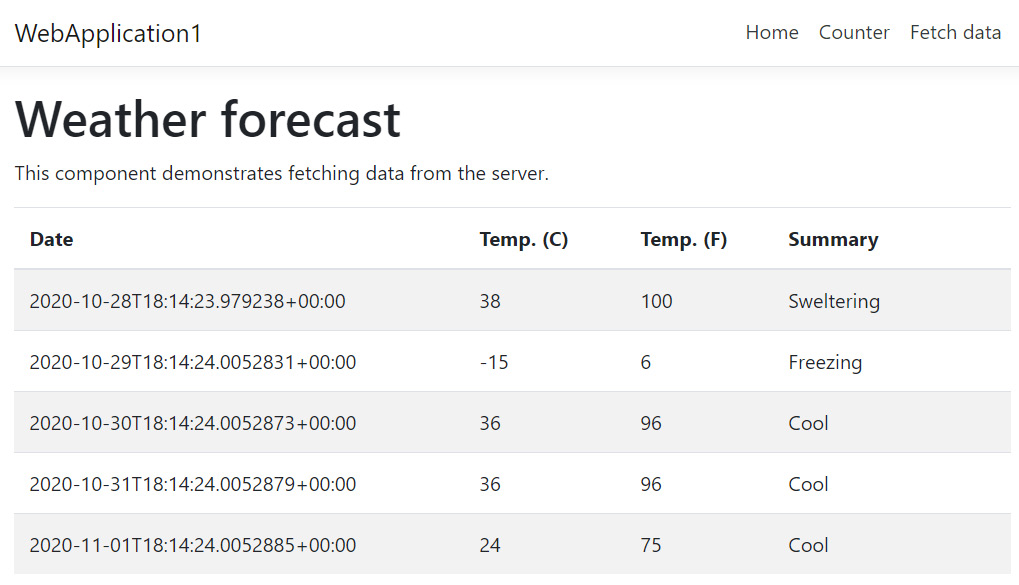
Figure 1.18 – Weather forecast data
If we cast our minds back to earlier in this chapter, in the Understanding controllers section, we looked at an ASP.NET Core controller that surfaced a web API that exposed the data at weatherforecast. So, this is a great place to have a quick look at how a React app can call an ASP.NET Core web API.
The component that renders this page is in FetchData.js. Let's open this file and look at the constructor class:
constructor (props) {
  super(props);
  this.state = { forecasts: [], loading: true };
}
The constructor class in a JavaScript class is a special method that automatically gets invoked when a class instance is created. So, it's a great place to initialize class-level variables.
The constructor initializes a component state, which contains the weather forecast data, and a flag to indicate whether the data is being fetched. We'll learn more about component state in Chapter 3, Getting Started with React and TypeScript.
Let's have a look at the componentDidMount method:
componentDidMount() {
  this.populateWeatherData();
}
This method gets invoked by React when the component is inserted into the tree and is the perfect place to load data. This method calls a populateWeatherData method, so, let's have a look at that:
async populateWeatherData() {
  const response = await fetch('weatherforecast');
  const data = await response.json();
  this.setState({ forecasts: data, loading: false });
}
Notice the async keyword before the populateWeatherData function name. Also, notice the await keywords within the function.
Important Note
An await keyword is used to wait for an asynchronous function to complete. A function must be declared as asynchronous for us to use the await keyword within it. This can be done by placing the async keyword in front of the function name. This is very much like async and await in .NET.
We can see that a function called fetch is used within this method.
Important Note
The fetch function is a native JavaScript function for interacting with web APIs. The fetch function supersedes XMLHttpRequest and works a lot nicer with JSON-based web APIs.
The parameter that's passed into the fetch function is the path to the web API resource; that is, weatherforecast. A relative path can be used because the React app and web API are of the same origin.
Once the weather forecast data has been fetched from the web API and the response has been parsed, the data is placed in the component's state.
Hang on a minute, though – the native fetch function isn't implemented in Internet Explorer (IE). Does that mean our app won't work in IE? Well, the fetch function isn't available in IE, but CRA has set up a polyfill for this so that it works perfectly fine.
Important Note
A polyfill is a piece of code that implements a feature we expect the browser to provide natively. Polyfills allow us to develop against features that aren't supported in all browsers yet.
Now, let's turn our attention to the render method:
render () {
  let contents = this.state.loading
    ? <p><em>Loading...</em></p>
    : FetchData.renderForecastsTable(this.state.forecasts);
  return (
    <div>
      <h1 id="tabelLabel">Weather forecast</h1>
      <p>This component demonstrates fetching data from the
        server.</p>
      {contents}
    </div>
  );
}
The code may contain concepts you aren't familiar with, so don't worry if this doesn't make sense to you at this point. I promise that it will make sense as we progress through this book!
We already know that the render method in a React component returns JSX, and we can see that JSX is returned in this render method as well. Notice the {contents} reference in the JSX, which injects the contents JavaScript variable into the markup below the p tag, at the bottom of the div tag. The contents variable is set in the first statement in the render method and is set so that Loading... is displayed while the web API request is taking place, along with the result of FetchData.renderForecastsTable when the request has finished. We'll have a quick look at this now:
static renderForecastsTable (forecasts) {
  return (
    <table className='table table-striped' aria-
      labelledby="tabelLabel">
      <thead>
        <tr>
          <th>Date</th>
          <th>Temp. (C)</th>
          <th>Temp. (F)</th>
          <th>Summary</th>
        </tr>
      </thead>
      <tbody>
        {forecasts.map(forecast =>
          <tr key={forecast.dateFormatted}>
            <td>{forecast.dateFormatted}</td>
            <td>{forecast.temperatureC}</td>
            <td>{forecast.temperatureF}</td>
            <td>{forecast.summary}</td>
          </tr>
        )}
      </tbody>
    </table>
  );
}
This function returns JSX, which contains an HTML table with the data from the forecasts data array injected into it. The map method on the forecasts array is used to iterate through the items in the array and render tr tags in the HTML table containing the data.
Important Note
The map method is a native JavaScript method that is available in an array. It takes in a function parameter that is called for each array element. The return values of the function calls then make up a new array. The map method is commonly used in JSX when iteration is needed.
Notice that we have applied a key attribute to each tr tag. What is this for? This isn't a standard attribute on an HTML table row, is it?
Important Note
The key attribute helps React detect when an element changes or is added or removed. So, it's not a standard HTML table row attribute. Where we output content in a loop, it is good practice to apply this attribute and set it to a unique value within the loop so that React can distinguish it from the other elements. Omitting keys can also lead to performance problems on large datasets as React will unnecessarily update the DOM when it doesn't need to.
Again, this is a lot to take in at this point, so don't worry if there are bits you don't fully understand. This will all become second nature to you by the end of this book.