This article is by Andrii Sergiienko, the author of the book WebRTC Cookbook.
WebRTC is a relatively new and revolutionary technology that opens new horizons in the area of interactive applications and services. Most of the popular web browsers support it natively (such as Chrome and Firefox) or via extensions (such as Safari). Mobile platforms such as Android and iOS allow you to develop native WebRTC applications.
In this article, we will cover the following recipes:
- Creating a multiuser conference using WebRTCO
- Taking a screenshot using WebRTC
- Compiling and running a demo for Android
(For more resources related to this topic, see here.)
Creating a multiuser conference using WebRTCO
In this recipe, we will create a simple application that supports a multiuser videoconference. We will do it using WebRTCO—an open source JavaScript framework for developing WebRTC applications.
Getting ready
For this recipe, you should have a web server installed and configured. The application we will create can work while running on the local filesystem, but it is more convenient to use it via the web server.
To create the application, we will use the signaling server located on the framework's homepage. The framework is open source, so you can download the signaling server from GitHub and install it locally on your machine. GitHub's page for the project can be found at https://github.com/Oslikas/WebRTCO.
How to do it…
The following recipe is built on the framework's infrastructure. We will use the framework's signaling server. What we need to do is include the framework's code and do some initialization procedure:
- Create an HTML file and add common HTML heads:
<!DOCTYPE html>
<html lang="en">
<head>
    <meta charset="utf-8">
- Add some style definitions to make the web page looking nicer:
    <style type="text/css">
        video {
            width: 384px;
            height: 288px;
            border: 1px solid black;
            text-align: center;
        }
        .container {
            width: 780px;
            margin: 0 auto;
        }
    </style>
- Include the framework in your project:
<script type="text/javascript" src =
"https://cdn.oslikas.com/js/WebRTCO-1.0.0-beta-min.js"
charset="utf-8"></script>
</head>
- Define the onLoad function—it will be called after the web page is loaded. In this function, we will make some preliminary initializing work:
<body onload="onLoad();">
- Define HTML containers where the local video will be placed:
<div class="container">
    <video id="localVideo"></video>
</div>
- Define a place where the remote video will be added. Note that we don't create HTML video objects, and we just define a separate div. Further, video objects will be created and added to the page by the framework automatically:
<div class="container" id="remoteVideos"></div>
<div class="container">
- Create the controls for the chat area:
<div id="chat_area" style="width:100%; height:250px;
overflow: auto; margin:0 auto 0 auto; border:1px solid
rgb(200,200,200); background: rgb(250,250,250);"></div>
</div>
<div class="container" id="div_chat_input">
<input type="text" class="search-query"
placeholder="chat here" name="msgline" id="chat_input">
<input type="submit" class="btn" id="chat_submit_btn"
onclick="sendChatTxt();"/>
</div>
- Initialize a few variables:
<script type="text/javascript">
    var videoCount = 0;
    var webrtco = null;
    var parent = document.getElementById('remoteVideos');
    var chatArea = document.getElementById("chat_area");
    var chatColorLocal = "#468847";
    var chatColorRemote = "#3a87ad";
- Define a function that will be called by the framework when a new remote peer is connected. This function creates a new video object and puts it on the page:
    function getRemoteVideo(remPid) {
        var video = document.createElement('video');
        var id = 'remoteVideo_' + remPid;
        video.setAttribute('id',id);
        parent.appendChild(video);
        return video;
    }
- Create the onLoad function. It initializes some variables and resizes the controls on the web page. Note that this is not mandatory, and we do it just to make the demo page look nicer:
    function onLoad() {
        var divChatInput =         document.getElementById("div_chat_input");
        var divChatInputWidth = divChatInput.offsetWidth;
        var chatSubmitButton =         document.getElementById("chat_submit_btn");
        var chatSubmitButtonWidth =         chatSubmitButton.offsetWidth;
        var chatInput =         document.getElementById("chat_input");
        var chatInputWidth = divChatInputWidth -         chatSubmitButtonWidth - 40;
        chatInput.setAttribute("style","width:" +         chatInputWidth + "px");
        chatInput.style.width = chatInputWidth + 'px';
        var lv = document.getElementById("localVideo");
- Create a new WebRTCO object and start the application. After this point, the framework will start signaling connection, get access to the user's media, and will be ready for income connections from remote peers:
webrtco = new WebRTCO('wss://www.webrtcexample.com/signalling',
lv, OnRoomReceived, onChatMsgReceived, getRemoteVideo, OnBye);
};
Here, the first parameter of the function is the URL of the signaling server. In this example, we used the signaling server provided by the framework. However, you can install your own signaling server and use an appropriate URL. The second parameter is the local video object ID. Then, we will supply functions to process messages of received room, received message, and received remote video stream. The last parameter is the function that will be called when some of the remote peers have been disconnected.
- The following function will be called when the remote peer has closed the connection. It will remove video objects that became outdated:
    function OnBye(pid) {
        var video = document.getElementById("remoteVideo_"         + pid);
        if (null !== video) video.remove();
    };
- We also need a function that will create a URL to share with other peers in order to make them able to connect to the virtual room. The following piece of code represents such a function:
function OnRoomReceived(room) {
addChatTxt("Now, if somebody wants to join you,
should use this link: <a
href=""+window.location.href+"?
room="+room+"">"+window.location.href+"?
room="+room+"</a>",chatColorRemote);
};
- The following function prints some text in the chat area. We will also use it to print the URL to share with remote peers:
    function addChatTxt(msg, msgColor) {
        var txt = "<font color=" + msgColor + ">" +         getTime() + msg + "</font><br/>";
        chatArea.innerHTML = chatArea.innerHTML + txt;
        chatArea.scrollTop = chatArea.scrollHeight;
    };
- The next function is a callback that is called by the framework when a peer has sent us a message. This function will print the message in the chat area:
    function onChatMsgReceived(msg) {
        addChatTxt(msg, chatColorRemote);
    };
- To send messages to remote peers, we will create another function, which is represented in the following code:
    function sendChatTxt() {
        var msgline =         document.getElementById("chat_input");
        var msg = msgline.value;
        addChatTxt(msg, chatColorLocal);
        msgline.value = '';
        webrtco.API_sendPutChatMsg(msg);
    };
- We also want to print the time while printing messages; so we have a special function that formats time data appropriately:
    function getTime() {
        var d = new Date();
        var c_h = d.getHours();
        var c_m = d.getMinutes();
        var c_s = d.getSeconds();

        if (c_h < 10) { c_h = "0" + c_h; }
        if (c_m < 10) { c_m = "0" + c_m; }
        if (c_s < 10) { c_s = "0" + c_s; }
        return c_h + ":" + c_m + ":" + c_s + ": ";
    };
- We have some helper code to make our life easier. We will use it while removing obsolete video objects after remote peers are disconnected:
    Element.prototype.remove = function() {
        this.parentElement.removeChild(this);
    }
    NodeList.prototype.remove =     HTMLCollection.prototype.remove = function() {
        for(var i = 0, len = this.length; i < len; i++) {
            if(this[i] && this[i].parentElement) {
                this[i].parentElement.removeChild(this[i]);
            }
        }
    }
</script>
</body>
</html>
Now, save the file and put it on the web server, where it could be accessible from web browser.
How it works…
Open a web browser and navigate to the place where the file is located on the web server. You will see an image from the web camera and a chat area beneath it. At this stage, the application has created the WebRTCO object and initiated the signaling connection. If everything is good, you will see an URL in the chat area. Open this URL in a new browser window or on another machine—the framework will create a new video object for every new peer and will add it to the web page.
The number of peers is not limited by the application. In the following screenshot, I have used three peers: two web browser windows on the same machine and a notebook as the third peer:

Taking a screenshot using WebRTC
Sometimes, it can be useful to be able to take screenshots from a video during videoconferencing. In this recipe, we will implement such a feature.
Getting ready
No specific preparation is necessary for this recipe. You can take any basic WebRTC videoconferencing application. We will add some code to the HTML and JavaScript parts of the application.
How to do it…
Follow these steps:
- First of all, add image and canvas objects to the web page of the application. We will use these objects to take screenshots and display them on the page:
<img id="localScreenshot" src="">
<canvas style="display:none;" id="localCanvas"></canvas>
- Next, you have to add a button to the web page. After clicking on this button, the appropriate function will be called to take the screenshot from the local stream video:
<button onclick="btn_screenshot()" id="btn_screenshot">Make a screenshot</button>
- Finally, we need to implement the screenshot taking function:
function btn_screenshot() {
var v = document.getElementById("localVideo");
var s = document.getElementById("localScreenshot");
var c = document.getElementById("localCanvas");
var ctx = c.getContext("2d");
- Draw an image on the canvas object—the image will be taken from the video object:
ctx.drawImage(v,0,0);
- Now, take reference of the canvas, convert it to the DataURL object, and insert the value into the src option of the image object. As a result, the image object will show us the taken screenshot:
s.src = c.toDataURL('image/png');
}
- That is it. Save the file and open the application in a web browser. Now, when you click on the Make a screenshot button, you will see the screenshot in the appropriate image object on the web page. You can save the screenshot to the disk using right-click and the pop-up menu.
How it works…
We use the canvas object to take a frame of the video object. Then, we will convert the canvas' data to DataURL and assign this value to the src parameter of the image object. After that, an image object is referred to the video frame, which is stored in the canvas.
Compiling and running a demo for Android
Here, you will learn how to build a native demo WebRTC application for Android. Unfortunately, the supplied demo application from Google doesn't contain any IDE-specific project files, so you will have to deal with console scripts and commands during all the building process.
Getting ready
We will need to check whether we have all the necessary libraries and packages installed on the work machine. For this recipe, I used a Linux box—Ubuntu 14.04.1 x64. So all the commands that might be specific for OS will be relevant to Ubuntu. Nevertheless, using Linux is not mandatory and you can take Windows or Mac OS X.
If you're using Linux, it should be 64-bit based. Otherwise, you most likely won't be able to compile Android code.
Preparing the system
First of all, you need to install the necessary system packages:
sudo apt-get install git git-svn subversion g++ pkg-config gtk+-2.0
libnss3-dev libudev-dev ant gcc-multilib lib32z1 lib32stdc++6
Installing Oracle JDK
By default, Ubuntu is supplied with OpenJDK, but it is highly recommended that you install an Oracle JDK. Otherwise, you can face issues while building WebRTC applications for Android. One another thing that you should keep in mind is that you should probably use Oracle JDK version 1.6—other versions (in particular, 1.7 and 1.8) might not be compatible with the WebRTC code base. This will probably be fixed in the future, but in my case, only Oracle JDK 1.6 was able to build the demo successfully.
- Download the Oracle JDK from its home page at http://www.oracle.com/technetwork/java/javase/downloads/index.html.
In case there is no download link on such an old JDK, you can try another URL: http://www.oracle.com/technetwork/java/javasebusiness/downloads/java-archive-downloads-javase6-419409.html.
Oracle will probably ask you to sign in or register first. You will be able to download anything from their archive.
- Install the downloaded JDK:
sudo mkdir –p /usr/lib/jvm
cd /usr/lib/jvm && sudo /bin/sh ~/jdk-6u45-linux-x64.bin --noregister
Here, I assume that you downloaded the JDK package into the home directory.
- Register the JDK in the system:
sudo update-alternatives --install /usr/bin/javac javac /usr/lib/jvm/jdk1.6.0_45/bin/javac 50000
sudo update-alternatives --install /usr/bin/java java /usr/lib/jvm/jdk1.6.0_45/bin/java 50000
sudo update-alternatives --config javac
sudo update-alternatives --config java
cd /usr/lib
sudo ln -s /usr/lib/jvm/jdk1.6.0_45 java-6-sun
export JAVA_HOME=/usr/lib/jvm/jdk1.6.0_45/
- Test the Java version:
java -version
You should see something like Java HotSpot on the screen—it means that the correct JVM is installed.
Getting the WebRTC source code
Perform the following steps to get the WebRTC source code:
- Download and prepare Google Developer Tools:Getting the WebRTC source code
mkdir –p ~/dev && cd ~/dev
git clone https://chromium.googlesource.com/chromium/tools/depot_tools.git
export PATH=`pwd`/depot_tools:"$PATH"
- Download the WebRTC source code:
gclient config http://webrtc.googlecode.com/svn/trunk
echo "target_os = ['android', 'unix']" >> .gclient
gclient sync
The last command can take a couple of minutes (actually, it depends on your Internet connection speed), as you will be downloading several gigabytes of source code.
Installing Android Developer Tools
To develop Android applications, you should have Android Developer Tools (ADT) installed. This SDK contains Android-specific libraries and tools that are necessary to build and develop native software for Android. Perform the following steps to install ADT:
Unlock access to the largest independent learning library in Tech for FREE!
Get unlimited access to 7500+ expert-authored eBooks and video courses covering every tech area you can think of.
Renews at £15.99/month. Cancel anytime
- Download ADT from its home page http://developer.android.com/sdk/index.html#download.
- Unpack ADT to a folder:
cd ~/dev
unzip ~/adt-bundle-linux-x86_64-20140702.zip
- Set up the ANDROID_HOME environment variable:
export ANDROID_HOME=`pwd`/adt-bundle-linux-x86_64-20140702/sdk
How to do it…
After you've prepared the environment and installed the necessary system components and packages, you can continue to build the demo application:
- Prepare Android-specific build dependencies:
cd ~/dev/trunk
source ./build/android/envsetup.sh
- Configure the build scripts:
export GYP_DEFINES="$GYP_DEFINES build_with_libjingle=1 build_
with_chromium=0 libjingle_java=1 OS=android"
gclient runhooks
- Build the WebRTC code with the demo application:
ninja -C out/Debug -j 5 AppRTCDemo
After the last command, you can find the compiled Android packet with the demo application at ~/dev/trunk/out/Debug/AppRTCDemo-debug.apk.
Running on the Android simulator
Follow these steps to run an application on the Android simulator:
- Run Android SDK manager and install the necessary Android components:
$ANDROID_HOME/tools/android sdk
Choose at least Android 4.x—lower versions don't have WebRTC support. In the following screenshot, I've chosen Android SDK 4.4 and 4.2:

- Create an Android virtual device:
cd $ANDROID_HOME/tools
./android avd &
The last command executes the Android SDK tool to create and maintain virtual devices. Create a new virtual device using this tool. You can see an example in the following screenshot:

- Start the emulator using just the created virtual device:
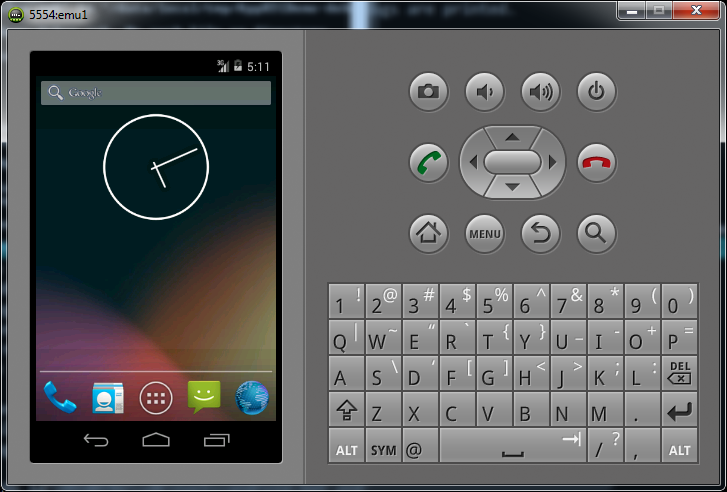
./emulator –avd emu1 &
This can take a couple of seconds (or even minutes), after that you should see a typical Android device home screen, like in the following screenshot:
- Check whether the virtual device is simulated and running:
cd $ANDROID_HOME/platform-tools
./adb devices
You should see something like the following:
List of devices attached
emulator-5554   device
This means that your just created virtual device is OK and running; so we can use it to test our demo application.
- Install the demo application on the virtual device:
./adb install ~/dev/trunk/out/Debug/AppRTCDemo-debug.apk
You should see something like the following:
636 KB/s (2507985 bytes in 3.848s)
pkg: /data/local/tmp/AppRTCDemo-debug.apk
Success
This means that the application is transferred to the virtual device and is ready to be started.
- Switch to the simulator window; you should see the demo application's icon. Execute it like it is a real Android device. In the following screenshot, you can see the installed demo application AppRTC:

While trying to launch the application, you might see an error message with a Java runtime exception referring to GLSurfaceView. In this case, you probably need to switch to the Use Host GPU option while creating the virtual device with Android Virtual Device (AVD) tool.
Fixing a bug with GLSurfaceView
Sometimes if you're using an Android simulator with a virtual device on the ARM architecture, you can be faced with an issue when the application says No config chosen, throws an exception, and exits.
This is a known defect in the Android WebRTC code and its status can be tracked at https://code.google.com/p/android/issues/detail?id=43209.
The following steps can help you fix this bug in the original demo application:
- Go to the ~/dev/trunk/talk/examples/android/src/org/appspot/apprtc folder and edit the AppRTCDemoActivity.java file. Look for the following line of code:
vsv = new AppRTCGLView(this, displaySize);
- Right after this line, add the following line of code:
vsv.setEGLConfigChooser(8,8,8,8,16,16);
You will need to recompile the application:
cd ~/dev/trunk
ninja -C out/Debug AppRTCDemo
- Now you can deploy your application and the issue will not appear anymore.
Running on a physical Android device
For deploying applications on an Android device, you don't need to have any developer certificates (like in the case of iOS devices). So if you have an Android physical device, it probably would be easier to debug and run the demo application on the device rather than on the simulator.
- Connect the Android device to the machine using a USB cable.
- On the Android device, switch the USB debug mode on.
- Check whether your machine sees your device:
cd $ANDROID_HOME/platform-tools
./adb devices
If device is connected and the machine sees it, you should see the device's name in the result print of the preceding command:
List of devices attached
QO4721C35410   device
- Deploy the application onto the device:
cd $ANDROID_HOME/platform-tools
./adb -d install ~/dev/trunk/out/Debug/AppRTCDemo-debug.apk
You will get the following output:
3016 KB/s (2508031 bytes in 0.812s)
pkg: /data/local/tmp/AppRTCDemo-debug.apk
Success
After that you should see the AppRTC demo application's icon on the device:

After you have started the application, you should see a prompt to enter a room number. At this stage, go to http://apprtc.webrtc.org in your web browser on another machine; you will see an image from your camera. Copy the room number from the URL string and enter it in the demo application on the Android device. Your Android device and another machine will try to establish a peer-to-peer connection, and might take some time. In the following screenshot, you can see the image on the desktop after the connection with Android smartphone has been established:

Here, the big image represents what is translated from the frontal camera of the Android smartphone; the small image depicts the image from the notebook's web camera. So both the devices have established direct connection and translate audio and video to each other.
The following screenshot represents what was seen on the Android device:

There's more…
The original demo doesn't contain any ready-to-use IDE project files; so you have to deal with console commands and scripts during all the development process. You can make your life a bit easier if you use some third-party tools that simplify the building process. Such tools can be found at http://tech.pristine.io/build-android-apprtc.
Summary
In this article, we have learned to create a multiuser conference using WebRTCO, take a screenshot using WebRTC, and compile and run a demo for Android.
Resources for Article:
Further resources on this subject:

 United States
 Great Britain
 India
India
 Germany
 France
 Canada
 Russia
 Spain
Spain
 Brazil
 Australia
 South Africa
 Thailand
 Ukraine
 Switzerland
 Slovakia
 Luxembourg
 Hungary
 Romania
 Denmark
 Ireland
 Estonia
 Belgium
 Italy
Italy
 Finland
 Cyprus
 Lithuania
 Latvia
 Malta
Malta
 Netherlands
 Portugal
 Slovenia
 Sweden
 Argentina
 Colombia
 Ecuador
 Indonesia
 Mexico
 New Zealand
 Norway
 South Korea
 Taiwan
 Turkey
 Czechia
 Austria
 Greece
 Isle of Man
 Bulgaria
 Japan
Japan
 Philippines
 Poland
 Singapore
 Egypt
Egypt
 Chile
Chile
 Malaysia