Search icon CANCEL
Subscription
0
Cart icon
Your Cart (0 item)
Close icon
You have no products in your basket yet
Save more on your purchases! discount-offer-chevron-icon
Savings automatically calculated. No voucher code required.
Arrow left icon
All Products
Best Sellers
New Releases
Books
Videos
Audiobooks
Learning Hub
Newsletter Hub
Free Learning
Arrow right icon
timer SALE ENDS IN
0 Days
:
00 Hours
:
00 Minutes
:
00 Seconds
Arrow up icon
GO TO TOP
Mastering Oculus Rift Development

You're reading from   Mastering Oculus Rift Development The next frontier of gaming and simulation

Arrow left icon
Product type Paperback
Published in Feb 2017
Publisher Packt
ISBN-13 9781786461155
Length 306 pages
Edition 1st Edition
Tools
Arrow right icon
Author (1):
Arrow left icon
 Donovan Donovan
Author Profile Icon Donovan
Donovan
Arrow right icon
View More author details
Toc

Table of Contents (17) Chapters Close

Mastering Oculus Rift Development
Credits
About the Author
About the Reviewer
www.PacktPub.com
Customer Feedback
Preface
1. Exploring a New Reality with the Oculus Rift FREE CHAPTER 2. Stepping into Virtual Reality 3. Improving Performance and Avoiding Discomfort 4. Interacting with Virtual Worlds 5. Establishing Presence 6. Adding Depth and Intuition to a User Interface 7. Hearing and Believing with 3D Audio 8. Adding Tone and Realism with Graphics 9. Bringing Players Together in VR 10. Publishing on the Oculus Store

Packaging a final Unity build


Typically, running the Unity Editor or making quick builds with default settings is enough for testing purposes, but before you upload any public builds, you should take care to configure a few build details that ensure a clean, polished final product.

Adding a game icon

All of the builds you've created so far have had the default Unity icon, shown in the following screenshot:

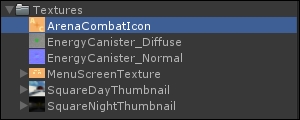
In this section, we'll go through the quick and easy steps of adding a custom icon to your build. Open your Arena Combat project and drag ArenaCombatIcon.png (included with this chapter) into the Textures folder:

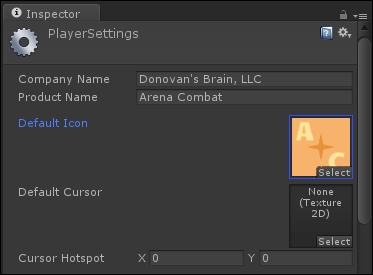
Open the Player settings from the Edit menu and notice the field labeled Default Icon in Inspector. Drag ArenaCombatIcon onto this field, and update the Product Name and Company Name as well (get creative with the company name if you want!):

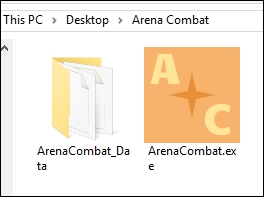
When you next make a build, this new icon will appear instead of the Unity icon:

Before we make our final build, though, we'll finalize...

lock icon The rest of the chapter is locked
Register for a free Packt account to unlock a world of extra content!
A free Packt account unlocks extra newsletters, articles, discounted offers, and much more. Start advancing your knowledge today.
Unlock this book and the full library FREE for 7 days
Get unlimited access to 7000+ expert-authored eBooks and videos courses covering every tech area you can think of
Renews at £13.99/month. Cancel anytime
Visually different images