In this article by Behzad Ehsani, author of the book Data Acquisition using LabVIEW, after a brief introduction and a short note on installation, we will go over the most widely used pallets and objects Icon tool bar from a standard installation of LabVIEW and a brief explanation of what each object does.
(For more resources related to this topic, see here.)
Introduction to LabVIEW
LabVIEW is a graphical developing and testing environment unlike any other test and development tool available in the industry. LabVIEW sets itself apart from traditional programming environment by its complete graphical approach to programming. As an example, while representation of a while loop in a text based language such as the C language consists of several predefined, extremely compact and sometimes extremely cryptic lines of text, a while a loop in LabVIEW, is actually a graphical loop. The environment is extremely intuitive and powerful, which makes for a short learning cure for the beginner. LabVIEW is based on what is called G language, but there are still other languages, especially C under the hood. However, the ease of use and power of LabVIEW is somewhat deceiving to a novice user. Many people have attempt to start projects in LabVIEW only because at the first glace, the graphical nature of interface and the concept of drag an drop used in LabVIEW, appears to do away with required basics of programming concepts and classical education in programming science and engineering. This is far from the reality of using LabVIEW as the predominant development environment. While it is true that in many higher level development and testing environment, specially when using complicated test equipment and complex mathematical calculations or even creating embedded software LabVIEW's approach will be much more time efficient and bug free environment which otherwise would require several lines of code in traditional text based programming environment, one must be aware of LabVIEW's strengths and possible weaknesses. LabVIEW does not completely replace the need for traditional text based languages and depending on the entire nature of a project, LabVIEW or another traditional text based language such as C may be the most suitable programming or test environment.
Installing LabVIEW
Installation of LabVIEW is very simple and it is just as routine as any modern day program installation; that is, Insert the DVD 1 and follow on-screen guided installation steps.
LabVIEW comes in one DVD for Mac and Linux version but in four or more DVDs for the Windows edition (depending on additional software, different licensing and additional libraries and packages purchased.) In this article we will use LabVIEW 2013 Professional Development version for Windows. Given the target audience of this article, we assume the user is well capable of installation of the program. Installation is also well documented by National Instruments and the mandatory one year support purchase with each copy of LabVIEW is a valuable source of live and email help. Also, NI web site (www.ni.com) has many user support groups that are also a great source of support, example codes, discussion groups and local group events and meeting of fellow LabVIEW developers, etc.
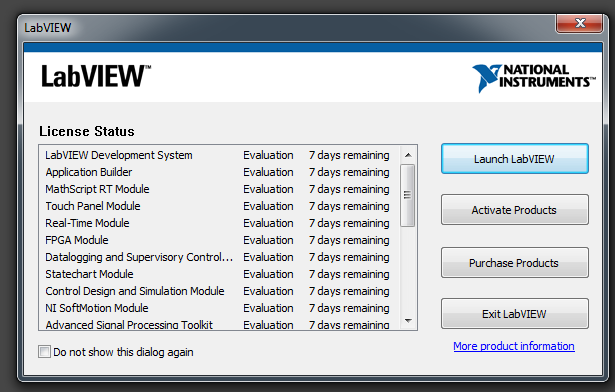
One worthy note for those who are new to installation of LabVIEW is that the installation DVDs include much more than what an average user would need and pay for. We do strongly suggest that you install additional software (beyond what has been purchased and licensed or immediate need!) These additional software are fully functional (in demo mode for 7 days) which may be extended for about a month with online registration. This is a very good opportunity to have hands on experience with even more of power and functionality that LabVIEW is capable to offer. The additional information gained by installing other available software on the DVDs may help in further development of a given project. Just imagine if the current development of a robot only encompasses mechanical movements and sensors today, optical recognition probably is going to follow sooner than one may think. If data acquisition using expensive hardware and software may be possible in one location, the need to web sharing and remote control of the setup is just around the corner. It is very helpful to at least be aware of what packages are currently available and be able to install and test them prior to a full purchase and implementation. The following screenshot shows what may be installed if almost all software on all DVDs are selected:

When installing a fresh version of LabVIEW, if you do decide to observe the advice above, make sure to click on the + sign next to each package you decide to install and prevent any installation of LabWindows/CVI.... and Measurement Studio... for Visual Studio LabWindows according to National Instruments .., is an ANSI C integrated development environment. Also note that by default NI device drivers are not selected to be installed. Device drivers are an essential part of any data acquisition and appropriate drivers for communications and instrument(s) control must be installed before LabVIEW can interact with external equipments. Also, note that device drivers (on Windows installations) come on a separate DVD which means that one does not have to install device drivers at the same time that the main application and other modules are installed; they can be installed at any time later on. Almost all well established vendors are packaging their product with LabVIEW drivers and example codes. If a driver is not readily available, National Instruments has programmers that would do just that. But this would come at a cost to the user.
VI Package manager, now installed as a part of standard installation is also a must these days. National Instruments distributes third party software and drivers and public domain packages via VI Package manager. Appropriate software and drivers for these microcontrollers are installed via VI Package manager. You can install many public domain packages that further installs many useful LabVIEW toolkits to a LabVIEW installation and can be used just as those that are delivered professionally by National Instruments.
Finally, note that the more modules, packages and software are selected to be installed the longer it will take to complete the installation. This may sound like making an obvious point but surprisingly enough installation of all software on the three DVDs (for Windows) take up over five hours! On a standard laptop or pc we used. Obviously a more powerful PC (such as one with solid sate hard drive) my not take such log time:
Unlock access to the largest independent learning library in Tech for FREE!
Get unlimited access to 7500+ expert-authored eBooks and video courses covering every tech area you can think of.
Renews at €14.99/month. Cancel anytime

LabVIEW Basics
Once the LabVIEW applications is launched, by default two blank windows open simultaneously; a Front Panel and a Block Diagram window and a VI is created:

VIs or Virtual Instruments are heart and soul of LabVIEW. They are what separate LabVIEW from all other text based development environments. In LabVIEW everything is an object which is represented graphically. A VI may only consist of a few objects or hundreds of objects embedded in many subVIs These graphical representation of a thing, be it a simple while loop, a complex mathematical concept such as polynomial interpolation or simply a Boolean constant are all graphically represented. To use an object right-click inside the block diagram or front panel window, a pallet list appears. Follow the arrow and pick an object from the list of object from subsequent pallet an place it on the appropriate window. The selected object now can be dragged and place on different location on the appropriate window and is ready to be wired. Depending on what kind of object is selected, a graphical representation of the object appears on both windows. Of cores there are many exceptions to this rule. For example a while loop can only be selected in Block Diagram and by itself, a while loop does not have a graphical representation on the front panel window. Needless to say, LabVIEW also has keyboard combination that expedite selecting and placing any given toolkit objects onto the appropriate window.

Each object has one (or several) wire connections going into as input(s) and coming out as its output(s). A VI becomes functional when a minimum number of wires are appropriately connected to input and output of one or more object. Later, we will use an example to illustrate how a basic LabVIEW VI is created and executed.
Highlights
LabVIEW is a complete object-oriented development and test environment based on G language. As such it is a very powerful and complex environment. In article one we went through introduction to LabVIEW and its main functionality of each of its icon by way of an actual user interactive example. Accompanied by appropriate hardware (both NI as well as many industry standard test, measurement and development hardware products) LabVIEW is capable to cover from developing embedded systems to fuzzy logic and almost everything in between!
Summary
In this article we cover the basics of LabVIEW, from installation to in depth explanation of each and every element in the toolbar.
Resources for Article:
Further resources on this subject:
 United States
 Great Britain
 India
India
 Germany
 France
 Canada
 Russia
 Spain
Spain
 Brazil
 Australia
 South Africa
 Thailand
 Ukraine
 Switzerland
 Slovakia
 Luxembourg
 Hungary
 Romania
 Denmark
 Ireland
 Estonia
 Belgium
 Italy
Italy
 Finland
 Cyprus
 Lithuania
 Latvia
 Malta
Malta
 Netherlands
 Portugal
 Slovenia
 Sweden
 Argentina
 Colombia
 Ecuador
 Indonesia
 Mexico
 New Zealand
 Norway
 South Korea
 Taiwan
 Turkey
 Czechia
 Austria
 Greece
 Isle of Man
 Bulgaria
 Japan
Japan
 Philippines
 Poland
 Singapore
 Egypt
Egypt
 Chile
Chile
 Malaysia


