In this article by Donabel Santos, author of the book, SQL Server 2014 with Powershell v5 Cookbook explains scripts and snippets of code that accomplish basic SQL Server tasks using PowerShell. She discusses simple tasks such as Listing SQL Server Instances and Discovering SQL Server Services to make you comfortable working with SQL Server programmatically.
However, even if ever you explore how to create some common database objects using PowerShell, keep in mind that PowerShell will not always be the best tool for the task. There will be tasks that are best completed using T-SQL. It is still good to know what is possible in PowerShell and how to do them, so you know that you have alternatives depending on your requirements or situation.
For the recipes, we are going to use PowerShell ISE quite a lot.
If you prefer running the script from the PowerShell console rather run running the commands from the ISE, you can save the scripts in a .ps1 file and run it from the PowerShell console.
(For more resources related to this topic, see here.)
Listing SQL Server Instances
In this recipe, we will list all SQL Server Instances in the local network.
Getting ready
Log in to the server that has your SQL Server development instance as an administrator.
How to do it...
Let's look at the steps to list your SQL Server instances:
- Open PowerShell ISE as administrator.
- Let's use the Start-Service cmdlet to start the SQL Browser service:
Import-Module SQLPS -DisableNameChecking
#out of the box, the SQLBrowser is disabled. To enable:
Set-Service SQLBrowser -StartupType Automatic
#sql browser must be installed and running for us
#to discover SQL Server instances
Start-Service "SQLBrowser"
- Next, you need to create a ManagedComputer object to get access to instances. Type the following script and run:
$instanceName = "localhost"

$managedComputer = New-Object
 Microsoft.SqlServer.Management.Smo.Wmi.ManagedComputer
 $instanceName
#list server instances
$managedComputer.ServerInstances
Your result should look similar to the one shown in the following screenshot:

Notice that $managedComputer.ServerInstances gives you not only instance names, but also additional properties such as ServerProtocols, Urn, State, and so on.
- Confirm that these are the same instances you see from SQL Server Management Studio.
- Open SQL Server Management Studio. Go to Connect | Database Engine.
- In the Server Name dropdown, click on Browse for More.
- Select the Network Servers tab and check the instances listed. Your screen should look similar to this:

How it works...
All services in a Windows operating system are exposed and accessible using Windows Management Instrumentation (WMI). WMI is Microsoft's framework for listing, setting, and configuring any Microsoft-related resource. This framework follows Web-based Enterprise Management (WBEM). The DISTRIBUTED MANAGEMENT TASK FORCE, INC. (http://www.dmtf.org/standards/wbem) defines WBEM as follows:
A set of management and Internet standard technologies developed to unify the management of distributed computing environments. WBEM provides the ability for the industry to deliver a well-integrated set of standard-based management tools, facilitating the exchange of data across otherwise disparate technologies and platforms.
In order to access SQL Server WMI-related objects, you can create a WMI ManagedComputer instance:
$managedComputer = New-Object
 Microsoft.SqlServer.Management.Smo.Wmi.ManagedComputer
 $instanceName
The ManagedComputer object has access to a ServerInstance property, which in turn lists all available instances in the local network. These instances however are only identifiable if the SQL Server Browser service is running.
The SQL Server Browser is a Windows Service that can provide information on installed instances in a box. You need to start this service if you want to list the SQL Server-related services.
There's more...
The Services instance of the ManagedComputer object can also provide similar information, but you will have to filter for the server type SqlServer:
#list server instances
$managedComputer.Services |
 Where-Object Type –eq "SqlServer" |
 Select-Object Name, State, Type, StartMode, ProcessId
Your result should look like this:

Instead of creating a WMI instance by using the New-Object method, you can also use the Get-WmiObject cmdlet when creating your variable. Get-WmiObject, however, will not expose exactly the same properties exposed by the Microsoft.SqlServer.Management.Smo.Wmi.ManagedComputer object.
To list instances using Get-WmiObject, you will need to discover what namespace is available in your environment:
$hostName = "localhost"
 $namespace = Get-WMIObject -ComputerName $hostName -Namespace
 rootMicrosoftSQLServer -Class "__NAMESPACE" |
             Where-Object Name -like "ComputerManagement*"
#see matching namespace objects
$namespace
 #see namespace names
$namespace | Select-Object -ExpandProperty "__NAMESPACE"
$namespace | Select-Object -ExpandProperty "Name"
If you are using PowerShell v2, you will have to change the Where-Object cmdlet usage to use the curly braces {} and the $_ variable:
Where-Object {$_.Name -like "ComputerManagement*" }
For SQL Server 2014, the namespace value is:
ROOTMicrosoftSQLServerComputerManagement12
This value can be derived from $namespace.__NAMESPACE and $namespace.Name. Once you have the namespace, you can use this with Get-WmiObject to retrieve the instances. We can use the SqlServiceType property to filter.
According to MSDN (http://msdn.microsoft.com/en-us/library/ms179591.aspx), these are the values of SqlServiceType:
|
SqlServiceType
|
Description
|
|
1
|
SQL Server Service
|
|
2
|
SQL Server Agent Service
|
|
3
Unlock access to the largest independent learning library in Tech for FREE!
Get unlimited access to 7500+ expert-authored eBooks and video courses covering every tech area you can think of.
Renews at €14.99/month. Cancel anytime
|
Full-Text Search Engine Service
|
|
4
|
Integration Services Service
|
|
5
|
Analysis Services Service
|
|
6
|
Reporting Services Service
|
|
7
|
SQL Browser Service
|
Thus, to retrieve the SQL Server instances, we need to provide the full namespace ROOTMicrosoftSQLServerComputerManagement12. We also need to filter for SQL Server Service type, or SQLServiceType = 1. The code is as follows:
Get-WmiObject -ComputerName $hostName
-Namespace "$($namespace.__NAMESPACE)$($namespace.Name)"
-Class SqlService |
Where-Object SQLServiceType -eq 1 |
Select-Object ServiceName, DisplayName, SQLServiceType |
Format-Table –AutoSize
Your result should look similar to the following screenshot:

Yet another way to list all the SQL Server instances in the local network is by using the System.Data.Sql.SQLSourceEnumerator class, instead of ManagedComputer. This class has a static method called Instance.GetDataSources that will list all SQL Server instances:
[System.Data.Sql.SqlDataSourceEnumerator]:
 :Instance.GetDataSources() |
Format-Table -AutoSize
When you execute, your result should look similar to the following:

If you have multiple SQL Server versions, you can use the following code to display your instances:
#list services using WMI
foreach ($path in $namespace)
{
Write-Verbose "SQL Services in:$($path.__NAMESPACE)$($path.Name)"
Get-WmiObject -ComputerName $hostName `
-Namespace "$($path.__NAMESPACE)$($path.Name)" `
-Class SqlService |
Where-Object SQLServiceType -eq 1 |
Select-Object ServiceName, DisplayName, SQLServiceType |
Format-Table –AutoSize
}
Discovering SQL Server Services
In this recipe, we will enumerate all SQL Server Services and list their statuses.
Getting ready
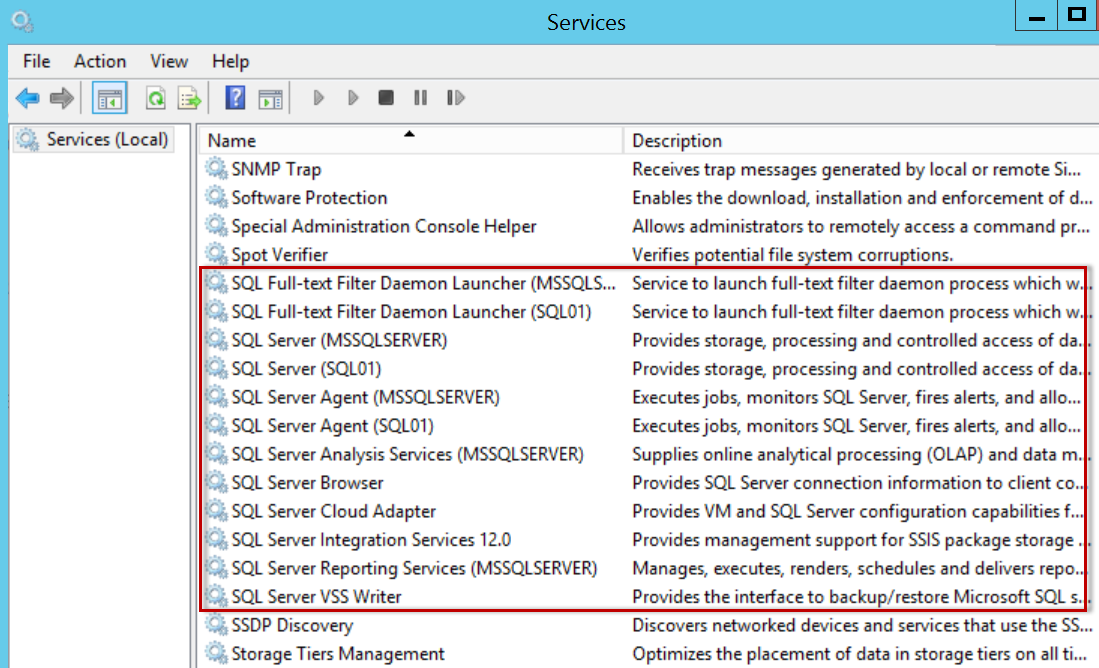
Check which SQL Server services are installed in your instance. Go to Start | Run and type services.msc. You should see a screen similar to this:
How to do it...
Let's assume you are running this script on the server box:
- Open PowerShell ISE as administrator.
- Add the following code and execute:
Import-Module SQLPS -DisableNameChecking
#you can replace localhost with your instance name
$instanceName = "localhost"
$managedComputer = New-Object
 Microsoft.SqlServer.Management.Smo.Wmi.ManagedComputer
 $instanceName
#list services
$managedComputer.Services |
Select-Object Name, Type, ServiceState, DisplayName |
Format-Table -AutoSize
Your result will look similar to the one shown in the following screenshot:

Items listed in your screen will vary depending on the features installed and running in your instance
- Confirm that these are the services that exist in your server. Check your services window.
How it works...
Services that are installed on a system can be queried using WMI. Specific services for SQL Server are exposed through SMO's WMI ManagedComputer object. Some of the exposed properties are as follows:
- ClientProtocols
- ConnectionSettings
- ServerAliases
- ServerInstances
- Services
There's more...
An alternative way to get SQL Server-related services is by using Get-WMIObject. We will need to pass in the host name as well as the SQL Server WMI Provider for the ComputerManagement namespace. For SQL Server 2014, this value is ROOTMicrosoftSQLServerComputerManagement12.
The script to retrieve the services is provided here. Note that we are dynamically composing the WMI namespace. The code is as follows:
$hostName = "localhost"
 $namespace = Get-WMIObject -ComputerName $hostName -NameSpace
 rootMicrosoftSQLServer -Class "__NAMESPACE" |
             Where-Object Name -like "ComputerManagement*"

 Get-WmiObject -ComputerName $hostname -Namespace "$($namespace.__NAMESPACE)$($namespace.Name)"
-Class SqlService |
Select-Object ServiceName
If you have multiple SQL Server versions installed and want to see just the most recent version's services, you can limit to the latest namespace by adding Select-Object –Last 1:
$namespace = Get-WMIObject -ComputerName $hostName -NameSpace rootMicrosoftSQLServer -Class "__NAMESPACE" |
             Where-Object Name -like "ComputerManagement*" |
             Select-Object –Last 1
Yet another alternative but less accurate way of listing possible SQL Server related services is the following snippet of code:
#alterative - but less accurate
Get-Service *SQL*
This uses the Get-Service cmdlet and filters base on the service name. This is less accurate because this grabs all processes that have SQL in the name, but may not necessarily be related to SQL Server. For example, if you have MySQL installed, it will get picked up as a process. Conversely, this will not pick up SQL Server-related services that do not have SQL in the name, such as ReportServer.
Summary
You will find that many of the scripts can be accomplished using PowerShell and SQL Management Objects (SMO). SMO is a library that exposes SQL Server classes that allow programmatic manipulation and automation of many database tasks. For some , we will also explore alternative ways of accomplishing the same tasks using different native PowerShell cmdlets.
Now that we have a gist of SQL Server 2014 with PowerShell, lets build a full-fledged e-commerce project with SQL Server 2014 with Powershell v5 Cookbook.
Resources for Article:
Further resources on this subject:

 United States
 Great Britain
 India
India
 Germany
 France
 Canada
 Russia
 Spain
Spain
 Brazil
 Australia
 South Africa
 Thailand
 Ukraine
 Switzerland
 Slovakia
 Luxembourg
 Hungary
 Romania
 Denmark
 Ireland
 Estonia
 Belgium
 Italy
Italy
 Finland
 Cyprus
 Lithuania
 Latvia
 Malta
Malta
 Netherlands
 Portugal
 Slovenia
 Sweden
 Argentina
 Colombia
 Ecuador
 Indonesia
 Mexico
 New Zealand
 Norway
 South Korea
 Taiwan
 Turkey
 Czechia
 Austria
 Greece
 Isle of Man
 Bulgaria
 Japan
Japan
 Philippines
 Poland
 Singapore
 Egypt
Egypt
 Chile
Chile
 Malaysia


